This site is supported by our readers. We may earn a commission, at no cost to you, if you purchase through links.
Start by measuring your machine to make sure a snug fit—grab dimensions for the base, height, and top.
Sketch out a rectangle with these measurements and round those pesky corners for a perfect fit.
Don’t forget about seam allowances and pockets, which are like the icing on your fabric cake.
Choose sturdy fabric and gather tools like zippers and thread.
As you sew, imagine yourself as a tailor from the future, protecting machines from dust and spills.
Discover easy patterns and tips that make this project a breeze!
Table Of Contents
- Key Takeaways
- Benefits of Sewing Machine Covers
- Types of Sewing Machine Covers
- Sewing Machine Cover Patterns
- Sewing Machine Cover Construction
- Materials and Tools Needed
- Step-by-Step Sewing Machine Cover Tutorial
- Sewing Machine Cover Binding Techniques
- Tips for Making a Better Sewing Machine Cover
- Common Mistakes to Avoid
- Advanced Sewing Machine Cover Ideas
- Frequently Asked Questions (FAQs)
- Conclusion
Key Takeaways
- Measure your machine accurately, including seam allowance, to ensure a snug and effective fit for your sewing machine cover.
- Choose durable and easy-to-clean fabrics like cotton; consider adding a lining for extra protection and style.
- Add personal touches like decorative stitches, pockets, and embellishments to transform your cover into a unique expression of your creativity.
- Regular maintenance like dusting and gentle washing will keep your cover in top shape, prolonging its life and maintaining its appearance.
Benefits of Sewing Machine Covers
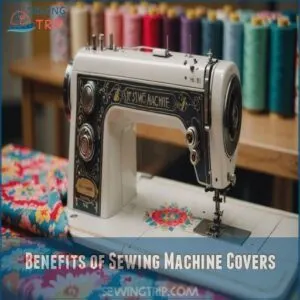
With a sewing machine cover, you protect your machine from dust, spills, and scratches.
These covers are durable and can be customized to express your unique flair.
Plus, these covers are durable and can be customized to express your unique flair, making sewing time more enjoyable!
Protection From Dust and Spills
A trusty sewing machine cover is your machine’s best friend!
It’s your first line of defense against dust bunnies and those accidental spills – you know, the ones that happen when you’re engrossed in a project.
Choose dust-proof fabrics and spill-resistant materials for ultimate protection.
Regular cleaning and cover maintenance will keep your sewing machine happy and humming for years to come.
Think of it as a superhero cape for your sewing machine!
Find DIY sewing machine covers and patterns online for a personalized touch.
Style and Customization Options
Imagine brightening your sewing room with a custom sewing machine cover!
You’ve got endless fabric choices and color schemes to fit your style.
Add decorative stitches or embroidered accents for a personal touch.
Patchwork designs can make any cover pop.
Explore sewing machine cover patterns to create a unique sewing machine cover with pockets or a zipper.
Happy sewing!
Organization and Storage
While personalizing your sewing machine cover, you’re not just sprucing things up.
These covers offer nifty sewing room organization with handy pockets for sewing machine accessories.
They’re the secret weapon of craft storage solutions, hugging your machine snugly, while offering DIY storage ideas.
Everything stays in place, avoiding the chaos of misplaced sewing supplies.
It’s like giving everything its own little home!
Durability and Long-Lasting
Your sewing machine’s protective shield, a cover, is as important as your machine itself.
Opt for quality materials to guarantee a long cover lifespan.
You’ll appreciate its durability when avoiding costly repairs from dust or mishaps.
Try these tips for longevity:
- Choose durable materials
- Regularly check and repair covers
- Store properly to prevent wear
Types of Sewing Machine Covers
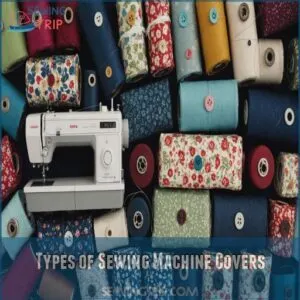
When choosing a sewing machine cover, you’ve got plenty of options to protect your trusty tool and spice up your sewing space.
From simple dust covers to quilted masterpieces and ones with decorative touches, each type offers a unique way to keep your machine safe and stylish!
Simple Sewing Machine Covers
A simple sewing machine cover is your trusty guardian, shielding from dust while adding flair to your space.
Choose fabric wisely—consider durability and ease of cleaning, opting for materials like cotton that provide long-lasting protection.
Make sure your machine fits perfectly by taking accurate measurements.
For budget tips, use scraps or thrifted fabric.
Adding handles and basic design elements makes it functional and stylish.
Enjoy crafting this practical storage solution!
Quilted Sewing Machine Covers
Need a quilted sewing machine cover?
Explore quilting techniques and fabric choices for a personalized touch.
Use batting types for extra protection, and don’t overlook pattern weights—they’re your secret helpers!
These covers aren’t just practical; they’re like a cozy blanket for your machine, shielding it from dust and ensuring it’s ready for any sewing marathon.
Sewing Machine Covers With Decorative Touches
Because you want a truly unique sewing machine cover, let’s add some pizzazz!
Consider these decorative options:
- Embroidered designs add a personal touch.
- Play with fun fabric choices.
- Experiment with appliqué techniques.
- Showcase your skills with intricate stitch patterns.
These touches transform a simple cover into a handmade masterpiece that reflects your style and enhances your sewing room decor.
Sewing Machine Cover Patterns
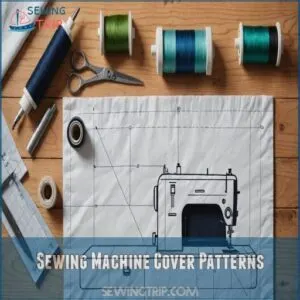
Finding the perfect sewing machine cover pattern can feel like a fun treasure hunt, whether you prefer free, paid, or custom designs.
Each pattern offers practical solutions to protect your machine, and with a hint of creativity, you might even spark a new sewing adventure.
Free Sewing Machine Cover Patterns
How about diving into some beginner-friendly, free sewing machine cover patterns?
You’ll find designs with handy PDF pattern sources and cover dimensions that suit your style.
Whether you’re looking for DIY tips or sewing machine cover inspiration, these resources have you covered—literally!
| Feature | Description |
|---|---|
| Beginner-friendly patterns | Easy to start with |
| PDF pattern sources | Convenient and accessible |
| Cover dimensions | Adapt to different machines |
| Design variations | Keep creativity flowing |
| DIY sewing tips | Essential for personalizing your cover |
Paid Sewing Machine Cover Patterns
Switching gears to paid sewing machine cover patterns opens a world of creative options.
Paid patterns often come with detailed instructions and unique designs, offering you design inspiration and customization tips.
Consider pattern reviews and cost comparisons before purchasing.
Investing in a paid pattern can enhance your sewing machine covers, ensuring they’re both functional and stylish, fitting your sewing machine organization ideas perfectly!
Custom Sewing Machine Cover Patterns
Tired of off-the-shelf patterns that don’t fit your creative vision?
Custom sewing machine covers offer the freedom to choose fabric and craft patterns that perfectly suit your style and machine size.
Incorporate personalization ideas like decorative details and quilting techniques, and don’t forget to use essential sewing machine accessories to protect your sewing machine while indulging in a fun crafting experience.
It’s where creativity meets practicality!
Sewing Machine Cover Construction
Constructing a sewing machine cover might seem tricky, but once you’ve mastered measuring, cutting, and quilting your fabric, you’re halfway there.
It’s like creating a cozy jacket for your sewing machine, ensuring every stitch is perfect and your machine is snug as a bug!
Measuring and Cutting Fabric
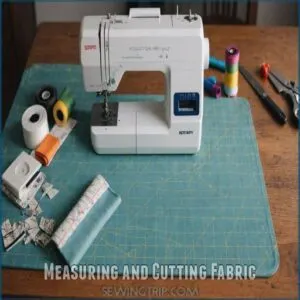
You’ve picked a pattern for your sewing machine cover; now it’s time to measure and cut.
Keep the fabric grain direction in mind for crisp edges.
Rotary cutter tips help for straight cuts, and always allow for seam allowance.
Smart pattern placement maximizes materials and saves time.
Quality cutting tools guarantee precision.
Ready, set, snip!
Quilting and Layering Fabric
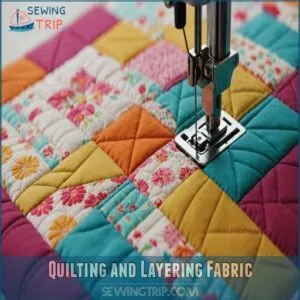
Before you start sewing, layer your fabrics!
Begin with your main fabric, then add your batting—consider cotton batting for a soft cover or a heavier option for extra durability.
Experiment with layering techniques; simple straight lines or more intricate quilting patterns are both great.
Choose your quilting pattern based on your desired stitch density and the fabric weight.
Remember, a denser stitch means a more durable cover!
Sewing and Binding Edges
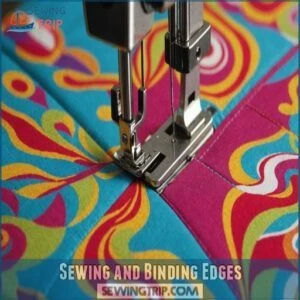
As you wrap up quilting and layering, it’s time to tackle the sewing and binding edges.
Grab your binding tools and bias tape, key to edge finishing.
For those tricky curved edges, bias tape is your best friend.
Use straight binding along the bottom.
It’s like a sewing superhero cape—ensuring no raw edge is left exposed!
Materials and Tools Needed
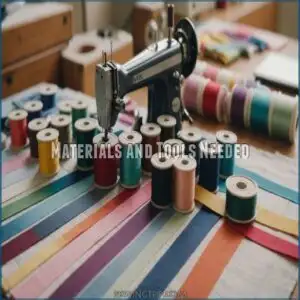
To craft that perfect sewing machine cover, you’ll need a few essentials: fabric, foam stabilizer, interfacing, and don’t forget zippers and thread.
Think of it as gathering your superhero toolkit—minus the cape—but trust me, these will make your project seamless and fun!
Fabric Requirements
Choosing the right fabric for your sewing machine cover is a bit like picking an outfit—occasionally tricky but important.
Think about the fabric weight and cotton types; heavier cotton stands up well.
Pattern matching can be tricky but worth it for a polished look.
Remember, lining choices matter for durability, and color coordination makes it visually appealing!
Foam Stabilizer and Interfacing
Got your fabric sorted?
Now, let’s talk foam stabilizer and interfacing for your sewing machine cover.
These materials add body and structure, making your cover not just stylish but sturdy.
Foam stabilizer types vary, but they all keep things firm.
Interfacing weights matter too—light or heavy determines flexibility; you can find an interfacing weight guide to help you make the right choice.
Perfecting stabilizer application boosts interfacing uses, ensuring everything fits together seamlessly.
Zippers, Thread, and Notions
Ever feel lost in a sea of zippers, threads, and notions?
Notions can include a variety of small sewing accessories like pins, buttons, and seam rippers that can save you time and help you achieve professional results learn more about sewing notions.
First, nail the zipper selection—choose a sturdy one for frequent use.
Thread weight matters too; it should match your fabric’s thickness.
Explore notion options for those extra touches that make sewing fun.
Plus, make sure your thread color complements the fabric, keeping your project neat and stylish!
Step-by-Step Sewing Machine Cover Tutorial
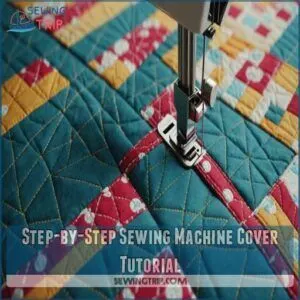
Get ready to craft a stylish sewing machine cover with this step-by-step guide that even a beginner can tackle.
You’ll create a quilt sandwich, add a side quilted pocket, and attach a handy mesh pocket, leaving your machine both protected and chic.
Creating The Quilt Sandwich
Let’s get started on your quilt sandwich!
Lay your chosen fabric face up, followed by your batting (consider felt for extra sturdiness!), then your lining fabric face down.
This layering technique is key.
Smooth out any wrinkles for a neat finish.
Now, carefully pin the layers together—this keeps everything snug during sewing.
Remember, a well-made sandwich is the foundation of a fantastic sewing machine cover!
Use your preferred batting options for a comfy, protective cover.
Making The Side Quilted Pocket
Craft the side quilted pocket with flair by choosing vibrant fabric that suits your style.
Use these steps to stitch it perfectly:
- Pocket Placement: Align the fabric edges carefully.
- Quilting Techniques: Start with a basting stitch to secure layers.
- Sewing Machine Settings: Adjust for precise stitching without puckers.
Enjoy the satisfying rhythm as each stitch unravels your creativity!
Attaching The Mesh Pocket
Imagine your mesh pocket is like the final piece of a puzzle.
First, decide on the mesh pocket placement according to your needs.
Cut the pocket size precisely, ensuring it fits the panel.
Secure the mesh with elastic placement at the top.
Brace yourself for pocket stitching, aiming for straight, secure lines, but don’t worry—practice makes perfect!
Sewing Machine Cover Binding Techniques
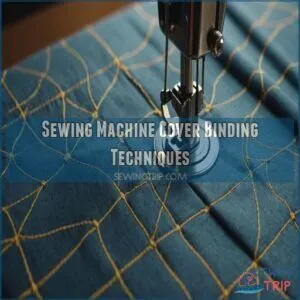
Learn how to master binding techniques for your sewing machine cover to make those edges neat and tidy.
With a dash of creativity and these simple steps, you’ll make your cover look professionally finished without breaking a sweat!
Bias Binding for Curved Edges
Creating a quilt sandwich sets the stage for bias binding those tricky curved edges.
It’s like giving your sewing machine cover a custom suit!
Use bias binding techniques to smoothly navigate the curves.
Handy binding tools help keep everything neat while avoiding puckering.
Those curves won’t know what hit them when your cover looks polished and professional.
Straight Cut Binding for Bottom Edge
Shifting from curvy to straight, let’s tackle straight cut binding for your sewing machine cover’s bottom edge.
Select sturdy fabric, employ pressing techniques for crispness, mind the seam allowances, and enhance your finishing details.
Remember:
- Keep binding strips straight-grained.
- Cut slightly longer to avoid surprises.
- Use a steam iron for sharp edges.
- Double-check measurements to dodge misfits.
Attaching Binding Strips
Aligning your binding strips isn’t rocket science—it’s like creating a fabric sandwich!
First, pick the right binding strip types for your project.
Use proper binding strip placement and folding to make sure you have neat edges.
For a snug fit, consider using fold-over elastic techniques.
Binding strip tools make the job easier, adding precision.
Tips for Making a Better Sewing Machine Cover
Ready to elevate your sewing machine cover game?
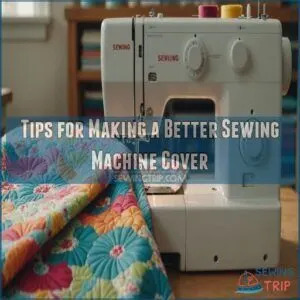
We’ll explore simple tricks for better fabric prep, sturdy binding, and even tips on keeping your cover looking spiffy for years—because let’s face it, a well-made cover is as much a sewing room statement as a trusty machine!
Fabric Preparation and Stabilization
Don’t let your sewing machine cover fall flat—prepare your fabrics like a pro! Here are some simple steps to make sure you’re on point:
- Pre-wash your fabric to avoid unexpected shrinking.
- Choose the right fabric types for durability.
- Use interfacing choices for added strength.
- Rely on stabilizers for essential layering techniques.
Keep it sturdy and stylish!
Binding Methods and Handles
You’ve prepped your fabric, so let’s focus on binding methods and handles.
Bias binding adds flair and durability, which can be achieved with the right Bias Binding Tape Supplies.
Experiment with different handle styles, using sturdy binding tools for neat finishes.
Securely attach handles to make moving the cover a breeze.
Remember these binding tips: keep seams tight and double-check handle attachment.
Your machine’s safety is now chic and efficient!
Caring for Your Sewing Machine Cover
To keep your sewing machine cover in top shape, consider a few upkeep strategies, such as regularly cleaning it to prevent dust buildup, which can cause friction and potential damage in the machine’s moving parts, like when a dust accumulation problem!
First things first: Regularly dust it off.
Next, wash it gently—follow those care labels!
For best care, refer to tips on mastering basic stitches to prevent snags and runs.
Store it properly when not in use, avoiding damp areas.
Oh, and keep an eye out for minor repairs to boost its longevity.
Here’s a quick list:
- Dust regularly
- Wash gently
- Store wisely
- Repair promptly
Common Mistakes to Avoid
When you start creating your sewing machine cover, watch out for common pitfalls like measuring errors, which can turn your perfect project into an unwearable fiasco.
Make sure your interfacing is up to snuff and pay attention to binding techniques to avoid a lopsided result that might make your machine chuckle at your expense!
Incorrect Measurements
Ever wonder why your sewing machine cover doesn’t fit right?
It’s often due to missteps in measurement.
Like wearing shoes that are too tight or baggy, incorrect sizing leads to nightmares like a cover too small or too big.
Keep an eye on seam allowance, fit issues, and machine size.
| Mistake | Consequence |
|---|---|
| Skipped seam allowance | Cover too small |
| Guessed machine size | Fit issues |
| Misread tape measure | Cover too big |
| Ignored fabric stretch | Poor fit |
Insufficient Interfacing
When making your sewing machine cover, don’t skimp on interfacing!
Interfacing types are like the backbone of your project.
Choose wisely, or you’ll face cover sag, wrinkles, and stiffness issues.
Poor interfacing placement can lead to disaster.
Here’s what to avoid:
- Limp covers
- Wrinkled edges
- Saggy fabric
- Uneven stiffness
- Poor durability
Poor Binding Techniques
Your project’s success hinges on neat binding!
Avoid uneven seams by carefully matching fabric edges.
Loose edges? Pre-wash your fabric to prevent fraying.
Using the wrong bias can cause fabric bunching, so double-check your cuts.
Remember, a little extra care translates to a professional-looking finish—and that’s seriously satisfying!
Advanced Sewing Machine Cover Ideas
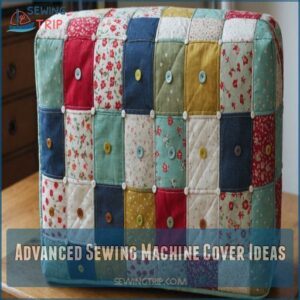
In advanced sewing machine cover projects, you can let your creativity shine by mixing different fabrics and textures for a unique touch.
Add extra flair with custom designs and smartly placed pockets, so everything you need is always within reach—because let’s face it, who doesn’t love a little extra storage space?
Custom Designs and Embellishments
Imagine turning your sewing machine cover into a masterpiece with custom designs and embellishments.
Jazz it up with embroidered details, playful applique designs, and clever button accents.
Consider using a computer with advanced sewing features like computerized sewing machines to create intricate designs.
For that personal touch, incorporate decorative stitching.
Here’s a quick checklist to keep in mind:
- Choose bold fabric choices.
- Experiment with applique designs.
- Add unique button accents.
- Embellish with decorative stitching.
Using Different Fabrics and Textures
Spice up your sewing machine cover with fabric choices that add flair!
Mix textures like smooth cotton with fuzzy fleece for a unique feel.
Play with pattern matching to find the right balance, and explore bold color palettes to brighten your space.
These surface finishes keep things fresh, ensuring your cover isn’t just functional but truly stylish.
Adding Pockets and Compartments
After exploring different fabrics and textures, let’s tackle adding pockets and compartments, a savvy upgrade!
Smart pocket placement keeps your essentials close.
Consider size – bigger pockets for patterns, smaller for sewing clips.
Check out various sewing machine cover pocket options online for inspiration, such as sewing machine cover pockets.
Decide between zipper vs flap closures.
And don’t forget hidden pockets for extra stealth storage.
With functional design, you’ll sew in style and convenience!
Frequently Asked Questions (FAQs)
How to make a sewing machine cover at home?
So, you wanna make a sewing machine cover? Great! Measure your machine, choose fabric, cut, sew, and add pockets if you’re feeling fancy. Voila! Dust-free sewing happiness.
What kind of fabric do you use for a sewing machine cover?
When choosing fabric for a sewing machine cover, opt for cotton for its durability and flexibility.
Add lining for extra protection.
Use vibrant prints or quilted patterns for a stylish touch.
It’s just like dressing!
Can a regular sewing machine do a coverstitch?
A regular sewing machine typically can’t do a coverstitch.
You’ll need a specialized coverstitch machine for those neat, stretchy hems you love on T-shirts.
It’s like trying to paint with a toothbrush—possible, but frustrating!
Is a sewing machine cover necessary?
You might think a sewing machine cover isn’t necessary, but it’s your machine’s first line of defense against dust, spills, and scratches.
Plus, it keeps your sewing space tidy and stylish, adding a splash of personality!
How to measure for a sewing machine cover?
Worried about fit? Don’t be!
Measure your sewing machine’s length, width, and height.
Add a little extra for seam allowance.
This’ll make sure your cover fits snug as a bug, keeping dust and scratches at bay.
Can I use old fabric scraps?
Absolutely, give your old fabric scraps a second chance!
They’re perfect for making sewing machine covers, adding a unique patchwork style while saving money.
Plus, it’s a fantastic way to declutter and recycle creatively!
Are there washable fabric recommendations?
Imagine the joy of creating washable sewing machine covers using fabrics like cotton or polyester blends. To get started, you’ll want to consider accurate measurement techniques for a proper fit.
They’re durable, easy to clean, and strong.
It’s like giving your sewing machine a stylish raincoat that laughs at stains!
What is the best lining material?
Cotton’s a great choice! It’s breathable and easy to sew. For extra durability, consider adding a layer of sturdy quilting cotton. Don’t forget, a fun print adds personality!
Can I hand-sew a machine cover?
You can definitely hand-sew a machine cover!
It’s a rewarding project that lets you personalize your design.
Use sturdy fabrics and take your time with stitching.
Sure, it requires patience, but the results are totally worth it!
Conclusion
Like wrapping a gift, making your own sewing machine cover adds a personal touch and protection.
With these tutorials, sewing machine covers become more than just a project; they’re a creative way to guard against dust and spills while showcasing your style.
You’ve got the patterns and tips inside, so get started and embrace the fun of sewing!
Whether you’re a beginner or seasoned seamstress, crafting your cover will be both practical and rewarding.

