This site is supported by our readers. We may earn a commission, at no cost to you, if you purchase through links.
Cut the fabric in a single layer using a rotary cutter and mat for clean edges. Painter’s tape works well for marking without leaving residue.
Stabilize the fabric with tissue or lightweight paper to prevent shifting. Use an extra fine needle (size 60/8 or 70/10) and matching fine thread for clean stitching.
Shorten your stitch length to around 2mm to avoid puckering. Start seams with a fabric scrap for stability.
Whether hemming or creating seams, techniques like narrow hems and French seams guarantee a polished look.
Table Of Contents
Key Takeaways
- Use a sharp needle (size 60/8 or 70/10) and fine thread to prevent snags and ensure clean stitching.
- Stabilize your fabric with tissue paper or sprays to stop shifting and distortion while cutting or sewing.
- Master techniques like French seams and narrow hems for polished, professional finishes.
- Adjust machine settings like tension and stitch length (around 2mm) to avoid puckering and maintain smooth seams.
Choosing Sheer Fabrics
You’ll need to pick the right sheer fabric for your project by checking if it’s stable enough to handle without stretching or distorting.
Choose sheer fabric wisely—test stability to ensure it holds its shape, resisting stretch and distortion for flawless, flowing results.
Consider factors like weight, drape, and fiber content as these will affect how easily you can sew the material and how your finished piece will look, including how it will drape.
Common Sheer Fabrics
The realm of sheer fabrics offers beautiful options for your next sewing project.
When sewing sheer fabric, it’s important to know the common varieties you’ll encounter.
- Chiffon: Light with a slight crinkle and flowing drape
- Organza: Crisp with more body and structure
- Georgette: Slightly textured with moderate drape
- Voile: Softer than organza with a smooth weave structure
Fabric Properties
Now that you know the common sheer fabrics, let’s understand what makes them unique.
Sheer fabrics have specific properties that affect how you’ll work with them, such as drape and opacity, which shows how see-through they are.
Texture, fiber content, and sheerness vary widely and impact your sewing techniques.
Lightweight sheers can be slippery and temperamental, so knowing these properties will help you master sheer fabric techniques.
Fabric Selection Tips
Now that you understand sheer fabric properties, let’s look at selecting the perfect material for your project.
When shopping for sheer fabrics, consider these key factors:
- Fiber Content – Natural fibers like silk breathe better than synthetics
- Fabric Weight – Lighter weights (under 3oz) provide more transparency
- Drape Quality – Test how the fabric falls by hanging a swatch over your hand
Always buy extra fabric to practice techniques before cutting into your project material.
Preparing Fabric
You’ll need to stabilize your sheer fabric before cutting by placing it between tissue paper layers or using a stabilizing spray to prevent shifting and distortion.
Once stabilized, cut each pattern piece separately using sharp scissors or a rotary cutter while maintaining gentle tension to guarantee precise, clean edges.
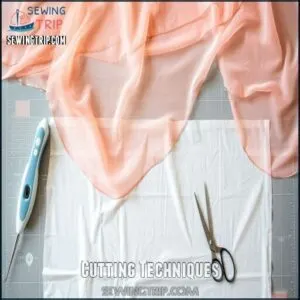
Cutting Techniques
When cutting sheer fabric, precision matters.
Try layering methods like placing tissue paper under and over your fabric before cutting.
For better control, cut in single layers using sharp scissors or a rotary cutter.
Mark sheers with chalk or tailor’s tacks instead of carbon.
Pattern placement is vital—pin patterns to stabilizing tools like cardboard cutting boards.
This prevents fabric edges from shifting and guarantees accurate cuts.
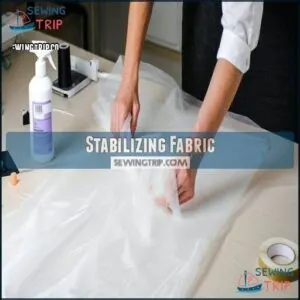
Stabilizing Fabric
Taming your floating sheer fabric requires proper stabilization before you start cutting.
You’ll find several methods work well:
- Tissue paper sandwiching keeps fabric from shifting during cutting
- Stabilizing sprays provide temporary stiffness without damaging delicate sheers
- Adhesive tape secures edges when precision is critical
- Walking foot attachments prevent layers from shifting while sewing
- Flannel sheets placed underneath grip slippery fabrics effectively
These sheer fabric tips guarantee your fabric behaves properly throughout your project, ensuring a successful outcome with proper stabilization and delicate sheers.
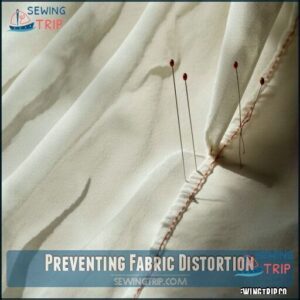
Preventing Fabric Distortion
Three main culprits cause fabric distortion when sewing sheer materials.
To prevent puckering sheer fabrics, apply gentle handling techniques and use stabilizing sprays for added control. Place tissue paper beneath your fabric while stitching to reduce distortion.
Maintain constant tension control by lightly guiding—never pulling—the fabric. Practice pin minimization by placing pins only in seam allowances to avoid permanent holes in your delicate sheers.
Shifting can occur because of uneven fabric feed.
Setting Up Machine
You’ll need to prepare your sewing machine with a sharp 70-size Microtex needle and either a Teflon or walking foot to handle sheer fabrics without snagging or puckering.
Adjust your machine’s tension to a slightly looser setting, around 3-4, so the delicate fabric feeds smoothly without gathering or stretching during stitching.
Needle Selection
Choosing the right needle makes all the difference when sewing sheer fabric. For delicate fabrics, use a fine needle sized 60/8 or 65/9 to prevent fabric snagging.
Sharp or microtex needles pierce cleanly through sheers, reducing skipped stitches. Always start with a fresh needle—dull ones damage delicate materials.
You can find suitable sheer fabric needles online. Various needle brands offer options specifically designed for sewing sheer fabric, ensuring your projects look professional rather than punctured.
Presser Foot Options
The right presser foot makes all the difference when sewing sheer fabric. Your sewing machine’s standard foot mightn’t handle delicate fabrics well.
Consider these specialized options:
- Walking Foot – prevents layers from shifting and reduces puckering
- Teflon Foot – stops sticky fabrics from dragging
- Roller Foot – helps maintain smooth fabric movement without stretching
For specialized sewing needs, consider walking foot options. Open-Toe and Blindstitch feet are also excellent for visibility and precision work on delicate materials.
Tension Adjustment
When sewing sheer fabric, proper tension adjustment is critical.
Start with a looser thread tension (around 2-3) to prevent puckering and fabric damage.
Your bobbin tension should remain standard, but check for smooth fabric feeding by testing on scraps first.
If you notice skipped stitches or gathering, gradually adjust until you achieve perfect stitch quality.
Remember, sheer and delicate fabrics require gentler handling from your sewing machine than standard materials.
Sewing Sheer Fabric
You’ll need the right techniques to transform slippery sheer fabric from frustrating to fantastic.
With proper needle setup and stabilizing methods, you can create beautiful French seams and precise stitches that make your sheer garments look professionally finished.
This approach allows for the creation of high-quality garments, making the effort worthwhile to achieve a professionally finished look.
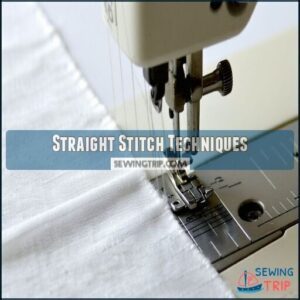
Straight Stitch Techniques
Now that your machine is set up properly, let’s focus on mastering straight stitch techniques for sheer fabrics.
Start with a shorter stitch length (1.5-2.0 mm) to prevent puckering. Place tissue paper under your fabric to stop it from getting pulled into the needle plate.
Control tension carefully—it should be slightly looser than normal. When securing seams, avoid backstitching; instead, start and end with tiny stitches.
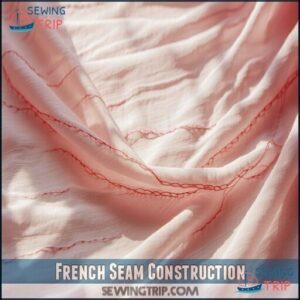
French Seam Construction
Now that you’ve mastered your straight stitch, let’s discover the secret to perfectly finished edges with French seams.
This elegant finish completely encloses raw edges by sewing twice – first with wrong sides together, then with right sides together after trimming.
French seams provide durable seams and adapt beautifully to sheer fabric, creating a professional interior that’s just as gorgeous as the outside.
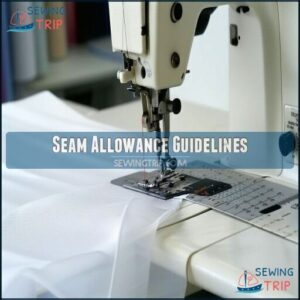
Seam Allowance Guidelines
Getting your seam allowances right makes all the difference when sewing sheer fabrics.
For best results:
- Use 1.5 cm (⅝") allowances for French seams to fully enclose raw edges
- Trim curved seam allowances to 3-4 mm after first stitching to reduce bulk
- Add extra allowance when cutting if your pattern has narrow margins
- Stabilize allowances with washable tape before stitching slippery fabrics
Managing Seam Allowances
You’ll need wider seam allowances of 1.5 cm (⅝") when working with sheer fabrics to create clean French seams that fully enclose raw edges.
When sewing curved areas like armholes, consider using run and fell seams instead of French seams to prevent puckering and maintain a smooth, professional finish.
French Seam Allowance
Now that you’ve learned the basics of sewing sheer fabric, let’s talk about French seam allowance.
For perfect French seams in sheer fabrics, you’ll need wider allowances than standard seams. Plan for 1.5 cm (⅝") total width.
This gives you room for the two-step process without creating bulk. Accurate cutting is essential here—measure twice, cut once!
Different fabric types may require slight adjustments to prevent edge fraying.
Seam Allowance Adjustment
Why struggle with bulky seams in sheer fabrics?
When pattern seam allowances are too wide, trim them down to 1/4 inch before sewing French seams.
For curves, consider seam grading and corner clipping to reduce bulk.
Pattern alteration might be necessary for delicate fabrics – add extra allowance (1.5 cm is ideal) directly to your pattern pieces for proper curve adjustments when sewing sheer fabric finishes, which can help with bulk reduction.
Armhole Seam Considerations
Armholes present unique challenges when sewing sheer fabric.
You’ll need special techniques to prevent puckering and maintain a clean finish.
For delicate fabrics, avoid standard French seams at armholes and opt for a run-and-fell seam instead.
Binding techniques using self-fabric offer neat seam finish options, though they add slight bulk.
Facing alternatives like narrow bias binding work well when traditional facings would show through your transparent creation.
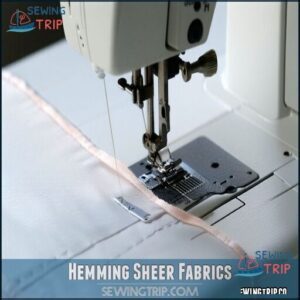
Hemming Sheer Fabrics
You’ll need special techniques to create clean, professional hems on sheer fabrics without damaging their delicate structure.
When hemming sheers, use a narrow double-folded hem with tissue paper underneath or try a rolled hem foot to achieve neat edges that maintain the fabric’s natural drape.
Narrow Hem Techniques
After preparing your seam allowances properly, it’s time to tackle those delicate edges with narrow hems.
A perfectly executed narrow hem creates an elegant finish that won’t distract from your sheer fabric’s beauty.
Fold your raw edge to the wrong side along the stitching line, then stitch through both layers.
For straight hems, a narrow hem foot works wonders.
Remember to use a short 1.5-mm stitch length for secure results.
Rolled Hem Methods
A rolled hem works wonders for sheer fabrics, creating nearly invisible edges.
Your serger rolled hem setting provides the quickest method—simply adjust your differential feed slightly lower than normal.
For hand-rolled hems, roll tiny fabric portions between your fingers before executing a shell hem stitch.
When using delicate fabrics, a blind hem foot can guide the fabric perfectly while maintaining consistent width.
Decorative rolled hems add subtle flair to your finished pieces.
Achieving this professional look requires understanding serger tension settings for a flawless finish.
Double Folded Hem Tips
While rolled hems create elegant finishes, double folded hems offer stability for straight edges.
For perfect double folded hems in sheer fabric, water-soluble tape is your best friend.
Place it along the edge, fold once, press lightly, then fold again. This prevents bulk and guarantees precise folding.
When sewing, use small stitches and gentle tension. Hemming straight seams becomes simple when you’re securing hems this way.
Finishing Seams
You’ll need to finish the raw edges of your seams to prevent fraying and create a professional look when working with sheer fabrics.
You can choose from French seams that hide raw edges completely, narrow overlocked edges for a clean finish, or binding techniques that work well for curved areas like armholes.
Overlocking Techniques
When working with sheer fabrics, proper overlocking techniques can transform your seam finishing.
Set your serger with a differential feed between 0.7-1.0 to prevent puckering. For decorative overlocking, use a 3-thread narrow stitch with reduced tension.
Securing threads is essential—weave them back through the stitches rather than trimming close. On delicate fabrics, a rolled hemming foot creates elegant edges without bulk, which is crucial for delicate fabrics.
Zigzag Stitching
While overlocking creates a clean finish, zigzag stitching offers another approach for finishing seams on sheer fabrics.
When using this technique, you’ll need to be careful as zigzags can sometimes "eat" delicate edges.
For successful zigzag stitching on sheer fabrics:
- Set a narrow zigzag width (0.5-1.0mm) to prevent fabric distortion
- Use higher stitch density for stronger edge finishing
- Test tension settings on fabric scraps first
- Apply zigzag to folded edges rather than single layers whenever possible, ensuring a clean finish.
Binding Seam Allowances
While zigzag stitching can be challenging on delicate materials, binding seam allowances offers an elegant solution for sheer fabrics.
You’ll find this technique provides both reinforcement and a professional finish. For specialized materials, consider purchasing seam bindings to guarantee a high-quality finish.
| Binding Type | Best For | Appearance |
|---|---|---|
| Self-Fabric Binding | Matching finish | Seamless, invisible |
| Bias Tape | Curved edges | Clean, finished |
| Decorative Binding | Statement pieces | Contrasting accent |
| Knit Binding | Stretch sheers | Flexible, soft |
| Alternative Bindings | Special projects | Unique texture |
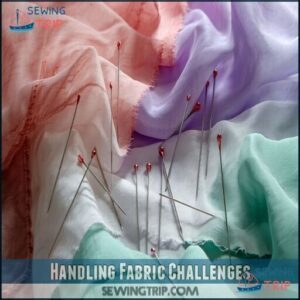
Handling Fabric Challenges
You’ll face three main challenges when working with sheer fabrics: shifting, distortion, and stretching.
Using tissue paper under your fabric and gentle handling with the right tools will help you manage these issues and create professional-looking garments.
Preventing Fabric Shifting
Sheer fabrics almost always try to escape while you’re sewing them.
To prevent shifting, place tissue paper beneath your fabric before stitching to stabilize it. Smooth pins or fabric weights can secure the material without leaving marks.
A walking foot guarantees even feeding, while stabilizing sprays offer temporary grip.
When handling sheer fabric, maintain gentle tension as you guide it through your machine for perfect stitches every time, using techniques like these to ensure perfect stitches.
Reducing Fabric Distortion
Your fabrics deserve better than to end up wrinkled and warped. When sewing sheer fabric, distortion happens easily but can be prevented with the right techniques.
Control tension while feeding fabric through your machine to maintain its integrity.
- Use stabilizing sprays for instant fabric taming without permanent stiffness
- Replace pins with paper clips or fabric weights to avoid holes
- Sandwich delicate materials between tissue paper layers for smooth feeding to prevent distortion and maintain the fabric’s integrity.
Managing Fabric Stretch
Now that you’ve mastered distortion prevention, let’s tackle stretch management. Sheer fabrics can stretch easily during handling, causing uneven seams.
Allow your cut pieces to hang for 24 hours before sewing. Apply stay stitching immediately after cutting to prevent stretching at necklines and armholes.
Use bias seam tape on curved edges for stability. Remember, gentle handling is key when sewing delicate fabrics – treat them like fine china!
To further prevent issues, consider using a walking foot attachment for even fabric feeding.
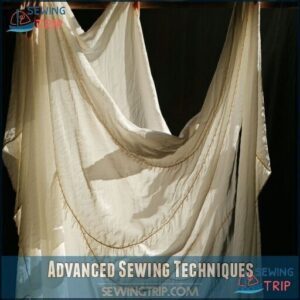
Advanced Sewing Techniques
You’ll master sophisticated techniques for gathering, ruffling, and draping sheer fabrics with practice and the right tools.
These methods transform ordinary sheer materials into professional-looking garments with elegant details that flow and catch light beautifully.
Gathering Sheer Fabric
Now that you’ve managed fabric shifting, let’s tackle gathering sheer material.
When gathering delicate fabrics, use two rows of long basting stitches (3-4mm) with reduced thread tension.
Pull bobbin threads gently for even distribution while preventing tears.
Hand-gathering with a double needle works best for lightweight sheers.
For machine gathering, sandwich your fabric between tissue paper to avoid puckering sheer fabrics as you sew.
Ruffling Sheer Fabric
When creating ruffles on sheer fabric, you’ll need special techniques to maintain fabric integrity.
Start with a wider strip than normal—typically 2-3 times your desired finished length. Lower your machine tension slightly and increase stitch length for gathering.
Consider ruffle density carefully; sheer fabrics look best with gentle gathers rather than tight ruffling. Secure ruffle placement with washable tape before stitching to prevent shifting and guarantee even sheer volume, ensuring the integrity of the sheer fabric.
Draping Sheer Fabric
The delicate dance of draping sheer fabric creates ethereal silhouettes that transform ordinary projects into showstoppers.
When working with these airy materials, fabric weight dramatically affects the final drape.
Master volume control with these five simple techniques:
- Test fabric drape by hanging samples before cutting
- Use understructure support for maintaining shape
- Create layering effects with multiple sheer layers
- Pin fabric while it’s hanging to achieve natural folds
- Steam rather than iron to preserve the fabric’s natural flow
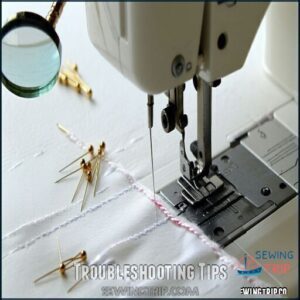
Troubleshooting Tips
You’ll find solutions to the most common sheer fabric problems in this section, from fixing snags to repairing delicate seams.
Even experienced sewers encounter challenges with these slippery fabrics, but with the right techniques, you can quickly transform frustrating mistakes into professional-looking results.
Common Sewing Mistakes
Frustration with sheer fabrics often stems from avoidable mistakes.
Skipped testing on scraps can lead to ruined projects. Using the wrong needle causes snags and tears, while uneven tension creates puckered seams.
Ignoring grain direction results in distorted garments. Rushing seams when sewing sheer fabric invites disaster.
Take your time, especially with French seams, to prevent puckering sheer areas. Patience pays off with delicate fabrics, as it helps to avoid mistakes and ensure a smooth finish, making delicate fabrics easier to work with.
Fabric Damage Prevention
Sheer fabrics face threats at every turn of your sewing journey. Prevent damage with these simple precautions:
Handle sheer fabrics with care—smooth pins, gentle tension, and pressing cloths ensure flawless results and protect their delicate beauty.
- Use smooth pin alternatives like fabric weights or washaway tape to avoid permanent needle marks
- Place pressing cloths between your iron and fabric to prevent scorching
- Practice tension control on scraps before tackling your main project
Always handle with gentle hands to prevent puckering, fraying, and distortion when sewing sheer fabric seams.
To maintain the integrity of your sheer fabrics, consider controlling temperature and humidity to prevent damage and ensure a successful sewing project with gentle hands and proper sewing journey planning.
Seam Repair Techniques
Repairing damaged seams on sheer fabrics doesn’t have to mean starting over. When problems arise, these targeted fixes will save your project.
The following solutions are available for common problems:
| Problem | Solution | Tools Needed | Difficulty |
|---|---|---|---|
| Snag Repair | Gently lift thread with needle | Fine needle, magnifier | Easy |
| Tear Mending | Apply stabilizer underneath | Washable stabilizer, fine thread | Moderate |
| Hole Patching | Insert invisible patch | Matching fabric scrap, fabric glue | Challenging |
| Thread Replacement | Re-stitch with lighter tension | Fine needle, matching thread | Moderate |
These targeted fixes can be used to address various issues, including snag repair, tear mending, hole patching, and thread replacement, allowing you to complete your project without starting over.
Frequently Asked Questions (FAQs)
What is the best stitch for sheer fabric?
Straight stitches work best for sheer fabrics, using a sharp needle and a short stitch length (5-2mm).
This prevents puckering while keeping seams clean and delicate.
Test on scraps first to avoid surprises, and consider sheer fabrics as a key factor in this process.
How do you keep sheer fabric from puckering when sewing?
To avoid puckering, use a Microtex needle, stabilize with tissue paper or spray, and maintain even tension.
Sew slowly with a walking foot, test stitches on scraps, and skip backstitching—tie thread ends instead.
How to sew sheer fabric on a sewing machine?
Think of sheer fabric as a delicate dance partner—handle it gently.
Use a sharp needle, a walking foot, and tissue paper underneath.
Set a small stitch length, avoid backstitching, and tie thread ends manually.
What is the best thread for sewing sheer fabric?
Polyester or fine cotton-wrapped polyester thread works best for sheer fabrics.
It’s strong, lightweight, and blends seamlessly.
Avoid thick threads—they’ll stand out.
Match thread color closely to the fabric for an invisible finish.
How do you sew sheer fabric with embellishments?
Taming sheer fabric with embellishments feels like herding cats, but it’s doable.
Use a stabilizer under the fabric, sew slowly with a fine needle, and hand-sew around delicate embellishments to avoid snags or puckering, which can be achieved by following these steps carefully with embellishments.
Can sheer fabrics be dyed or painted effectively?
Yes, you can dye or paint sheer fabrics, but use fabric paints or dyes designed for delicate materials.
Test on scraps first, as sheer fabrics absorb color quickly, and uneven application can show through, using delicate materials can be key.
What are the best options for lining sheer fabrics?
Lining sheer fabrics is like giving them a secret partner—lightweight options like silk organza or polyester chiffon work best.
They add structure without bulk, maintain transparency, and keep your project looking polished and professional.
How to handle sheer fabric with stretchy properties?
Stretchy sheer fabrics need extra care.
Use a stretch needle and lightweight stabilizer like tissue paper. A walking foot prevents slipping, and test stitches on scraps first.
Handle gently to avoid stretching or distorting, using methods like a walking foot to prevent issues.
Are there ideal techniques for repairing torn sheer fabrics?
Use a fine needle and matching thread to hand-stitch small, even stitches along the tear.
Reinforce with a lightweight fusible interfacing or sheer patch underneath.
Avoid pulling too tight to prevent further damage.
Conclusion
Did you know that sewing sheer fabric reduces waste by up to 30% compared to heavier materials?
With the right tools and techniques, you’ll master even the most delicate fabrics. From cutting with precision to finishing with narrow hems or French seams, every step matters.
Follow these tutorials on sewing sheer fabric to achieve professional results without frustration.
Practice makes perfect, so grab your supplies, start small, and watch your confidence grow with each project, and remember that precision is key.


