This site is supported by our readers. We may earn a commission, at no cost to you, if you purchase through links.
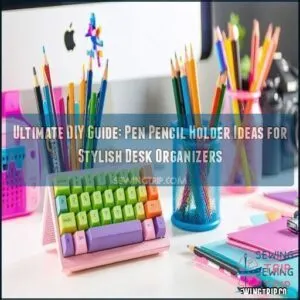 If you’re looking for the ultimate DIY guide for pen and pencil holders, start with materials you already have.
Upcycle old cans, jars, or toilet paper rolls. Add personality with paint, stickers, or twine.
Want something unique? Try arranging popsicle sticks into geometric designs or hollowing out a thick book for hidden storage.
For a modern twist, repurpose keyboard buttons into a functional holder. Plastic bottles also shine with creative cutting and splashy colors.
Whether you’re crafting a sleek organizer or something playful, it’s all about mixing purpose with personal style. Ready for inspiration? There are endless ideas to explore!
Table Of Contents
- Key Takeaways
- Essential Materials for DIY Pen Pencil Holders
- Repurposing Everyday Items for Stylish Desk Organizers
- Step-by-Step Guide: Keyboard Button Pencil Holder
- Transforming Tin Cans Into Chic Writing Utensil Storage
- Creative Popsicle Stick Pen Holder Designs
- Origami-Inspired Paper Pencil Holder Tutorials
- Upcycled Book and Magazine Pencil Holders
- Eco-Friendly Toilet Paper Roll Pencil Organizers
- Plastic Bottle Pen Holders: From Trash to Treasure
- Customizing Your DIY Pen Pencil Holder
- Frequently Asked Questions (FAQs)
- Conclusion
Key Takeaways
- Use recycled materials like tin cans, toilet paper rolls, and plastic bottles to create eco-friendly, functional pen and pencil holders.
- Get creative with decoration by using paint, twine, fabric, or buttons to personalize your holder and reflect your personal style.
- Experiment with unique designs like keyboard button holders, popsicle stick patterns, or origami-inspired creations to make your organizer stand out.
- Add practical features like multiple compartments, wall-mounted options, or themed decorations for a stylish yet functional desk accessory.
Essential Materials for DIY Pen Pencil Holders
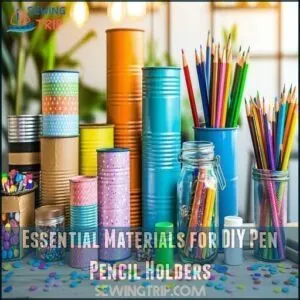
To create a great DIY pen and pencil holder, you’ll need the right materials to get started.
The perfect DIY pencil holder starts with creative materials, inspiring designs, and a touch of personal flair!
Gather items like recycled containers, sturdy cardboard, glue, and decorative supplies to guarantee your project is both functional and stylish, with decorative supplies.
Recycled and Upcycled Materials
Finding the right materials for a recycled pen holder or an upcycled pen holder is easier than you think.
Many household items can be transformed into stylish storage solutions with a little creativity. Plus, using recycled materials tackles durability concerns while reducing your environmental impact.
Here are a few ideas to get you started:
- Tin cans: Empty soup or coffee cans are sturdy and easy to customize.
- Cardboard tubes: Paper towel or toilet paper rolls are lightweight and adaptable.
- Glass jars: Mason jars or other containers offer elegant, see-through options.
Creative recycling can highlight your design innovation. Use fabric scraps, pages from old magazines, or even discarded keyboard buttons for decoration. Consider using creative appliqué patches made from fabric scraps to add a unique touch.
Balance aesthetic appeal with functionality by reinforcing with eco-friendly adhesives. With minimal effort, these upcycled materials create durable, practical organizers. Every piece you make reduces waste and adds personality to your desk.
Craft Supplies and Tools
Starting any DIY pencil holder project? Having the right crafting tools and craft supplies will make your work more precise and fun.
Sharp cutting implements, like scissors or craft knives, are a must for clean edges. Pair them with proper adhesives, such as a hot glue gun, to bond materials securely.
Measuring precision is critical, so keep a ruler or measuring tape nearby for accurate sizing. To turn your project design into something special, grab some markers and brushes for decoration techniques that add personality.
And don’t skip safety equipment like finger guards when cutting. You can find various craft knife options online.
With the right crafting materials and tools at your fingertips, your creative journey will be safe, efficient, and, most importantly, enjoyable!
Decorative Elements and Embellishments
Bring your DIY pencil holder to life with decorative elements that show off your personality.
Add personality to your DIY pencil holder with bold colors, playful textures, or meaningful designs that truly stand out.
Use paint techniques to add bold colors or intricate patterns. Fabric accents like scraps or ribbons can soften edges and add texture. Twine wraps around the base create a rustic, handmade charm.
Get creative with button art, arranging buttons into geometric patterns for a playful look. Personalization ideas include adding inspirational quotes or your initials for a thoughtful touch.
Try thematic designs, like floral patterns or favorite colors, to make it uniquely yours. For clean lines, washi tape works wonders.
These decorative techniques are versatile, so experiment freely. Consider browsing options for unique holder trimmings to further enhance your design.
Your custom creation can be as practical as it’s stylish—perfectly blending form and function.
Repurposing Everyday Items for Stylish Desk Organizers
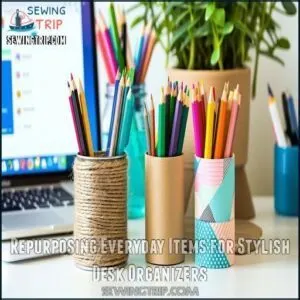
Now that you’ve gathered materials, it’s time to give everyday items a second chance by using them for your desk organizer DIY projects.
Upcycling ideas like these cut down waste as well as create unique, functional decor. With a mix of material combination and design inspiration, you can craft an upcycled pen holder that’s both stylish and personal.
Here are some simple yet effective options:
- Tin cans: Wrap these recycled containers with twine or rope for a rustic touch, or use acrylic paint for bold, colorful designs.
- Plastic bottles: Trim and shape them into lightweight holders, then customize them with themed decor or patterns.
- Cardboard tubes: Group several rolls, decorate with washi tape or paper strips, and enjoy instant space optimization.
You’ll keep your workspace tidy while showcasing your creativity—an organizer that’s as practical as it’s personalized!
Step-by-Step Guide: Keyboard Button Pencil Holder
Transform your old keyboard into a unique pencil holder with this easy project. Follow these clear steps to create a functional and stylish organizer using recycled materials.
Disassembling The Keyboard
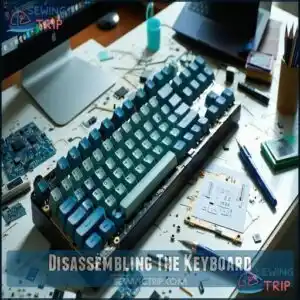
Transforming an old keyboard into a unique pen holder starts with button removal. Use a flathead screwdriver to gently pry off each keycap, working systematically.
Keep screws in a small dish to avoid losing them. As you dismantle, you’ll reveal intriguing layers like keyboard types, switches, and circuitry exposure—set aside components you’d like to reuse or recycle.
Clean keyboard buttons thoroughly for a polished look. Sorting them by color or size makes designing easier later.
This detailed prepwork transforms your keyboard recycling project into an exciting creative journey, allowing you to craft a stunning keyboard button holder.
Creating The Base Structure
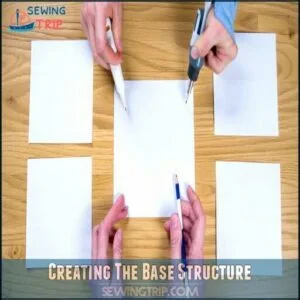
Building the base for your keyboard button pencil holder is simple with a little planning. Start by selecting sturdy cardboard—it guarantees Structural Integrity.
Cut five identical 7cm x 7cm cardboard squares, considering Shape Options and Size Considerations. Cover each square with white paper for a smooth Base Decoration.
Now, assemble the box:
- Use hot glue for Box Assembly, joining the squares with white sides facing inward.
- Reinforce the corners to strengthen your new cardboard crafts creation.
- Check for wobbling—a secure structure stands firm, ready for the next steps.
This strong base sets the stage for your masterpiece!
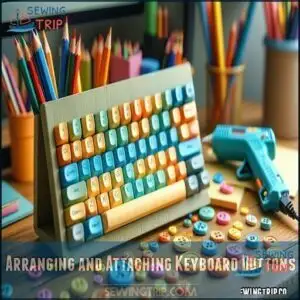
Arranging and Attaching Keyboard Buttons
Now that your base is ready, it’s time to transform it with keyboard buttons.
Play with Button Color Schemes or arrange letters to spell messages. Test Pattern Design Options by positioning buttons in rows, sequences, or random groupings.
Experiment with Button Orientation Effects, flipping some horizontally or vertically for contrast. Once happy, verify even Spacing Between Buttons and use a hot glue gun for Secure Button Adhesion.
- Mix matching and contrasting button colors
- Spell initials or words
- Align rows for sleek symmetry
- Alternate orientations
- Test layouts before gluing
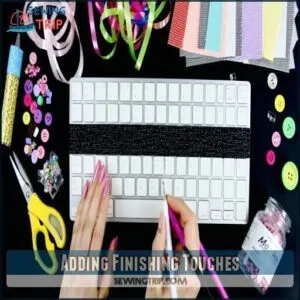
Adding Finishing Touches
Now’s the chance to add the finishing touches and truly elevate your keyboard button pencil holder.
Start by smoothing edges with a black or colored strip for a polished look. Use decorative accents like ribbon, fabric scraps, or button clusters to cover gaps creatively.
Protective coatings, such as clear Mod Podge, seal your design and give it a subtle shine, guaranteeing durability. When adding buttons, guarantee a secure button attachment method for longevity.
Explore customization ideas by adding small patterns or paint effects around cardboard edges. Before calling it complete, perform a final inspection, verifying all pieces are secure, to ensure your creation is a unique masterpiece, blending style with function seamlessly.
Transforming Tin Cans Into Chic Writing Utensil Storage
You can turn empty tin cans into stylish holders for your pens and pencils with just a little cleaning and creativity.
By adding simple embellishments like twine or applying a coat of Mod Podge, you’ll create functional and attractive organizers for your desk.
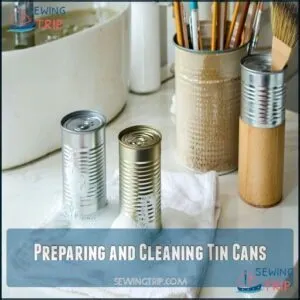
Preparing and Cleaning Tin Cans
Give your old tin cans a second life with proper preparation.
Start by soaking them in hot, soapy water for 10 minutes to loosen labels. Scrub off any sticky residue with a baking soda paste for smooth surfaces.
Sand sharp edges and rust spots cautiously to guarantee safe handling and rust prevention. Don’t forget to clean the interior coating with soap and water before decorating.
Air-dry the cans thoroughly to avoid rust. Clear containers are useful, just like for sewing notions storage.
-
Steps to Prep Tin Cans:
- Soften labels with warm water.
- Sand edges for safe handling.
- Address rust spots early.
- Clean and dry interiors completely.
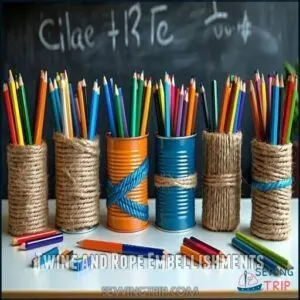
Twine and Rope Embellishments
Once your tin cans are clean and prepped, add charm with twine colors and rope textures. Secure one end of natural jute twine or rope with glue, then wrap it around the can in smooth layers.
For nautical themes, use thicker rope and experiment with knot styles like sailor’s knots. Want a playful look? Combine bold braided designs using different twine colors.
You can find inspiration for your project by browsing various available twine options. This simple DIY pen holder method works great for personalized desk pen organizers.
It’s a budget-friendly way to showcase creativity while organizing your supplies with stylish, handcrafted pen storage DIY options.
Mod Podge Application Methods
To elevate your homemade pen holders into creative masterpieces, Mod Podge is your secret weapon.
Start by using a foam brush for smooth Brush Strokes and even coverage. Next, apply thin layers, focusing on Sealing Techniques to avoid bubbles or uneven surfaces.
If you’re working with fabric, pre-treat it with Fabric Mod Podge for better Fabric Adhesion—this prevents fraying when cutting. Allow 20 minutes for each coat to fully dry before adding the next.
For extra refinement, lightly sand between layers to achieve professional Texture Effects. Want a unique Image Transfer? Smooth paper or fabric onto the surface while the Mod Podge dries.
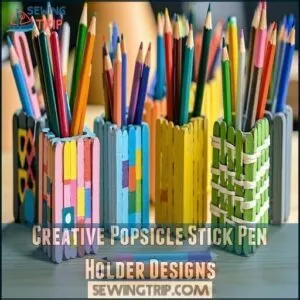
Creative Popsicle Stick Pen Holder Designs
You can turn simple popsicle sticks into creative pen holders with just a few materials and some careful assembly.
Use paint, patterns, and smart designs to create functional and stylish organizers for your workspace.
Basic Popsicle Stick Construction
With just popsicle sticks and a few craft supplies, you can build a sturdy and easy pencil holder.
Lay 4-6 sticks flat for the base, securing them with strong stick adhesives like wood glue. Attach vertical sticks to the edges for walls, holding each joint firmly for structural integrity. Square or hexagonal shapes guarantee balance and simplicity.
You can also add decorative elements to the holder, similar to how crafters use die-cut shapes to enhance gift bags.
| Material | Use Cases |
|---|---|
| Standard sticks | Everyday holders |
| Jumbo sticks | Larger storage |
| Mini sticks | Compact designs |
| Colored sticks | Pre-decorated |
This step-by-step tutorial creates an adaptable popsicle stick holder with endless design options.
Colorful Painting and Decorating Ideas
Transform your popsicle stick holder into stunning desk decor with simple paint techniques. Start with bold Color Palettes like turquoise, coral, or sunshine yellow to create a vibrant base.
Layer on Texture Effects and Pattern Inspiration to make it uniquely yours.
- Blend shades for an ombré effect with smooth light-to-dark gradations.
- Highlight edges with metallic paint for a sleek, modern twist.
- Use stencils for stars, flowers, or initials to add playful patterns.
For added durability, seal your colorful crafts with clear varnish.
Finish with Embellishment Ideas like fine marker details, making your DIY pen holder the centerpiece of your workspace.
Incorporating Geometric Patterns
Let’s take your popsicle stick holder up a notch with geometric flair! Using Geometric Arrangement and Pattern Symmetry, you can craft unique designs that add a modern touch to your workspace.
- Arrange sticks into Tessellation Designs like hexagons or triangles for a clean, uniform look.
- Experiment with Color Combinations—think bright contrasts or pastel gradients.
- Create 3D Geometry by layering cubes or pyramids for personalized designs.
- Add geometric paper or washi tape for stylish, decorative elements.
- Mix angles for asymmetrical patterns that feel contemporary yet effortless.
Seal your holder for durability and elegance!
Multi-compartment Organizer Variations
Building on geometric patterns, adding multi-compartment features makes your DIY desk caddy more practical and stylish.
A multi-compartment desk organizer helps you sort your stationery effortlessly and keeps clutter at bay.
You’ll love these pen storage DIY tips:
- Make a sturdy base by gluing popsicle sticks into a flat grid.
- Use angled slots or vertical sticks to create sections for markers, pens, or rulers.
- Add adjustable dividers to form smaller spaces for paper clips or sticky notes.
- Incorporate a stackable design, connecting layers with extra sticks for added storage.
These desk organization ideas turn simple materials into innovative, efficient, and customizable DIY office supplies.
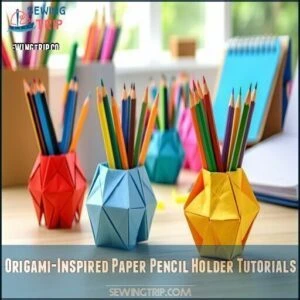
Origami-Inspired Paper Pencil Holder Tutorials
You can turn simple sheets of paper into practical and decorative pencil holders with just a few folds.
These origami-inspired designs are perfect for keeping your desk organized while adding a creative touch.
Simple Folding Techniques for Beginners
Creating a simple origami paper holder starts with the right paper type.
Fold a rectangular sheet using basic folds like valleys and mountains to form a pouch. Add stability by securing folds with glue or reinforced paper strips inside.
This step-by-step tutorial makes an easy pencil holder perfect for beginners.
Finish your DIY pen pencil holder with vibrant patterns or decoration ideas for a personal touch!
Advanced Origami Designs for Pen Storage
Master advanced origami techniques to elevate your DIY pen pencil holder projects.
These stunning designs require precision and artistry, perfect for creating functional yet decorative organizers:
- Modular Origami Toolbox – Add compartments with clever folds for ultimate desk organization.
- Geometric Tessellation Stand – Showcase intricate patterns for modern aesthetics.
- Complex Hexagonal Container – Achieve stability and charm using unique angles.
- Wet-Folding Tower Design – Form gentle curves with wet-folding methods, adding durability.
Master these techniques, and your creative pen holder will truly stand out!
Combining Origami With Other Materials
Combine classic origami with creative materials to craft unique DIY pen pencil holders. Use wood bases for sturdiness, or enhance your folds with metal accents for a sleek, industrial look.
Add warmth with origami fabric integration or charm with clay embellishments pressed onto your designs. Try Origami mixed media by reinforcing with plastic bottle sections or wrapping fabric around boxes.
Attach origami flowers to wooden holders for a touch of elegance. These step-by-step tutorials showcase how origami projects with paper glue can become functional art pieces.
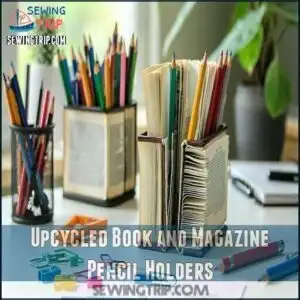
Upcycled Book and Magazine Pencil Holders
Turn old books and magazines into practical pencil holders that add charm to your desk.
With just a few cuts and simple techniques, you can repurpose these items into unique organizers.
Book Hollowing Methods
Turn an old book into a clever DIY pen holder with these simple steps. This pen holder tutorial blends practicality with creativity.
Start by choosing a sturdy book you’re comfortable repurposing—hardcovers work best for durability.
- Cutting Techniques: Mark the hollow area with a pencil, ensuring it’s centered. Use a sharp craft knife and ruler to gently cut a few pages at a time. Be patient—precision is key.
- Sealing Methods: Once you’ve carved a niche deep enough, apply white glue mixed with water to the page edges. This step prevents fraying and keeps everything neat.
- Hiding Mechanisms: To make your desk organizer functional, attach strips of velcro inside the hollowed area. This secures items while enhancing usability.
Display options like using the book’s cover as a decor piece add charm. It’s a unique pencil holder idea!
Magazine Page Rolling Techniques
Old magazines don’t have to gather dust—they can transform into unique desk organizers with magazine page rolling techniques.
This DIY pen pencil holder method is simple but stylish, letting you reuse paper in creative ways.
Follow these steps for success:
- Tightness Control: Roll magazine pages diagonally, keeping the tension consistent for solid, durable tubes.
- Adhesive Selection: Secure the edges with glue or tape for long-lasting hold.
- Pattern Creation: Arrange the rolled tubes by height or colors for an eye-catching design.
Once assembled, add finishing options like a varnish coat for durability and shine.
This step-by-step tutorial helps you declutter as well as gives your workspace a personal, eco-friendly touch while promoting structural integrity in every roll!
Incorporating Book Covers as Bases
Book covers make excellent bases for sturdy and creative DIY pen holders. Their structural integrity guarantees they last through daily use, while their aesthetic appeal adds charm to your desk.
Hardback covers are perfect for this project because they’re durable, versatile, and easily customized.
First, reinforce the spine with paper mache or glue for extra stability. Decorate the cover using old book pages, fabric, or decorative papers for seamless design integration. Add a clear varnish to seal and protect your creation.
Incorporate dividers to organize pens and pencils neatly.
For the best results, pick books with interesting textures or designs to show off your style. These fun, upcycled materials projects give damaged books a second life and inspire creative reuse.
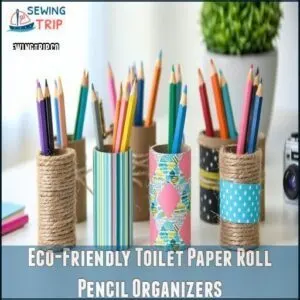
Eco-Friendly Toilet Paper Roll Pencil Organizers
Turn empty toilet paper rolls into practical and eco-friendly pencil organizers with just a few simple steps.
By cutting, shaping, and grouping the rolls, you’ll create a budget-friendly solution that keeps your desk tidy and organized.
Cutting and Shaping Toilet Paper Rolls
Toilet paper rolls are an easy, eco-friendly choice for crafting a practical DIY pencil holder out of household waste.
With simple cutting techniques, you can shape these cardboard tubes into organizers that are both functional and stylish.
Start by varying the roll height. Cut the tubes into different lengths, like 2 to 4 inches, for a tiered effect that’s visually interesting.
Experiment with shape variations by trimming the edges into zigzags, scallops, or geometric waves. For better stability, make small vertical slits at one end, folding them outward to create a sturdy base.
To build compartments, try cross-joint cutting—slice halfway through two tubes and slot them together. Reinforce thinner rolls by layering; insert one into another for more strength.
Remember to secure shapes with glue and finish edges for a polished look.
-
Ideas to Try:
- Painted cardboard tubes for colorful designs.
- Decorative trimming on edges.
- Strengthen with double layers.
- Interlock rolls for extra compartments.
- Fold-out bases for added stability.
Creating Animal-Themed Holders
If you’re looking for adorable pencil holder ideas, try turning toilet paper rolls into animal-themed DIY pen holders.
To create cartoon characters, attach googly eyes and felt ears for a playful look. For realistic textures, use acrylic paint and small brushes to mimic fur or scales.
Add 3D features like pipe cleaner tails or cardboard wings to mythical creatures. Want bold simplicity? Paint animal silhouettes using stencils and black paint.
For more vibrant designs, decorate with colorful paper and markers. Display your handmade pencil holder beside small habitat dioramas for extra charm, bringing personality and creativity to your desk!
Grouping Rolls for Larger Organizers
Creating a larger toilet paper roll holder is a great way to up your desk organization game.
By grouping multiple rolls together, you can design a functional and budget-friendly desk organizer that holds everything from pencils to paper clips.
Follow this step-by-step tutorial to make yours:
- Roll Size & Base Stability – Use rolls of varying heights to create a tiered design. Secure them firmly onto a sturdy base, like cardboard or wood, to prevent tipping. Adhesive strength is key—hot glue works well.
- Section Dividers – Add small cardboard pieces between rolls to create compartments for smaller items like erasers or push pins.
- Finishing Touches – Cover the assembled desk organizer with decorative paper or paint for a polished look. A honeycomb pattern adds both style and efficiency.
This DIY saves space while enhancing your office organization!
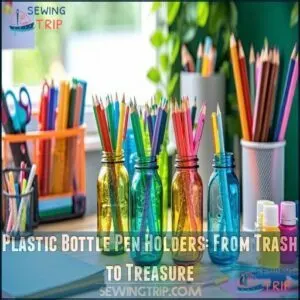
Plastic Bottle Pen Holders: From Trash to Treasure
You can turn old plastic bottles into practical pen holders with just a few simple steps. By cutting, shaping, and decorating them, you’ll create stylish organizers while reducing waste.
Cutting and Shaping Plastic Bottles
Transforming a plastic bottle into a pen holder is easier than you’d think! Begin by cleaning the bottle thoroughly to remove dirt and labels.
Use a marker to sketch your design, keeping bottle thickness in mind when choosing your tools. An X-Acto knife works well for precise cuts, while scissors handle simpler shapes.
To smooth rough edges, press them lightly against a warm iron for edge finishing. For unique shaping methods, try using a bowl as a guide. Just don’t skip safety measures—always wear gloves and stabilize the bottle!
With these cutting techniques, you’ll create an ecofriendly and stylish DIY pen holder.
| Step | Details |
|---|---|
| Clean the Bottle | Remove dirt, labels, and sticky residue. |
| Cut with Precision | Use tools based on your design and material. |
| Smooth Edges | Finish edges with a warm iron or sandpaper. |
Decorative Painting Techniques
One of the most creative ways to elevate your plastic bottle pen holder is through decorative painting. Start by sanding the bottle’s surface lightly and applying a primer—this helps paint stick better, giving you a clean base to work with.
Experiment with brushstroke techniques and texture effects to make your DIY pen holder stand out. Acrylic paint works best, applied in thin layers to avoid drips. Want more dimension? Mix a little white glue with paint to create subtle raised designs.
For a speckled look, grab a sponge and dab on complementary color palettes. Stencils are perfect for geometric shapes—just tape your design in place and paint away.
Finish with clear varnish to seal your work. Whether you’re into glossy or matte faux finishes, sealing methods guarantee your pencil holder lasts while adding flair to your desk decor DIY.
Hanging and Wall-Mounted Designs
Maximize vertical space with unique pen holder ideas that blend style and function.
Wall-mounted designs are perfect for freeing desk space, making tools accessible, and enhancing your decor.
Follow these steps for your DIY pencil holder:
- Explore mounting options: Use adhesive strips for secure attachment and easy repositioning.
- Assess weight considerations: Choose lightweight materials for stability.
- Plan accessibility design: Mount holders at eye level for convenience.
- Get creative: Try pegboards or magnetic strips for flexible wall hanging pen holder setups.
Craft desk decor DIY that’s practical and stylish!
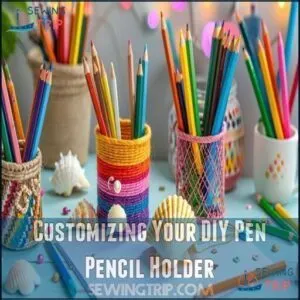
Customizing Your DIY Pen Pencil Holder
You can make your DIY pencil holder truly unique by adding personal touches like photos or meaningful quotes.
Choose a theme that reflects your style, and use simple materials to create functional and stylish designs.
Adding Personal Touches With Photos
Photos can turn your DIY pen holder into a keepsake. Try creating a photo collage with family shots or your favorite memories.
Use transfer techniques to adhere images neatly. Strong glue keeps them in place, while a clear sealant guarantees photo protection.
These personalized gifts aren’t just functional—they become desk organizers full of heart. Show off these unique pencil holder ideas with pride, making each piece a meaningful display of your life.
Incorporating Inspirational Quotes
Turn your DIY pen holder into a daily dose of inspiration with carefully chosen quotes. Adding impactful words can transform a desk organizer into something truly meaningful.
When selecting phrases, think about what motivates you most. Pair them with a font choice that reflects your style to enhance their appeal. Use contrasting colors for visual integration, making the quotes pop against the holder’s background. Strategic quote placement is key—position them where they’ll catch your eye often.
For lasting impact, write with permanent markers or durable stickers.
- **Choose meaningful quotes that resonate with your goals.
- **Use simple, bold fonts for readability.
- **Align designs with positive themes.
- **Apply durable lettering techniques.
- **Experiment with placement for maximum visibility.
Themed Designs for Special Occasions
Give your pencil holders a festive twist with thematic creations perfect for special occasions.
For Holiday Holders, add snowflakes or autumn leaves for stunning Seasonal Decor.
Create Birthday Themes using bright colors, glitter, or small balloon details to add a playful vibe.
Celebrate milestones with Graduation Gifts by designing holders with school colors, tassels, or inspirational text.
Teacher Appreciation ideas can include apple shapes or book patterns for thoughtful, handmade gifts.
Valentine’s designs are easy too—use heart shapes and red hues for a charming touch.
These personalized accessories turn simple DIYs into meaningful, heartfelt teacher gifts, craft ideas, or keepsakes for any occasion.
Frequently Asked Questions (FAQs)
How many DIY pencil holders are there?
Imagine transforming an old coffee can into a chic pencil holder.
There are over 40 creative DIY pencil holder ideas, ranging from upcycled tin cans and cardboard tubes to intricate wooden and polymer clay designs.
How can you make a DIY pencil holder?
Start by picking a base material like a tin can, cardboard, or glass jar.
Clean it, decorate with paint, fabric, or paper.
Add finishing touches for personality, and you’ve got a custom pencil holder!
What is a good DIY pencil holder for kids?
Let’s face it—kids love chaos.
They can channel that energy into crafting a pencil holder using tin cans, vibrant paint, and stickers.
It’s simple, cheap, and gives them a creative spot to organize their mess!
Why is a pencil holder important?
A pencil holder keeps your workspace organized, saves time by ensuring tools are easy to find, and adds personality to your desk.
It’s practical, makes life simpler, and helps you stay focused on tasks.
Do you need a pencil holder?
A pencil holder is like a home for your creativity, keeping your desk organized and your tools within reach.
You’ll work more efficiently, avoid clutter, and add a personal touch to your workspace, which can be seen as a personal touch to your overall productivity.
Can you make a pen holder for a desk?
Use simple materials like empty tin cans, cardboard tubes, or glass jars.
Decorate them with paint, fabric, or washi tape.
Add compartments for organization, and voilà—your desk stays tidy and stylish!
How to make a DIY pencil holder?
Transform your workspace with a DIY pencil holder!
Use tin cans, cardboard, or jars as a base.
Decorate with paint, fabric, or washi tape.
Add personal flair and enjoy a stylish, functional design!
How to make a reusable pen holder?
Use a clean tin can or a sturdy cardboard tube as the base.
Cover it with decorative paper, fabric, or paint.
Add compartments, secure materials with glue, and let your creativity shine!
How to make your own pen loop?
Craft a clever, compact pen loop by cutting elastic to fit snugly around pens.
Secure its ends with strong glue or stitching onto a sturdy surface, like a notebook cover.
It’s simple, yet effective!
How to stick a pen to a clipboard?
To stick a pen to a clipboard, attach a self-adhesive pen loop near the edge.
Use strong double-sided tape to secure a small clip.
Verify the adhesive is firm for durability.
Conclusion
Elevate your workspace with ease by crafting your custom pen and pencil holders.
This ultimate DIY guide for pen and pencil holders offers diverse ideas using recycled materials, from tin cans to popsicle sticks.
Combine functionality with personal flair by experimenting with colors, textures, and designs.
Explore creative possibilities, whether it’s turning plastic bottles into art or mastering origami techniques.
With accessible materials and simple steps, you can transform everyday items into stylish desk organizers that reflect your unique taste.
- https://modernmrsdarcy.com/upcycled-diy-pencil-holders-inspired-by-all-you-magazine/
- https://www.100directions.com/easy-recycled-hanging-pencil-and-pen-organizers/
- https://m.youtube.com/watch?v=lAcZUUgcAMU
- https://www.youtube.com/playlist?list=PLcwoNh_vOFYJtaqnryh5ama9r9yx_oeQW
- https://www.quora.com/How-do-I-make-a-pencil-holder-from-a-block-of-wood

