This site is supported by our readers. We may earn a commission, at no cost to you, if you purchase through links.
 French seams are a professional sewing technique that creates ultra-clean, enclosed edges by sewing twice.
You’ll first stitch with wrong sides together using a 3/8" seam allowance, trim to 1/8", then flip the fabric so right sides face together and sew again with 1/4" allowance.
This double-stitching completely encases raw edges, preventing fraying and creating durability that’s perfect for delicate fabrics like silk, chiffon, and cotton voile.
They’re essential for unlined garments, lingerie, and luxury linens where both seam sides might show.
While they require more time and skill than regular seams, the professional finish transforms your sewing from amateur to couture-level craftsmanship.
Table Of Contents
Key Takeaways
- You’ll create French seams by sewing twice—first with wrong sides together at 3/8", then trimming to 1/8" and flipping to sew right sides together at 1/4"
- They’re perfect for lightweight fabrics like silk, chiffon, and cotton voile where you need clean edges without bulk or fraying
- You’ll get professional results in unlined garments, lingerie, and delicate items where both sides of seams might be visible
- While they take more time and skill than regular seams, they completely encase raw edges for durability and finish
What Are French Seams in Sewing
Looking beyond ordinary seam finishes, French seams represent the gold standard of enclosed seams in professional sewing. You’ll create these distinctive seam finishes by sewing twice—first with wrong sides together, then with right sides together.
This dual-stitching process completely encases raw edges within the seam construction, eliminating fraying and creating exceptional seam durability. French seams excel in sewing techniques for lightweight fabrics where other seam finishes appear bulky or unprofessional.
Your fabric choice directly impacts success—sheer materials like chiffon, silk, and organza showcase this method’s professional finish beautifully. These enclosed seams prove essential for unlined garments where interior construction remains visible.
Project suitability extends beyond delicate blouses to include lingerie, children’s clothing, and luxury linens. Unlike serged edges or pinked seams, French seams provide comfort against sensitive skin while maintaining structural integrity.
Seam applications span from couture fashion to everyday garments requiring refined interior finishing. Mastering seam construction steps is vital for achieving a professional finish in various sewing projects.
How Do French Seams Work?
Unlike traditional seam construction, French seams work through a double-stitching method that completely encases raw edges within the finished seam.
French seams transform raw edges into professional perfection through elegant double-stitching craftsmanship
This enclosed seam technique creates clean finish seams by reversing the fabric between two sewing passes.
Here’s how this seam construction process functions:
- First Pass: You’ll sew with wrong sides together using a 3/8" seam allowance, creating the foundation for your enclosed seams
- Trimming Stage: Cut the seam allowance to approximately 1/8" to reduce bulk in the final seam finishes
- Fabric Reversal: Flip the pieces so right sides face together, positioning raw edges inside the fold
- Second Pass: Stitch again with a 1/4" seam allowance, completely encasing the trimmed edges
- Final Result: Your sewing techniques produce a neat, durable seam with no visible raw edges
This method works best with careful fabric selection of lightweight materials.
Proper thread choices and consistent stitch length guarantee the seam lies flat while maintaining structural integrity throughout the garment’s life.
Step-by-Step Guide to Sewing French Seams
Learning French seams might seem tricky at first, but you’ll master this elegant technique with practice and patience.
You’ll create professional-looking seams that completely encase raw edges and add durability to your garments.
Pinning and Stitching The First Seam
Start by placing your fabric pieces with wrong sides together. This unusual arrangement sets up the magic of French seams. Pin carefully along the seam line to prevent shifting during stitching. To achieve accurate seams, using the right sewing pin types for your project is vital.
| Step | Action | Details |
|---|---|---|
| 1 | Position Fabric | Wrong sides together, edges aligned |
| 2 | Pin Placement | Every 2-3 inches along seam line |
| 3 | Seam Allowance | Measure exactly 3/8 inch from edge |
| 4 | Stitch Length | Set machine to 2.5mm for stability |
| 5 | First Pass | Sew straight seam maintaining accuracy |
Fabric preparation guarantees clean finish seams. Use consistent pinning techniques for seam accuracy. Your stitch length affects the durability of professional seams in sewing projects.
Trimming The Seam Allowance
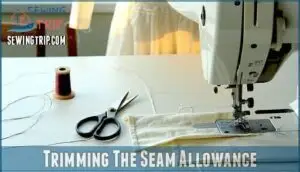
After your first seam is complete, seam trimming becomes your next focus. Proper allowance reduction prevents bulk and guarantees clean edge finishing. Cut the seam allowance in half for professional seams and improved garment construction.
Follow these fabric cutting steps for seam accuracy:
- Trim seam allowance to approximately 1/8 inch
- Cut both fabric layers together for even edges
- Use sharp fabric scissors for clean cuts
- Remove loose threads immediately
- Check trimmed edges align perfectly before proceeding
This allowance reduction creates the foundation for durable seams in your sewing projects. Understanding seam construction basics is vital for achieving a professional finish.
Pressing The Seam for Accuracy
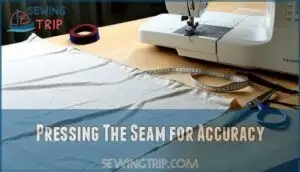
After your first seam is complete, proper seam pressing transforms raw stitches into professional results. This vital step sets the foundation for your second seam’s success.
| Pressing Stage | Temperature Setting | Technique |
|---|---|---|
| Initial Press | Medium heat | Press seam flat as sewn |
| Side Press | Medium heat | Press to one side only |
| Final Check | Cool setting | Verify edges lie flat |
Heat activates fabric fibers and creates sharp creases essential for accurate folding. Press the seam flat first, then to one side. This fabric preparation guarantees your second seam captures raw edges completely.
Use accuracy tools like pressing cloths to protect delicate materials while achieving durable seams through proper garment construction techniques.
Folding and Sewing The Second Seam
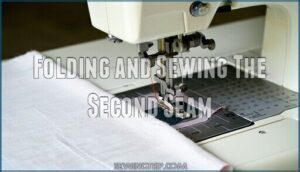
With your pressed seam ready, flip the fabric so right sides face together.
The raw edges should align perfectly inside this fold.
Stitch the second seam at 1/4" seam allowance using consistent sewing methods. This fabric enclosure step locks those pesky fabric edges inside permanently.
Keep fold accuracy tight for professional seam types.
Final Pressing and Seam Inspection
After completing the second seam, press it to one side with consistent heat and pressure for a professional seam finish.
Your pressing tools will help flatten the enclosed fabric edges completely. Inspect the seam carefully for any visible raw edges or uneven stitching.
This final touch guarantees maximum seam strength and clean appearance. Proper fabric inspection at this stage perfects your sewing skills and validates your sewing tutorials technique.
When and Why to Use French Seams
You’ll discover French seams work best with lightweight fabrics like silk, chiffon, and cotton voile where raw edges need complete encasing.
These refined seams excel in garments where both sides might be visible, such as unlined blouses, delicate lingerie, and sheer tops, making them ideal for delicate lingerie.
Ideal Fabrics for French Seams
French seams work best with specific fabric types that benefit from enclosed edges.
Your fabric choice determines success with this sewing technique.
Top fabric categories for French seams:
- Sheer fabrics – Silk Fabrics, Chiffon Textiles, and Organza Materials showcase clean finishes without visible raw edges
- Lightweight Cotton – Voile, batiste, and lawn create smooth seams without bulk
- Delicate Synthetics – Fine rayons and lightweight blends maintain drape while preventing fraying
These sewing tutorials recommend avoiding heavy materials like denim or canvas, which create bulky seams.
For ideal results, consider using silk sewing techniques to achieve a professional finish.
Garments and Projects That Benefit
You’ll find French seams perfect for delicate blouses and sheer dresses where exposed edges would show through.
Lightweight tops in silk or chiffon benefit from this couture sewing technique.
Silk nightwear gains professional polish while beginner sewing projects like pillowcases offer practice.
Advanced sewing tutorials often feature French seams in children’s clothing and fine linens where comfort matters most, and they utilize French seams.
Advantages Over Other Seam Finishes
Beyond specific projects, French seams deliver real advantages that set them apart from other seam finishes. Seam Strength increases through double stitching while Professional Finish standards match couture sewing expectations. Your Fabric Protection stays superior to standard finishes.
Using the correct seam allowance techniques is essential for achieving a professional finish.
- Durability Benefits: French seams resist splitting and fraying better than zigzag or serged alternatives
- Clean Appearance: No exposed raw edges create a polished interior finish for advanced sewing
- Enhanced Protection: Complete edge encasement prevents unraveling in delicate fabrics during washing
Limitations and Considerations
While French seams create beautiful finishes, they aren’t suitable for every project.
Fabric restrictions limit their use to lightweight materials since seam bulk becomes problematic with thick fabrics.
Time consumption doubles compared to standard seams, requiring higher skill levels for precision, and heavy fabrics may cause fabric fraying during trimming.
Consider these sewing techniques carefully when choosing seam types for your sewing tips and French seams applications, keeping in mind the potential issues to ensure the best results for your project, with complete concepts in mind.
Tools and Tips for Perfect French Seams
You’ll need the right tools and techniques to create flawless French seams that look professional every time.
Mastering these essentials will save you from common pitfalls and guarantee your delicate fabrics get the pristine finish they deserve.
Essential Sewing Tools and Accessories
You’ll need reliable Sewing Machines with consistent stitch quality for precise French seams.
Sharp Sewing Needles prevent fabric snags while quality thread and Thread Cutters guarantee clean cuts.
Essential Measuring Tapes help maintain accurate seam allowances.
Proper Ironing Tools create crisp folds between seam steps.
These sewing resources support perfect seam types when you learn sewing techniques, making French seams achievable with proper sewing tips.
Investing in good sewing machine models can substantially improve your sewing experience.
Techniques for Consistent Seam Allowances
Achieving consistent seam allowances makes the difference between amateur and professional-looking French seams. Your measurements need to stay precise throughout both passes to guarantee raw edges remain completely enclosed.
Consider these proven techniques for maintaining accuracy:
- Use masking tape or magnetic seam guides positioned at exact 3/8" and 1/4" measurements on your machine
- Mark fabric with washable markers before cutting to establish clear stitching lines
- Practice on scrap fabric first to calibrate your machine settings and develop muscle memory
Seam accuracy depends heavily on fabric selection and proper sewing tools. Edge finishing becomes effortless when you maintain stitch control through consistent feeding and steady machine speed. Mastering sewing tutorial techniques is essential for achieving professional results in French seam construction.
Common Mistakes and How to Avoid Them
French seams look simple but trip up even experienced sewers. Seam allowance errors top the mistake list. You can’t wing the measurements—that first 3/8" seam must be exact or your edges won’t encase properly.
Understanding a seam guide is essential for achieving professional results.
| Common Mistake | Quick Fix |
|---|---|
| Wrong sides apart first | Start wrong sides together |
| Skipping trim step | Cut to 1/8" after first seam |
| No pressing between steps | Iron flat before folding |
| Racing through final stitch | Slow down, check alignment |
Fabric choice mistakes happen when you pick heavy materials. French seams work best on lightweight fabrics like silk or cotton voile.
Thread tension issues create puckering—adjust your machine settings before starting. Incorrect folding after trimming leaves raw edges exposed.
Trimming mistakes mean either cutting too much or too little fabric away.
Maintenance and Care for Finished Seams
Proper care extends your French seams’ lifespan substantially.
Handle finished garments gently during washing to prevent seam stress.
Store pieces on padded hangers rather than folding at seam lines.
Press seams lightly using a pressing cloth to avoid shine on delicate fabrics.
Check seams periodically for loose threads or wear.
When cleaning, turn garments inside out to protect the enclosed seam structure from agitation, and always press seams lightly.
Frequently Asked Questions (FAQs)
Can French seams be used on curved seams?
Yes, you can use French seams on gentle curves, but they work best on straight or slightly curved edges.
Sharp curves create bulk and puckering that compromises the seam’s clean finish.
What are the disadvantages of using French seams?
While incredibly neat and professional-looking, French seams aren’t always your best choice. You’ll face increased bulk in corners, longer construction time, and they’re tricky on curves or tight spaces.
Are French seams suitable for heavyweight fabrics?
You shouldn’t use French seams on heavyweight fabrics.
They create excessive bulk since you’re sewing two seams plus encasing the raw edges.
Heavyweight materials like denim or canvas work better with flat-felled seams instead.
Can French seams be used on pillowcase patterns?
French seams work perfectly on pillowcases since they’re suited for lightweight fabrics and home décor items. You’ll get beautifully finished edges that won’t fray or irritate skin.
What are some essential tools needed for sewing French seams?
You’ll need a sewing machine with accurate seam allowances, sharp fabric scissors, pinking shears to prevent fraying, an iron for pressing seams, masking tape for consistent measurements, and fine pins for precise alignment.
Can French seams be sewn by hand?
Yes, you can hand-sew French seams using the same two-step process.
Start with wrong sides together, stitch at 3/8", trim, then flip right sides together for the final 1/4" seam.
Hand-stitching takes patience but produces beautiful results.
How do French seams affect garment sizing?
Since French seams use two rows of stitching instead of one, they consume more seam allowance than standard seams.
This effectively reduces your garment’s final dimensions by approximately 1/8 to 1/4 inch per seam, requiring adjustments to your pattern measurements.
Whats the cost difference using French seams?
Money-wise, you’ll spend roughly the same on thread and fabric.
However, French seams require double the stitching time, which means higher labor costs if you’re paying someone else to sew your garments.
Do French seams work on curved edges?
French seams work beautifully on gentle curves but struggle with sharp corners or tight curves.
You’ll need to clip or notch curved seam allowances carefully between stitches to prevent puckering and guarantee smooth results.
Can you unpick French seams for alterations?
Unpicking French seams is tricky but doable.
You’ll need to carefully remove both seam lines – the outer and inner stitches.
Work slowly to avoid damaging the fabric since you’re dealing with two layers of stitching.
Conclusion
Practice makes perfect when mastering what’re french seams in sewing.
You’ve learned the complete process from initial stitching through final pressing.
These enclosed seams transform your projects from amateur to professional quality.
They work best with lightweight fabrics and unlined garments.
While french seams require extra time and precision, the results speak for themselves.
Your delicate fabrics will have clean finished edges that won’t fray over time.
The investment in learning this technique pays dividends in garment longevity and appearance.
- https://ilsa-makes-things.tumblr.com/post/144350378545/tutorial-sew-a-linen-bocksten-tunic-with-french
- https://en.wikipedia.org/wiki/Seam_(sewing)
- https://blog.colettehq.com/tutorials/tutorial-french-seam-with-the-serger
- https://www.srf.ch/news/archaeologie-juwelen-als-die-solothurner-noch-in-hoehlen-lebten
- https://fineartamerica.com/featured/elias-howe-sewing-machine-1845-photo-researchers.html


