This site is supported by our readers. We may earn a commission, at no cost to you, if you purchase through links.
You’ll start with basics like straight stitching, hemming, and seam finishing – think of them as your foundation skills.
Once you’ve got those down, you can tackle advanced methods like inserting zippers, creating buttonholes, and working with tricky fabrics like knits or silks.
Each technique serves a purpose, whether it’s preventing fraying, adding structure, or creating professional-looking details.
From pressing methods that make your seams crisp to specialty cuts that maximize fabric patterns, these skills give you creative freedom.
Master the fundamentals first, then watch your projects transform from simple to stunning.
These skills are essential for any sewing project, and mastering them will take your creations to the next level, with a focus on preventing fraying.
Table Of Contents
- Key Takeaways
- Getting Started With Sewing
- Choosing The Right Sewing Machine
- Essential Sewing Fabrics and Accessories
- Basic Sewing Techniques
- Advanced Sewing Techniques
- The Most Important Sewing Technique
- Tips and Tricks From Victoria Villasana
- Troubleshooting Common Sewing Problems
- Frequently Asked Questions (FAQs)
- Conclusion
Key Takeaways
- You’ll master sewing by starting with foundation skills like straight stitching, hemming, and seam finishing before advancing to complex techniques like zipper insertion and working with stretchy fabrics.
- Pressing isn’t just ironing—it’s the most crucial technique that transforms amateur projects into professional-quality work by creating crisp seams and proper fabric shaping at each construction step.
- You’ll prevent fraying and ensure durability by choosing the right seam finish for your fabric type, whether it’s French seams for delicate materials or zigzag edges for everyday fabrics.
- Your sewing success depends on matching tools to techniques—using ball point needles for knits, proper thread weights for different fabrics, and maintaining consistent tension for professional results.
Getting Started With Sewing
Starting your sewing journey doesn’t have to feel overwhelming. The key to mastering sewing basics lies in building confidence through hands-on practice.
Begin with simple hand stitches like running stitch and backstitch on fabric scraps. This foundation teaches you how thread moves through different materials and builds muscle memory.
Next, focus on proper fabric prep by washing and pressing your materials before cutting. This prevents shrinkage disasters later. When choosing threads, match the fiber content to your fabric for best results. Cotton thread works well with cotton fabrics, while polyester thread suits synthetic materials.
Sewing safety starts with keeping your workspace organized and fingers away from moving needles. Set up your machine in good lighting with proper posture. Practice straight lines on paper first, then move to fabric. These beginner sewing techniques create the foundation for every project you’ll tackle. Master these sewing tips, and you’ll discover endless creative possibilities. Understanding the basics of sewing machine selection is vital for a successful sewing experience.
Choosing The Right Sewing Machine
Picking the perfect sewing machine feels like finding your creative soulmate – it’s all about matching your ambitions with the right features. Your skill level and project goals should drive this decision, not flashy bells and whistles.
Your sewing machine should grow with your skills, not overwhelm them with unnecessary complexity.
Consider these four essential factors that’ll make or break your sewing journey:
- Machine Types – Basic models handle everyday mending, while heavy-duty versions tackle canvas and leather like champions
- Stitch Options – More variety means endless creative possibilities for your projects
- Thread Tension and Bobbin Control – These features guarantee professional-looking results every time
- Sewing Speed – Variable speed control helps you master delicate work and power through thick materials
Smart shoppers prioritize core sewing machine functions over novelty features. Look for top-load bobbins and see-through covers for hassle-free threading.
Remember, understanding sewing machine parts and sewing machine maintenance will extend your investment’s lifespan substantially. When choosing a machine, consider the sewing machine guide to make an informed decision.
Essential Sewing Fabrics and Accessories
Three categories dominate every successful sewing room: fabrics, threads, and notions.
Your foundation starts with understanding fabric types—cotton for beginners, knits for stretch projects, and silk for advanced work. Thread colors should match your fabric or blend seamlessly. Interfacing materials add structure where needed.
Mastering the use of proper sewing machine tools is essential for efficient sewing.
| Fabric Types | Best Thread Colors | Essential Sewing Notions |
|---|---|---|
| Cotton weaves | Matching neutrals | Sharp fabric scissors |
| Knit fabrics | Contrasting accents | Quality measuring tape |
| Silk materials | Invisible monofilament | Seam ripper tool |
Master fabric textures through hands-on experience. Quality sewing tools make fabric cutting precise and professional.
Basic Sewing Techniques
You’ll build your sewing foundation with these essential techniques that transform fabric pieces into polished projects.
These core skills include pressing, staystitching, and proper seam finishes that’ll make your work look professional from day one.
Pressing Techniques
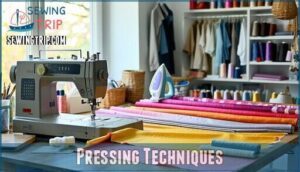
Proper fabric pressing transforms amateur work into professional results. Steam pressing and heat setting create crisp lines that hand-smoothing can’t match. Your iron becomes a shaping tool, not just a wrinkle remover.
Mastering the right steam iron techniques is essential for achieving professional-looking results.
Master these fabric pressing fundamentals:
- Use pressing cloths to protect delicate fabrics from direct heat
- Press seams open immediately after stitching for clean finishes
- Apply steam strategically for fabric shaping without stretching
- Set appropriate temperatures for different fabric types
- Press, don’t drag—lift and lower your iron systematically to achieve the best fabric shaping without damaging the material.
Staystitching
Staystitching acts as your fabric’s security blanket, preventing stretching and distortion before you assemble pieces.
This single line of straight stitches sits within the seam allowance, typically 1/8 inch from the edge.
You’ll want proper stitch tension and fabric control when working with curved necklines or armholes.
This seam reinforcement technique keeps everything stable during construction.
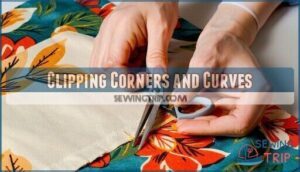
Clipping Corners and Curves
Perfect seams start with smart curve clipping and corner cutting techniques.
Snip into your seam allowance at tight corners and curves before turning fabric right-side out. This fabric manipulation prevents puckers and creates smooth edges.
Make clips close to your stitching line for best results. Proper curve trimming transforms amateur projects into professional-looking pieces instantly.
Mastering the art of corner clipping techniques is essential for achieving crisp corners and eliminating bulk in sewing projects, which requires complete concepts and corner cutting techniques to be applied correctly for a professional-looking finish.
Seam Finishes
A quality seam finish transforms amateur work into professional-grade garments.
Different fabrics demand specific finishing techniques to prevent fraying and guarantee durability. Your choice affects both appearance and longevity of your projects.
For a clean finish, understanding seam finish options is essential for garment construction.
- French Seams – Perfect for sheer fabrics, creating enclosed edges with double-sewn construction
- Hong Kong Finish – Uses bias binding for clean, colorful interior seam allowance edges
- Zigzag Edge – Simple overcast stitch that prevents fraying on most fabric types
- Bound Seams – Encase raw edges with bias tape for professional, durable results
- Overlock Stitch – Serger-style finish that trims and seals edges simultaneously
Hemming
Hemming transforms baggy pants into custom pieces that fit like they were made for you.
Start with folded hems for beginners, then master blind hems for invisible hemming that looks professional.
Use hemming tools like a hem gauge to measure consistent lengths.
Your straight stitch creates clean finish seams that won’t unravel, giving every garment that polished appearance.
Using a Rotary Cutter
Your rotary cutter transforms fabric cutting from tedious chore to swift precision work. This circular rotary blade slices through multiple layers effortlessly when paired with cutting mats and ruler guides.
Master these three safety precautions for clean cuts:
- Always cut away from your body
- Keep fingers behind the ruler edge
- Replace dull blades immediately
Proper fabric preparation ensures accurate measurements every time. Regular maintenance of the rotary cutter, including checking for sharp blade options, is vital for peak performance to achieve clean cuts and maintain a sharp blade.
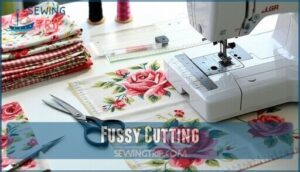
Fussy Cutting
Fussy cutting transforms ordinary fabric into show-stopping pieces by highlighting specific motifs or patterns.
This precision technique requires careful fabric selection and proper cutting tools to capture that perfect design element.
Position your pattern pieces strategically around featured motifs, allowing extra fabric for adjustments.
Take your time with textile analysis—rushing leads to crooked cuts and wasted material, which can be avoided with careful planning and attention to detail, ensuring a successful outcome with precision technique.
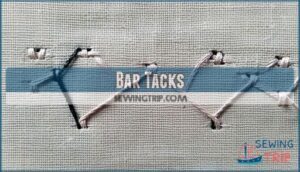
Bar Tacks
Bar tacking locks down stress points where fabric takes a beating.
This reinforced stitch technique uses dense zigzag or straight stitches to create secure fastening at pocket corners, belt loops, and seam ends.
Master this tack stitch by adjusting your machine’s stitch length to nearly zero.
Thread matching guarantees invisible stitch reinforcement that’ll outlast regular backstitching every time.
Dog Ear Pockets
The dog ear method transforms ordinary pocket construction into professional-grade garment construction. This sewing technique adds essential reinforcement to prevent pocket separation and tearing.
Here’s your step-by-step approach to mastering sewing pockets with dog ears:
- Mark pocket placement accurately on your fabric selection
- Create small triangular reinforcements at upper corners
- Stitch diagonal lines using basic sewing stitches
- Backtack securely to lock reinforcement in place
- Apply pocket interfacing if working with lightweight fabrics
These triangular reinforcements strengthen stress points where pockets endure the most tension. Your dressmaking skills will shine when you incorporate this simple yet effective method into your sewing patterns, using the dog ear method to achieve professional-grade results.
Calculating Yardage for Custom Bias
Creating custom bias binding requires smart fabric estimation and sewing math.
You’ll need to measure your project’s perimeter first.
For a 30-inch waistline, expect to use about 5 yards of fabric for half-inch double-fold bias tape.
Bias cutting works on the fabric grainline’s diagonal, allowing stretch around curves.
| Fabric Width | Bias Tape Yield |
|---|---|
| 44/45 inches | 15 yards |
| 60 inches | 20 yards |
| 108 inches | 35 yards |
Mark your fabric carefully before cutting.
This yardage calculator helps maximize your material while ensuring enough custom binding for bias-cut garments and curved seam allowance applications.
Advanced Sewing Techniques
Once you’ve mastered basic stitches and seams, you’re ready to tackle advanced techniques that separate amateur work from professional-quality garments.
These skills include creating clean scalloped edges, installing invisible zippers, and working with challenging fabrics like stretchy knits that require specialized handling methods, including techniques for professional-quality garments.
Sewing Scalloped Edges
Scalloped edges transform ordinary fabric into something special with their gentle curves and decorative appeal.
This advanced technique requires patience but delivers stunning results for pillowcases, curtains, and garment hems.
Here’s how to master this elegant finishing method:
- Mark your curves – Use a template or compass to draw even scallops along your fabric edge
- Perfect your edge stitching – Sew slowly around each curve, maintaining consistent seam allowances
- Trim and clip – Cut notches in curved areas to prevent puckering when turned right-side out
Adding Zippers to Pants Leg Opening
Adding zippers to pant leg openings transforms ordinary pants into functional fashion statements. This advanced zipper installation technique requires precision but delivers professional results.
- Purchase zippers that match your pant leg circumference plus two inches
- Interface the zipper placket area for stability and smooth operation
- Use an invisible zipper foot for clean, professional zipper installation
- Finish raw edges with flat-felled seams for durability
Mastering the use of an invisible zipper is essential for achieving a polished look.
Cutting Fabrics
Precision fabric cutting transforms your projects from amateur to professional.
Master rotary cutter techniques for straight cutting lines that prevent fabric curve distortion. Always identify fabric grainline before making your first cut—it’s your roadmap to success.
Sharp scissor techniques matter for intricate shapes, while proper fabric preparation guarantees cutting accuracy. Your tools become extensions of your creative vision when wielded correctly.
Sewing Techniques for Stretchy Knit Fabrics
Working with stretchy knit fabric requires specific sewing techniques for beginners to master.
Switch to ball point needles and adjust your sewing machine tension for maximum fabric stretch. These specialized tools prevent snags and guarantee professional results.
- Use ball point needles to avoid damaging knit patterns
- Apply zigzag stitches instead of straight seams for flexibility
- Stabilize stress points with fusible interfacing at necklines
Choosing The Right Sewing Thread
Thread selection transforms your sewing game completely.
Match thread colors to your fabric for invisible seams, or choose contrasting shades for bold design statements.
Cotton threads work beautifully with natural fabrics, while synthetic blends handle stretch materials perfectly.
Thread weights determine stitch quality—lighter weights for delicate fabrics, heavier for denim.
Proper needle selection complements your thread choice for flawless results.
Understanding the importance of needle size compatibility is essential for achieving professional-looking stitches with the right thread choice and needle selection.
The Most Important Sewing Technique
After mastering advanced sewing methods, you’ll discover one technique stands above all others in sewing basics: pressing. This single skill transforms amateur projects into professional masterpieces.
Pressing isn’t just ironing—it’s the foundation of stitch mastery and fabric handling. You’ll press seams flat before crossing them with another seam. Press curved seams over a tailor’s ham to set their shape. Press darts, tucks, and pleats toward the garment center for clean lines.
Your machine mastery means nothing without proper pressing technique. Here’s how to press like a pro:
- Use steam with up-and-down motions, never slide the iron
- Test press delicate fabrics like silk to avoid heat damage
- Press bias edges before attaching trim or bindings
Thread control and hand sewing skills won’t save poorly pressed work. Take time to press at each construction step—it’s what separates homemade from handmade quality.
Tips and Tricks From Victoria Villasana
Victoria Villasana’s wisdom transforms novice sewers into confident creators through proven sewing techniques and practical shortcuts.
Her approach emphasizes building foundational skills while discovering efficient methods that save time and frustration. These sewing tips focus on developing muscle memory and creating organized workflows that enhance your creative process.
- Master hand stitching first – Build muscle memory through basic stitches before advancing to machine work, creating stronger technique foundations
- Organize sewing notions strategically – Keep tools within arm’s reach using clear containers and labeled sections for efficient project flow
- Choose thread choices wisely – Match thread weight to fabric type and select colors that complement rather than perfectly match your material
- Trace existing garments – Use well-fitting clothes as templates for custom patterns, ensuring better fit than commercial alternatives
Troubleshooting Common Sewing Problems
Even seasoned sewers encounter frustrating snags that can derail projects. Don’t let these common issues steal your creative momentum.
Thread Breakage often stems from incorrect needle selection or poor-quality thread. Fabric Fraying happens when you skip proper seam finishes. Machine Jamming usually indicates bobbin troubles or lint buildup.
| Problem | Quick Fix |
|---|---|
| Tension Issues | Adjust dial gradually while testing on scraps |
| Skipped Stitches | Replace needle and check threading path |
| Uneven Seams | Clean feed dogs and check presser foot pressure |
Master these sewing machine troubleshooting basics to keep your creative flow uninterrupted, and remember to address issues like Thread Breakage and Machine Jamming to ensure a smooth sewing experience.
Frequently Asked Questions (FAQs)
How many sewing techniques are there?
Picture your fingertips dancing across fabric as you discover countless stitching possibilities.
There’s no exact number of sewing techniques—you’ll find dozens of basic methods, hundreds of specialized skills, and endless creative combinations to master throughout your journey.
What is the simplest sewing technique?
The running stitch is your simplest starting point.
You’ll thread your needle, knot the end, and weave in and out through fabric in even spaces.
It’s the foundation that lays the groundwork for every other technique you’ll master, making it a crucial starting point.
What are advanced sewing techniques?
Like a master chef perfecting knife cuts, advanced sewing techniques elevate your projects from homemade to haute couture.
You’ll master French seams, invisible zippers, mitered corners, couture darts, and bias binding for professional-quality results.
What are the 5 classification of sewing?
Sewing techniques are grouped into five main classifications: hand sewing fundamentals, machine stitching basics, seam construction methods, fabric manipulation skills, and finishing techniques.
You’ll master each category as your skills develop from beginner to advanced levels, focusing on complete concepts to improve your sewing abilities.
What are some good beginner sewing projects to start with?
Start with simple projects like face masks, pillowcases, or tote bags.
You’ll master straight stitches and basic seams without overwhelming complexity.
These beginner-friendly options build confidence while creating useful items for your home, and help you master basic skills, which are essential to creating useful items.
Where can I find sewing classes or groups in my local area?
Over 60% of craft enthusiasts learn better in group settings.
Check community centers, local fabric stores, and libraries for classes.
Search online for sewing circles near you.
Many offer beginner-friendly sessions that’ll jumpstart your creative journey.
How do you sew French seams properly?
French seams create clean, enclosed edges by sewing fabric wrong sides together first, trimming seam allowances, then flipping right sides together for a second seam.
You’ll get professional-looking finishes that hide raw edges completely, which is achieved through this process of creating clean edges.
What is the difference between darts and pleats?
Like twin sisters with different personalities, darts and pleats both shape fabric, but they’re distinct.
You’ll fold darts to remove excess fabric permanently, while pleats create controlled fullness that can expand when needed.
How do you attach bias binding correctly?
Fold the bias binding over your fabric edge, ensuring equal amounts show on both sides.
Pin carefully, then stitch close to the binding’s inner fold, catching both layers for a clean, professional finish.
When should you use interfacing in garments?
Think of interfacing as your garment’s backbone—it provides structure and prevents stretching. You’ll need it for collars, cuffs, button bands, and waistbands where crispness matters most for professional results.
Conclusion
Mastering what’re sewing techniques transforms your creative journey from basic stitching to professional-quality projects.
You’ve discovered that foundation skills like pressing and seam finishing prevent fraying while advanced methods like zipper insertion elevate your work.
These techniques aren’t just rules to follow—they’re your toolkit for creative freedom.
Start with the basics, practice consistently, and watch your fabric creations evolve from simple attempts into stunning, polished pieces that showcase your growing expertise and attention to detail.

