This site is supported by our readers. We may earn a commission, at no cost to you, if you purchase through links.
The backstitch is the strongest hand-sewn stitch you’ll find. It creates durable, overlapping stitches on the underside of the fabric for secure seams.
To backstitch, insert the needle from back to front, space evenly with the previous stitch, then bring the needle up from the back – positioning the tip near the previous stitch’s end.
Maintain steady tension, angling stitches slightly for interlocking for even more strength. Its overlapping technique reinforces high-stress areas perfectly.
You’ll soon see why this stitch shines as the ideal hand-sewn choice for sturdy and long-lasting results.
Table Of Contents
Key Takeaways
- The backstitch is considered the strongest hand-sewn stitch due to its overlapping technique, which creates durable, reinforced stitches on the underside of the fabric.
- The backstitch is versatile and can be used for various purposes, including joining two pieces of felt, hand repairs and mending, sewing outline shapes and designs, and even as an alternative to knots at the start and end of sewing.
- To master the backstitch, it is essential to maintain proper needle placement, thread tension, fabric thickness, and seam allowance, as well as even stitch spacing and thread type.
- In addition to the backstitch, other hand-sewing techniques, such as the running stitch, fell stitch, and buttonhole stitch, can be used for different purposes and serve as valuable skills for any sewer.
What is the Strongest Hand Sewn Stitch?
The strongest hand sewn stitch is the backstitch.
It’s a sturdy stitch that resembles machine stitching in appearance.
It can be used for joining two seams together or mending a seam.
The backstitch is considered the most adaptable and permanent of hand stitches due to its strength.
It’s a time-consuming stitch but is well worth it for the strength it provides.
Understanding Backstitch
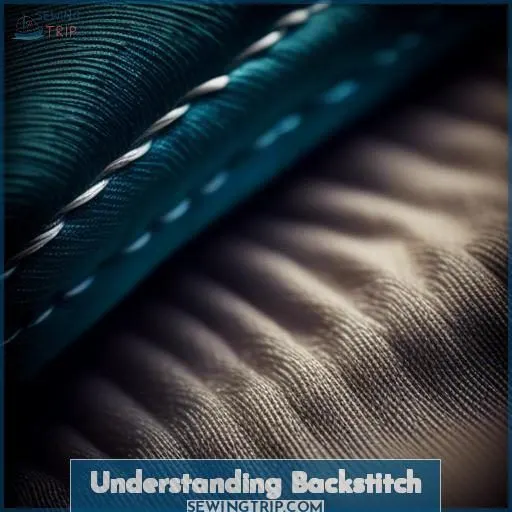
The backstitch is considered the strongest hand sewn stitch because it creates overlapping stitches on the underside of the fabric, providing greater durability and strength compared to a simple running stitch. This overlapping technique reinforces each stitch, preventing thread from easily unraveling or breaking under tension.
Definition and Strength
Backstitch is the strongest hand-sewn stitch, often used for joining two pieces of felt, hand repairs and mending, sewing outline shapes and designs, and even as an alternative to using knots at the start and end of sewing. It’s a variation of a straight stitch, where the needle is placed behind where the thread is pulled out, making the stitches overlap on the wrong side, making the line of stitches even tougher to break.
Backstitch is often used for repairs instead of machine stitching when the repair is in an awkward place to sew, and it can be used to fix thread in place instead of knots by working 2-3 of them on top of each other. It’s a versatile stitch that can be worked with a variety of threads and is often used by tailors.
In comparison to a running stitch, backstitch is stronger because the stitches overlap on the wrong side, making the line of stitches even tougher to break. It’s also relatively easy to learn and can be worked with a variety of threads.
Comparison With Running Stitch
When comparing backstitch to running stitch, think of backstitch as the Hercules of hand stitching.
Its overlapping technique creates a bond tougher than a bear hug, perfect for durable seams.
Running stitch, while quicker, can be as fleeting as a summer romance—great for basting, but not for longevity.
Choose your stitch wisely: fabric type, thread tension, and stitch length matter.
Preparing to Sew
For proper needle preparation, thread your needle with a length no longer than a yard, tying a substantial knot at the end and doubling the thread. Mark your seam allowances precisely, using a thin pencil line and ruler for straight seams, while carefully measuring curved seam allowances.
Needle Preparation
Before you start sewing, prepare your needle and thread for the best results. Here’s a step-by-step guide:
- Choose the Right Needle: Use a needle with a sharp tip and a small eye to make threading easier.
- Thread the Needle: Thread the needle with a length of thread no longer than a yard. Knot the end of the thread with a large knot and double the thread for extra strength.
- Mark the Seam Line: Use a thin pencil line to mark the seam line. For straight seams, use a ruler to measure the seam allowance. For curves, use your finger as a guide.
- Knot Placement: Knot the two ends of the thread together and place the knot at the starting point of the seam. This guarantees that the knot is hidden on the reverse side of the fabric.
Seam Marking
To prepare for sewing, it’s crucial to mark the seam lines precisely.
Start by using a slim pencil to mark the seam line on the fabric.
For straight seams, utilize a ruler to measure the seam allowance, ensuring it remains consistent for all pattern pieces.
For curved seams, use a ruler to measure the seam allowance at various points along the curve, altering the markings as needed.
This will assist in ensuring that your stitches are uniform and your seams are properly aligned.
Starting the Backstitch
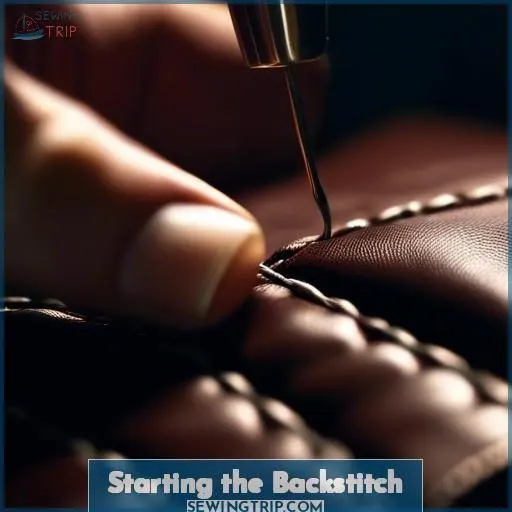
You’ll start your first backstitch by inserting the needle through the fabric from the back to the front, creating a starting stitch. For your next stitch, measure a similar gap and push the needle up from the back, positioning the needle’s tip close to the end of the previous stitch before pushing it down through the fabric.
Making the First Stitch
To start the backstitch, select the appropriate thread, needle, and fabric.
Choose a thread length no longer than a yard and knot the ends together.
Mark the seam line with a thin pencil line.
Push the needle into the fabric at the starting point and bring it back through both layers in front of the knot.
Space stitches evenly, ensuring that they touch or overlap.
Use small stitches for secure seams and longer stitches for less durability.
Positioning for Strength
After completing your initial stitch, it’s essential to position your needle for optimal backstitch durability. Envision it as establishing the bedrock of a stronghold—each stitch reinforces your fabric’s resilience. Maintain a steady thread tension and consider the fabric’s thickness and seam allowance. This guarantees that your backstitch remains the most robust hand sewn stitch, particularly when connecting felt pieces.
| Factor | Significance |
|---|---|
| Needle Placement | Guarantees accuracy |
| Thread Tension | Impedes wrinkling |
| Fabric Thickness | Modifies stitch size |
| Seam Allowance | Maintains stitch uniformity |
| Front and Back Sides | Balances aesthetics |
Mastering the Technique
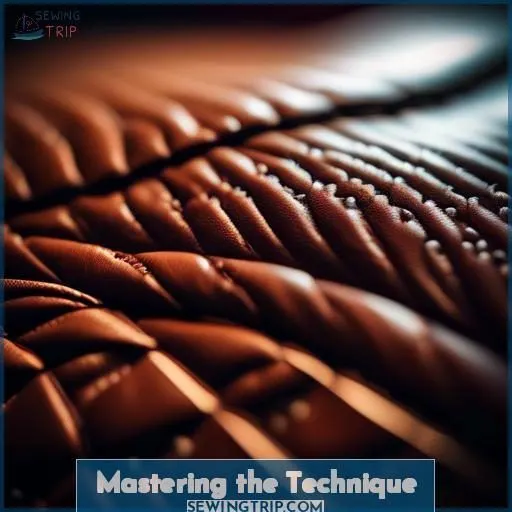
To master the backstitch technique, you’ll work the needle in and out of the fabric, inserting it at the end of the previous stitch and pulling it up a stitch-length away. Keep the stitches uniform by using your non-dominant hand to gently guide the fabric, maintaining consistent spacing between each puncture.
Stitching Technique
To master the backstitch, focus on thread tension, needle size, and fabric thickness.
Stitch spacing and thread type are essential for durability.
Push the needle into the fabric at the starting point, then bring it back through both layers in front of the knot.
Continue pushing the needle back into the fabric between entry and exit points, always bringing it through at the same distance as the first stitch.
Use small stitches for sturdy seams and longer stitches for less strength.
Tips for Even Stitches
To achieve even stitches when working with backstitch, consider these tips:
- Needle position: Hold the needle at a consistent angle and position it perpendicular to the fabric as you push it through.
- Thread tension: Keep the thread taut but not too tight to maintain an even stitch length.
- Stitch distance: Measure and maintain a consistent distance between stitches to guarantee even spacing.
- Fabric thickness: Adjust your needle and thread thickness according to the fabric you’re sewing, guaranteeing they’re compatible for even stitches.
- Stitch overlap: Overlap the stitches on the wrong side of the fabric to create a strong and durable seam.
- Practice: As with any skill, practice is key to achieving even stitches. Try sewing on scrap fabric before working on your project to get a feel for the stitch.
Advancing Your Skills
To advance your backstitch skills, you’ll want to focus on proper seam finishing techniques. Overlapping backstitches creates an extremely durable seam – stack and stitch overtop previous stitches to build a strong, reinforced join.
Seam Finishing Techniques
To create durable seams with backstitch, you’ll want to employ seam finishing techniques. Here’s how:
- Overlap Threads: On the reverse side of the fabric, overlap the threads from the front and back stitches. This adds strength to the seam.
- Anchor Thread: Make a few stitches on top of one another to secure the thread and prevent it from coming undone.
- Cut Excess Thread: Trim the excess thread off the knot at the beginning of the seam. This gives a clean finish and prevents fraying.
Overlapping for Durability
To enhance the longevity of your backstitch, consider interlocking your stitches.
This method entails inserting the needle through the fabric at a slightly altered angle compared to the preceding stitch, forming a tiny loop that overlaps the prior stitch.
This not only reinforces the strength of your stitch but also imparts a refined aesthetic.
The size of your needle and the tightness of your thread can influence the effectiveness of this technique.
For thicker fabrics, you may need to adjust your needle size and thread tension to ensure the stitches overlap properly.
By mastering this technique, you can create the most durable hand-sewn stitch possible, surpassing the resilience of a catch stitch.
Tips for Successful Hand Sewing
You’ll achieve excellent stitch quality by using a thimble to protect your finger and keep the thread taut but not excessively tight. The thimble helps push the needle through the fabric smoothly, and maintaining proper thread tension prevents loose, uneven stitches.
Using a Thimble
Using a thimble is essential for comfortable and efficient hand sewing, especially when working with a strong stitch like backstitch. Here are three tips to help you choose the right thimble:
- Thimble Comfort: Select a thimble that fits comfortably on your finger, allowing for easy movement and control.
- Thimble Grip: Look for a thimble with a secure grip to prevent slipping during sewing, ensuring precise stitching.
- Thimble Materials: Consider thimbles made from materials like leather or rubber, which offer both durability and flexibility for a comfortable sewing experience.
Keeping Thread Taut
Maintaining optimal thread tension is akin to navigating a tightrope.
Overly loose and your stitches droop, excessively tight and they crinkle.
Strive for taut stitches that resonate but avoid cacophony.
This equilibrium guarantees robust seams and enhances durability.
As you progress with the backstitch, bear in mind that the appropriate needle size and thread can determine the success or failure of your hand-sewn masterpiece.
Post-Sewing Care
After completing your backstitch project, remove any pencil marks or temporary guideline stitches to guarantee a neat, professional finish. To extend the life of your handwork, handle the stitched area with care during use and cleaning; refrain from excessive friction or tugging on the stitches, and consider bolstering high-stress areas regularly.
Removing Marks
To remove pencil marks from fabric after sewing, consider the following options:
- Eraser Selection: Choose an eraser specifically designed for fabric, such as a dry cleaning pad or a fabric eraser. These erasers are gentle and won’t damage the fabric surface.
- Pencil Types: Opt for water-soluble pencils or ceramic leads, which are easier to remove from fabric.
- Mark Visibility: Use a pencil with a light graphite or choose a colored pencil that blends well with the fabric color.
- Fabric Preparation: Wash the fabric before sewing to remove any existing pencil marks.
- Pre-Washing: Wash the fabric with a gentle detergent and warm water before sewing to remove any pencil marks that may be present.
- Knot: Make sure to remove any knots or excess thread from the fabric before attempting to remove pencil marks.
- Buttonhole Stitch: If you’ve used a buttonhole stitch, be aware that it may be more difficult to remove pencil marks from this type of stitch.
- Fell Stitch: For fell stitch marks, consider using a small, pointed eraser or a clean, dry toothbrush to gently rub away the marks.
- Visible Mending: If you’ve used visible mending techniques, be careful not to damage the mending thread when erasing pencil marks.
- Hand Repairs and Mending: For delicate fabrics or hand-sewn repairs, use a soft eraser or a dry cleaning pad to avoid damaging the fabric.
Remember to always test any erasing method on a scrap piece of fabric first to make sure that it won’t harm the fabric or the stitches.
Ensuring Longevity
Once you’ve erased those pesky pencil marks, it’s all about ensuring your backstitch stands the test of time. Here’s how to make your stitches last longer than a well-kept secret:
- Compare stitch strengths and pick the backstitch for muscle.
- Mix up stitch variations to avoid wear in one spot.
- Choose quality thread for unbeatable durability.
- Maintain needle sharpness; a dull one just won’t cut it.
- Always guard your digits with a thimble—your fingers will thank you.
Exploring Other Hand Stitches
While the backstitch is renowned for its durability, you shouldn’t overlook other hand stitches that serve different purposes. The running stitch, fell stitch, and buttonhole stitch are versatile techniques that can strengthen seams, secure edges, and add decorative flair to your projects.
Running Stitch
Running stitch is a versatile hand sewing technique with numerous variations and applications. It’s a basic stitch used for sewing seams, gathering fabric, and as a foundation for many composite embroidery stitches. Running stitch can be worked horizontally, vertically, diagonally, or around curves, making it suitable for various projects, such as clothing, shoes, hats, storage bags, bedding, and shelter.
There are several types of running stitch, including double running stitch, threaded running stitch, interlaced running stitch, and looped running stitch. These variations can be used for different purposes, such as creating decorative lines, filling designs, or forming patterns. Running stitch is also used in quilting and embroidery, where it serves as a base for more complex stitches.
When working with running stitch, it’s crucial to use a sharp needle and keep the thread tight but not too taut. To make sure the stitches are even and consistent, use a thimble to protect your finger and practice on scrap fabric before sewing your garment.
Running stitch can be used with various fabrics, including felt, felt plushies, and felt toys, and can be worked with different threads, such as flax, animal hair, or plant fibers.
Fell Stitch
The fell stitch is a versatile hand sewing technique that can be used for a variety of applications, from decorative purposes to reinforcing seams.
It involves taking the needle into the background fabric just at the edge of the piece being sewn down, then bringing it up through both layers a little way inside the top piece.
This stitch can be adapted for different fabrics and thread choices, making it a valuable skill for any sewer.
Whether you’re working on a felt project or using threads magazine for inspiration, the fell stitch is a technique that will continue to serve you well.
Buttonhole Stitch
To create a buttonhole stitch, insert the needle from below and wrap the thread under the needle from old stitches toward new ones.
Pull the stitch through, pulling the knot snug against the fabric edge.
Space stitches close together for a buttonhole or further apart for edge protection.
Use a single or double strand of thread for a different look.
Backstitch is a strong stitch for buttonholes, as it overlaps on the wrong side, increasing durability.
Conclusion
Envision a sturdy seam, unyielding against wear and tear. That’s the backstitch’s hallmark—the strongest hand sewn stitch. You’ve mastered its painstaking overlapping technique, reinforcing high-stress areas with unparalleled durability. Maintain steady tension and even stitches, and your hand-sewn projects will endure life’s demands, a testament to your newfound backstitch expertise.


