This site is supported by our readers. We may earn a commission, at no cost to you, if you purchase through links.
 Making a corset might sound tricky, but it’s all about staying organized.
Start by picking a sturdy pattern that matches your measurements.
Choose an outer fabric you love, a lining for comfort, and interfacing for support.
Once your pieces are pinned and cut (don’t rush this part!), sew the panels together, pressing the seams as you go.
Add boning for structure and attach busks carefully—these are the heart of the corset.
Finish with grommets, binding, and laces for that polished look.
Perfecting the fit takes patience, but each step builds your skills.
Ready to create a piece that feels custom-made?
Table Of Contents
Key Takeaways
- Start by picking a sturdy pattern, measuring accurately, and using high-quality materials like cotton coutil and steel boning for durability.
- Cut fabric along the grainline precisely, sew panels together with strong seams, and press them for a clean, professional look.
- Add structural components like boning, busks, and waist tape carefully to ensure your corset holds its shape and supports the body.
- Finish by installing eyelets evenly, threading laces securely, and testing the fit to make adjustments for comfort and style.
Corset Materials Needed
Before you start sewing, make sure you’ve gathered the right materials to guarantee your corset is both durable and comfortable.
From sturdy fabrics to boning and closures, each component plays an important role in creating a well-structured final piece.
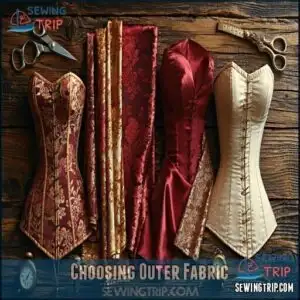
Choosing Outer Fabric
Regarding corset fabric selection, you’ll want corset fabrics that combine durability and beauty.
Medium- to heavyweight materials like dupioni silk, brocade, or cotton drill make certain your corset holds its shape under tension.
Consider texture variety—fabric should be sturdy but elegantly smooth.
Solid colors are beginner-friendly and simplify pattern matching.
Cost analysis is essential; pricier fabrics like brocade or silk may elevate the project, but cotton remains budget-friendly.
You can explore options for brocade corset fabric for a luxurious touch.
Choose wisely to craft a corset that’s both eye-catching and long-lasting!
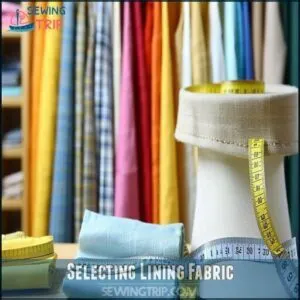
Selecting Lining Fabric
Choosing the right corset lining is like building a solid foundation—it determines durability, comfort, and shape retention.
While cotton coutil is the gold standard, there are excellent, budget-friendly alternatives that don’t compromise on quality.
- Herringbone coutil: Unmatched strength and durability.
- Cotton drill: A reliable, cost-effective choice.
- Cotton twill: Lightweight and perfect for breathable corsets.
- Cotton duck canvas: Durable with excellent stability.
- Floating lining: Great for moisture-wicking and comfort.
For those seeking the best, consider exploring options for purchasing coutil fabric.
Pick fabric combining breathability and durability for long-term wear!
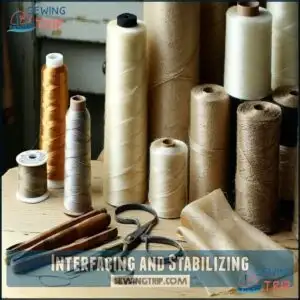
Interfacing and Stabilizing
Building a corset starts with the right interfacing types and stabilizing methods.
Match interfacing weight to your outer fabric—coutil is a gold standard for corset interfacing, while fusible alternatives like weft provide flexibility.
Always follow grain direction to prevent warping.
Reinforce stress points like the waistline with twill tape using layering techniques.
Fabric can substitute interfacing in certain projects.
These foundations enhance corset support, ensuring durability under tension and maintaining structure for a polished, professional finish.
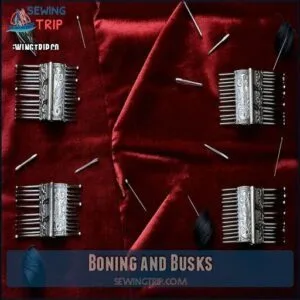
Boning and Busks
To give your corset its structure and durability, boning and busks are essential.
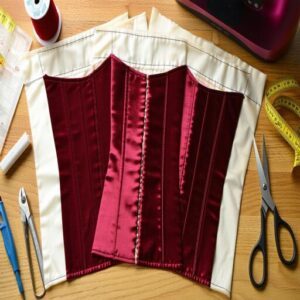
Steel boning, like flat steel and spiral steel, offers strength and flexibility for shaping. Plastic boning is a beginner-friendly alternative but lacks the rigidity of steel.
Flat steel provides firm structure, while spiral steel flexes beautifully—steel boning ensures strength and stunning corset shaping.
For high-quality options, consider exploring flat steel products.
Choose a busk style that complements your design for a polished front closure. Proper channel construction makes certain the boning stays secure and functional.
- Steel vs. Plastic: Use steel for durability; plastic for simplicity.
- Boning Placement: Align channels along seams.
- Busk Styles: Select tapered or straight busks for front closures.
Corset Pattern Selection
Choosing the right corset pattern is essential for achieving the perfect fit and style.
Start by measuring your bust, waist, and hips accurately, then select a pattern that matches your desired look and comfort level.
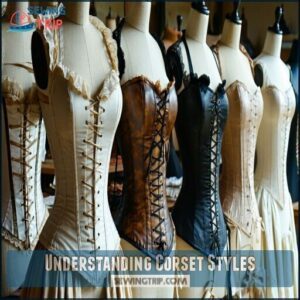
Understanding Corset Styles
Corset styles range from historical silhouettes to modern interpretations, offering endless options for every vision.
An underbust corset works well for everyday wear, shaping the waist without restricting bust movement.
Overbust designs, however, provide full coverage and serve as striking statement pieces.
Explore historical corset designs like Victorian and Edwardian to achieve a period-inspired look, or experiment with modern corset variations, such as steampunk or gothic styles, for unique flair.
Patterns also cater to different body types and closure types, ensuring versatility.
Choose a corset making style that balances function with aesthetic variations perfectly.
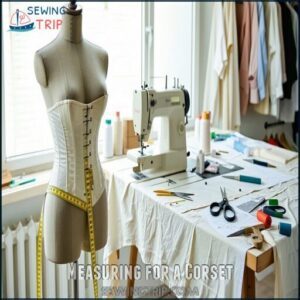
Measuring for a Corset
To create a corset that fits like a glove, accurate measurements are key. Think of it as mapping out your body’s unique blueprint for the perfect corset fit analysis.
Use a flexible tape measure and follow these steps:
- Bust Measurement: Measure the fullest part of your bust and underbust area.
- Waist Definition: Locate your natural waist—usually the narrowest spot—and measure snugly.
- Hip Placement: Measure upper and low hips for proper shaping.
Double-check these corset measurements, and always keep your body proportions in mind.
A muslin mockup confirms precise corset fitting.
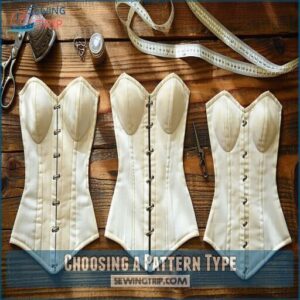
Choosing a Pattern Type
With your measurements ready, it’s time to find the perfect corset making pattern.
Think about style considerations—like underbust, overbust, or cincher styles—based on your torso length and comfort.
Simplicity and Truly Victorian offer patterns blending modern needs with historical accuracy.
Beginners might prefer underbust designs for their reduced pattern complexity. A flexible corset making guide guarantees pattern success!
Adjusting Patterns for Fit
Before cutting fabric, make a muslin mockup for accurate corset fitting.
Adjust your corset pattern with these steps:
- Bust Adjustments: Add or remove space for comfort.
- Torso Length: Lengthen or shorten by spreading or overlapping pattern pieces.
- Hip Adjustments: Add gores or ties for extra hip room.
- Pattern Alterations: Align seams perfectly.
- Test Fit: Refine areas with corset mockup tweaks.
When altering pattern parts, remember to use the slash and spread method for precise adjustments.
Cutting Corset Pieces
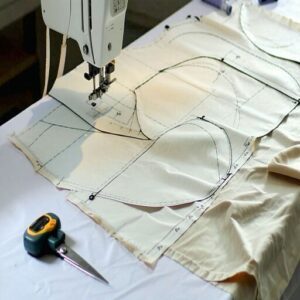
Start by aligning your pattern pieces carefully along the fabric’s grain line to make certain the corset holds its shape and fits properly.
Cut each piece with precision, taking care to match the outer fabric, lining, and interfacing for consistent results.
Working With Grain Lines
Understanding fabric grain is critical for corset making.
Fabric stability depends on the grain direction—with warp threads running vertically and weft threads horizontally.
Align patterns parallel to the selvage edge to guarantee stretch control and avoid distortion.
To locate the grain with the most give, gently tug the fabric; this guides where your corset grain lines should fall.
Proper pattern alignment on stable grain creates a structured, professional look in your corset making fabric. To guarantee proper drape, it’s important to understand straight grain alignment.
Pinning and Cutting Fabric
Now that you’ve lined up your grain lines, it’s time to focus on cutting your fabric with precision. Proper planning here will save headaches later during corset construction.
Lay your fabric flat, keeping the grain alignment straight, and secure your pattern pieces using these tips:
- Pin or use pattern weights to stop pieces from shifting.
- Mark seam allowances with tailor’s chalk for accuracy.
- Use sharp cutting tools to avoid frayed edges.
- Work carefully to prevent fabric waste by arranging pieces efficiently.
- For layered cutting, stack fabric neatly with consistent grain alignment.
Take your time—fabric cutting in corset making sets the foundation for a comfortable, symmetrical fit.
Cutting Boning Channels
Ever wondered how corset boning channels make all the difference in structure?
Start by aligning channel placement with vertical seams for stability.
Match channel width to your boning type—spiral boning needs 1/2 inch, while flat steel boning requires 5/8 inch.
Use cutting tools to precisely mark and trim your channels, ensuring clean edges.
Don’t forget seam allowance: spiral steel needs 5/8 inch. Careful boning placement transforms your fabric into a polished, structured corset masterpiece.
Preparing Interfacing and Lining
Ready to strengthen your corset? Interfacing and lining are your secret weapons for durability and comfort.
Focus on sturdy corset materials and follow these steps:
- Trim interfacing 1/4 inch smaller than the fabric pattern.
- Pre-shrink fabric by steaming cotton interfacing—no surprises later.
- Align interfacing to the fabric’s wrong side (for a smoother build).
- Firmly press with a dry iron, setting stabilization in place.
- Cut corset lining along the exact grain alignment for structure.
Lining Alternatives such as strong cotton can substitute coutil.
Layering techniques matter here; precise preparation guarantees polished seam finishing.
Sewing Corset Panels
Sewing the corset panels is where your project starts taking shape, so accuracy is key.
You’ll join the outer fabric and lining, ensuring smooth seams and a sturdy foundation for the boning.
Sewing Outer and Lining Fabric
Once your fabric pieces are cut, it’s time to stitch them together.
Proper stitching turns fabric into fashion—sew with precision to build a corset that merges strength, beauty, and structure.
Lay out your outer fabric and corset lining panels in order, ensuring proper fabric alignment and right sides touching.
Starting from the center front, sew panel pairs using a 1/2-inch seam allowance and a short stitch length (2mm) on your sewing machine for strong seams.
Pay close attention to matching points at the edges for a clean finish. Clipping curves where needed prevents fabric puckering.
Layering fabrics correctly at this stage sets the foundation for a professional-looking corset.
Take your time, and trust the process!
Pressing Seams and Trimming Excess
Once your seams are stitched, grab your trusty pressing tools to smooth each seam flat—this guarantees neat seam allowances and prevents unwanted bulk.
Carefully trim any excess fabric for sharp, clean edges, especially around curves.
This approach to seam pressing, bulk reduction, and edge finishing elevates your corset construction, making the corset sewing process look polished and professional from the inside out.
Adding Waist Tapes and Boning
With seams trimmed and pressed, reinforce your corset’s strength by carefully placing waist tape at the waistline, securing it with basting stitches.
Confirm Boning Channel Width matches your boning type—spiral steel boning offers flexibility, while flat steel adds firm structure.
Corset makers often choose between historical or modern patterns, and pattern selection matters.
Insert boning carefully to prevent damage.
These steps lock in stability, giving your steel boned corset durability and a beautifully smooth, supported silhouette.
Attaching Busks and Binding
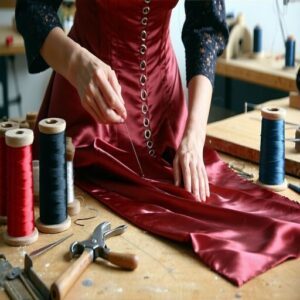
Align the busk hooks and loops carefully along the center front for perfect closure security.
Attach each side with small, precise stitches for durability.
For binding techniques, use bias tape or fabric strips to finish edges cleanly.
This edge finishing step reinforces the corset and adds a professional finish, beautifully highlighting your corset making busks and closures work.
Finishing Corset Details
Now it’s time to add the finishing touches that bring your corset together.
You’ll install eyelets, secure closures, adjust the fit, and confirm your corset is ready for wear.
Adding Eyelets and Lacing
Once your panels are stitched, it’s time for eyelet installation and corset lacing.
Begin by marking eyelet spacing evenly along the back edges—about an inch apart works well.
Use an awl or fabric punch to create clean holes, then secure each eyelet with proper corset hardware and reinforcement techniques for durability.
Choose sturdy cord material for lacing, threading it in classic crisscross styles or decorative lacing patterns for flair. This step guarantees your corset lacing is adjustable, snug, and visually polished.
Installing Busks and Closures
Installing busks adds both strength and elegance to your corset.
Place the busk hooks and knobs on the center front, ensuring even alignment. Sew carefully so each knob slides securely into its loop. Check for tight, accurate placement to guarantee smooth closures.
- Double-check knob placement for snug fits.
- Opt for closure durability with sturdy stitching.
- Explore busk alternatives, like hook-and-eye strips.
- Use precise tools for effective corset hardware installation.
Finalizing Fit and Adjustments
Slip into your corset and start "wear testing" to assess "lacing tension" and how it supports "posture correction".
Watch for gaps or pinching, signaling a need for "corset adjustments."
Apply "alteration techniques" like adjusting panels or seams for a "comfortable fit."
Final tweaks make certain flawless "corset alteration" and guarantee both a "flattering fit" and long-lasting comfort.
Caring for and Maintaining Corsets
After perfecting your corset’s fit, keep it in peak shape with proper care. Caring for your corset guarantees its durability and beauty.
- Cleaning methods: Spot clean with mild soap and air dry flat. Avoid soaking to protect boning.
- Storage solutions: Lay flat or use padded hangers in a dry, cool place.
- Boning care: Prevent rust by avoiding direct water exposure.
To prevent damage, always practice proper corset removal. Keep it stylish and strong!
Frequently Asked Questions (FAQs)
Are corsets easy to make?
Making a corset isn’t exactly easy—it’s a detailed process requiring precise measurements, quality materials, and patience.
With practice and the right tools, it’s achievable, but expect a learning curve for professional results.
Can you make a corset without a busk?
You can absolutely make a corset without a busk.
Use a sturdy, non-stretch fabric like coutil, add a modesty panel for support, and rely on back lacing for closure.
It’s functional and stylish!
How much fabric is needed to make a corset?
You’ll need about 1–5 yards of sturdy fabric for the outer layer and lining, depending on the pattern and size.
Always grab extra for testing or mistakes—it’s better to have leftovers!
What is the best fabric for corsets?
Did you know cotton coutil, known as the “gold standard” for corsets, guarantees durability and minimal stretch?
Pair it with sturdy outer fabrics like brocade or silk for structure and a professional finish. Pair it with sturdy outer fabrics like brocade or silk for structure and a professional finish.
What type of corset do you make?
You choose the type of corset based on style and purpose.
For dramatic shaping, go for an underbust design.
If you want torso coverage, an overbust works better.
Waist cinchers focus solely on accentuating curves.
How do I make a successful corset?
Cut your teeth on corset-making by starting with sturdy fabric, an accurate pattern, and steel boning.
Focus on precision—align grain lines, sew snug boning channels, and press seams flat for a professional, long-lasting finish.
How do you sew a corset?
Sew a corset by stitching fabric panels with strong seams, pressing them flat.
Adding boning channels, inserting steel bones, securing waist tape.
And finishing with binding, busk installation, eyelets, and lacing for structure.
How do I create a duct tape custom corset pattern?
Wrap your torso tightly with duct tape over a snug-fitting shirt, marking your natural waistline.
Carefully cut it off along the side seam, transfer it to paper, and refine the pattern for accuracy.
How do I choose a corset pattern?
Did you know corset patterns range from historical to modern styles?
Start by measuring your bust, waist, and hips accurately.
Pick a pattern matching your skill level and body shape for the best fit.
How do you cut a corset?
Align your pattern on the fabric’s grainline for proper structure.
Trace carefully, ensuring accuracy.
Use sharp scissors or a rotary cutter for crisp edges.
Don’t forget to add seam allowances and label each piece clearly.
Conclusion
Starting a corset is like assembling a puzzle—each piece fits into your perfect design.
By following this step-by-step tutorial on how to make a corset, you’ve learned to combine fabric, boning, and busks for a personalized fit.
Take your time adjusting patterns, securing seams, and adding details like grommets and lacing.
With patience and practice, you’ll create a masterpiece that’s both stylish and functional.
Now, you’ve built skills to craft your next custom corset confidently.
- https://utopiastore.de/blogs/news/guide-how-to-take-care-of-a-corset?srsltid=AfmBOoqrwIZBcBUHnLpb-dKfNp3Kqq3q6W0KeDVJvve1WeX06t6kzDMa
- https://timeless-trends.com/pages/corset-care?srsltid=AfmBOoozY0yTs-hSd5c3gsCv2uySI7n-wUVRMA8u6n1jcuMeI-dnghYc
- https://corset-story.com/blogs/news/how-to-care-for-your-corset?srsltid=AfmBOor1XhgtOHMLGWU4Vhx4lttUKaYQf-P1B7pzinAoTPpDGdesDaP1
- https://corset-story.co.uk/blogs/news/care-for-your-corset?srsltid=AfmBOorIDwPXm0vgP9XnS3rqsV_oXbVHU-wDv144gOWODYanJqYWB_EC
- https://glamorouscorset.com/articles/corset-care-explained/?srsltid=AfmBOooN5q24XWO9jxa_0sAUrBQgfWHFGBVml_qySwY3L42psMQD_Uob

