This site is supported by our readers. We may earn a commission, at no cost to you, if you purchase through links.
Hand-sewing? A saddle clamp can secure your leather while you stitch, making the process smoother. Always stitch along the right side of pre-marked or grooved lines to avoid uneven results—precision counts here!
Use a leather needle and a heavy-duty thread to handle the material’s density without snapping. With the right setup, sewing leather is as rewarding as piecing together a puzzle, but less messy!
Table Of Contents
Key Takeaways
- You’ll need a sturdy, flat workspace like a heavy table or workbench for stability when sewing leather, with good lighting to see detailed stitching lines clearly.
- Choose the right tools for your leather project—leather needles, waxed thread, and accessories like a stitching pony will help you achieve professional results.
- Consider your leather’s thickness and type when selecting your approach; thinner hides work for wallets while thicker ones suit belts, and different tanning methods affect workability.
- You can sew leather by hand using saddle stitching for maximum durability or by machine for speed, but you’ll need a heavy-duty machine with proper presser feet for machine sewing.
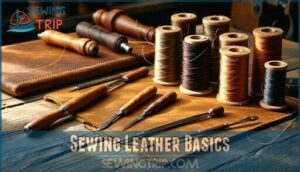
Sewing Leather Basics
When you’re sewing leather, having the right tools and understanding the material’s unique properties is essential to get clean, durable stitches.
From selecting waxed thread to prepping your leather with a groover, each step sets the foundation for a successful project, which involves working with leather to achieve the desired outcome.
Essential Tools and Materials
Start with quality leather sewing tools: leather needles and strong waxed thread.
A stitching pony keeps your work steady, while sharp cutting tools (scissors or knives) guarantee precision.
Leather adhesives are key for securing seams during stitching.
For superior results, consider using specialized leather needles, whether you’re hand sewing or using a leather sewing machine, the right leather sewing supplies make projects smoother and stitching more durable.
Preparing Needle and Thread
When preparing for leather sewing, start by threading leather needles with thick waxed thread, leaving a 2-inch tail.
Thread your leather needle with thick waxed thread, leaving a 2-inch tail—it’s the first step to durable, professional stitches.
Measure thread length at 2.5 times your seam’s length for precision.
Skip knots—secure ends using backstitching instead.
Waxing thread reduces friction, making stitches stronger.
Whether hand-stitching or using a leather sewing machine, proper thread thickness guarantees smooth, sturdy results.
Beginners often find chrome-tanned leather easier to manage, which can lead to more precise and smooth outcomes.
Leather Thickness and Type
Choosing the right leather thickness depends on your project.
Thinner hides work for wallets, while thicker ones suit belts.
Pay attention to tannin types—veg-tanned leather is durable but stiff.
Check grain quality for smoothness and strength.
Your leather sewing techniques, thread choice, and needles should match the hide.
Verify your leather sewing machine compatibility for effortless stitching on different weights.
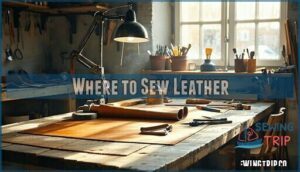
Where to Sew Leather
Sewing leather isn’t just about tools; where you work matters too.
A comfortable workspace setup can save headaches—literally.
You’ll need good lighting to see detailed stitching lines clearly and ventilation options if you’re using adhesives for leather crafting.
Working on a stable surface like a table, secured with a stitching pony, keeps those pesky seams steady.
For a quieter environment, especially with machine sewing, consider noise reduction tricks like soft flooring or padding under your machine.
Ergonomics also play a role—sit at a height where your shoulders stay relaxed.
For durable seams, consider locking the stitch for added security.
Whether crafting leather projects by hand or tackling thicker pieces with a machine, these leather sewing tips guarantee a smoother experience.
It’s all about making the space work for you, with a focus on good lighting and ventilation options, to ensure comfortable workspace setup.
Leather Sewing Techniques
You’ll need a mix of skill and the right tools to master leather sewing techniques, whether you’re using a machine or working by hand.
From sturdy saddle stitches to clean seam finishes, these methods guarantee durability and a professional look for your projects.
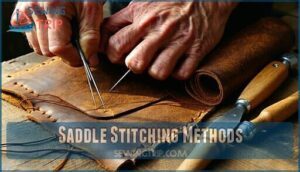
Saddle Stitching Methods
Saddle stitching is a favorite among leather stitching methods for its durability.
Saddle stitching stands out for its unmatched durability, offering strength and a handcrafted touch that elevates any leather project.
The two-needle method is your go-to technique, providing excellent stitch tension control.
Use an awl for widening holes, ensuring smooth threading.
A stitching pony holds your work steady, while thread locking and a firm backstitch security prevent unraveling.
Master this, and hand sewing leather becomes a rewarding craft.
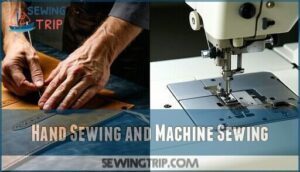
Hand Sewing and Machine Sewing
Hand sewing leather offers unmatched stitch durability and tension control, perfect for intricate designs.
With saddle stitching, your work stays intact even if a stitch breaks.
Machine sewing leather, on the other hand, provides speed and consistent precision, though it lacks the handcrafted charm.
Pair quality leather sewing tools with needle types and thread selection suited to your project’s needs.
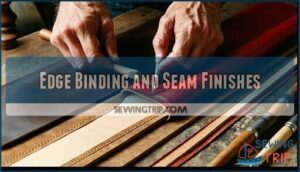
Edge Binding and Seam Finishes
Edge finishing types and seam durability can make or break a project.
Use these techniques for professional results:
- Trim and burnish edges for a smooth, clean look.
- Apply binding materials like leather tape for decorative stitching and support.
- Experiment with layering techniques, ensuring leather edge treatments stay neat.
Leather edge finishing techniques balance aesthetics and strength—master them for exceptional results.
For a rustic aesthetic, consider using cut edge seams.
Leather Sewing Tools and Equipment
You’ll need specific tools to successfully work with leather, including sharp awls for punching holes, stitching groovers for clean lines, and specialized presser feet for your machine.
Having the right equipment makes all the difference between a professional-looking leather project and one that looks homemade.
Much like trying to cut a steak with a butter knife versus using a proper steak knife, the right tools are essential for achieving a high-quality result.
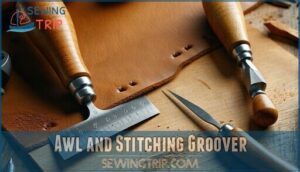
Awl and Stitching Groover
Nearly every successful leather project begins with proper hole alignment and stitch marking.
Your awl creates precise holes at various angles, while your stitching groover carves channels that protect threads from wear.
When setting groover depth, aim for 1-2mm depending on leather thickness. For best results, prepare your leather surface first, then mark your stitch line before using these essential leatherworking tools.
Find the right stitching groover products for your next project. They’re the unsung heroes of hand sewing leather, helping you achieve professional results.
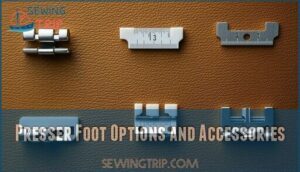
Presser Foot Options and Accessories
After preparing your leather with proper hole markings, you’ll need the right presser foot for your machine. Choosing the correct presser foot can make or break your leather sewing project.
- Teflon-coated feet glide smoothly over sticky leather surfaces without marking
- Walking feet prevent layers from shifting during stitching
- Edge guide feet guarantee consistent seam allowances without additional attachments
When sewing leather, match your foot to your material—knurled feet work best with chrome tan buffalo, while smooth feet protect delicate leathers from unwanted marks. For buttonholes, consider a specialized foot that guides fabric precisely.
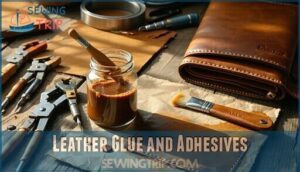
Leather Glue and Adhesives
You’ll need the right adhesives for successful leather projects.
Contact cement and rubber cement are go-to leather adhesives with different bonding strengths. Apply them with a small brush for precise seam bonding, avoiding excess that causes residue.
For various project needs, you can explore leather options.
Let adhesives become tacky before pressing pieces together for maximum hold. When finished, remove any residue with a gentle solvent that won’t damage your leather’s finish.
Advanced Leather Sewing Projects
You’ll transform your leatherworking skills when you tackle more complex projects like braided straps, decorative edge binding, and multi-component assemblies.
With the right preparation and techniques, you can master challenging leather pieces that showcase both function and craftsmanship.
Assembling Leather Projects
When assembling leather projects, pay attention to seam construction and edge finishing for polished results.
Use hardware attachment sparingly for function and flair. Lining installation improves durability and gives a professional touch. Pattern matching guarantees consistency.
- Plan seam alignment before stitching.
- Punch holes uniformly.
- Secure edges with adhesives.
- Attach hardware last.
- Use stitching ponies for precision.
Decorative and Functional Techniques
Transform your leather projects with braiding techniques that add both strength and visual appeal to straps and edges.
You can easily integrate hardware like buckles and snaps by pre-punching holes with your awl.
For edge embellishments, try pattern carving or dyeing techniques in contrasting colors.
These leather crafting methods also enhance your piece’s functionality and create that professional finish that’ll make others wonder where you bought it.
Troubleshooting Common Sewing Issues
Beyond decorative techniques, you’ll need to handle common leather sewing challenges.
When you encounter skipped stitches, check your needle—it might be dull or inappropriately sized for your leather thickness.
Thread breaks often signal uneven tension or improper threading.
For needle breaks, slow your pace and make certain you’re using proper leather needles.
Leather puckering typically results from incorrect presser foot pressure or inadequate leather preparation.
Remember, patience solves most leather sewing mistakes.
Frequently Asked Questions (FAQs)
What is the best way to sew leather?
Hand-stitching with a saddle stitch provides the strongest results for leather.
You’ll need waxed thread, leather needles, and an awl for punching holes.
Machine sewing works too if you’ve got a heavy-duty machine with leather point needles.
Can most sewing machines sew leather?
Not all that glitters is gold in the context of leather sewing.
Most standard machines can’t handle thick leather, but you’ll succeed with a heavy-duty machine equipped with the right needle and presser foot.
Why is leather hard to sew?
Leather’s density challenges your needle penetration and can stick to your machine.
You’ll need special needles, as standard ones break easily.
Its thickness also creates bulk at seams that’s difficult to manage.
What is leather sewing called?
The most common leather sewing technique is called "saddle stitching."
You’ll use two needles on a single thread to create durable, locked stitches that won’t unravel even if one stitch breaks.
What is the best leather needle for sewing leather?
Like a knight choosing the perfect sword, you’ll want leather needles with blunt, triangular points.
They’re specifically designed to pierce through leather without tearing it.
You’ll need sizes 14-18 for most projects.
How should I cut leather for a project?
Use sharp scissors or X-acto knives for clean cuts on a self-healing mat.
Always draw your pattern first, and cut slowly following the lines.
You’ll need firm pressure for thicker leather pieces.
What is the difference between a regular needle and a leather needle?
The right tool makes all the difference.
Regular needles have sharp points that tear leather fibers, while leather needles feature chisel-shaped tips that slice between fibers, creating clean holes without damage.
What type of thread should I use for sewing leather?
For leather projects, you’ll want waxed thread—either polyester or nylon—which provides strength and prevents unraveling.
Ritza 25 Tiger Thread is particularly recommended.
Choose thread thickness based on your leather’s weight for best results.
How do I avoid glue puddles when working with leather?
Apply adhesive sparingly with a small brush or roller, letting it dry until tacky before joining pieces.
You’ll avoid messy puddles and get cleaner seams by using thin, even coats instead of heavy applications.
How to fix skipped stitches when sewing leather?
When the needle’s skipping like a scratched record, check for dull needles, improper tension, or sticky thread.
Use leather point needles, adjust tension, and clean surfaces.
A little wax on the thread helps too!
Conclusion
Remember, knowing where to sew leather makes all the difference—like a knight choosing the right battlefield.
Whether you’re working at a sturdy table or with a specialized machine, your setup impacts your final product.
You’ll find that investing in proper tools and workspace arrangement saves time and frustration.
With practice, you’ll discover your preferred spot for where to sew leather projects, making each stitch more confident than the last, and ultimately leading to better leatherworking outcomes.
Happy leatherworking!

