This site is supported by our readers. We may earn a commission, at no cost to you, if you purchase through links.
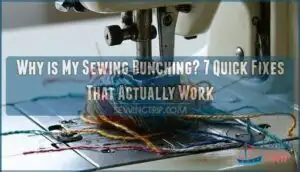
When these two forces don’t balance, you’ll get loops and tangles underneath your fabric instead of smooth stitches.
Check if you’ve threaded your machine correctly, inserted the bobbin properly, and lowered the presser foot before sewing.
A bent or wrong-sized needle can also cause bunching, as can lint buildup in your bobbin area.
Sometimes switching fabric weights without adjusting tension settings creates this frustrating mess.
The good news is that most bunching issues have surprisingly simple solutions once you know what to look for, and understanding the causes, such as tension problems, can help you fix them, making it easier to achieve smooth stitches.
Table Of Contents
Key Takeaways
- Check your thread tension first – Most bunching happens when your upper and bobbin thread tensions do not balance, creating loops underneath your fabric instead of smooth stitches.
- Clean your bobbin area regularly – Lint buildup around the bobbin case disrupts thread flow and causes bunching, so remove debris weekly to prevent problems before they start.
- Match your needle to your fabric – Using the wrong needle size or a bent or dull needle creates immediate bunching issues, so replace needles every 8 hours and choose the right size for your fabric weight.
- Always lower your presser foot – Forgetting this simple step causes fabric slippage and uneven stitches that lead to thread tangles, so make it part of your pre-sewing routine.
Sewing Bunching Causes
Thread bunching happens when your sewing machine creates loops, knots, or tangled messes instead of neat, even stitches.
Thread bunching turns smooth sewing into a frustrating tangle of loops and knots beneath your fabric.
You’ll typically notice this problem on the underside of your fabric, where loose threads gather into frustrating clumps that can ruin your project, and it is often associated with tangled** messes.
Incorrect Thread Tension
The tension dial controls how tightly your machine grips the thread as it feeds through.
When thread tension is off, you’ll get loops underneath your fabric or puckered seams on top.
Check your tension dial first – it’s usually numbered 1-9, with 4-5 being standard.
Test stitch on scrap fabric matching your project’s thread weight and fabric type before starting.
Balanced tension guarantees durable stitch formation, which is crucial for durable and balanced stitch formation, and to achieve standard results.
Needle Problems
Your needle might be the culprit behind sewing bunching.
Your needle could be sabotaging every perfect stitch you’re trying to create.
Bent needles, wrong needle size, or dull needles cause thread bunching and skipped stitches.
Check your needle type matches your fabric weight.
Improper needle installation also creates stitch quality issues.
Replace bent or dull needles immediately—they can’t pierce fabric cleanly, leading to frustrating thread tangles underneath your project.
Selecting the correct needle size is vital for your project should be a priority to achieve the best results with the right needle size and proper installation.
Lint in The Bobbin Area
Accumulated lint creates havoc in your bobbin case, disrupting smooth thread flow and causing sewing bunching. Regular cleaning prevents thread bunching issues before they start.
Lint buildup occurs from various sources:
- Thread type matters – some fibers shed more during stitching
- Cleaning frequency should match your sewing volume
- Lint composition includes fabric particles and thread debris
- Bobbin case requires thorough cleaning around tension springs
Remove your bobbin and brush away debris weekly for ideal sewing machine maintenance. Consider using a specialized cleaning tool for this purpose.
Bobbin Insertion Issues
Improperly inserted bobbins throw your entire sewing rhythm off-balance, creating fabric bunching nightmares.
Check bobbin direction matches your machine’s requirements—some wind clockwise, others counterclockwise.
Verify you’re using the correct size bobbin for your model. A proper bobbin size is critical for smooth operation.
Clean the bobbin case thoroughly, removing lint buildup that affects bobbin tension. Make certain thread compatibility between upper and bobbin threads to prevent sewing machine errors and tension issues during sewing troubleshooting.
Forgetting to Lower The Presser Foot
Imagine this scenario: you’re sewing along smoothly when suddenly your machine starts creating a tangled mess underneath.
If you’ve forgotten to lower the presser foot, your fabric won’t stay in place, causing fabric slippage and uneven stitches.
The presser foot function holds fabric steady against the feed dogs. Without proper presser foot pressure, you’ll encounter skipped stitches, fabric bunching, and potential needle breakage.
Always check this simple step before troubleshooting other sewing machine errors. A key function is to provide consistent stitch quality for different fabric types, and it is crucial for achieving proper presser foot pressure and preventing fabric slippage through the use of a consistent stitch quality.
Why Sewing is Bunching
Thread bunching happens when your machine can’t maintain proper stitch formation. Multiple factors work together to create this frustrating problem, and understanding them helps you troubleshoot effectively.
Your sewing machine relies on precise coordination between several components. When one element goes wrong, it affects the entire stitching process.
Here’s what causes sewing bunching:
- Thread Quality issues create weak spots that snap or tangle
- Needle Size mismatches with fabric weight disrupt thread flow
- Machine Timing problems prevent proper hook and needle synchronization
- Fabric Feed Issues cause uneven movement through the machine
- Stitch Length Problems create tension imbalances between upper and lower threads
Fabric puckering often signals that your machine isn’t feeding material smoothly. When fabric feeding becomes irregular, you’ll notice uneven stitches forming. Bobbin problems compound these issues by creating additional tension irregularities.
Each component must work in harmony for clean stitches. Your needle pierces fabric while the bobbin hook catches upper thread at precisely the right moment. Poor coordination between these elements results in thread loops, knots, and bunching underneath your project.
Thread Bunching Solutions
Thread bunching can turn your sewing project into a tangled mess, but you don’t have to live with this frustrating problem.
Once you understand the main causes and apply the right fixes, you’ll get back to smooth, professional-looking stitches in no time, and achieve professional-looking results.
Importance of Avoiding Thread Bunching
Thread bunching isn’t just annoying—it’s a project killer.
When threads tangle beneath your fabric, you’re looking at fabric damage, compromised seam integrity, and potential project ruin.
Those uneven stitches create fabric puckering that screams amateur hour instead of delivering the professional finish you want.
Beyond appearance issues, thread bunching wastes time and materials, killing your efficiency boost and momentum.
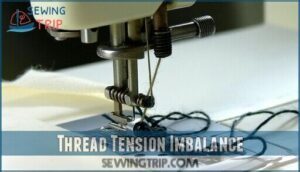
Thread Tension Imbalance
When your tension knobs aren’t balanced, sewing bunching becomes inevitable.
Bobbin tension that’s too tight creates loops underneath, while loose upper tension causes bunching on top.
Different thread weight and fabric type require specific adjustments. Test stitch on scraps first, then fine-tune tension gradually until stitches look even on both sides, which helps achieve even stitches.
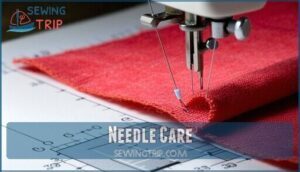
Needle Care
Beyond simple thread issues, your needle holds the key to smooth stitching.
Wrong needle types create immediate sewing bunching problems that frustrate even experienced sewers.
- Match needle size to fabric type – Heavy fabrics need size 16-18 needles, while delicate materials require size 9-11
- Check for bent needles regularly – Even slight bends cause thread loops and bunching underneath your fabric
- Ensure proper needle insertion – Push firmly until you hear the click, then tighten the screw completely
- Replace needles every 8 hours – Dull points snag thread type fibers, creating tension problems and messy stitches
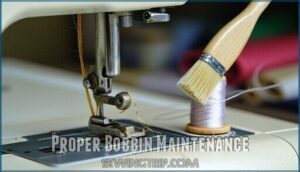
Proper Bobbin Maintenance
When bobbin cleaning becomes routine, you’ll notice fewer thread tangles immediately.
Remove your bobbin case and brush away lint buildup that causes tension settings to malfunction.
Check for nicks or scratches during case inspection—damaged areas snag thread quality.
Verify proper bobbin winding technique prevents loose threads that create bunching underneath your fabric, ensuring a smooth process with proper bobbin maintenance.
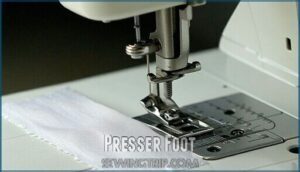
Presser Foot
Forgetting to lower your presser foot before sewing creates immediate thread chaos.
When raised, the presser foot can’t control fabric feed properly, causing irregular stitching and bunching. Different presser foot types require specific foot pressure settings for best performance.
Specialty feet uses vary by fabric thickness—adjust accordingly. Check that your feed dog issues aren’t competing with aftermarket presser feet compatibility problems.
Regular cleaning prevents fabric buildup issues ensuring smooth operation.
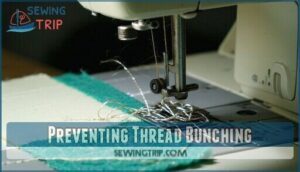
Preventing Thread Bunching
Once you know what causes thread bunching, you can take specific steps to prevent it from happening again.
These preventive measures will save you time and frustration while ensuring smooth, professional-looking stitches every time you sew.
This will result in a smooth sewing experience.
Tip 2: Ensure Presser Foot is Down While Sewing
Precision matters—always lower the presser foot before sewing. This simple habit improves fabric feeding and stitch quality, while also preventing material slippage.
If the presser foot stays up, you’ll face:
- Uneven stitches
- Thread tangles
- Poor foot pressure
- Feed dog issues
- Needle problems.
Mastering this step refines your sewing techniques and keeps grammar—of your stitches—perfect. Incorrect threading can cause thread bunching underneath, which affects the overall stitch quality, and proper handling is essential for preventing thread tangles.
Tip 3: Check for Upper Thread Getting Caught
You need to check that your upper thread follows the correct thread path through all tension discs and guides clean of lint.
When the thread gets caught outside these guides, it bypasses the tension system entirely, causing bunching underneath your fabric.
Re-thread your machine completely, ensuring the thread sits properly in each guide, which is a simple sewing technique that prevents most needle problems and improves seam finishing quality.
Tip 4: Avoid Touching The Knee Lever While Sewing
Knee-lever mishaps create unexpected tension changes that wreak havoc on your stitching.
This hand-free sewing feature responds to slight pressure, making accidental activation surprisingly common during focused work.
Here are five ways to prevent knee lever interference:
- Adjust your sewing posture – Sit with knees positioned away from the lever mechanism
- Check lever sensitivity settings – Some machines allow you to modify activation pressure
- Practice mindful hand placement – Keep hands on fabric and steering wheel, not bracing against machine
- Consider disabling the feature – Turn off knee lever function if you don’t actively use it
- Monitor your seam finishing technique – Consistent pressure prevents linguistic confusion between intentional and accidental activation
Cultural sewing habits often influence how we position ourselves at machines, but awareness prevents threading disasters.
Tip 5: Consider Turning Off Securing Stitches for Certain Fabrics
Securing stitches can create unwanted bulk on delicate fabrics, causing thread bunching at seam starts and stops.
When working with lightweight materials like chiffon or silk, turn off your machine’s automatic securing function.
These fabric stabilizers and temporary adhesives often respond better to manual backstitching for seam security.
Linguistic preferences in sewing terminology vary, but the principle remains: delicate fabrics need gentler stitch reinforcement approaches than standard materials, which is why delicate fabrics are a key consideration.
Fixing Sewing Machine Issues
Thread bunching can turn your sewing project into a frustrating mess, but you don’t have to struggle with tangled disasters underneath your fabric.
Understanding the root causes and applying the right fixes will get your machine running smoothly again in minutes, which can help prevent tangled disasters.
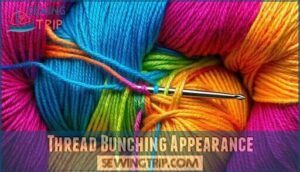
Thread Bunching Appearance
Thread bunching creates telltale visual clues that reveal underlying machine problems.
You’ll spot looped stitches forming bird’s nests underneath your fabric, creating unsightly nest formation that damages delicate materials.
These tension indicators signal stitch density problems requiring immediate attention.
This linguistic anomaly in your machine’s performance stems from mechanical issues rather than operator error, making proper diagnosis essential for quality results.
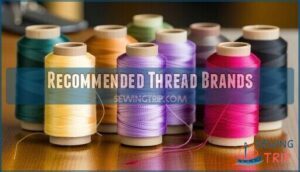
Recommended Thread Brands
Quality thread brands prevent bunching through superior thread material consistency and reliable brand reputation.
Gütermann, Coats & Clark, and Superior Threads offer excellent thread weight options with extensive color variety.
These brands follow strict language conventions in manufacturing standards, ensuring cultural context compatibility across different sewing communities.
Investing in high-quality thread can help prevent issues related to loose thread fibers.
Consider specialty threads for specific projects requiring enhanced performance and durability.
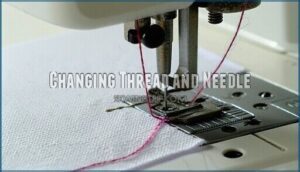
Changing Thread and Needle
Sometimes poor thread quality creates more problems than you’d expect. When your machine starts acting up, swap out both the thread and needle together. Old thread weakens and breaks easily, while a dull or wrong needle size compounds the issue.
- Fresh thread flowing smoothly through a sharp, properly-sized needle like silk through butter
- Crisp, even stitches forming in perfect rows without skips or tension problems
- Clean fabric holes that close naturally instead of staying stretched or torn
Match your needle size to your thread type and fabric weight. Heavy threads need larger needles, while delicate fabrics require finer ones. Check your threading order follows your machine’s path exactly – one wrong move throws off the entire tension adjustment system.
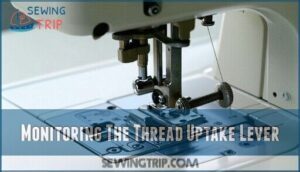
Monitoring The Thread Uptake Lever
Your machine’s thread uptake lever requires precise Lever Timing to prevent bunching issues.
Watch for Smooth Movement as it cycles—jerky motion indicates worn Cam Follower components affecting Uptake Alignment.
This mechanical language demands linguistic understanding to diagnose properly, and Poor Tension Control often stems from uptake lever problems, making linguistic expertise essential for troubleshooting these complex timing relationships effectively.
Removing The Plastic Cover
After locating the securing screws around your machine’s base, carefully pry off the plastic cover using non-marring tools to prevent scratches.
The cover’s purpose involves protecting internal mechanisms while allowing maintenance access. Once removed, you’ll discover accumulated lint that creates static buildup, affecting thread flow.
Regular cleaning can also help resolve bobbin tension issues. Clean thoroughly before reattaching the cover securely to restore proper function and address bobbin tension issues.
Common Thread Bunching Causes
Thread bunching stems from several interconnected causes that require systems thinking to diagnose effectively.
Thread type mismatches with fabric choice create tension imbalances, while incorrect stitch settings compound these issues.
Machine age affects timing mechanisms, and user error often involves overlooking basic setup steps.
Understanding the linguistic nuances of question phrasing helps identify causality patterns in troubleshooting.
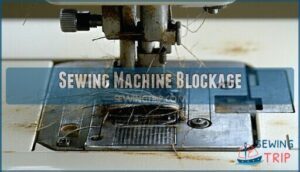
Sewing Machine Blockage
Machine blockages stem from accumulated debris disrupting critical components.
Lint buildup around the shuttle hook and feed dogs creates mechanical interference, while tension disks clogged with thread fragments halt smooth operation.
Remove the needle plate to access hidden obstructions.
Motor issues often indicate severe internal blockages requiring professional attention before permanent damage occurs.
Thread Bunching Issue for Beginners
Beginners often struggle with Thread Bunching Issue because they haven’t mastered Tension Basics or proper Needle Selection.
Understanding these fundamentals prevents most Beginner Mistakes.
Start by learning correct Bobbin Threading techniques and choosing appropriate Fabric Choice for your project.
These linguistic explanations might seem confusing initially, but mastering these core concepts eliminates frustrating bunching problems completely.
Sharing Tips
Sharing your sewing victories helps build community confidence around fabric choices and needle types.
When you’ve mastered thread quality and stitch settings through a solid maintenance schedule, pass along your wisdom.
Your linguistic usage in explaining techniques mirrors natural speech patterns, creating linguistic flow that resonates.
Language norms in sewing circles thrive when experienced sewers share practical solutions with beginners facing bunching issues.
Frequently Asked Questions (FAQs)
How do I stop my sewing from bunching?
Check your thread tension—if it’s too loose, you’ll get bunching underneath.
Make certain you’re using the right needle size for your fabric weight and that your machine’s properly threaded through all guides.
How to fix bunching on a sewing machine?
Even if you’re frustrated by persistent bunching, don’t blame your machine yet.
Check your thread tension first—it’s usually too tight or too loose.
Rethread both top and bobbin, ensuring proper threading paths, and use matching thread weights.
Verify your needle’s sharp and correct size to ensure optimal performance.
How to fix sewing machine birdnesting?
Birdnesting happens when your bobbin thread creates tangled loops underneath.
Re-thread your upper thread, check bobbin tension, clean your machine, use quality thread, and make certain you’re pulling both threads back when starting to sew.
Why does my machine skip stitches randomly?
Your machine’s playing favorites with fabric layers, skipping stitches when tension’s off, needle’s dull, or thread quality’s questionable—check these troublemakers first.
How often should I oil my machine?
You’ll want to oil your sewing machine every 8-10 hours of active stitching time.
Most home sewers find monthly oiling works perfectly for regular use, while daily sewers should oil weekly for peak performance.
What causes fabric to pucker while sewing?
Fabric puckering happens when you’re sewing with incorrect tension settings, using the wrong needle size, or pulling fabric through too quickly.
Check your thread tension, match needle to fabric weight, and let the machine feed naturally to prevent fabric puckering and ensure a smooth sewing process with the correct needle size.
Why wont my machine feed fabric evenly?
Nearly 80% of uneven feeding stems from incorrect presser foot pressure.
You’re likely dealing with worn feed dogs, wrong presser foot pressure, or mismatched fabric weight to needle size, causing irregular fabric advancement.
How do I fix loose stitches?
Tighten your upper thread tension, check you’re using the correct needle for your fabric weight, and make certain you’re pulling both threads to the back when starting to sew.
Conclusion
Strangely enough, the moment you understand why is my sewing bunching, these frustrating problems often disappear entirely.
Thread tension imbalances, incorrect needle sizes, and bunching situations create most bunching situations you’ll encounter.
By checking your machine’s threading, cleaning lint from the bobbin area, and ensuring your presser foot stays down, you’ll eliminate the majority of these problems.
Remember that different fabric weights require tension adjustments, so don’t hesitate to make small changes when switching materials for consistently smooth results and to avoid bunching.
- https://english.meta.stackexchange.com/questions/253/referencing-the-existence-of-words-that-may-be-offensive
- https://needlesnbeadsnsweetascanbe.com/what-is-the-best-brand-of-sewing-thread-to-use/
- https://www.poconosewandvac.com/products/thread/
- https://suzyquilts.com/best-quality-sewing-thread/
- https://www.wawak.com/thread/thread-by-brand/

