This site is supported by our readers. We may earn a commission, at no cost to you, if you purchase through links.
Imagine this: a beautifully finished garment with edges that catch the eye and tell a story.
From the classic running stitch to the delightful shell stitch, you’ve got a toolkit ready to turn any project into a masterpiece.
Imagine running your hand over a perfectly embroidered satin stitch or the rustic charm of a blanket stitch that whispers elegance.
Each technique is your secret weapon for adding flair and finesse.
Intrigued by the possibilities? There’s a world of stitches waiting to be explored!
Table Of Contents
- Key Takeaways
- Essential Hand Stitches
- Mastering Basic Edge Stitches
- Hand Stitches for Seam Embellishments
- Advanced Hand Stitches for Edges
- Stitches for Hemming Garments
- Creative Edges and Trims
- Techniques for Beautiful Seams
- Professional Finishing With Hand Stitches
- Frequently Asked Questions (FAQs)
- Conclusion
Key Takeaways
- Don’t underestimate the power of decorative edges like the blanket and shell stitches. They’re like a charming bow tie on a tuxedo, instantly adding flair and completeness to your projects.
- Mastering essential hand stitches like the running and backstitches is your secret weapon for creating timeless designs, and the overcast stitch technique is a must-have in your sewing toolkit. It’s like learning the chords before playing a melody – once you’ve got them down, the sky’s the limit!
- Tension control is critical when stitching. Think of your thread as a tightrope; too loose and it flaps in the breeze, too tight and it snaps. Practice on scraps to hit that Goldilocks zone: just right.
- Experiment with thread colors and embellishments like beads for a splash of glamour. Imagine your fabric as a party dress that just needs the right accessories to make it dance and shine on the runway.
Essential Hand Stitches
Mastering the essential hand stitches – running stitch, back stitch, blanket stitch, buttonhole stitch, satin stitch, and blind hem stitch – is the foundation for elevating your sewing skills. With a little practice, these versatile techniques will become your go-to tools for adding beautiful, custom touches to any project.
Running Stitch
Running stitch—a staple in every stitcher’s toolkit—offers versatility for decorative edges and embroidery techniques. Picture it as your sewing superhero, tackling tasks like a breeze. running stitch variations allow creativity to flow:
- Simple Gathering: Perfect for ruffles.
- Outline Design: Embellishes beautifully.
- Quilting Lines: Adds texture.
- Seam Reinforcing: Keeps fabric sturdy.
Practice makes perfect, so grab a needle and start stitching!
Back Stitch
Let’s talk about back stitch, your trusty sidekick in hand embroidery stitches learn basic stitches!
This stitch creates strong, seamless lines that will knock your socks off.
It’s ideal for seam finishes and embroidery finishing, and it’s versatile with various uses.
It even comes in exciting back stitch variations.
Grab your hand sewing tools, practice, and watch your decorative stitches shine!
Blanket Stitch
Imagine this: you’re sitting by a cozy fireplace, practicing the blanket stitch. This classic edge stitch dates back centuries, adding a lovely decorative flair to hems or appliques. Grab a sturdy needle and contrasting thread for that pop! Master its easy rhythm, and watch your hand embroidery projects sparkle with personality and finesse. Give it a whirl—you’ll love it!
Buttonhole Stitch
The buttonhole stitch is a versatile edge finish that adds a charming touch to your projects. To master this stitch, start by:
- Selecting the right needle and thread for your fabric.
- Practicing on scraps to find your rhythm.
- Experimenting with variations like the blanket stitch or zigzag buttonhole for a unique look.
With a little patience, you’ll be stitching up beautiful buttonholes in no time!
Satin Stitch
Now that you’ve nailed the buttonhole stitch, give the satin stitch a whirl! Known for its smooth finish, it’s perfect for embroidery projects. Here’s a fun table to guide you:
| Task | Tip | Tool Needed |
|---|---|---|
| Outline | Start with a border | Embroidery hoop |
| Fill Area | Keep stitches close | Embroidery floss |
| Trouble? | Adjust tension gently | Sharp needle |
Blind Hem Stitch
Master the delightful Blind Hem Stitch to add finesse to your sewing projects!
This invisible hem technique is perfect for creating decorative edges without visible stitches.
When tackling various fabric types for blinding, grab your hand-stitching tools and remember: practice makes perfect.
It’s a bit like magic—embroidery ornaments appear seamless.
Explore Blind Hem Stitch variations to elevate those hidden hems!
Mastering Basic Edge Stitches
Mastering basic edge stitches is like learning the secret handshake of sewing, where each stitch brings a touch of elegance and strength to your project. You’ll find yourself impressing even the toughest sewing critics with a well-placed whipstitch or invisible slip stitch.
Whipstitch for Edges
The whipstitch is a versatile edge stitch that can elevate your sewing projects. Here’s how to master it:
- Use a sharp needle and strong thread for best results.
- Experiment with different thread colors and thicknesses to create unique looks.
- Try the whipstitch on leather or curved edges for a professional finish.
- Practice makes perfect – the more you use this stitch, the smoother your edges will be.
Slip Stitch for Edges
| Slip Stitch | Tools | Fabrics |
|---|---|---|
| Basic | Needle | Knit |
| Locked | Thimble | Leather |
| Curved | Thread | Bias Bound |
| Slip Knot | Scissors | Self Bound |
| Backward | Pliers | Knit/Leather |
Zig Zag Stitch for Edges
Ever wondered how zig zag stitch variations can elevate your hand stitching techniques?
This stitch is your secret weapon for decorative edges, especially on tricky fabrics like knits, leather, or denim.
Grab the right zig zag stitch tools, and you’ll transform whipped seams into standing flat fell marvels.
It’s like turning plain fabric into a canvas, just itching for your creativity!
Blind Hem Stitch for Edges
Dabbling in blind hem stitches gives your projects a polished, professional look.
It’s the secret sauce for invisible hemming techniques, perfect for lightweight fabric types.
Always have the right tools for blind hemming: a needle, thread, and thimble.
Explore blind hem stitch variations to suit your style.
Hand Stitches for Seam Embellishments
Hand stitches can elevate the look of your seams, adding a touch of elegance and personality to your sewing projects learn hand serging techniques. Explore the versatility of running stitches, back stitches, and buttonhole stitches to create beautiful decorative edges and seam embellishments that will make your garments stand out.
Running Stitch for Seam Embellishments
You’ve nailed the basics, so let’s spruce up your seams!
With running stitch variations, you can transform plain seams into artistic wonders.
Play with stitch tension control to create dimensional effects, and explore thread color choices for vibrant designs.
Picture the laughter across ages, as running stitch history threads generations together, connecting embroidery novices and experts through decorative edges and seam embellishment ideas.
Back Stitch for Seam Embellishments
Consider the timeless back stitch, a versatile gem for seam embellishments. With its roots steeped in history, this stitch offers endless seam embellishment ideas and can be adapted to different fabrics. Armed with just a needle, thread, and a few embroidery supplies, you’ll master backstitch variations for stunning decorative edges. Who knew a simple stitch held such power? Happy stitching!
Buttonhole Stitch for Seam Embellishments
Elevate your sewing flair with buttonhole stitch seam embellishments!
This versatile stitch offers endless variations and can transform seams into decorative edges.
For best results, consider thread color choices that complement your fabric and master stitch tension control to avoid puckering.
With buttonhole stitch history tracing back centuries, you’ll be stitching with a nod to tradition while sparking embroidery inspiration.
Decorative Stitch Patterns
Boost your creativity by experimenting with decorative stitch patterns! Combine classic techniques like running stitch and back stitch to craft intricate designs. Explore historical embroidery styles or put a modern spin on traditional motifs. The possibilities are endless – let your imagination run wild and elevate your sewing projects with these beautiful hand-stitched embellishments.
Advanced Hand Stitches for Edges
Incorporating advanced hand stitches for edges can transform your sewing projects from ordinary to extraordinary learn hand stitching techniques. You’ll discover techniques like the Herringbone and Shell Stitches which add a delightful spritz of charm and durability to every seam.
Hand-Overcast Stitch
Now, you’re ready for the hand-overcast stitch, a trusty sidekick when it comes to decorative edges. This stitch keeps your seams neat and tidy, while adding a lovely twist to your projects. Grab your needle, and practice various hand-overcast stitch variations. Historically, this stitch’s been a go-to for finishing edges. Explore its uses in embroidery classes and get creative!
Herringbone Stitch for Edges
After mastering the Hand-Overcast Stitch, tackle the Herringbone Stitch for decorative edges.
This stitch combines flair with strength, like an artist wielding embroidery tools for fabric masterpieces.
Perfect for embroidery art and kits, choose your fabric wisely.
Adjust your stitch tension, thinking of its rich history and variations.
Ever tried it? It’s like sewing with a waltz in your hands!
Shell Stitch for Edges
The shell stitch is a versatile edge embellishment that adds a delightful scalloped texture.
It’s a great way to add a touch of personality to your projects.
To create this decorative stitch, you’ll need a needle, thread, and a bit of patience.
Start by making a series of loops along the edge, securing each one with a small stitch.
Experiment with different thread colors and stitch spacing to personalize your shell stitch projects.
Seed Stitch for Edges
Moving from shell stitches, the seed stitch offers a new flair. Often likened to a textile dance floor, it adds a playful texture to your decorative edges.
- Mix seed stitch variations for unique designs.
- Choose the right seed stitch tools for precision.
- Explore seed stitch projects with embroidery trends in mind.
- Consider seed stitch history while planning.
- Don’t forget seed stitch alternatives for versatility.
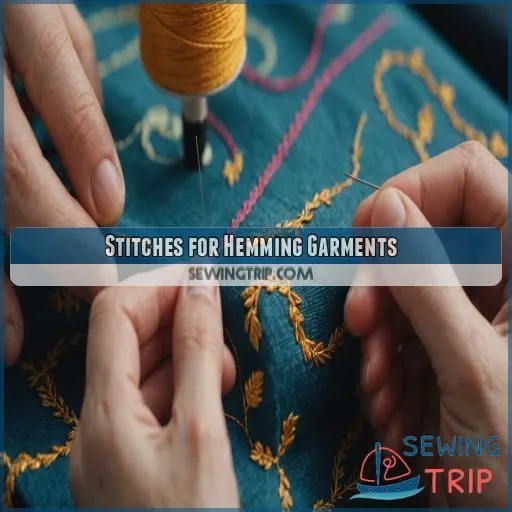
Stitches for Hemming Garments
When you’re looking to finish your garments like a pro, mastering a variety of hem stitches is key. Whether you’re straightening out a hem with precision or adding a visible flourish, these techniques will have you hemming with style and ease.
Straight Hem Stitch
Now, let’s talk about the straight hem stitch, a must-have for hemming fabrics.
Picture it as the sturdy backbone of hemming!
You’ll need tools for hemming, like a needle and some patience.
Try straight stitch variations to add personal flair.
Choosing thread carefully makes sure it’s durable.
Mastering this technique transforms plain edges into decorative edges, enhancing your hand stitching techniques.
Curved Hem Stitch
Occasionally, you may encounter a curved hem that requires a delicate touch. The curved hem stitch is perfect for this task. Here’s how to master it:
- Use a sharp needle and fine thread to minimize puckering.
- Adjust your stitch tension to prevent the fabric from pulling.
- Experiment with thread colors to complement your design.
Inverted Hem Stitch
When life gives you lemons, make lemonade, but when fabric gives you raw edges, use the inverted hem stitch! This handy technique is your sewing ally for creating clean, polished edges. Here’s a quick guide:
| Stitch Type | Description | Application |
|---|---|---|
| Straight | Basic, neat | Everyday use |
| Cross | Adds flair | Couture sewing |
| Bargello | Ornate | Decorations |
| Decorative | Stylish | Edges |
| Pojagi | Round | Circle ornament |
Perfect for everything from couture sewing to pojagi circle ornament, the inverted hem stitch is your go-to for hidden magic!
Visible Hem Stitch
While inverted hem stitches might seem like a secret club, visible hem stitches have their own charm. Choose the right thread and tools for:
- Intricate visible hem stitch variations
- Efficient hem stitch troubleshooting
- Flexibility for different fabrics
- Precise hem stitch techniques
With a visible hem stitch, you’ll add character and personality to your garments, turning hems into a statement piece!
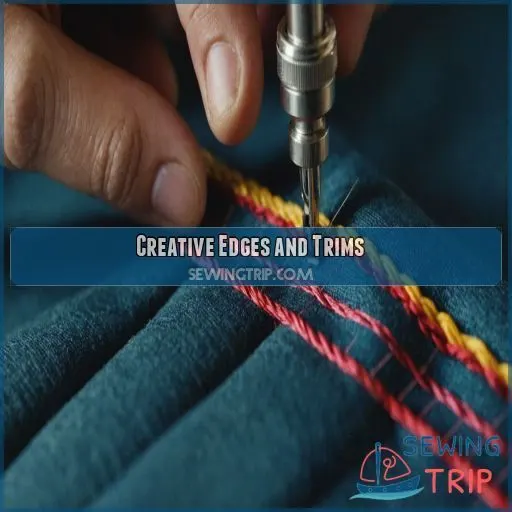
Creative Edges and Trims
When you’re ready to take your sewing projects up a notch, exploring creative edges and trims like shell, feather, or loop stitches can add just the right amount of flair. Think of it this way: it’s like giving your garments a stylish, custom haircut—everyone will want to know who did it!
Shell Edges
Elevate your sewing with shell edges! This decorative stitch creates a scalloped, textured border that adds a touch of elegance to any project. Experiment with different thread weights and fabrics to achieve unique effects. Shell edges work beautifully on garment hems, pillow cases, and even table linens. Embrace your creativity and let these charming stitches shine.
Feather Stitch Edges
Feather stitch edges are like the cherry on top of your sewing projects, adding flair with delightful loops. Try experimenting with feather stitch variations using different threads for a unique touch on diverse fabric types.
- Opt for lighter threads on delicate fabrics.
- Use contrasting colors for a bold statement.
- Perfect for adding personality to home decor projects.
Now, go and give your creations that artistic twist!
Loop Stitch Edges
When you’re aiming for a unique flair in your sewing projects, the loop stitch edges are your ticket! They’re more fun than a squirrel on a trampoline. Experiment with loop stitch variations using cotton or silk threads depending on your project. Use quality loop stitch tools to keep things smooth, and enjoy the rich history of loop stitch techniques.
Soutache Stitch Edges
After mastering loop stitch edges, let’s talk about the classic elegance of soutache stitch edges. This technique introduces cord-like embellishments, perfect for adding pizazz. Imagine accenting garments with these eye-catching details! Grab your needle, soutache braid, and get creative with variations. Whether inspired by its rich history or exploring new projects, this stitch lets your imagination run wild.
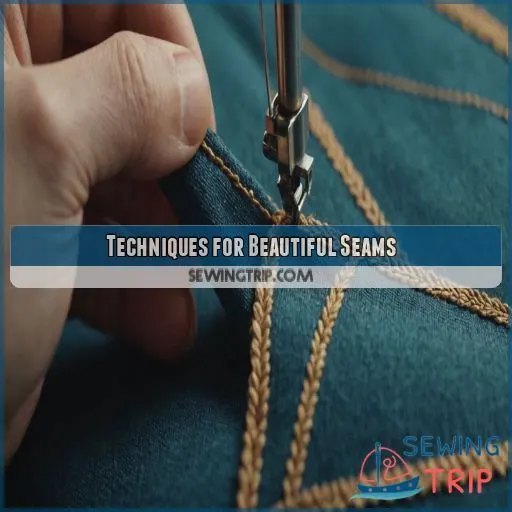
Techniques for Beautiful Seams
Elevate your sewing skills with these must-know techniques for beautiful seams essential sewing tools. From interfacing and zig-zag finishing to self-binding and hemming, you’ll create professional-looking results that’ll make your projects shine. (Source)
Interfacing Seams
Embrace creative edges and trims, and explore interfacing seams—your garments’ secret weapon for perfection. Choose the right interfacing types to enhance stability and structure. Remember, working with:
- Fusible interfacing
- Seam allowance
- Iron-on interfacing
- Precise pressing techniques
- Seam transformation potential
…is akin to a magician’s hat trick, effortless elegance! Let’s weave these techniques into your sewing toolkit for that polished finish.
Edge Finishing With a Zig Zag
You ever feel your seams need pizzazz? Try zigzag stitching! It’s versatile, adding flair to different fabrics and edges. Zigzag stitch tools make it durable and easy.
| Zigzag Stitch Use | Fabric Type | Tool Needed |
|---|---|---|
| Edge Finishing | Cotton | Standard Zigzag Foot |
| Stretch Fabrics | Jersey | Ballpoint Needle |
| Decorative Touch | Denim, Corduroy | Heavy-Duty Foot |
Zigzag adventures await!
Self-Binding Seams
Turn your seams from drab to fab with self-binding seam variations!
Choose fabrics wisely, as stiffer ones can be trickier.
Mind your seam allowances; you don’t want them too slender or wide.
Pressing techniques are key for a polished look.
Don’t overlook thread selection; pick colors that sing in harmony with your fabric.
Master these steps, and you’ll be sewing like a pro!
Hems for Edges
For hems, the edge finish can make all the difference. To achieve beautiful, professional-looking hems, try these techniques:
- Use a narrow hem for lightweight fabrics like chiffon or silk.
- Opt for a blind hem for a virtually invisible finish on heavier fabrics.
- Experiment with a rolled hem for a delicate, decorative touch.
- Consider a faced hem for a crisp, structured look on structured fabrics.
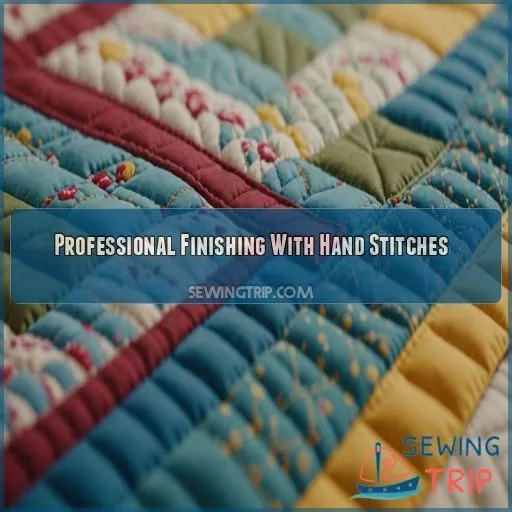
Professional Finishing With Hand Stitches
Achieving that professional finishing touch on your sewing projects is easier than you think with a few hand stitching techniques. You’ll explore how working in a hoop, using felt backing, finishing with piping trim, and basting for invisible hems can transform your creations into polished masterpieces.
Working in a Hoop
Hoops can make your stitching smoother than butter! Choose the right hoop size for different fabric types; it’s the Goldilocks principle—just right. Adjust hoop tension to avoid wrinkles; you don’t want fabric sagging like overcooked pasta. Experiment with hoop placement to find the sweet spot. For a twist, try hoop alternatives like stretcher bars.
| Feature | Tip | Benefit |
|---|---|---|
| Hoop Size | Match to fabric type | Even tension |
| Hoop Tension | Keep firm, not too tight | Wrinkle-free fabric |
| Hoop Placement | Center it well | Balanced stitches |
| Hoop Alternatives | Use stretchers or clips | Versatility in projects |
Felt Backing Finishing
After mastering the art of working in a hoop, try adding felt backing to your projects.
It’s a game changer!
This method provides your creations with stability and a polished look.
Using felt backing materials and tools, you’ll notice the benefits instantly, giving your work that professional edge.
It’s like adding whipped cream to a pie—irresistibly perfect!
Finishing With Piping Trim
Elevate your sewing with piping trim! This versatile finishing touch adds a polished, professional look to any project. From bold contrasting colors to subtle tone-on-tone accents, piping trim offers endless creative possibilities. Carefully install it by hand-stitching for a flawless finish that will make your garments and home decor truly shine.
Basting for Invisible Hems
Now that you’ve embraced piping, let’s breeze into basting for invisible hems. Picture it like a magician pulling off a grand illusion—no stitches in sight!
- Choose light threads matching fabric.
- Practice basting stitch types for precision.
Frequently Asked Questions (FAQs)
What is the decorative stitch for the edges of fabric?
Think of the blanket stitch as giving your fabric a friendly hug. It’s perfect for finishing edges with flair, adding a polished look. Grab your needle, and let’s transform those plain edges into something truly special!
What are decorative hand stitches?
Decorative hand stitches jazz up your clothes with flair! Think of them as the icing on your garment cake—adding character with stitches like running, back, blanket, and buttonhole. It’s the secret sauce to personalizing your style.
What is the best hand stitch for frayed edges?
For frayed fabric edges, the blanket stitch is your best buddy. This stitch securely surrounds the edge, stopping frays in their tracks. Picture it as a tiny fence around your fabric to prevent threads from misbehaving.
How to sew an edge stitch?
To sew an edge stitch, grab your needle and thread, and stitch close to the fabric’s edge. Keep them even, like a soldier marching in formation, and remember, practice makes perfect! Your edges will dazzle in no time.
How do I achieve consistent stitch spacing and tension?
Think of stitching like dancing: it’s all about rhythm and balance. Use a ruler or seam guide for spacing, maintain even needle tension, and practice diligently on scrap fabric to waltz smoothly to consistent, beautiful stitches.
What are the best thread types and needle sizes for decorative stitches?
For decorative stitches, use mercerized cotton thread for a polished look. Choose needle sizes 7-9 for lightweight fabric, 5-7 for medium, or 3-5 for heavy. It’s like picking the right wand in the sewing world!
How can I incorporate beads, sequins, or other embellishments?
Incorporate beads and sequins by threading them onto your needle as you sew. Its like adding a little sparkle parade across your garment! Make sure they’re tightly secured to avoid an unplanned game of hide and seek.
What techniques work best for curved or irregular edges?
For curved edges, try the chain stitch or stem stitch. They’re flexible like a seasoned yogi, allowing you to follow curves smoothly. Practice on scraps first; it’s like warming up for a crafting marathon!
How do I transition between different decorative stitches seamlessly?
To move between decorative stitches smoothly, plan your sequence like a dance routine. Finish one stitch, knot discreetly, and start the next with overlapping loops to hide join marks. Keep rhythm and let creativity lead!
Conclusion
Imagine your sewing creations transformed into works of art, where every stitch tells a story.
The possibilities are endless with the decorative edges and hand stitching techniques at your fingertips.
From the timeless running stitch to the beautiful shell stitch, this toolkit will elevate your sewing skills and infuse your projects with a touch of elegance.
Embrace the decorative edges and hand stitching techniques, and watch your sewing dreams come to life.

