This site is supported by our readers. We may earn a commission, at no cost to you, if you purchase through links.
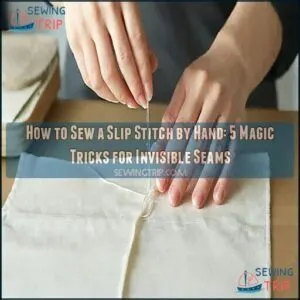 To sew a slip stitch by hand, start with matching thread and tie a small knot at the end. Fold the fabric edges inward for a clean finish.
Insert your needle into the fold of one side, pulling it through without piercing the outer fabric. Then, stitch into the fold on the opposite side, creating a zigzag or “ladder” pattern as you alternate.
Keep your stitches small and evenly spaced. Gently pull the thread to close the gap, making the seam nearly invisible.
It’s like magic—simple, neat, and perfect for hems or repairs. Want pro tips? It’s all in the details!
Table Of Contents
- Key Takeaways
- Preparing for Slip Stitch
- Executing The Slip Stitch
- Understanding Invisible Stitching
- Applications of Slip Stitch
- Tips for Mastering Slip Stitch
- Common Slip Stitch Mistakes
- Working With Different Fabrics
- Finishing Your Slip Stitch Project
- Advanced Slip Stitch Techniques
- Frequently Asked Questions (FAQs)
- Conclusion
Key Takeaways
- Match your thread color to the fabric and double it for strength, ensuring your stitches stay invisible and durable.
- Fold fabric edges inward and press them neatly to create a clean foundation for your slip stitch.
- Use small, even stitches, alternating between folds to form a ladder-like pattern that pulls tight for an invisible seam.
- Maintain consistent tension to avoid puckering, and secure your work with a hidden knot for a polished finish.
Preparing for Slip Stitch
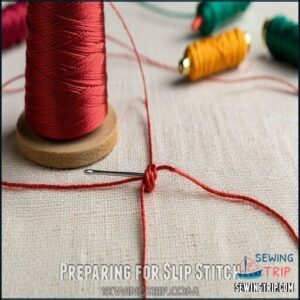
Before you start your slip stitch, you’ll need to select a thread that matches your fabric and double it for strength.
You’ll also want to tie a secure knot at the end of your doubled thread to prevent it from pulling through as you work, which is a secure way to ensure your thread does not come loose.
Choosing Matching Thread
The first trick to a perfect slip stitch is selecting the right thread color. Your stitches will disappear like magic when your thread matches your fabric exactly.
Choose the perfect thread color, and watch your stitches vanish seamlessly into the fabric like magic.
Under natural light, compare thread options directly against your fabric—indoor lighting often deceives even experienced sewers.
- Choose thread one shade darker than your fabric when in doubt; it blends better into shadows.
- Match thread weight to fabric thickness—lighter threads for delicate fabrics, heavier for denim or canvas.
- Consider thread fiber types—cotton for natural fabrics, polyester for synthetics and stretch.
- Test potential threads on scrap fabric before committing to your project.
- For patterned fabrics, match the dominant or background color rather than accent colors.
When you’ve found the perfect match, you’ll know—your stitches will practically vanish against the fabric. A helpful resource is matching thread products for finding the perfect shade. This careful selection makes all the difference between obvious repairs and professional-looking seams.
Doubling Thread for Security
Many sewers overlook doubling thread, but it’s the foundation of slip stitch security. When you double your thread, you’re instantly boosting thread strength and reducing breakage in one simple step.
This technique increases stitch durability, and you can further explore the benefits of double threading techniques for enhanced seam resilience.
Here’s how to do it properly:
Step Action Needed
This hand sewing technique creates ply considerations that enhance durability without adding bulk—perfect for invisible seams that last.
Tying a Knot at The End
With your thread doubled for strength, let’s secure it properly with a knot. This step builds on your doubled thread preparation by adding another layer of security.
To tie a perfect knot for your slip stitch:
- Hold the thread ends together and wrap them around your index finger once, creating a loop. Roll the loop between your thumb and finger, then pull it tight to form a secure knot.
- Position your knot so it can be hidden inside the fabric fold, and trim the thread tail to about 1/4 inch for easy concealment.
Good knot placement prevents your hand sewing from unraveling while keeping your slip stitch truly invisible.
Executing The Slip Stitch
You’ll begin the slip stitch by inserting your needle into the fold of your fabric, making sure it doesn’t pierce through to the visible side.
Now you’ll work back and forth between the folds, creating a ladder-like pattern that pulls together for an invisible seam when tightened.
Folding Fabric Inside Closure
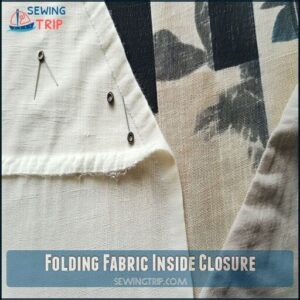
Before starting your slip stitch, proper fabric folding creates the foundation for truly invisible seams. When you carefully prepare your closure, the magic happens naturally.
For perfect hand sewing results:
- Create neat folds by pressing with an iron or using finger-creasing techniques along your seam allowance
- Align both fabric edges precisely, measuring equal fold widths on each side
- Secure your work with pins every 2-3 inches or use basting as an alternative
This preparation step might seem small, but it’s what separates beginner attempts from professional-looking finishes. Your slip stitch can only hide what’s properly folded first!
Inserting Needle Into Folds
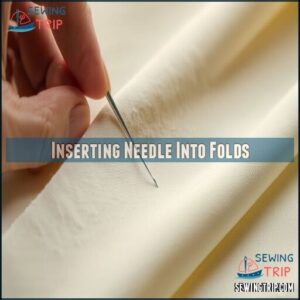
With your carefully folded fabric ready, it’s time for needle placement. Insert your needle into the first fold, approximately 1/8 inch from the edge.
Maintain consistent fold depth while angling your needle slightly upward for knot concealment. Pull the thread snug but not tight.
Next, guide your needle into the opposite fabric layers, capturing just a few threads. This stitch placement creates the invisible "ladder" that makes slip stitch hand sewing techniques truly magical.
Avoiding Outside Fabric
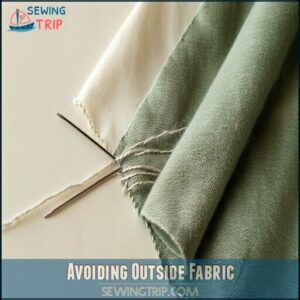
The key to truly invisible slip stitches lies in needle placement between fabric layers.
When working your slip stitch, remember these four essential techniques:
- Position your needle parallel to the fold, never piercing through to the visible side
- Keep your stitch depth shallow—about 1/8 inch into each fold
- Catch only the inside layers where they meet at the seam
- Check both sides periodically to confirm no stitches show through
With practice, you’ll develop the muscle memory for perfect stitch angle and fold depth every time.
Understanding Invisible Stitching
You’ll create invisible seams by making ladder-like stitches that alternate between both sides of your fabric opening.
When you pull these stitches tight, the thread creates a hidden bridge that connects your fabric edges without showing on the surface.
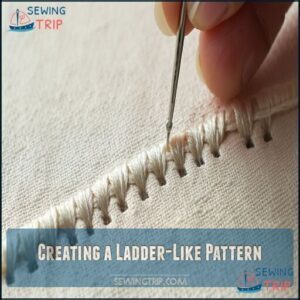
Creating a Ladder-Like Pattern
When you create a ladder-like pattern with slip stitches, you’re building an invisible bridge between fabric edges.
To achieve this effect, keep your stitch spacing uniform at approximately 1/8 inch apart. By making tiny diagonal stitches that catch just a few threads, you’ll maintain consistent depth and proper stitch angle throughout your work.
| Technique | Purpose | Result |
|---|---|---|
| Tension Control | Prevents puckering | Professional finish |
The key to a successful invisible ladder stitch lies in your attention to ladder visibility—ironically, less is more. Maintain uniform spacing between each entry point and pull with steady pressure. Not too tight (which causes puckering) and not too loose (which reduces durability).
This hand sewing method creates strong seams that practically disappear, making your finished project look professionally crafted.
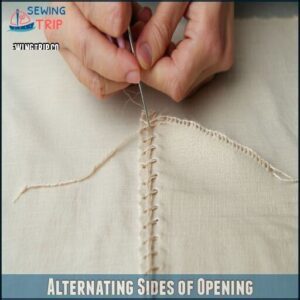
Alternating Sides of Opening
While sewing with the slip stitch, alternating sides of the opening works much like lacing up shoes.
After completing one side, move directly across to work the opposite edge.
For perfect results:
- Maintain consistent spacing of 1/8 to 1/4 inch between each stitch placement
- Grab only the folded edge of fabric, never piercing through to the visible side
- Vary your needle angle slightly for stronger seams
- Control thread tension as you work, keeping it firm but not puckering
This alternating pattern creates the invisible ladder effect that makes slip stitches so magical.
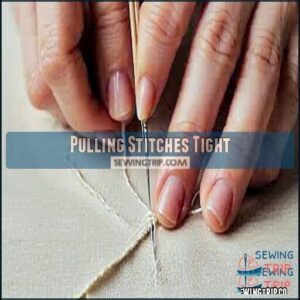
Pulling Stitches Tight
After alternating between sides, it’s time to perfect your tension control. Pulling stitches tight is where slip stitch magic happens!
When tightening each stitch:
- Pull with just enough force to close the gap—like zipping up a favorite jacket that fits just right
- Watch for fabric distortion—your goal is flat seams, not puckered ones
- Test seam strength with a gentle tug after every few stitches
Your hand sewing will look professional when you maintain consistent tension throughout. This prevents puckering while ensuring your invisible seams stay secure.
Applications of Slip Stitch
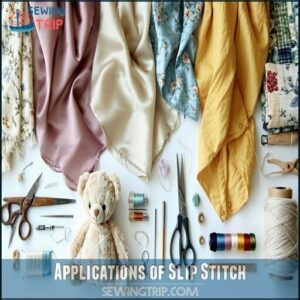
You’ll find slip stitches useful for hemming garments, finishing bias bindings, and creating invisible seams on pillows or stuffed animals.
This versatile technique also works perfectly for attaching delicate trims, closing linings in jackets, and repairing upholstery where machine stitching isn’t practical, making it a versatile technique for various applications, including invisible seams.
Hemming Garments
Now that you understand invisible stitching, let’s apply those skills to hemming garments.
When hemming with a slip stitch, you’ll achieve professional results that look machine-made. A slip stitch creates practically invisible finishes that won’t distract from your beautiful garment.
| Fabric Weight | Hem Size | Stitch Spacing |
|---|---|---|
| Light | 1/2 inch | 1/8 inch |
| Medium | 3/4 inch | 1/4 inch |
| Heavy | 1 inch | 3/8 inch |
You’ll want to match your thread precisely to your fabric color. For hemming stitch durability, keep your tension consistent—not too tight, not too loose. This hand sewing technique works for everything from pants to curtains, giving you clean hem types that last.
Finishing Bias Bindings
While hemming creates clean garment edges, bias bindings add a professional finishing touch to your projects.
Finishing bias bindings with a slip stitch creates that seamless, store-bought look everyone wants. Here’s how to perfect this technique:
- Position your bias binding over raw edges, matching binding edge options to your fabric type
- Create clean mitered corners by folding and pressing carefully before stitching
- Work the slip stitch through the binding attachment, catching only thread layers underneath
- Pull thread with even tension for curved binding areas to prevent puckering
The invisible finish you’ll achieve with hand sewing makes even decorative binding look professionally crafted. You can’t beat that satisfaction!
Joining Seams Invisibly
After perfecting your bias bindings, you’ll want to tackle invisible seams next.
When joining fabric edges invisibly, proper alignment is your secret weapon. Pin both edges carefully before you begin your slip stitch work.
| Seam Factor | Impact | Solution |
|---|---|---|
| Thread color | Visibility | Match exactly |
| Stitch length | Strength | Keep consistent |
| Tension | Appearance | Pull gently |
Catch just 1-2 threads from each fabric edge for that perfectly discreet hand-sewn closure that nobody will notice, using a technique that requires gentle tension.
Tips for Mastering Slip Stitch
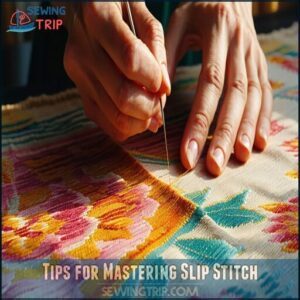
You’ll master the slip stitch faster when you focus on even tension and careful thread placement.
Practice keeping your stitches small and consistent, grabbing just a few threads with each pass, and you’ll soon create seams that seem to disappear like magic.
Maintaining Even Tension
Behind every perfect slip stitch lies the secret of even tension. When hand sewing, your thread’s tightness determines whether seams lie flat or pucker awkwardly. Pull each stitch with consistent force—not too tight, not too slack.
- Hold fabric firmly without stretching to maintain stitch consistency
- Check your work every few stitches to avoid puckering
- Keep thread slack minimal between stitches for a clean look
- Place your knots strategically inside folds where they won’t show
Your fingers will develop muscle memory with practice. Soon you’ll feel when the tension is just right, creating truly invisible seams every time.
Controlling Thread Length
Measure your thread carefully to master the slip stitch technique. You’ll need just enough length to work comfortably without fighting tangles.
The ideal length depends on your project size and re-threading preferences.
| Project Size | Ideal Length | Thread Waste | Re-threading Needs |
|---|---|---|---|
| Small (under 6") | 18 inches | Minimal | Low |
| Medium (6-12") | 24 inches | Moderate | Medium |
| Large (12-24") | 30 inches | Higher | Medium |
| Extra Large | Multiple shorter threads | Varies | High |
For beginners, start with shorter lengths (18-24 inches) to avoid frustrating tangles while practicing your slip stitch technique. This approach will help you develop a comfortable working length that suits your project size and re-threading preferences.
Avoiding Visible Stitches
To master invisible stitches, focus on precision and subtlety. Start with a thread color that blends seamlessly with your fabric—this guarantees your work stays hidden.
Use steady stitch tension to avoid puckering and keep the fabric smooth.
Follow these steps:
- Catch just 1-2 threads of fabric for a delicate, invisible stitch.
- Place knots discreetly within folds for clean knot placement.
- Work in good lighting conditions to spot uneven stitches.
- Practice with a slip stitch tutorial to refine technique.
Common Slip Stitch Mistakes
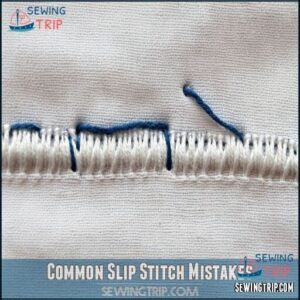
It’s easy to make a few slip-ups when learning the slip stitch, but most mistakes are simple to fix.
By spotting uneven stitches or loose threads early, you’ll save yourself time and frustration down the line.
Uneven or Loose Stitches
Uneven or loose stitches can ruin your slip stitch project, but fixing them is easier than you think.
Wondering where to start? Focus on tension, spacing, and tools.
- Tension Issues: Pull the thread evenly—too tight causes fabric pulling, while too loose risks knot slippage and weak seams.
- Stitch Spacing: Keep stitches consistent. Uneven gaps can make your hand sewing look messy and less durable.
- Thread Choice & Needle Size: Match your thread and needle to the fabric. A proper setup guarantees smoother sewing stitches and better control.
Practice these sewing tutorials, and your slip stitch technique will shine!
The slip stitch joins crochet pieces securely.
Troubleshooting and Fixing Errors
Got Stitch Looseness or Fabric Pucker? No problem! Here’s how to fix common slip stitch errors:
- Fabric Pucker: Carefully snip out sewing stitches, smooth the fabric flat, and re-stitch with steady tension. It keeps alignment issues in check.
- Knot Visibility: Hide knots by starting inside the fold and redoing hand sewing discreetly.
- Thread Breaks: Switch to high-quality thread and guarantee even spacing for durable sewing techniques.
With patience, your slip stitch will look flawless!
Preventing Future Mistakes
Avoid future slip stitch headaches with proper preparation and consistent practice.
Cut thread no longer than your forearm—longer threads tangle faster than a cat with yarn! Press folds neatly for crisp seams, and use fine needles for delicate fabrics.
Review stitches as you sew to catch errors early.
Here’s a quick reference:
| Tip | Why It Helps | Common Mistake Fixed |
|---|---|---|
| Shorter thread | Prevents tangles | Knots and snags |
| Press fabric | Guarantees even folds | Uneven seams |
| Fine needles | Protects delicate fabrics | Snagging or puckering |
| Review stitches | Spots errors early | Loose or uneven stitching |
| Consistent tension | Keeps stitches uniform | Visible or uneven seams |
Follow this hand sewing guide for flawless results every time!
Working With Different Fabrics
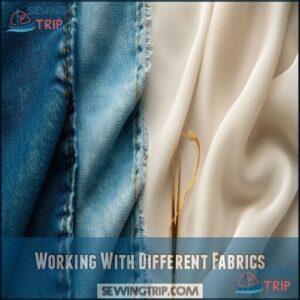
Working with different fabrics requires adjusting your technique to match the material’s texture and weight.
Whether you’re handling delicate silk or thick denim, understanding fabric behavior guarantees your slip stitches stay neat and invisible, which is crucial for maintaining the overall quality of your work, especially when invisible stitches are required.
Delicate Fabrics
Working with delicate fabrics like silk, chiffon, or lace can feel like threading a needle in the dark—tricky but rewarding. Use a fine hand sewing needle (size 9-11) and lightweight silk thread to keep your slip stitch invisible and fabric intact. Press folds first; they act like your GPS for neat stitching. Many tailors prefer to use high quality thread for delicate projects.
For a flawless finish:
- Ease up on tension to maintain the fabric’s drape, especially for chiffon hemming.
- Stick to short stitches to avoid puckering or tearing.
- Test on scraps before stitching your project.
- Fold seams tightly for cleaner, more durable results.
Whether it’s satin bindings or lace applications, patience is key. Take your time, and your invisible stitch will look professionally done.
Thick or Heavy Fabrics
Tackling thick or heavy fabrics like denim or canvas requires patience and precision. Start with the right tools: a heavy-duty hand sewing needle (size 14-16) and strong thread for durability.
Keep your slip stitch spacing tight—about 1/4 inch apart—for secure seams. Double your thread to handle the extra weight, and press the fabric layers beforehand to align the seam allowance neatly.
This technique is also ideal for achieving discreet, fine seams on various projects.
- Pro Tip: Stabilize fabric layers with pins or basting tape to prevent shifting as you sew. It’s a small step that saves big headaches!
Stretchy Fabrics
Stretchy fabrics, like jersey or spandex, can be tricky, but with the right approach, they’re manageable. Start with a ballpoint hand sewing needle—it’s your best friend for preventing snags.
For perfect slip stitch results, focus on Tension Control. Keep the thread slightly loose to maintain Stitch Elasticity and avoid puckering. Use a polyester thread for durability, as it stretches with the fabric.
To prevent skipped stitches, consider using stretch needles designed for these materials. Wider stitch lengths are key to preventing breakage, especially when sewing basics like hems or linings.
Try the “pinch and stitch” technique: fold the fabric edges neatly, secure with pins, and sew small, even stitches. Practice on scraps first—it’s a lifesaver for sewing beginners mastering stretchy fabrics. Patience makes all the difference!
Finishing Your Slip Stitch Project
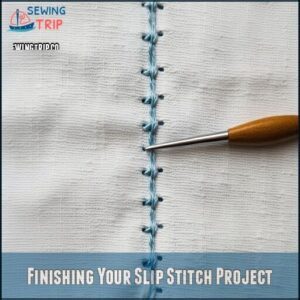
You’re almost done, but finishing strong is key to a polished look.
Secure the final knot, trim the excess thread, and inspect your work to confirm those seams stay invisible.
Securing Final Knot
Securing the final knot is like tying a bow on your slip stitch masterpiece—it keeps everything intact.
- Make a small loop near the seam.
- Slide the needle through the loop twice.
- Pull snugly to lock the knot.
- Repeat for extra strength.
- Tuck the knot under the fold, hiding thread for a flawless finish.
These steps ensure that your knot is secure and your work looks professional.
Trimming Excess Thread
After tying your knot, grab sharp scissors for precise thread trimming.
Leave a small thread tail length—about 1/8 inch—for knot security. Snip carefully; cutting too close risks unraveling.
For delicate fabrics, tuck the thread ends into folds to prevent fraying. Choose quality trimming tools for clean cuts.
Thread trimming is a simple sewing technique for beginners that guarantees a polished, professional slip stitch finish.
Inspecting and Refining Work
Once you’ve trimmed your thread, it’s time to fine-tune your handiwork.
For a polished finish, inspect your slip stitch closely. Lightly run your fingers along the seam to spot bumps or uneven edges. Angle the fabric under good lighting to check stitch visibility and seam alignment. A gentle tug will test stitch tension, revealing weak spots or fabric distortion.
Don’t skip this final step—it’s where your hard work shines. A durable closure is achievable by using the slip stitch technique.
Here’s a handy checklist for refining your slip stitch:
- Feel for irregularities or gaps in stitches
- Ensure seam alignment looks clean and smooth
- Test stitch tension by tugging gently
- Examine stitches for consistency and invisibility
- Snip stray thread ends for a neat overall appearance
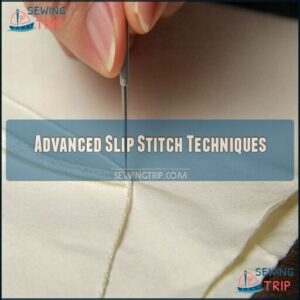
Advanced Slip Stitch Techniques
You can take your slip stitch skills to the next level by adjusting stitch length and mastering repairs for tricky seams.
These techniques guarantee stronger, nearly invisible finishes that make your projects appear professionally done.
Adapting Stitch Length
Adapting your slip stitch length is key to balancing fabric thickness, desired strength, and the aesthetic impact of your project.
For delicate fabrics like silk, aim for tiny stitches (1-2mm) with gentle tension to keep them invisible. Thicker fabrics, such as wool or denim, need longer stitches (3-5mm) and firmer tension for durability.
On curves, adjust stitch size slightly to maintain smooth seams and reduce puckering. Uneven gaps can ruin the look, so keep spacing consistent.
Practice on scraps first—this is one of those sewing techniques for beginners that rewards patience and precision. Small tweaks make all the difference!
Using Slip Stitch for Repairs
Slip stitching is a lifesaver for sewing repairs, especially when you want invisible mending that doesn’t scream, “I fixed this!” Whether you’re tackling upholstery repair or mending clothes, this technique works wonders for delicate repairs and seam reinforcement.
Here’s how you can use slip stitch for seamless fixes:
- Patch small holes in sweaters, blankets, or other fabrics.
- Reinforce seams on jackets, pants, or dresses without bulky stitching.
- Close linings on garments or bags for a polished finish.
- Attach trims or appliqués securely to decorative edges.
- Fix upholstery tears discreetly, keeping furniture neat.
Keep stitches tiny and thread tension even. Matching thread is key for invisible results. With a little patience, your seam repair will look so flawless, no one will notice!
Creating Invisible Seams
Creating invisible seams with a slip stitch is surprisingly simple when you focus on precision.
Start by folding the fabric edges neatly, guaranteeing they align perfectly. Use small, consistent stitches—about 1/8-inch apart—to create seamless closures. Alternate between folds, mimicking a ladder pattern, and keep your thread hidden by matching it to your fabric.
Maintain steady tension control to avoid puckering. A hidden knot at the start guarantees durability, while pulling the thread snugly blends the seam effortlessly.
This hand stitching technique is ideal for sewing beginners mastering invisible seams or anyone refining sewing techniques for beginners. Practice makes perfect—your seams will look professional in no time!
Frequently Asked Questions (FAQs)
What is a slip stitch in sewing?
Think of a slip stitch as the ninja of sewing—it’s nearly invisible.
You use it to discreetly close seams, hems, or linings by hand, joining fabric edges without showing stitches on the outside.
How to turn the fabric for sewing a slip stitch?
Fold the fabric edges inward along the seam line, pressing them neatly with your fingers or an iron.
Pin or baste the folds to keep everything aligned.
This creates a clean edge for discreet stitching.
What is a hand sewing Slipstitch?
A slip stitch is a hand-sewing technique that creates nearly invisible seams.
It’s perfect for hemming, closing linings, or repairing gaps.
By sewing discreetly between folds, you’ll achieve a clean, professional finish every time, using the slip stitch technique.
How do you use a slip stitch?
Slip stitching is like sewing magic.
You discreetly join fabric by picking up tiny threads from each fold, creating an invisible seam.
Keep stitches small, even, and secure the end with a hidden knot.
What is the purpose of a slip stitch in sewing?
A slip stitch lets you create nearly invisible seams, perfect for hemming, closing gaps, or attaching linings.
It’s your go-to for delicate, hand-sewn finishes where a sewing machine just can’t sneak in.
What is the difference between a ladder stitch and a slip stitch?
Ever wonder if ladder and slip stitches are the same?
They’re identical techniques!
Both names describe the same hand-sewing method for creating nearly invisible seams, perfect for hemming, closing gaps, or finishing delicate projects.
How do you slip stitch for beginners?
Start by threading a needle with doubled thread and knotting the end.
Hide the knot inside the fabric fold, then stitch small, even loops between folds.
Keep stitches tight and invisible for a clean finish.
How to do invisible slip stitch sewing?
To sew an invisible slip stitch, hide the knot inside the fabric fold.
Catch a few threads from one side, then the other, keeping stitches tiny and even.
Secure with a hidden knot to finish.
What is the difference between slip stitch and fell stitch?
A slip stitch creates nearly invisible seams by alternating between folded edges, while a fell stitch secures overlapping fabric layers with visible diagonal stitches.
Slip stitches are discreet; fell stitches add strength and decorative detail.
How do you sew a slip stitch?
Imagine stitching so seamlessly it’s like magic.
Fold your fabric edges, thread your needle, and anchor the knot inside the fold.
Pick up tiny threads alternately from each side, keeping stitches small and invisible.
Conclusion
Mastering how to sew a slip stitch by hand combines simplicity and precision.
It’s quick to learn but takes practice to perfect. Small, even stitches and gentle tension make the seam nearly invisible, giving your projects a polished, professional finish.
Whether you’re hemming pants, repairing seams, or tackling tricky fabrics, this technique is a game-changer.
Remember, the magic is in the details—so slow down, stay consistent, and enjoy the satisfaction of flawless, hidden stitching.
- https://www.moodfabrics.com/blog/how-to-handsew-a-slipstitch/
- https://www.leathercraftmasterclass.com/post/the-ultimate-guide-to-choosing-the-right-thread-size-for-hand-stitching-leather
- https://inspiredtosew.com/blogs/sewing-essentials-getting-started/how-to-sew-thick-or-slippery-fabric
- https://www.reddit.com/r/sewhelp/comments/12fvc3g/struggling_to_sew_through_thick_fabric/
- https://www.kheyo.com/mastering-the-art-how-do-you-slip-stitch-a-thread/

