This site is supported by our readers. We may earn a commission, at no cost to you, if you purchase through links.
Use the right needle for your fabric type; a heavy denim needle on silk won’t end well!
Adjust the presser foot pressure so it glides, not stomps.
Pair your thread to your fabric like peanut butter and jelly, they should complement each other perfectly.
Consider using a walking foot for stretchy or slippery materials.
And resist the urge to yank your fabric through; gentle hands win the race.
Just a stitch in time can save you from those pesky puckers!
Curious about more tips?
Table Of Contents
- Key Takeaways
- Causes of Fabric Puckering
- Fabric-Specific Puckering Issues
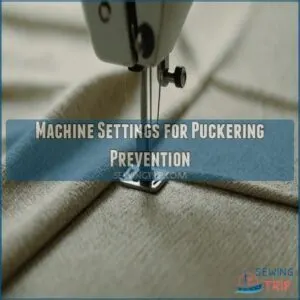
- Machine Settings for Puckering Prevention
- Fabric Preparation Techniques for Puckering Prevention
- Sewing Machine Setup for Puckering Prevention
- Solutions for Seam Puckering
- Fixing Seam Puckering Issues
- Common Puckering Mistakes and Troubleshooting
- Advanced Puckering Prevention Techniques
- Maintaining a Pucker-Free Sewing Experience
- Frequently Asked Questions (FAQs)
- Conclusion
Key Takeaways
- Adjust your thread tension carefully; it shouldn’t be too tight or too loose to prevent puckering.
- Choose the right needle and thread type for your fabric; mismatches can lead to puckering seams.
- Modify the presser foot pressure to suit your fabric’s thickness; too much or too little pressure can cause issues.
- Use a walking foot for slippery or stretchy fabrics to maintain smooth, consistent stitches without puckering.
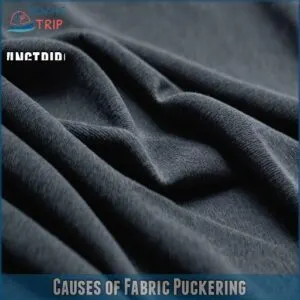
Causes of Fabric Puckering
Ever felt like your fabric’s throwing a tantrum during sewing?
You’re not alone – fabric puckering can turn your smooth seams into a wrinkly mess, but understanding its causes is the first step to taming those unruly stitches.
Unbalanced Thread Tension
Countless sewists have fallen victim to the dreaded fabric pucker caused by unbalanced thread tension.
It’s like a tug-of-war between your top and bottom threads!
To keep your seams smooth, try these tension-taming tricks:
- Adjust your top thread tension dial gradually
- Check your bobbin tension with the "drop test"
- Use the same thread type in both top and bobbin
- Clean your tension discs regularly
- Consult your machine’s tension chart for guidance
Remember, finding the perfect balance is key to pucker-free sewing!
Incorrect Needle Size or Type
Now, let’s talk about needle size and type.
You might think all needles are created equal, but that’s a recipe for disaster!
Using the wrong needle can turn your smooth seams into a puckered mess faster than you can say "oops!"
Here’s a quick guide to help you match your needle to your fabric:
| Fabric Type | Needle Size | Emotional Impact |
|---|---|---|
| Delicate Chiffon | 60/8 | Confidence Boost |
| Sturdy Denim | 100/16 | Empowerment |
| Stretchy Knits | Ballpoint 75/11 | Relief |
| Silky Satin | Microtex 70/10 | Excitement |
Remember, the right needle is your secret weapon against puckering!
Improper Presser Foot Pressure
You’ve got the right needle, but your fabric’s still dancing the pucker polka? Let’s talk presser foot pressure! It’s like Goldilocks – too much squishes delicate fabrics, too little lets them slip and slide. Adjust that dial for a perfect fit.
Light fabrics need a gentle touch, while heavy ones crave more pressure.
Remember, your sewing machine’s not one-size-fits-all. Experiment and find your fabric’s sweet spot for smooth, pucker-free seams.
Mismatched Thread and Fabric Types
Thread-fabric mismatch can turn your sewing project into a pucker party.
When you pair heavy thread with lightweight fabric, it’s like trying to fit a square peg in a round hole.
To find the right thread for your project, consider the different types of thread choosing the right thread.
Your stitches might look fine at first, but they’ll soon pucker up like a puckish
Fabric-Specific Puckering Issues
You’ll face unique puckering challenges with different fabrics, from slippery silks to stubborn denim.
Let’s tackle these fabric-specific issues head-on, so you can say goodbye to those pesky puckers and hello to smooth, professional-looking seams.
Lightweight Fabrics
Gossamer-thin fabrics can be as tricky as catching butterflies!
But don’t let chiffon, silk, or organza ruffle your feathers.
Here’s how to tame these delicate beauties:
- Use tissue paper as a support while stitching
- Opt for smaller needles (size 60/8 or 70/10) to prevent holes
- To prevent thread breakage and tangling, check your machine’s thread placement and tension settings by following guidelines on mastering thread tension. Adjust thread tension to a lighter setting
With these tricks up your sleeve, you’ll be stitching smooth seams on lightweight fabrics faster than you can say "silk charmeuse!
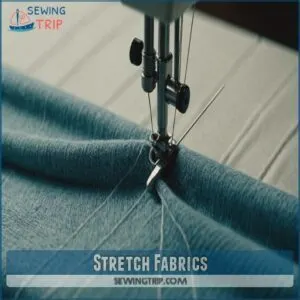
Stretch Fabrics
Stretchy fabrics can be as slippery as a greased pig at a county fair!
To tame these tricky materials, opt for a Ballpoint needles online or stretch needle.
Use a narrow zigzag or stretch stitch to allow for movement.
Adjust your thread tension slightly looser and consider a walking foot attachment.
Remember, knits come in various weights, so test your settings on
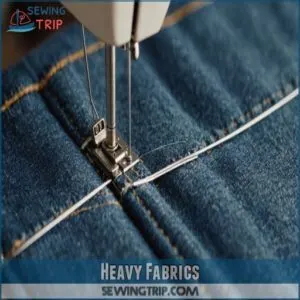
Heavy Fabrics
Heavy fabrics like denim or wool can be tough cookies.
You’ll need to beef up your game to avoid puckering.
Crank up your tension a notch and grab a beefier needle – size 16 or 18 should do the trick.
Keep your stitches long and steady, and don’t skimp on the presser foot pressure.
Remember, these fabrics are like stubborn mules – they need a firm hand and plenty of patience to keep them in line.
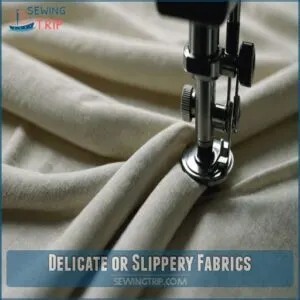
Delicate or Slippery Fabrics
Taming delicate or slippery fabrics can feel like wrestling with a greased pig!
But don’t worry, you’ve got this.
To keep these tricky materials in line, using a zig-zag stitch with reduced stitch length can also help prevent puckering on stretchy fabrics.
Use tissue paper as a stabilizer, try a walking foot attachment, opt for a smaller needle size, and
Bias-Cut Fabrics
Bias-cut fabrics are like wild horses – beautiful but tricky to tame.
You’ll want to handle these beauties with kid gloves.
Use a walking foot to keep layers in check, and consider adding temporary stiffness with spray starch.
Pin generously and sew with a light touch.
Remember, patience is your secret weapon here.
With these bias-cut sewing tips, you’ll be draping like a pro in no time!
Machine Settings for Puckering Prevention
You’re about to become the boss of your sewing machine’s settings.
With a few tweaks, you’ll kiss those pesky puckers goodbye.
And create seams smoother than a fresh jar of peanut butter.
Thread Tension Adjustment
Thread tension can be a real tightrope walk, but don’t sweat it! You’ve got this. Here’s your game plan for smooth sailing:
- Start with a balanced tension, then tweak as needed
- Test on scrap fabric before diving into your project
- Adjust in small increments – patience is key
Remember, different fabrics sing different tunes. Light fabrics prefer looser tension, while heavy ones like it snug. It’s all about finding that sweet spot for pucker-free perfection!
Needle Selection for Fabric Type
For smooth sewing, picking the right needle is like finding your fabric’s perfect dance partner.
You’ll want to match needle sizes to fabric weight: lighter fabrics need smaller needles, while heavier ones crave larger sizes.
Don’t forget about needle types! Ballpoint for knits, sharp for wovens.
Keep your needles fresh and sharp – they’re the unsung heroes of pucker-free stitching.
Trust me, your fabric will thank you!
Presser Foot Pressure Adjustment
Imagine your presser foot as a gentle guide, not a strict taskmaster.
You’ll want to adjust its pressure based on your fabric’s personality, and finding the right setting can make all the difference.
For delicate or slippery fabrics, ease up on the pressure to prevent puckering.
Heavier fabrics? Crank it up.
As seen in tutorials on how to adjust presser foot pressure janome.
Stitch Length and Width Adjustment
Just like Goldilocks, you’ll need to find the "just right" stitch length and width for your fabric.
Adjust your stitch length based on fabric weight: shorter for delicate fabrics, longer for heavier ones.
To minimize puckering, consider using specialized products like Stitch Length Puckering Solutions.
For width, stick to narrow stitches on stretchy fabrics to
Fabric Preparation Techniques for Puckering Prevention
You’ll save yourself a world of sewing headaches by prepping your fabric right.
From pre-washing to proper cutting, these simple steps are your secret weapons against those pesky puckers that can turn your project from fab to drab.
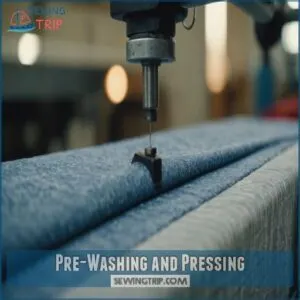
Pre-Washing and Pressing
You’ve got your machine settings down pat, but don’t forget the fabric prep.
Pre-washing and pressing are your secret weapons against puckering. Think of it as giving your fabric a spa day before the big show.
Here’s why it’s a game-changer:
- Pre-washing kicks fabric shrinkage to the curb
- Pressing irons out wrinkles and sets the stage for smooth sewing
- Different fabrics need different TLC – cotton loves a hot iron, while silk
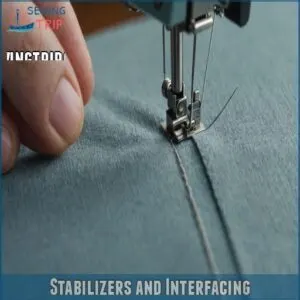
Stabilizers and Interfacing
The fabric-whisperer’s secret weapon? Stabilizers and interfacing! These dynamic duos work wonders to prevent puckering. They’re like a supportive friend for your fabric, giving it structure and stability.
Here’s a quick guide to help you choose the right one:
| Type | Best For | Application Method |
|---|---|---|
| Fusible | Non-stretch fabrics | Iron-on |
| Sew-in | Delicate or heat-sensitive fabrics | Machine or hand-stitched |
| Tear-away | Temporary support | Remove after stitching |
| Cut-away | Permanent reinforcement | Trim excess after stitching |
| Water-soluble | Delicate fabrics | Dissolves in water |
Remember, the right stabilizer can make or break your project!
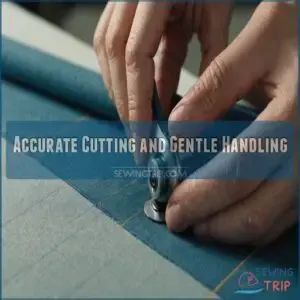
Accurate Cutting and Gentle Handling
Now that you’ve got your stabilizers in place, let’s talk about cutting and handling your fabric.
Think of it like prepping ingredients for a gourmet meal – precision is key!
Use sharp rotary cutters to slice along the grainlines, and treat that bias grain like gold.
When pattern matching, line up those prints like a pro.
Remember, gentle hands win the race – no tugging or stretching allowed!
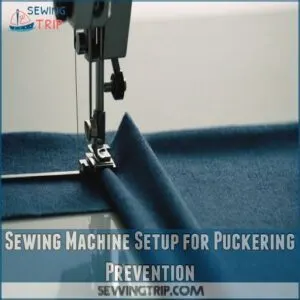
Sewing Machine Setup for Puckering Prevention
You’ve prepped your fabric, but your sewing machine‘s still a wild card in the puckering game.
Let’s tame that beast with some quick setup tricks that’ll have you stitching smoother than a buttered-up bobsled track.
Proper Threading and Thread Take-Up Lever
Ready to tackle puckering head-on?
Let’s set up your sewing machine like a pro, which may require a specialty Sewing Machine Needle.
First things first: thread it right.
Check your manual if you’re unsure – it’s your best friend here.
Make sure the thread take-up lever‘s at its highest point before threading.
It’s like the conductor of your
Thread Tension Adjustment and Needle Condition
Got your threading sorted? Great! Let’s tackle tension and needles.
Think of thread tension like Goldilocks – not too tight, not too loose. Adjust it for your fabric weight.
As for needles, they’re your fabric’s BFF or worst enemy. Keep ’em sharp and swap ’em often.
A dull needle’s like trying to cut bread with a spoon – frustrating and messy. Remember, happy needles mean happy seams!
Bobbin and Fabric Thread Matching
While it might seem like a small detail, matching your bobbin thread to your fabric is key to smooth, pucker-free seams.
To prevent issues like bobbin thread bunching up, you should check your bobbin’s thread tension and threading. To make sure you get the best results, choose a bobbin thread that matches your fabric type and sewing machine model, such as a bobbin designed for Baby Lock machines.
Think of it as finding the perfect dance partner for your fabric.
Solutions for Seam Puckering
You’ve got puckers in your seams?
Don’t worry, we’ve all been there!
Let’s tackle those pesky fabric wrinkles with some tried-and-true solutions that’ll have your seams looking smooth as butter in no time.
Fabric Feeding Techniques
Now that your machine’s all set, let’s talk about feeding your fabric smoothly.
Ever feel like you’re wrestling with your fabric?
You’re not alone!
The key is to let your machine do the work.
Don’t push or pull – just guide gently.
Your feed dogs are like tiny fabric teeth, moving everything along.
For tricky fabrics, a walking foot can be a game-changer, keeping layers in sync.
Thread Tension Adjustment and Matching Fabric Densities
Thread tension can be a real tightrope walk!
You’ll want to adjust it based on your fabric’s density.
For lightweight fabrics, loosen up a bit.
Heavier fabrics? Tighten that tension.
Match your thread to your fabric’s weight too.
It’s like finding the perfect dance partner – when they’re in sync, your seams will be smooth as butter.
Don’t forget to test on scraps first!
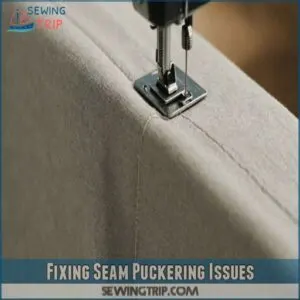
Fixing Seam Puckering Issues
You’ve got pesky puckers in your seams? Don’t panic – we’ve some quick fixes to smooth things out.
From ripping and re-sewing to pressing and using seam finishes, you’ll find the right technique to rescue your project and achieve those flawless, professional-looking seams.
Ripping and Re-Sewing
You’ve hit a snag with puckered seams. Don’t sweat it—we’ve all been there. Let’s fix it together.
Grab your seam ripper and let’s get to work.
Here’s your game plan:
- Carefully remove stitches
- Re-adjust fabric layers
- Pin strategically to prevent shifting
- Re-sew with adjusted settings
Remember, patience is key. Take it slow, and you’ll have those smooth seams in no time.
It’s like giving your project a do-over—embrace the chance to perfect your craft!
Pressing and Seam Rippers
Sometimes, even after ripping out a seam, you’ll need to press out those stubborn puckers.
Grab your trusty iron and seam ripper – they’re your dynamic duo for smoothing things out.
Here’s a quick guide to help you tackle those pesky puckers:
| Tool | Use | Pro Tip |
|---|---|---|
| Seam Ripper | Remove stitches | Work slowly to avoid fabric damage |
| Iron | Press out puckers | Use appropriate heat for fabric type |
| Pressing Cloth | Protect delicate fabrics | Prevents shine and scorching |
Remember, patience is key when fixing fabric puckering.
You’ve got this!
Steam Iron and Seam Finishes
A steam iron can be your secret weapon against stubborn puckers.
Set the right temperature for your fabric and let the steam work its magic.
As you press, focus on the seam allowance, gently stretching the fabric.
Don’t forget about seam finishes – they’re not just pretty, they help prevent puckering too.
Try French seams or zigzag stitches to keep those edges smooth and pucker-free.
Common Puckering Mistakes and Troubleshooting
You’ve mastered the basics, but those pesky puckers still pop up now and then.
Let’s tackle the most common culprits behind fabric puckering and arm you with quick fixes to keep your seams smooth and professional-looking.
Unbalanced Thread Tension and Incorrect Needle Size
Balancing act gone wrong? You’re not alone! Uneven thread tension and wrong needle size are like kryptonite for smooth seams.
Check your tension dial – it should be around 4 for most fabrics.
For needles, remember: light fabrics need thin needles, heavy fabrics need thick ones.
To master thread tension and prevent issues like loose stitches, overly tight stitches, or thread breakage, it’s essential to understand when to adjust sewing machine tension. Keep a needle size guide handy and adjust your thread tension for each project. You’ll be stitching like a pro in no time!
Improper Presser Foot Pressure and Mismatched Thread
Your fabric puckering? Check presser foot pressure and thread matching. Both can cause a ruckus if not set right.
Try these quick fixes:
- Adjust Presser Foot Pressure: Getting a handle on presser foot pressure control is super important for smooth fabric feeding and perfect stitches. Too tight or loose? Tweak it.
- Match Threads: Use same weight for top and bobbin.
- Test on Scrap Fabric: Always wise.
- Regular Maintenance: Keeps sewing machine smiling.
Fabric Type and Sewing Machine Malfunctions
So, you’ve mastered presser foot pressure and thread matching? Great! Now, let’s talk about machine compatibility.
Different fabrics need different needles and stitch lengths.
Heavy fabrics? You might need a heavier needle and a stronger stitch.
Lightweight fabrics? Go for a finer needle and shorter stitch length.
Ignoring this? Expect puckering!
Your machine’s feed dogs also play a big part—make sure they’re clean and working smoothly.
Happy sewing!
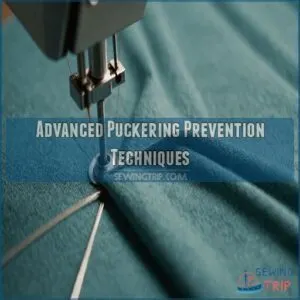
Advanced Puckering Prevention Techniques
You’ve tackled the basics, now let’s outsmart those pesky puckers with some advanced techniques.
Ever thought of using a walking foot or applying a spritz of spray starch?
These tricks might just save your sanity—and your seams!
Using Walking Foot Attachments
Ever wish you had a secret weapon against fabric puckering?
A walking foot might be it!
It’s fantastic for keeping slippery fabrics in line and perfect for knits.
Here’s how it helps:
- Steady feeding: Moves fabric evenly.
- Variety: Different types for unique needs.
- Ease: Simplifies sewing tricky textures.
Applying Spray Starch and Water-Soluble Stabilizers
Stability is key when sewing trickier fabrics.
Try spray starch to add structure without stiffness.
For trickier fabrics, water-soluble stabilizers work wonders—like a trusty umbrella on a rainy day.
You can use a wash-away stabilizer to prevent fabric puckering and guarantee design precision, especially for delicate fabrics or intricate embroidery patterns.
Here’s how they compare:
| Application Technique | Pros and Cons |
|---|---|
| Spray Starch | Easy but temporary |
| Water-Soluble Stabilizers | Versatile, takes more effort |
Use these techniques to keep your seams smooth and puckering-free!
Implementing Tissue Paper Support
After adding starch or water-soluble stabilizers, try using tissue paper as the next puckering prevention method.
Slip it under lightweight or delicate fabrics like chiffon to help with seam stability.
This works like a charm by preventing bunching.
Once sewn, simply tear away the tissue.
You’re left with smooth, professional-looking seams without much effort—just like magic!
Maintaining a Pucker-Free Sewing Experience
To keep your sewing projects free of puckers, make sure to regularly maintain your sewing machine and replace needles when needed.
With a little patience and attention to detail, you’ll have smooth seams that would make even your grandmother proud!
Regular Machine Maintenance and Needle Replacement
Jumping from using spray starch or stabilizers to regular sewing machine maintenance isn’t a leap.
Regular maintenance, such as adjusting your sewing machine’s feed dog height and alignment, can significantly reduce fabric puckering issues. You’d be amazed how a simple sewing machine cleaning and needle replacement can keep fabric puckering at bay.
Swap out dull needles regularly to match the needle gauge with your project.
Keep up with a lubrication schedule, and you’re golden!
Practicing Patience and Attention to Detail
Many sewists struggle with fabric puckering.
Slow stitching and mindful sewing are your secret weapons!
Focus on your seams; careful cutting helps.
Don’t rush; practice makes perfect.
Even thread tension is key.
Proper fabric preparation prevents many issues.
Remember, patience and attention to detail are important for a pucker-free project.
You’ve got this!
Frequently Asked Questions (FAQs)
How do you stop a fabric from Puckering?
Imagine your fabric flowing smoothly like a gentle river, untroubled by pesky puckers.
Use the right needle and thread combo, tweak the tension, and handle fabrics gently.
Always test your settings to keep everything stable and wrinkle-free.
How do I Stop my sewing machine from Puckering?
Tackle fabric puckering by adjusting your machine’s tension, choosing the right needle, and using matching thread weight.
Also, make sure that the fabric feeds evenly—no tugging!
A walking foot can help keep things silky smooth.
Happy sewing!
How do I avoid puckering seams?
To avoid puckering seams, balance your thread tension, choose the right needle, and adjust presser foot pressure.
Pre-wash fabrics and use stabilizers for slippery materials.
Let your sewing machine guide the fabric naturally.
Why is my sewing machine Puckering?
Your sewing machine puckers like a cat’s tongue on a smooth surface when the thread tension’s off, often due to issues like bottom thread bunching, needles are dull, or the fabric’s wrong.
Check machine settings, needle type, and fabric-thread match to smooth things out.
How do you stop a sewing needle from Puckering?
It’s not the needle, it’s the fabric! Check your tension, needle type, and presser foot pressure. Pre-wash your fabric, too. Master these, and puckering’s a thing of the past!
Can fabric pucker if you pull it through a sewing machine?
Pulling fabric through a sewing machine can definitely cause puckering.
Try letting the feed dogs do their job and avoid tugging.
Picture it like letting a puppy walk itself—no pulling, just gentle guidance!
How to stop fabric from puckering when sewing?
Start by adjusting thread tension, choosing the right needle and thread, and using a stable stitch.
Pre-wash and press your fabric, and let your machine feed the fabric naturally.
Avoid stretching it, and check settings.
How to sew without puckering?
Nail sewing without puckering by balancing thread tension and choosing the right needle.
Use proper fabric stabilizers.
Adjust presser foot pressure.
Pre-wash your fabric.
These steps will help you achieve smooth, even stitches, like a pro!
How do you keep fabric straight when sewing?
Keep your eyes peeled and your hands steady!
Use a seam guide or marked tape to stay straight.
Gently guide fabric without pulling.
Practice with scraps to perfect your technique.
Soon, sewing will feel like second nature.
How do you keep fabric stretchy when sewing?
Use a ballpoint needle and stretch stitch or narrow zigzag to keep fabric stretchy.
Adjust thread tension and use matching thread.
A walking foot helps feed fabric evenly, preventing distortion.
These tips keep your fabric flexible.
How does humidity affect fabric puckering?
Humidity can really mess with fabric, causing puckering by swelling fibers and changing tension.
Imagine trying to sew a marshmallow!
Control your sewing environment with dehumidifiers to keep your fabric smooth and wrinkle-free.
Can thread color influence puckering severity?
Nope, thread color doesn’t directly cause puckering.
It’s all about tension, needle type, and fabric.
Matching thread weight to your fabric is key!
Think of it like this: the right tools for the right job!
Do fabric softeners reduce puckering risk?
Fabric softeners might slightly help by making the fabric smoother, reducing friction during stitching, which can lessen puckering.
While not a magic fix, they could be worth a try for easing those pesky wrinkles.
Are certain sewing patterns more prone to puckering?
Did you know around 70% of sewists encounter fabric puckering?
Curved seams and patterns with bias cuts often cause more puckering issues.
Use proper tension, needles, and techniques suited to each fabric type to combat this.
How does sewing speed impact puckering?
Sewing speed affects puckering; going too fast can cause fabric bunching since it limits feed dog control and stitch consistency.
Slower speeds allow the machine to manage fabric smoothly, reducing tension issues and seam puckering.
Conclusion
Achieving pucker-free seams might feel like threading a needle on a roller coaster, but you’ve got this!
With these handy tips, you can prevent fabric puckering while sewing by mastering tension, choosing the right needle, and treating each fabric with care.
Remember, smooth sewing is all about balance and patience.
So take a deep breath, tweak those settings, and let your creativity flow.
The perfect seam is just a stitch away—happy sewing!

