This site is supported by our readers. We may earn a commission, at no cost to you, if you purchase through links.

Start by cleaning out lint and dust, especially around the bobbin case. It’s like removing cobwebs from a tiny attic!
Regularly oil the moving parts, but don’t overdo it, or your machine might start its own oil slick.
Keep your sewing area organized to prevent a thread jungle.
Replace needles after every project to avoid nasty surprises like broken tips.
And here’s a pro tip: read your machine’s manual; it’s loaded with secrets for perfect stitches.
Curious for more insights? Keep those creativity engines running!
Table Of Contents
- Key Takeaways
- Daily Sewing Machine Care
- Weekly Maintenance Tasks
- Monthly Sewing Machine Care
- Tension Adjustment and Troubleshooting
- Essential Tools for Maintenance
- Preparing for Maintenance
- Oiling Your Sewing Machine
- Needle Care and Replacement
- Preventing Common Problems
- Creating a Maintenance Routine
- Frequently Asked Questions (FAQs)
- Conclusion
Key Takeaways
- Regularly clean your machine, focusing on the bobbin case and feed dogs, to prevent jams and maintain stitch quality.
- To properly maintain your sewing machine, lubricating a sewing machine is crucial for its durability and peak performance with the right sewing machine oil type. Oil moving parts weekly with a specialized sewing machine oil to ensure smooth operation and extend your machine’s life.
- Replace your sewing machine needle after each project or when you notice skipped stitches or broken threads to maintain consistent stitch quality and prevent damage to your fabric.
- Develop a consistent maintenance schedule, including daily quick cleanings, weekly oiling, and monthly deep cleanings, to keep your machine running smoothly and prevent major problems.
Daily Sewing Machine Care
Starting your day with a little sewing machine TLC can make all the difference, ensuring it runs as smoothly as your favorite fabric.
A quick sweep to banish lint, a swipe to shine its exterior, and organizing your workspace can keep your machine (and you) humming happily all day.
Removing Lint and Dust
Imagine your sewing machine’s like a lint magnet.
Get rid of dust and lint for smooth sewing.
Make it a habit: Follow a thorough cleaning routine, like giving your sewing machine a mini spa day, to keep it running smoothly.
- Lint brush tips: Brush gently but thoroughly.
- Vacuuming machine: Suck up stubborn bits.
- Dust removal tools: Use canned air occasionally.
- Cleaning frequency: Try daily quick sweeps.
- Lint trap importance: Keep it clear, avoid jams.
Every sewing session gets easier!
Cleaning Bobbin Case Area
Got a stubborn thread jam?
Keep your sewing humming smoothly by cleaning the bobbin case area.
Grab a lint brush or vacuum attachment—Bobbin case cleaning tools are a blessing here.
Regular lint removal is key to bobbin case maintenance, preventing bobbin jams.
Make it part of your routine, and your machine will thank you later with flawless stitches!
Wiping Down Machine Exterior
Why let dust dull your machine’s shine?
Regularly wipe down its exterior with a soft cloth and mild cleaning solutions to keep it looking fresh.
Bonus points for using a microfiber cloth for those pesky stains—it won’t scratch the finish!
Protect your investment, and your machine will keep humming smoothly, like a trusted sidekick on your sewing adventures.
Organizing Sewing Area
After wiping down your machine, let’s tackle organization.
Consider investing in a suitable storage solution, such as sewing machine storage and or such as consider machine storage options like [sewing machine storage]( machine, and.
A tidy space means a happy sewing experience.
A tidy space means a happy sewing experience.
Check out the sewing machine storage options available.
Think storage solutions—bins for bobbins, drawers for notions.
Decluttering tips: ditch what you don’t need.
Designated zones for tools prevent frantic searches.
Maximize vertical space with shelves.
You’ll sew faster and feel more in control.
Happy sewing!
Weekly Maintenance Tasks
Think of your weekly maintenance routine as giving your sewing machine a mini spa day.
You’ll keep it happy and humming by oiling moving parts, swapping out dull needles, and checking the power cord and foot pedal for any signs of wear.
Oiling Moving Parts
Keeping your sewing machine purring is much like caring for a bike—just add oil.
Weekly oiling keeps those gears happy.
Use clear, low-odor oil, and focus on moving parts for a smooth operation.
You can find suitable sewing machine oil products that fit your machine’s needs.
- Oiling frequency: Weekly
- Oil types: Clear, low-odor
- Oiling techniques: Light dab, avoid belts
- Oil application: Target moving parts
- Oil storage: Cool, dry place
Checking and Replacing Needles
Swap out your sewing machine needle regularly to keep stitches sharp and avoid needle breakage.
Needles wear out after a few projects; look for unusual sounds or struggles with fabrics.
Different needle types and gauge matter—choose the right one for your material.
Proper needle alignment makes for smooth, precise sewing.
It’s like changing oil in your car—crucial for smooth driving!
Inspecting Power Cord and Foot Pedal
Swapping needles is just the start. Let’s talk cord safety and foot pedal wear to avoid electrical hazards.
Follow these steps:
- Unplug your machine to prevent surprises while inspecting.
- Check for frays or exposed wires—your ticket to troubleshooting issues.
- Ensure snug connections for seamless sewing.
- DIY repairs? Only tackle them if you’re confident.
Monthly Sewing Machine Care
Your sewing machine appreciates a little monthly TLC to keep running smoothly without a hitch.
Focus on deep cleaning those feed dogs, lubricating gears, checking bobbin tension, and maybe even updating the firmware—you’ll feel like the superhero of stitches in no time!
Deep Cleaning Feed Dogs
Ever wonder why your stitches look off even when you haven’t changed a thing?
Time for a deep clean of the feed dogs.
Every month, grab your trusty lint brush to tackle stubborn grime.
Consistent cleaning prevents build-up and keeps stitch quality high.
It’s a twenty-minute task with a big payoff, letting you sew smoothly without hiccups.
Lubricating Gears and Mechanisms
After cleaning those feed dogs, let’s oil those gears!
Use a high-quality sewing machine oil; a few drops go a long way.
Apply oil to moving parts, avoiding the motor belt.
Regular gear lubrication keeps your machine running smoothly.
Remember, a well-oiled machine is a happy machine!
Consistent oiling boosts its lifespan.
Examining Bobbin Tension
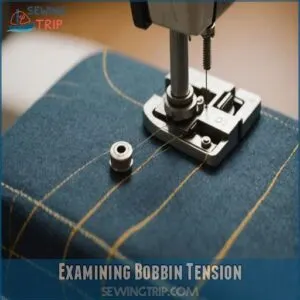
To prevent issues like skipped stitches or broken threads, it’s essential to regularly clean and oil your machine. Keeping your sewing machine running smoothly means you’ve got to keep an eye on bobbin tension.
Uneven stitches or thread breakage might just be your tension crying out for attention.
Flick that bobbin case and:
- Check for snug fit
- Adjust tension screw
- Test on scrap fabric
- Balance top and bottom tension
Your projects will thank you!
Updating Firmware
Once you’ve checked the bobbin tension, it’s time to think about those firmware updates.
Just like your smartphone, your sewing machine might need software updates to work smoothly.
Updating the firmware can fix glitches and improve performance.
Check your manufacturer’s website for instructions.
Don’t worry—it’s not rocket science.
You’ll feel more confident afterward and your machine will thank you!
Tension Adjustment and Troubleshooting
When your sewing projects start showing wavy lines instead of perfect stitches, it’s time for a tension tune-up.
Don’t worry, with a few tweaks and some patience, you’ll have those stitches as smooth as a cat’s whisker!
Identifying Tension Issues
Imagine this: your sewing project looks like it went through a bumpy rollercoaster with uneven stitches and puckered fabric.
Maybe you’re facing a classic thread breakage saga!
These tension terrors might be due to improper bobbin tension or needle type mismatches.
Keep an eye out for these sneaky culprits to avoid epic sewing fails—your stitching peace depends on it!
Step-by-Step Tension Adjustment Process
Adjusting your sewing machine’s tension is like tweaking a guitar string. Regularly checking your sewing machine oil helps to prevent overheating and maintain smooth stitch formation.
First, test with scrap fabric.
Turn the tension dial slowly, one number at a time.
You’re aiming for balanced top and bobbin tension to achieve even stitching.
If stitches misbehave, check your troubleshooting guide.
Patience is key—it’s a delicate dance, not a race.
Common Tension Problems and Solutions
Tackling tension issues is important for smooth sewing.
Uneven stitches, thread breakage, and puckered fabric are clues your machine’s crying out for help.
Here’s what to do:
- Top/bottom tension balance: Adjust the tension dial in small increments.
- Thread type: Use high-quality thread.
- Practice: Test tension adjustments on scrap before real projects.
When to Seek Professional Help
Sewing machine problems, including those caused by poor thread tension basics, are often a sign of underlying maintenance issues, and some sewing machine problems are beyond a quick fix.
Loud noises? Skipped stitches driving you crazy? Persistent issues like thread jams or uneven stitching?
Don’t hesitate to call a pro. They’ve seen it all, and a little expert help can save you a lot of frustration.
It’s better to get it fixed right than to wrestle with it forever!
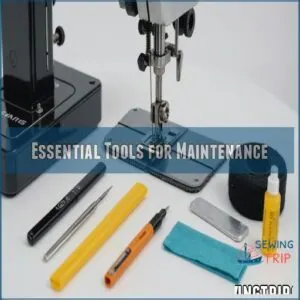
Essential Tools for Maintenance
To keep your sewing machine in tip-top shape, you’ll need some trusty tools in your maintenance arsenal.
Think of lint brushes, cleaning cloths, sewing machine oil, and even a trusty screwdriver as your sewing machine’s best friends—they keep things running smoother than a well-oiled zipper!
Lint Brushes and Cleaning Cloths
For sewing machine maintenance, don’t underestimate the power of lint brushes and cleaning cloths.
A trusty lint brush helps swipe away pesky lint, while microfiber cloths tackle dust like champs.
For a spotless machine, regular care is key.
Consider your cleaning gear just like teammates—maintain them well, and they’ll have your back every time.
Sewing Machine Oil and Lubricants
Keep your sewing buddy humming with the right oil. Choose oils with light viscosity for smooth application, such as mineral oil or synthetic oil, which offer enhanced lubrication properties and stability.
Remember these tips:
- Oil Types: Avoid motor oil; use sewing machine oil.
- Oil Application: Don’t drown it; a little goes a long way.
- Oil Storage: Store oils in cool, dry places to keep them fresh.
Sewing machine oil reduces friction, prevents rust, minimizes noise, increases efficiency, and is cost-effective, so consider choosing the right sewing machine oil. Sewing machine oil reduces friction, prevents rust, minimizes noise, increases efficiency, and is cost-effective. Sewing machine oil reduces friction, prevents rust, minimizes noise, increases efficiency, and is cost-effective, so consider choosing the right sewing machine oil.
Screwdrivers and Allen Wrenches
You know, screwdrivers and Allen wrenches are like the unsung heroes of sewing machine maintenance.
Having both types on hand lets you tweak those pesky bolts and screws with precision.
Always tighten snugly but don’t go Herculean—machines appreciate it!
Store them neatly, maybe in a drawer, to avoid the dreaded “Where did I put that?” moment.
Needle Threader and Tweezers
A needle threader can be your sewing superhero, swooping in to save your eyes and patience.
These handy gadgets help you thread needles without a hitch.
Pair them with tweezers—the trusty sidekick—for picking out stubborn threads or fabric bits.
With these essential tools, your sewing machine care becomes more of a breeze, making DIY maintenance a delightful dance.
Preparing for Maintenance
Before you start tweaking and tuning your sewing machine, setting up a safe and tidy workspace is as essential as choosing the perfect fabric.
You don’t want to be fishing for that tiny screwdriver in a mountain of thread while keeping track of stray pins that could turn any barefoot walk into a game of "avoid the pokies"!
Setting Up a Safe Workspace
Having the right tools is only half the battle; a great workspace makes all the difference!
Good workspace lighting prevents eye strain.
Think ergonomics – a comfy chair and a surface at the right height.
Smart storage solutions keep things neat and handy.
Remember electrical safety; don’t work near water.
A well-organized space means you’ll happily spend time maintaining your machine.
Safety Precautions During Maintenance
Electrical safety is no joke, especially when you’re surrounded by sharp needles and proper tools.
Always unplug your machine before maintenance.
Wear eye protection like those stylish clear goggles to dodge any flying bits.
Keep a first-aid kit handy; bumps and nicks happen.
Being cautious makes sure that your sewing adventures remain smooth and enjoyably productive.
Proper Disposal of Sharps and Waste
Your sewing room’s safety is essential when handling sharps and waste.
To avoid injury and environmental damage, consider proper disposal methods for sewing supplies.
Follow these steps:
- Recycling needles: Use designated sharps containers, and don’t mix with general waste.
- Safety guidelines: Cap needles immediately after use.
- Waste disposal: Follow local regulations for proper disposal.
- Stay organized: Keep a system for separating sharps from regular waste, avoiding accidental pricks.
Oiling Your Sewing Machine
Giving your sewing machine a little oiling love is like taking your car for a spin to keep the engine purring.
Remember, a few drops in the right spots promise smoother stitches and fewer headaches on your sewing journey!
Choosing The Right Oil
Choosing the right oil for your sewing machine feels a bit like finding the perfect pair of shoes; you’ll want it to fit just right.
Always go for clear, low-odor sewing machine oil.
Trustworthy brands make a difference, so check the label for sewing machine specifics.
Store it properly to keep it from clumping or losing its slick properties.
Procedure for Oiling
Got the oil ready from the last step? Great.
Before we begin, consult your Singer sewing machine manual to verify the specific oiling instructions and frequency for your model, especially since mechanical machines require regular oiling, while electronic sewing machine maintenance has different requirements.
First, unplug the machine—safety first, right?
Open up your manual to find the oiling points.
Add a tiny drop on each moving part, imagining you’re feeding a hamster, not a lion.
This keeps those gears spinning like a charm!
Store the oil in a cool spot.
Avoiding Excess Oil
Ever pour too much dressing on a salad? Well, oiling your sewing machine can be similar.
To dodge oil-related problems:
- Use oil sparingly and evenly to avoid dripping.
- Keep a cloth handy for quick oil removal.
- Revisit oil usage frequency to keep everything in check.
Too much oil attracts lint, so store oil wisely!
Needle Care and Replacement
You’ll want to treat your sewing machine needles like royalty; regular replacement is key to preventing those frustrating skipped stitches and broken threads.
Learn how to choose the right needle for your fabric and install it properly, so you can keep those sewing projects flowing smoothly!
Why Regular Replacement is Important
Replacing your needles often isn’t just a chore; it’s essential maintenance.
Over time, a needle wears out, affecting stitch quality and risking fabric damage.
Regular swaps keep your sewing machine’s lifespan healthy and your projects running smoothly.
Project efficiency is all about control, and fresh needles are key.
Don’t let a worn needle pull threads—or your spirits!
Choosing The Right Needle for Fabric Type
Needle choice is like picking the right shoes for an occasion—you wouldn’t jog in heels!
Match needle types to fabric weight: use a fine needle for delicate silk, and a sturdy one for denim.
Needle size matters too—size 70/10 works beautifully on light fabrics, while 90/14 suits heavier textiles.
Your project’s success often hinges on these small details!
Properly Installing a New Needle
Quickly installing a new needle doesn’t have to be a difficult task.
First, loosen the needle clamp screw to remove the old needle.
You can find a variety of sewing machine needles online at sewing machine needles.
To ensure your sewing machine runs smoothly, select a needle size that matches the fabric type and thread weight by referring to your sewing machine manual guide. Choose the correct needle size and type for your project.
Insert the new needle, ensuring the flat side faces the correct direction, typically facing the machine’s back.
Tighten securely to prevent needle damage or misalignment.
Preventing Common Problems
You know those moments when your sewing machine seems to have a mind of its own and skips stitches for fun?
By keeping your machine clean and addressing minor hiccups as they arise, you can prevent those pesky problems and keep things running smoothly.
How to Prevent Skipped Stitches
When those stitches start skipping, it’s usually because something’s misaligned. Check your needle condition first; dull or bent needles can throw everything off.
Adjust thread tension for balance—like a tightrope walker finding their groove.
Consider the fabric type and make sure the needle matches.
Why Regular Cleaning is Crucial
Keeping your sewing machine tidy isn’t just about the looks; it affects stitch quality and extends its lifespan.
Here’s why regular cleaning’s essential:
- Minimize Thread Jams: Dust can cause tangles, messing up your project.
- Prevent Needle Breakage: Clean parts reduce stress on needles.
- Smooth Operation: Dirt-free gears move seamlessly.
- Boost Machine Performance: A clean machine runs like a dream!
Troubleshooting Common Issues
A jammed needle? Don’t panic! That’s a common sewing machine hiccup.
Thread breakage? Check your tension.
Skipped stitches often mean a dull needle or bobbin problems.
Uneven stitching? Adjust your top and bottom tension.
Little issues? A quick clean might fix it.
For bigger problems, consult your manual or a sewing pro.
You’ve got this!
Creating a Maintenance Routine
Creating a maintenance routine for your sewing machine is like planning the perfect road trip—get it right, and the journey is smooth.
With regular cleaning, oiling, and needle care, you’ll keep your sewing adventures free of bumps and hiccups!
Scheduling Regular Cleaning and Oiling
Imagine your sewing machine as a good friend—don’t let it down!
- Importance of Routine: Schedule regular check-ups.
- Maintenance Schedule: Choose weekly or monthly.
- Oil Types: Use clear, low-odor oil.
- Cleaning Frequency: Dust daily, deep clean monthly.
Remember, regular maintenance is the key to crafting freedom!
Incorporating Needle Maintenance
Every stitch’s foundation is your needle, so treat it like gold.
Swap universal needles every 6-8 hours and ballpoint needles after several projects.
Keep an eye on needle replacement schedule to maintain consistent stitching.
Keep an eye on needle size for fabric type—it’s vital.
Got a dull or bent one? Toss it in a safe needle disposal to avoid mishaps.
Simple care avoids sewing snafus.
Tips for Staying Organized
Imagine this: you’ve got a messy work area, and it’s a creativity killer.
Tackle it by setting up designated spaces for your sewing tools.
Imagine clever storage solutions like labeled bins and pegboards.
Managing your supplies becomes a breeze.
Plus, having a tidy layout boosts productivity—but don’t get too hung up!
It’s all about finding your rhythm.
Frequently Asked Questions (FAQs)
How to maintain a sewing machine?
Keep your sewing machine happy! Regular cleaning’s key, plus oiling those moving parts. Don’t forget to replace needles – they’re workhorses, not superheroes. A little TLC goes a long way!
How often should a sewing machine be maintained?
See if this fits: A sewing machine? It’s like a car—it runs best with regular care.
Clean daily, oil weekly, and deep clean monthly.
Tweak tension and replace needles often.
Your machine will hum happily ever after!
Why should you keep your sewing machine clean and maintained?
Keeping your sewing machine clean and maintained boosts performance, extends lifespan, and prevents costly repairs.
Regular TLC guarantees smooth stitching and creativity flows uninterrupted.
Without maintenance, you’d end up with skipped stitches, or worse, a real sewing disaster!
How do I know if my sewing machine needs service?
When your sewing machine’s needles skip like a scratched record, a likely culprit is a dull needle that’s past its prime, which happens after 8 hours, or it groans louder than a tired tractor, it’s time for service.
Check for thread jams, uneven stitches, or persistent odd noises to know for sure!
What are the 7 common sewing machine troubles?
You’ll often face these sewing machine troubles: thread bunching, needle breakage, tension issues, skipped stitches, fabric puckering, jamming, and bobbin woes.
Tackle each with patience and a little finesse for smooth stitching outcomes.
Do I need to oil my sewing machine?
Seventy percent of machine failures come from lack of oiling.
Your sewing machine runs smoother with regular oiling for its moving parts.
Use clear, low-odor sewing machine oil weekly to make sure it’s always in tip-top shape.
How often should a sewing machine be serviced?
Service your sewing machine every 12-18 months for best performance.
Regular check-ups keep it running smoothly and prevent issues.
It’s like taking your car for maintenance—keeps things humming along without any surprise breakdowns!
How to service a sewing machine at home?
Regularly clean lint, oil moving parts, and replace needles. Check tension, and don’t forget a deep clean monthly! A little TLC keeps your machine singing.
How to store a sewing machine properly?
Don’t stash your sewing machine in a dusty corner.
Instead, slip it into a sturdy cover, keep it upright, and tuck it in a dry, cool spot.
It’s like giving your trusty machine a cozy vacation!
What fabrics affect machine maintenance needs?
Heavy fabrics like denim or canvas increase wear and tear on your sewing machine, necessitating more frequent maintenance.
Lighter fabrics like cotton are gentler, but still require regular cleaning to prevent lint buildup and maintain smooth operation.
Can I use household oil for lubrication?
Swapping household oil for sewing machine oil is like trying to feed a car soup—it won’t end well.
Household oils can gum up gears and attract grime.
Stick with clear, low-odor machine oil for smooth operation.
How often should I clean the bobbin area?
Clean the bobbin area every week or after every few sewing projects.
It keeps your stitches smooth and your machine happy.
Just think of it as giving your sewing machine a little spa day!
Are there eco-friendly cleaning options available?
You can use eco-friendly options like white vinegar or baking soda for cleaning.
Mix with water for a gentle solution that’s kind to your machine and the planet, ensuring grime doesn’t stand a chance.
Conclusion
Imagine a well-oiled sewing machine gliding smoothly, compared to a squeaky contraption that’s too stubborn to stitch.
Keeping your sewing machine in tip-top shape might seem like an endless chore, but these sewing machine maintenance tips turn it into a relaxing routine.
Tackle dust with gusto, pamper moving parts with just the right amount of oil, and cherish those needles like gold.
Your creativity deserves the best tools, so give your sewing machine the love it needs!

