This site is supported by our readers. We may earn a commission, at no cost to you, if you purchase through links.

A dull needle can wreak havoc, leaving skipped stitches and frayed threads in its wake. Replace needles regularly—ideally every 16 hours of use—before disaster strikes.
Use the right needle type: ballpoint for knits, sharp for wovens, and sturdy ones for heavy fabrics like denim. And don’t force fabric! Let your feed dogs do their job.
Still frustrated? Inspect threading and tension, and clean your machine to banish lint buildup.
Got squeaks or jams? That’s a sign to dig deeper!
Table Of Contents
- Key Takeaways
- Common Sewing Machine Needle Problems
- Choosing The Right Sewing Machine Needle
- Preventing Needle Breakage and Damage
- Troubleshooting Sewing Machine Issues
- Maintaining Your Sewing Machine
- Solving Skipped Stitches and Uneven Seams
- Managing Fabric Feed and Tension
- Advanced Sewing Machine Repair Techniques
- Best Practices for Sewing Machine Maintenance
- Frequently Asked Questions (FAQs)
- Conclusion
Key Takeaways
- Check your needle regularly for dullness, bends, or damage, and replace it every 8–16 hours of use to avoid fabric snags and stitching issues.
- Match your needle type and size to the fabric you are using—ballpoint for knits, sharp for wovens, and thicker needles for heavy materials like denim.
- Don’t force fabric through the machine; let the feed dogs guide it to prevent needle damage and maintain smooth stitching.
- Keep your machine clean and well-maintained by removing lint, lubricating moving parts, and checking threading and tension for consistent performance.
Common Sewing Machine Needle Problems
Ever had a sewing project go south because of a pesky needle problem?
Don’t let bent, broken, or dull needles turn your creative session into a stitching nightmare—this guide’ll help you spot, fix, and prevent common sewing machine needle issues.
before they ruin your masterpiece.
Bent or Broken Needles Causes
Nearly all sewing machine needle breakages stem from a perfect storm of mechanical mishaps.
Incorrectly sized needles striking tough fabrics create catastrophic impact forces that snap threads and bend metal.
Poor needle quality, machine timing misalignments, and fabric type mismatches can transform your peaceful sewing session into a frustrating breakdown—leaving you with a bent needle and a mangled project.
Dull or Hooked Needles Symptoms
A dull needle can wreak havoc on your fabric, transforming your sewing project into a nightmare of imperfections.
Watch out for these telltale signs of needle wear:
- Jagged or uneven fabric edges
- Skipped stitches that disrupt your seam lines
- Increased thread breakage during stitching
- Visible fabric damage or puckering
- Rough, inconsistent penetration through material
Additionally, using the wrong type of needle, such as a sewing machine needle, in your serger can exacerbate these issues and lead to further problems.
Needle Breakage Frequency
Sewing machine needles aren’t immortal warriors, but they’re more resilient than you might think. Most home sewists break just 1-2 needles every 3-4 years, depending on usage patterns and project complexity.
Your needle’s lifespan varies with fabric type, machine quality, and sewing technique.
Using the correct needle type for fabric weight can greatly reduce breakage rates.
Don’t stress—with proper care, you’ll minimize unexpected needle breakage and keep stitching smoothly.
Needle Damage Warning Signs
Every seasoned seamstress knows that spotting needle damage early can save your project from total disaster.
- Visible nicks or burrs on needle tip
- Bent or crooked needle shaft
- Discoloration or rust on needle surface
- Uneven or ragged fabric edges after stitching
- Strange sounds during machine operation
Catch these red flags before they wreck your fabric and machine. Early detection is key to avoiding total disaster.
Choosing The Right Sewing Machine Needle
Ever struggled with a sewing project that went sideways faster than a runaway bobbin?
Choosing the right sewing machine needle is your secret weapon to transforming fabric frustrations into stitch-perfect success.
Needle Types for Specific Fabrics
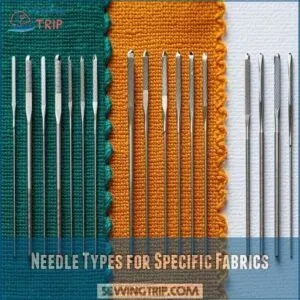
Selecting the right sewing needle can transform your sewing from frustrating to flawless. Your fabric dictates the perfect needle match, turning potential disasters into professional-looking projects.
| Fabric Type | Recommended Needle | Best Use |
|---|---|---|
| Knits | Ballpoint | Stretch Fabrics |
| Woven | Sharp | Quilting, Cottons |
| Denim | Denim/Jeans | Heavy Fabrics |
Choose wisely, and watch your stitches sing!
Ballpoint, Regular Point, and Wedge Point
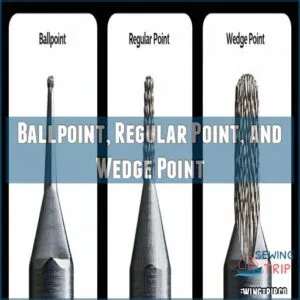
When sewing through delicate jersey or sturdy denim, your needle’s point makes all the difference.
Ballpoint needles glide between fabric fibers, perfect for knits.
Sharp regular point needles slice cleanly through woven fabrics.
Wedge point needles tackle heavy-duty materials, punching through leather and thick layers with precision.
Choose wisely to elevate your stitch game.
Needle Size Ranges and Fabric Types
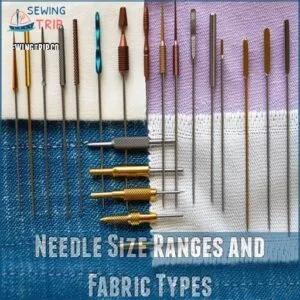
Ever struggled with needle sizes that just won’t play nice with your fabric.
Needle sizes range from 8 to 18, matching different fabric weights like perfect dance partners.
Delicate fabrics crave smaller needles (9 or 11), while heavyweight materials demand larger sizes (16 or 18).
Choosing the right needle guarantees smooth stitching and prevents frustrating fabric damage.
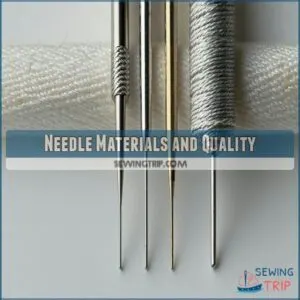
Needle Materials and Quality
At the heart of sewing success, needle materials make or break your project.
High-quality steel grades determine a needle’s durability, with chromium and titanium coatings extending point sharpness and lifespan.
Your needle’s core matters: professional-grade stainless steel resists wear, prevents fabric snags, and delivers consistently smooth stitches across different fabric types.
Preventing Needle Breakage and Damage
You’ve been sewing along, and suddenly—snap! Your needle breaks, leaving you frustrated and your project in shambles.
Don’t worry, master seamstress or budding crafter: with the right techniques, you’ll learn how to prevent needle breakage and keep your stitching smooth and trouble-free.
Proper Threading and Tension Adjustment
Now that you’ve picked the perfect needle, threading and tension can make or break your sewing success.
Master your machine’s tension like a pro with these quick fixes:
- Adjust top thread tension systematically, watching stitch quality
- Check bobbin tension matches top thread for smooth stitching
- Experiment with tension dial settings on scrap fabric first
Your needle’s performance depends on getting these settings just right. This is crucial for sewing success. Tension is key.
Regular Needle Inspection and Replacement
After getting your threading right, keep your needle in top shape by checking it regularly.
Swap out needles every 16 hours of stitching or when you spot wear.
A dull needle can wreck your fabric faster than you’d think.
Pro tip: Always have spare needles on hand—they’re your secret weapon against sewing machine mishaps and uneven stitches.
Using The Correct Needle for Fabric Type
Picking the right needle for your fabric is like choosing the perfect dance partner.
Lightweight cottons crave sharp needles, while stretchy knits beg for ballpoint companions.
Match your needle type to fabric weight – sizes 9-11 for delicate materials, 16-18 for heavy fabrics.
Your stitch quality depends on this matchmaking magic, transforming potential sewing disasters into smooth, professional results.
Avoiding Forced Fabric Feed
Don’t wrestle with your machine like it’s your wrestling opponent when handling fabric feed. Let the feed dogs do their job by gently guiding fabric through at a consistent speed.
Fighting against the machine’s natural rhythm can damage needles and disrupt smooth stitching.
To achieve this smooth movement, understanding the proper use of feed dog adjustment is key.
Work with your sewing machine, not against it, and you’ll master fabric handling like a pro.
Troubleshooting Sewing Machine Issues
Is your sewing machine throwing a tantrum with bunched threads, skipped stitches, or mysterious squeaks?
Don’t panic—with the right troubleshooting techniques,
you’ll transform those stitching nightmares into smooth, professional-looking projects in no time.
Identifying Root Causes of Problems
Every sewing machine hiccup tells a story – and your job is to become a needle detective.
Trace each stitch problem back to its source by methodically examining your machine’s threads, needle condition, and fabric interaction.
Look for subtle clues like irregular tension, unusual noises, or unexpected fabric movement that reveal underlying repair needs before they escalate into major malfunctions. This is needle detective work. The goal is to find the source of the stitch problem.
Consulting Repair Shops for Complex Issues
When your sewing machine starts throwing tantrums, it’s time to call in the pros.
Repair shops can be your saving grace for those head-scratching mechanical mysteries.
Consider these key points when seeking professional help:
- Check online reviews for reputable sewing machine repair services
- Get quotes from multiple repair shops
- Ask about warranty coverage and repair timelines
- Bring detailed notes about your machine’s symptoms
- Request cost estimates before authorizing repairs.
By taking the right approach, you can ensure a successful and stress-free repair experience for your sewing machine.
Regular Machine Cleaning and Maintenance
Behind every smooth stitch lies a well-maintained machine. Regular cleaning prevents lint buildup and keeps your sewing buddy running like a dream.
Grab a soft brush and compressed air to dust out those hidden corners. Oiling key moving parts reduces friction and extends your machine’s life. A little TLC goes a long way in sewing machine maintenance.
By following proper needle selection and usage, you can also prevent common issues like broken needles and uneven stitches.
Checking Bobbin, Needle, and Thread
After clearing dust bunnies from your machine, zoom in on the bobbin, needle, and thread trio.
Check your bobbin’s smooth winding and tension – jerky threads spell trouble.
Swap out dull needles that look bent or hooked. Match thread weight to fabric and needle type.
These quick checks can prevent stitch nightmares and keep your sewing smooth as silk.
Maintaining Your Sewing Machine
Ever wondered why your sewing machine suddenly starts throwing tantrums mid-project?
Keeping your machine clean, well-serviced, and attentive to its warning signs can turn those stitching nightmares into smooth, stress-free sewing sessions.
Cleaning The Machine Regularly
Your sewing machine’s performance hinges on regular cleaning. Dust and lint can derail your creative flow faster than a tangled thread. To keep your machine in top shape, invest in a good sewing machine brush.
Embrace these quick maintenance moves to keep your machine humming:
- Use a soft-bristled brush to sweep lint from bobbin area
- Wipe exterior with microfiber cloth
- Remove needle plate for deep cleaning
- Vacuum internal mechanisms gently
- Apply one drop of machine oil to designated points
Regular cleaning is essential for optimal performance.
Servicing The Machine for Deep Issues
When dust bunnies turn your pristine machine into a maintenance minefield, it’s time to wave the white flag and call in the pros.
Professional sewing machine servicing tackles those deep-seated gremlins lurking inside your gear.
Machine tune-ups can uncover hidden issues, preventing costly breakdowns and ensuring your trusty sewing companion keeps humming smoothly through countless creative adventures.
Noticing Changes in Machine Performance Warning Signs
Three telltale signs signal your sewing machine needs attention: strange noises like grinding or squealing, skipped stitches disrupting your perfect seams, and unexpected fabric jams.
Listen closely and watch carefully.
These performance warning signs are your machine’s cry for help, indicating potential needle damage or mechanical issues that demand immediate sewing machine troubleshooting before minor problems become major headaches.
Machine Seizures and Feed Issues Causes
The nightmare of machine seizures can leave you feeling stuck mid-project.
Tough fabrics, incorrect needle installation, or worn feed dogs often trigger these frustrating halts.
Check your presser foot pressure and make sure you’re using the right needle for your fabric type.
Gently guide the material—don’t force it—and watch for signs of mechanical resistance that could signal deeper sewing machine troubleshooting needs.
Machine Noises and Clogged Mechanisms
After battling machine seizures, weird noises might signal your sewing companion’s cry for help. Listen closely to your machine’s whispers—grinding, squeaking, or clunking are red flags.
Tackle these sewing machine problems head-on by:
- Clearing lint from hidden nooks
- Applying precision machine oil
- Following troubleshooting guides religiously
Your machine will thank you with smoother, quieter stitching adventures.
Machine Misalignment and Worn-Out Parts
When misalignment strikes your sewing machine, it’s like a precision dance gone wrong.
| Symptom | Potential Cause | Recommended Action |
|---|---|---|
| Uneven Stitching | Worn Gears | Professional Tuneup |
| Needle Deviation | Loose Mechanisms | Realignment Check |
| Unusual Noises | Part Wear | Immediate Inspection |
| Inconsistent Feed | Alignment Issues | Calibration Required |
Catching these red flags early prevents costly breakdowns and keeps your sewing rhythm smooth. Professional Tuneup is sometimes needed. Identifying Alignment Issues early is key. Look for Unusual Noises and Needle Deviation.
Solving Skipped Stitches and Uneven Seams
Are your sewing projects plagued by skipped stitches and wonky seams that make you want to throw your machine out the window?
Don’t panic – with a few simple adjustments and some insider know-how, you’ll transform those stitching nightmares into smooth, professional-looking results.
That’ll have you sewing like a pro in no time.
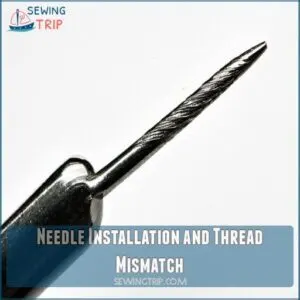
Needle Installation and Thread Mismatch
Battling skipped stitches? Your needle might be the culprit.
Make sure you’ve matched the right needle type to your fabric – ballpoint for knits, sharp for woven fabrics.
Check that the flat side faces the correct direction when installing. A loose needle clamp spells trouble, causing fabric jams and potential breakage.
For more on avoiding needle breakage, consider the benefits of regular machine maintenance tips (https://www.thesewingpalacebernina.com/repair.htm). Precision is your sewing superpower.
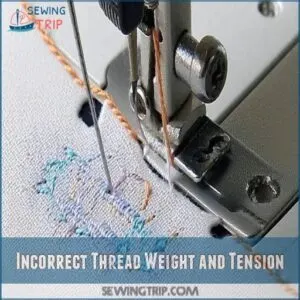
Incorrect Thread Weight and Tension
Thread tension can make or break your sewing project like a wild rollercoaster ride.
Mismatched thread weights create uneven stitches that pucker and distort fabric.
Adjust your machine’s tension dial carefully, matching thread types between top and bobbin. Test on scrap fabric first, tweaking settings until stitches lay smooth and flat, preventing those frustrating tension nightmares.
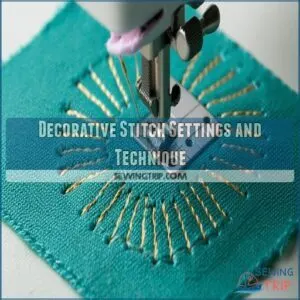
Decorative Stitch Settings and Technique
When diving into decorative stitch settings, precision is your secret weapon.
Master your machine’s unique capabilities with these key steps:
- Check stitch length carefully
- Select appropriate needle choice
- Adjust thread tension precisely
- Test patterns on scrap fabric
Experiment fearlessly, knowing each adjustment brings you closer to stunning, professional-looking embroidery and intricate sewing machine needle techniques.
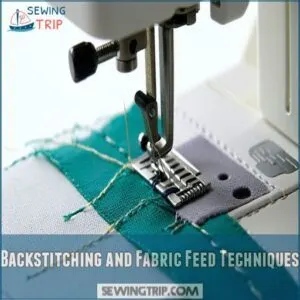
Backstitching and Fabric Feed Techniques
At the heart of smooth sewing, backstitching demands precision and finesse.
| Technique | Key Considerations |
|---|---|
| Needle Position | Align perfectly for consistent seams |
| Fabric Tension | Control stitch quality and strength |
| Backstitch Control | Secure seam edges without bunching |
Master your fabric feed with these critical techniques:
Avoid forcing fabric – let your machine guide you to professional-looking results.
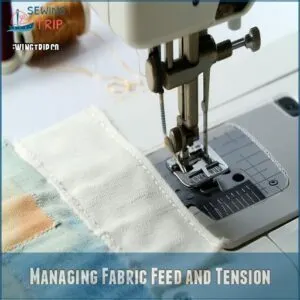
Managing Fabric Feed and Tension
Is your sewing machine fighting you at every turn, turning your creative project into a tangled mess?
Learn how to tame your machine’s fabric feed and tension,
so you can get back to crafting masterpieces without the frustration.
Presser Foot Pressure and Drop-Feed Settings
In sewing, presser foot pressure can make or break your fabric’s journey. Adjust the sewing machine presser foot height to match your fabric’s thickness, preventing slip-ups and uneven stitches.
Drop-feed settings open up free-motion magic, letting you guide delicate or thick materials with precision.
Tension control is your secret weapon for smooth, professional results.
Feed Dogs and Fabric Movement
If fabric slippage drives you nuts, check the sewing machine feed dogs.
These little teeth grip and move fabric, but grime buildup or misalignment can cause uneven feeding.
Clean the feed dogs regularly and verify proper feed dog adjustment. Pair it with the right presser foot pressure for smooth fabric movement.
It’s sewing machine troubleshooting 101!
Adjusting Tension for Specific Fabrics
Loose stitches got you down? Tension adjustment techniques can save the day.
Different fabric types call for unique sewing machine tension tweaks. Proper sewing machine tension settings are key to achieve smooth stitching.
Turn the tension dial gradually—test on scraps to perfect it. Too tight? You’ll see puckering. Too loose? Messy loops.
Troubleshooting tension improves stitch quality and prevents thread problems. Mastering this dance helps you achieve smooth sewing techniques every time.
Using The Correct Presser Foot
Using the right presser foot makes fabric handling seamless.
Different presser foot types are built for fabric types—like a zipper foot for zippers or a walking foot for layered fabric.
Proper foot alignment and foot pressure prevent skipped stitches and bunching. Troubleshooting issues often starts here.
Changing a presser foot is a simple process that can be done with a presser foot lever. Pair it with good sewing machine needle care for smooth stitching success!
Advanced Sewing Machine Repair Techniques
When your sewing machine starts acting up, it’s time to roll up your sleeves and tackle the tricky repairs.
From timing adjustments to replacing worn-out parts, you’ve got the tools to keep your machine running smoothly.
Replacing Worn-Out Parts and Belts
Worn-out parts and belts can turn your trusty machine into a headache. Start by inspecting and sourcing the right sewing machine parts.
Remember to always check for proper needle and thread selection, as described in this helpful guide on avoiding common sewing machine mistakes.
Replacing belts? Check tension and fit. Here’s how to DIY:
- Match new parts to your machine model.
- Follow your manual’s steps for installation.
- Tighten belts snugly—never overtighten.
- Call a pro if repair seems tricky.
This is a helpful guide.
Adjusting Timing Mechanism and Needles
If your stitches still look wonky after replacing parts, it’s probably time for timing adjustments.
Misaligned sewing machine needles or odd timing belt issues can throw everything off.
Check the needle plate and make certain of proper tension calibration.
Adjusting the sewing machine timing may sound intimidating, but careful fixes can save you from sewing machine needle replacement costs down the line.
Cleaning and Lubricating Machine Parts
A clean sewing machine hums like a dream.
First, grab cleaning tools like a brush or canned air to remove lint.
Use sewing machine oil or specialized lubricants sparingly on moving parts. Check your manual for part access.
Stick to a maintenance schedule—monthly cleaning and lubrication work wonders. Proper sewing machine lubrication keeps stitches sharp and prevents costly needle repair!
Troubleshooting Complex Machine Issues
Sometimes machines act up like toddlers refusing vegetables. Here’s a quick sewing machine troubleshooting guide for complex issues:
- Check for broken needles causing jams.
- Adjust timing mechanisms to fix irregular stitching.
- Inspect internal mechanisms for wear or misalignment.
- Clean and oil parts to avoid clogs.
- Visit machine repair shops for advanced techniques or preventative maintenance.
Best Practices for Sewing Machine Maintenance
Keeping your sewing machine in top shape isn’t magic—it’s all about preventative maintenance. Regular cleaning is your machine’s secret weapon against lint buildup, which often leads to bigger problems. A little oil and lubrication also go a long way toward keeping moving parts humming. Don’t forget to scan your manual’s troubleshooting guide for fast fixes.
Schedule a sewing needle replacement after every 16 hours of stitching. Trust me, dull needles are villains in disguise. Explore repair resources online to tackle sewing machine needle problems or basic repairs confidently.
| Maintenance Tip | Frequency | Tools Needed | Outcome |
|---|---|---|---|
| Clean the machine | Weekly/Monthly | Lint brush, cloth | Prevents clogs |
| Oil and lubrication | As needed | Machine oil | Smooth operation |
| Replace needles | Every 16 hours | Sewing needles | Avoids stitching issues |
| Read troubleshooting | On breakdowns | Manual, online guides | Fast problem-solving |
Frequently Asked Questions (FAQs)
Why does my sewing needle keep jamming?
When it rains, it pours—your needle jams usually mean dullness, improper threading, or mismatched fabric and needle types.
Check for bends, rethread carefully, and choose the right needle size for your project.
What is the remedy for needle breaking?
Stop needle breaking by using the right needle size and type for your fabric.
Avoid pulling the fabric; let the machine feed it.
Replace needles regularly, and check alignment if breakage keeps happening.
How to fix a broken sewing machine needle?
A snapped needle feels like hitting a speed bump mid-race.
Switch off the machine, remove broken bits, replace it with the correct size/type, tighten securely, and double-check threading.
Then, you’re ready to sew again!
Why does my sewing machine needle keep getting bent?
Your needle bends because it’s likely the wrong type or size for your fabric, or you’re pulling fabric too hard.
Double-check the needle, guide fabric gently, and watch for hidden pins or thick seams.
Why do needles suddenly break during sewing?
Needles breaking mid-sew feels like a dropped stitch in your rhythm.
It’s likely you’re using the wrong needle size, improper tension, or sewing thick fabric.
Check needle type and install it correctly.
How often should I replace machine needles?
Swap your needle after every 8–16 hours of sewing, or at the start of a new project.
A dull or damaged needle wreaks havoc on fabric and stitches, so don’t push your luck!
Can a damaged needle ruin fabric permanently?
Imagine your favorite fabric shredded like confetti—yes, a damaged needle can permanently ruin fabric.
It snags, tears, or pulls fibers beyond repair.
Swap that bent troublemaker immediately to save both your project and your sanity.
What causes repeated needle breaking incidents?
Needles break repeatedly when they’re the wrong size or type for your fabric, installed incorrectly, or bent.
Timing issues, worn parts, or excessively tight tension can also snap them.
Check alignment, tension, and install carefully.
Are expensive needles worth the extra cost?
Ever thought why some needles cost more?
Premium needles last longer, resist breakage, and glide through tough fabrics with ease.
If you sew regularly or tackle tricky projects, the investment’s worth every penny.
How to fix sewing machine timing issues?
If your sewing machine’s timing is off, adjust the needle and hook alignment.
Remove the needle plate, rotate the handwheel, and check the hook’s position.
Consult your manual or a pro if it stays off!
Conclusion
Don’t let a stubborn sewing machine needle throw a wrench in your stitching dreams.
With regular maintenance, the right needle, and proper techniques, you’ll solve most needle mishaps before they escalate.
Pay attention to signs like skipped stitches, broken needles, or fabric snags—it’s often a quick, simple fix.
Keep things running smoothly by cleaning, inspecting, and using compatible tools for every project.
Mastering these sewing machine needle repair solutions will transform frustration into seamless creativity. Happy stitching!
- https://sewingsociety.com/why-does-my-sewing-machine-not-sew-in-reverse/
- https://moresewing.co.uk/how-often-do-sewing-machines-need-servicing/
- https://www.youtube.com/watch?v=7HesU0bPrW8
- https://res.cloudinary.com/singer-sewing/image/upload/v1620941592/Singer-Website-Library/Other/SINGER_Needle_Guide.pdf
- https://wunderlabel.com/en-gb/blog/p/17-common-sewing-machine-problems-solve/

