This site is supported by our readers. We may earn a commission, at no cost to you, if you purchase through links.
For a stronger hold, try the back stitch, which is great for repairing seams.
Got a fraying edge? The whip stitch wraps things up nicely by securing fabric edges.
If you’re aiming for an invisible repair, learn the slip stitch—it practically disappears into the fabric.
These stitches are easy to master and require just a needle, thread, and a bit of patience.
Bonus: they’re great life skills that’ll save both your clothes and your wallet!
Table Of Contents
Key Takeaways
- Learn the running stitch for quick fixes and the backstitch for strong repairs on seams and high-stress areas.
- Use a whip stitch to secure fraying edges or fix busted seams, and try a slip stitch for nearly invisible repairs like hems.
- Fix rips and holes by trimming stray threads, using matching thread, and stitching carefully with durable techniques like the backstitch or whip stitch.
- Save money and reduce waste by mending clothes with easy sewing techniques, turning repairs into stylish, long-lasting fixes.
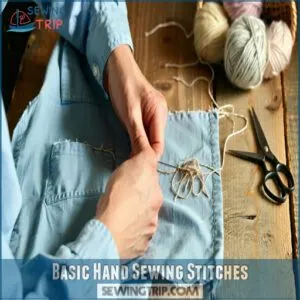
Basic Hand Sewing Stitches
You don’t need to be a sewing expert to master a few basic stitches—they’re simpler than you think.
With just a needle, thread, and a little patience, you can tackle common clothing fixes like a pro!
Running Stitch Technique
The running stitch is one of those no-fail basics every beginner needs.
It’s perfect for quick mends and small repairs.
Here’s how to nail it:
- Pick the right thread and fabric combo – they should work together.
- Start small for better needle control.
- Keep your stitch tension even.
- Pace your sewing speed—it’s not a race!
Mastering the simple running stitch technique is essential for beginners to achieve professional-looking repairs with a simple approach.
Back Stitch Method
The back stitch is your go-to for strong, tidy repairs.
To mend torn fabric, start by prepping it flat, pick sturdy thread and control your needle as you sew backward into each previous stitch—it’s like planting anchors.
Keep stitch length consistent for durability, this hand sewing stitch works wonders on seams, zippers, and high-stress areas needing a reliable sewing repair.
The technique is especially useful for creating a strong and lasting fix.
Whip Stitch Application
If you’ve got a busted seam or split pocket, the whip stitch is your go-to.
It’s all about looping stitches over the edge to bind the fabric together neatly.
Use matching thread and a steady hand for a clean finish.
This hand sewing technique is perfect for quick fabric repair and mastering tougher sewing tools in your kit, using the hand sewing technique.
Slip Stitch Procedure
After mastering the whip stitch, let’s talk slip stitch.
This gem is your go-to for nearly invisible repairs. Slip stitch tips: Pick thread matching your fabric, keep stitch tension just snug, and take your time—it’s not about speed here.
Ideal for hems or closing seams, this easy sewing technique keeps everything tidy without screaming, “I’ve been mended!”
Mending Clothing Tears
When your favorite shirt or pants gets a tear, don’t panic—it’s easier to fix than you think.
With just a needle, thread, and a little patience, you’ll have it looking good as new in no time!
Repairing Rips and Holes
Life happens, and so do rips.
For quick Fabric Tear Repair, trim stray threads first.
Use matching thread and hand sewing stitches like a running stitch or invisible stitch for Rip Fixing Methods.
For small hole repair, try fusible interfacing or fabric glue.
Mend rips in thicker fabrics by reinforcing seams with careful stitching to keep things sturdy.
When dealing with torn jeans, consider using jeans repair techniques to extend the life of your clothing, which is a great way to practice jeans repair.
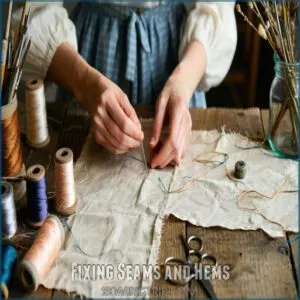
Fixing Seams and Hems
When fabric fraying ruins your day, grab your needle and thread.
For seam repairs, lay the fabric flat, align edges, and use a running stitch or back stitch for a sturdy fix.
Hemline repairs? Try a slip stitch to keep it invisible.
With the right thread selection, these hand sewing stitches can restore worn edges and fix broken seams quickly! Mastering invisible stitches techniques is essential for a professional-looking repair that lasts.
Reattaching Buttons and Straps
Replacing buttons or fixing straps isn’t rocket science—it’s just a little patience and the right steps.
- Button Placement: Line it up where it belongs.
- Thread Selection: Pick a sturdy, matching thread.
- Fabric Alignment: Keep it steady for smooth sewing.
- Sewing Tools: Needle, thimble, and scissors.
- Strap Weaving: Secure the strap ends snugly.
You’re basically unstoppable now!
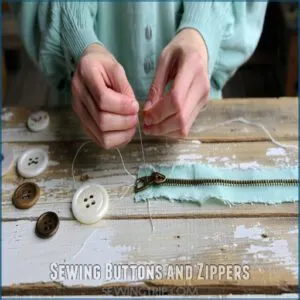
Sewing Buttons and Zippers
Replacing a missing button or fixing a stuck zipper might seem tricky, but it’s actually easier than you think with a little patience.
With some thread, a needle, and a few simple tips, you can tackle these common repairs like a pro and save your favorite clothes, which is a great way to practice simple repairs.
Hand Sewing Buttons
Got a loose button? Start by picking strong thread that matches your fabric choice—trust me, it’s worth it.
Secure the button placement using a toothpick for spacing. Grab your sewing tools and stitch through the holes in an “X” pattern. Watch your stitch tension, so it’s snug but not tight.
Button sewing’s easier than it looks! Mastering sewing buttons techniques can greatly improve your overall mending skills and help with sewing buttons.
Replacing Zippers on Jeans
Stuck with a busted zipper?
First, grab a matching replacement zipper and a seam ripper to carefully remove the old one.
Pin the new zipper along the original hemline and start sewing stitches to secure it.
Reinforce the seams for sturdiness, and if needed, use fabric adhesive.
Denim repair done right gives your jeans a second life!
For a successful repair, understanding zipper replacement techniques is essential to achieve a professional-looking fix.
Sewing Hidden Buttons
Sewing hidden buttons feels like a secret ninja skill in sewing basics.
Start by checking button placement on the inside seam for balance, and match your thread color with fabric selection, and use simple sewing tools.
Keep stitch tension snug but not too tight, and hand sewing tutorials often stress neat anchor knots—practice makes perfect, even for beginners!
Hemming Pants and Sleeves
Hemming pants and sleeves by hand is easier than you’d think and a great way to save a trip to the tailor.
With just a needle, thread, and a little patience, you can adjust lengths to fit perfectly—and maybe even tack on a few bragging rights!
You can achieve this with little patience.
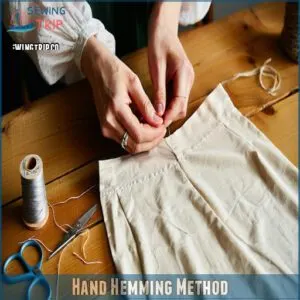
Hand Hemming Method
When fixing a hem by hand, grab your hemming tools and let’s make it easy.
Fold the fabric evenly (hello, thread tension!) and use basic hand stitches like the running stitch.
Keep your stitch length consistent for a neat hem repair.
To achieve a professional finish, mastering the blind hem stitch is essential for hand hemming.
- Use sewing notions: needles, thread, thimble.
- Focus on fabric folding: align edges!
- Test thread tension: avoid puckering.
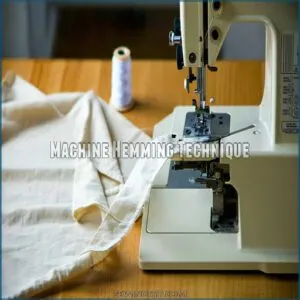
Machine Hemming Technique
Using hemming machines is a game-changer for sewing speed.
Adjust the stitch length to match your fabric and monitor fabric tension to avoid thread breakage.
It’s smoother than hand sewing but demands practice.
A quick tip: start slow—sewing for beginners isn’t a race, master these simple stitches, and you’ll feel like a pro from your hand stitch guide.
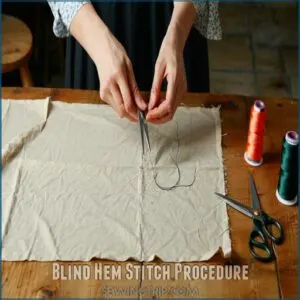
Blind Hem Stitch Procedure
Mastering the blind hem stitch adds finesse to your hemming techniques, especially for pants or sleeves.
Here’s how:
- Prep the Hem: Fold, press, and secure the edge with stitching to prevent fraying.
- Adjust Sewing Tools: Use a blind hem presser foot and matching thread color.
- Perfect Your Stitch: Align fabric, sew slowly, and make certain thread tension avoids visible stitches.
The instructions are designed to be followed in sequence to achieve a professional-looking hem.
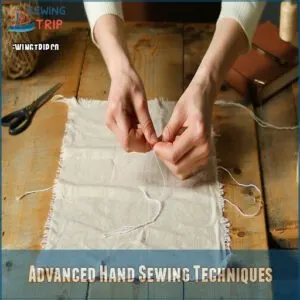
Advanced Hand Sewing Techniques
When you’re ready to take your sewing skills up a notch, advanced techniques like the catch stitch, invisible stitch, and basting stitch can make your mending nearly seamless.
These stitches may sound tricky, but with a little patience (and maybe a few coffee breaks), you’ll be stitching like a pro in no time!
Catch Stitch Application
Ever felt like hems conspire against you?
The catch stitch saves the day!
This cross stitch pattern is stellar for joining fabrics and reinforcing seams.
Keep your thread loose but sturdy—slack keeps it flexible.
Grab basic hand stitches know-how and experiment.
Want step-by-step help?
Explore sewing basics online for extra tips!
| Tips | Why It’s Helpful |
|---|---|
| Use matching thread | Seam looks clean and professional |
| Keep stitches evenly spaced | Guarantees durability |
| Work inside-out on hems | Hides stitches on the surface |
| Use a thimble | Protects your fingers during sewing |
Invisible Stitch Method
If you love the idea of discreet fixes, the invisible stitch is gold.
Perfect for hems or patching spots where visible mending isn’t ideal.
Start by choosing matching thread, fold the fabric edges, and connect them with tiny, hidden stitches.
It’s like fabric weaving in disguise.
- Match your thread color carefully.
- Fold fabric edges neatly.
- Use small, precise stitches.
- Keep stitches slightly loose for flexibility.
Basting Stitch Procedure
If you’re after temporary stitching to test the waters before fully committing, the basting stitch is your go-to.
Prep the fabric, load your needle, and sew long, loose stitches.
It’s perfect for holding seams together (think seam marriage!) or giving garments firmness during adjustments.
Stitch removal is a breeze too—basic hand stitches don’t get easier, with the basting stitch being particularly straightforward.
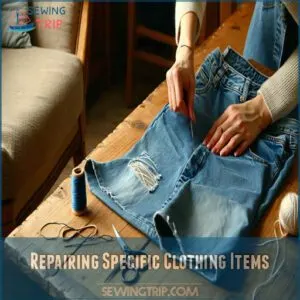
Repairing Specific Clothing Items
In the context of mending specific clothing items, understanding how to approach different materials can save you time and stress.
Whether you’re fixing a hole in your favorite jeans or darning a cozy sock, there’s a simple technique for every repair.
Darning Socks and Knitwear
Fixing socks and knitwear is easier than you think.
Grab some yarn that matches or totally contrasts—your call! Use basic hand stitches and try this:
- Sock darning: Stretch fabric on a darning egg; weave rows with matching or bold thread.
- Knitwear repair: For snags, pull threads back inside.
- Fabric weaving: Strengthen large holes creatively.
- Visible mending: Add flair with colorful stitches.
The instructions provided are designed to be straightforward and easy to follow, allowing for a fun and creative approach to mending.
Mending Jeans and Denim
Jeans take a beating, but mending clothes like denim isn’t tricky with a little know-how.
Start with clean, ironed fabric. For Denim Patching, cut a patch slightly larger than the tear.
Use strong thread selection and basic stitches like the running stitch for jeans reinforcement.
Want flair? Try visible mending techniques, blending Denim Restoration with creativity!
Fixing Leather and Delicate Items
When repairing leather or delicate fabrics like suede, silk, or lace, focus on patience and precision.
For leather patching or suede repair, use strong needles and waxed thread.
With silk mending or lace restoration, stick to basic hand stitches.
Practice visible mending techniques for charm.
Fabric mending takes practice—follow sewing tutorials, and don’t stress over imperfections!
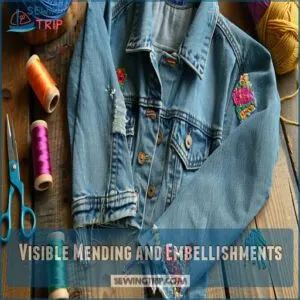
Visible Mending and Embellishments
When your clothes have tears, why not turn them into something uniquely stylish?
With a few colorful threads and fun patch designs, you can create repairs that aren’t just functional but full of personality.
Embroidery Thread Selection
Choosing embroidery thread is like picking the right spice for a dish—it makes all the difference.
Cotton, silk, or polyester? Each fiber type brings its own flair.
Don’t skip on yarn weight or texture options.
Lighter threads work wonders on delicate pieces, while bold thread colors can refresh worn fabrics.
For best results, match thread colors to your handiwork!
Designing Stitch Patterns
Patterns bring personality to your mending projects.
Combine running stitch and back stitch for unique designs, or experiment with slip stitch for subtle details.
Match your thread selection with the fabric choice to enhance sewing aesthetics.
Sketch ideas first—think waves, stars, or grids.
Stitch variety isn’t just practical; it’s your chance to create something both repaired and stylishly personal!
Understanding visible mending stitches can help you achieve a professional and personalized look in your clothing repairs.
Using Patches for Large Holes
Got a big tear? Grab sturdy patch materials like denim or cotton.
Start with a quick hole assessment—trim ragged edges.
For no-sew fixes, fabric adhesives work, but stitching’s stronger.
Place the patch inside or over the hole, ensuring clean patch placement.
Use hand sewing techniques like a whip stitch for seam reinforcement.
Patching clothes makes fabric repair fun and durable!
When selecting materials, consider using fabric patches for a professional finish.
Sustainable Clothing Repair Practices
You don’t need to toss your favorite clothes just because they’ve got a tear or two—it’s easier (and cheaper) to repair them.
By mending instead of replacing, you’ll cut down on waste, save money, and give your wardrobe a little extra mileage, which is a key part of reducing waste.
Reducing Waste and Consumption
Want to make your wardrobe last longer while staying eco-friendly? Start embracing waste reduction and sustainable living with simple clothing repair.
Patch those tears, sew on buttons, and embrace DIY fixes. Here’s how:
- Wash less and repair more.
- Swap clothes with friends.
- Donate instead of tossing.
- Buy second-hand gems.
- Master hand sewing techniques.
Joining The– Living More Sustainably Through Repair
Repairing clothes isn’t just a sewing hack—it’s an eco-friendly habit that fights waste and champions sustainable living.
By mending instead of tossing, you embrace zero waste and join the circular economy.
Simple handsewing techniques keep your wardrobe alive, while green practices like visible mending make repairs stylish.
Sustainable fashion starts with easy sewing techniques—why not stitch your way there?
Frequently Asked Questions (FAQs)
How do you sew a stitch in a sewing machine?
Slide the thread through the machine, following its threading guides.
Place fabric under the presser foot, lower it, and select your stitch.
Press the pedal gently—it’s like driving a car but for clothes!
What is hand stitching fabric repair?
Hand stitching fabric repair is all about fixing tears, holes, or seams by hand.
It’s simple, calming, and doesn’t need fancy tools—just a needle, thread, and a little patience to save your clothes!
How do you use a hand stretch stitch?
To use a hand stretch stitch, start by sewing small, slightly diagonal stitches across the fabric.
Keep the thread loose enough so the fabric can flex.
It’s perfect for stretchy fabrics like leggings or activewear!
Which sewing stitch is best for attaching patches?
Sewing on a patch is a breeze with a whip stitch—it’s like giving your fabric a firm, loving hug.
It’s sturdy, simple, and works great for securing patches while adding a neat finish.
What is a good hand stitch to repair a tear?
A backstitch works wonders for repairing tears.
It’s strong, neat, and holds up well in high-stress spots.
Think of it as the duct tape of sewing—reliable, durable, and perfect for life’s little mishaps.
What stitch to use when repairing clothes?
A tear’s like life throwing a curveball—it happens.
Grab a trusty backstitch for strong repairs or a whip stitch for seams.
Both are simple, secure, and ready to save your favorite clothes.
What is the best stitch for mending seams?
When fixing seams, go for the backstitch—it’s like the overachiever of stitches.
It’s super strong, handles stress like a champ, and works well for high-wear areas.
Perfect balance of durability and ease!
How to mend clothes by hand?
A stitch in time saves nine.
Grab a needle, matching thread, and start small—patch tears with simple running stitches or sew hems back with a whip stitch.
Practice patience; even beginners can master this skill.
What stitch is best for hand sewing clothes?
You’ll love the versatility of the backstitch—strong and flexible, it’s perfect for areas under stress, like seams or zippers.
For quick fixes, try a running stitch; it’s basic, speedy, and beginner-friendly!
How do I fix stretchy fabric tears?
Stretchy fabric tears can be tricky, but grab a zigzag stitch for flexibility.
Use matching thread, slightly stretch the fabric as you sew, and stitch slowly to avoid puckering.
It’s easier than it sounds!
Conclusion
Think of mending clothes like giving old friends a little TLC—they’re worth it, right?
With these easy hand sewing stitches for mending clothes, you’ve got simple tools to patch up tears, fix seams, and even hem pants without breaking a sweat.
Plus, a slip or whip stitch can make all the difference when saving frayed edges.
You’ll keep your favorite pieces alive longer, and you’ll save money and embrace a more sustainable lifestyle as a result.
- https://lifehacker.com/five-basic-hand-stitches-you-should-know-for-repairing-1723233194
- https://www.usatoday.com/story/money/problem-solved/2024/01/04/hand-sewing-stitches-repair-clothes/71992373007/
- https://so-sew-easy.com/hand-sewing-stitches-for-making-clothes-by-hand/
- https://sewing.com/hand-sewing-basic-stitches/
- https://talu.earth/5-basic-hand-stitches-for-mending-clothes/

