This site is supported by our readers. We may earn a commission, at no cost to you, if you purchase through links.
Don’t overlook the buttonhole stitch—it’s a real project-saver when you’re in a button emergency!
Modern machines offer decorative options like scallop and satin stitches that add professional flair to your projects.
For durability, the lock stitch and reinforced straight stitch are your fabric’s best friends.
Start with these essentials, and you’ll handle most projects with ease, transforming your sewing from homemade to handcrafted in seconds.
Table Of Contents
Key Takeaways
- You’ll need the straight stitch for basic seams, zigzag for stretch fabrics, and buttonhole stitch for functional garment openings – these form the backbone of most sewing projects.
- Your machine’s specialized stitches like gathering, topstitching, and understitching can transform homemade projects into professional-looking creations with crisp finishes.
- You can add personality to your work with decorative options like satin stitch for smooth ribbon-like lines, scallop stitch for elegant curved edges, and shell tuck stitch for vintage elegance.
- You’ll get the best results by matching your stitch type to your fabric – use serging techniques for clean edges, blind hem for invisible finishes, and proper tension settings (usually 4-5) for balanced stitches.
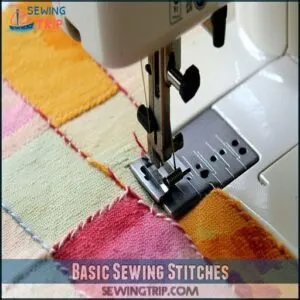
Basic Sewing Stitches
You’ll master your sewing machine in no time with these fundamental stitches that form the backbone of every project.
The straight stitch, reverse stitch, and basting options provide the essential techniques you need to create durable seams, secure your thread ends, and temporarily hold fabric together before permanent stitching, using the straight stitch.
Straight Stitch
The workhorse of your sewing arsenal, the straight stitch forms the backbone of virtually every project.
You’ll use this versatile utility stitch for seams, hems, and topstitching. With adjustable length (typically 0-6mm), you can customize it for different fabrics—shorter for delicate silks, longer for basting.
Many machines also offer needle position adjustment, letting you create perfectly aligned seams with just the right tension adjustment.
Reverse Straight Stitch
At the beginning and end of every seam, the reverse straight stitch is your security guard.
When you press that reverse button, you’re creating anchor stitching that prevents unraveling and guarantees durable seams.
This utility stitch secures your work by doubling back on itself.
For best seam reinforcement, sew forward 3 stitches, backward 3 stitches, then continue forward, using the reverse straight stitch as your guide to ensure durable seams.
Your projects will thank you!
Basting Stitches
While reverse stitches lock your seams in place, basting stitches are the quick-change artists of your sewing arsenal.
These long, temporary stitches hold fabric together until permanent stitching is complete.
When machine basting, try these variations:
- Set stitch length to 4-5mm for standard basting
- Use 6mm+ for gathering fabric
- Try different thread colors for easy removal
- Apply light tension for smooth quick fixes
Zigzag Stitch Options
You’ll find zigzag stitches are your secret weapon for tackling stretchy fabrics and preventing frayed edges, with adjustable width and length settings to customize for any sewing challenge.
From the versatile standard zigzag to specialty options like the 3-step zigzag and narrow stretch stitch, these flexible alternatives to straight stitching will expand your sewing capabilities tremendously.
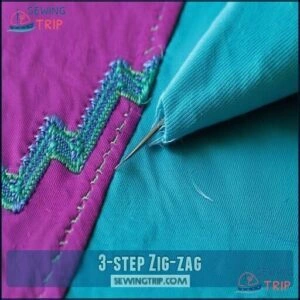
3. step Zig-zag
While the classic zigzag offers versatility, the 3-step zigzag takes your sewing game up a notch.
This powerhouse stitch creates three small stitches within each diagonal zigzag, providing superior seam flexibility and stitch durability.
Perfect for stretch fabrics like yoga pants and leggings, it’s also ideal for finishing edges without puckering.
Your sewing machine features this stitch for both practical and decorative uses—try it on appliqué applications for extra security.
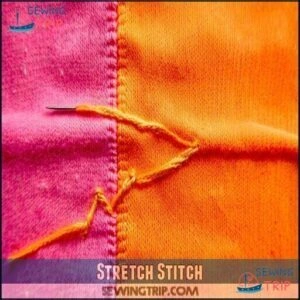
Stretch Stitch
While 3-step zig-zag gives you flexibility, stretch stitches are truly the superheroes for knit fabrics and spandex sewing.
They look like tiny lightning bolts that stretch with your fabric without popping threads.
For best results, use a ballpoint needle and adjust your tension slightly looser.
Many machines offer triple stretch stitch options for maximum seam durability.
Your T-shirts and leggings will thank you! A lightning stitch works well on all weights of stretch fabrics.
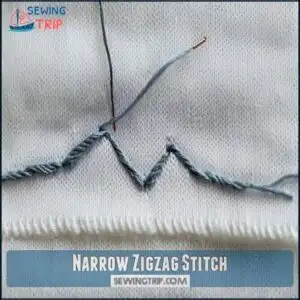
Narrow Zigzag Stitch
When you need just a hint of flexibility without the obvious zigzag look, narrow zigzag stitch comes to the rescue.
This beginner-friendly stitch is perfect for stretch seams on knit fabric while remaining almost invisible.
Set your sewing machine to the smallest zigzag width (0.5-1.0) for edge neatening that won’t draw attention.
It’s also ideal for subtle appliqué uses when you don’t want decorative stitches to steal the show.
Specialized Stitches
You’ll discover specialized stitches are the secret weapons in your sewing arsenal, transforming basic projects into professional-looking creations.
These technical options like buttonhole, gathering, and understitching let you tackle specific challenges that regular stitches can’t handle.
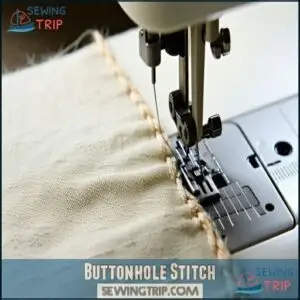
Buttonhole Stitch
The buttonhole stitch transforms plain fabric into functional garment openings with precision. Learning this essential technique elevates your sewing projects from homemade to professional-looking.
- Choose from four common buttonhole types: standard, keyhole, rounded, and stretch
- Match your buttonhole length to your button size plus 1/8 inch for smooth function
- Always test on scrap fabric with proper machine settings before working on your final piece
Many sewers find a buttonhole sewing machine useful for this task, which can help create smooth function and proper machine settings are crucial for a successful outcome.
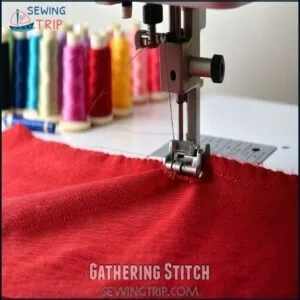
Gathering Stitch
Anyone can master the gathering stitch—it’s your secret weapon for creating beautiful ruffles.
Simply set your machine to its longest stitch length and sew two parallel lines within the seam allowance, about 1/4" apart.
Then pull the bobbin threads while sliding the fabric to achieve your desired ruffle density.
For fabric with higher density, try alternative methods like using a gathering foot or working from the center outward.
You can also buy a specialized presser foot to automate this process.
Topstitching
Adding visible topstitching to your projects creates both functional strength and eye-catching detail.
You’ll want to use a slightly longer straight stitch length (3.0-3.5mm) for best results.
Thread selection makes all the difference—contrasting colors pop while matching threads create subtle texture.
Consider thread color options for a unique look.
Always test your needle choice and presser feet on scrap fabric first, as different fabric types require specific sewing machine techniques.
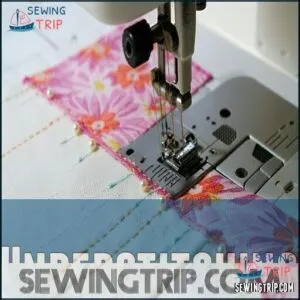
Understitching
While topstitching adds visible detail to your project’s exterior, understitching works behind the scenes as your secret weapon for crisp finishes.
This technique prevents facings and linings from rolling to the visible side of your garment. You’ll stitch close to the seam on the facing side, catching the seam allowance underneath.
It’s particularly useful around necklines and armholes where preventing rollout is essential for professional-looking garment construction.
It helps in preventing outward rolling of garment edges.
Decorative Stitching
You’ll transform your ordinary sewing projects into showstoppers with decorative stitches that add personality and professional flair.
Your machine’s decorative options, from satin and scallop to shell tuck and insertion stitches, let you customize edges, create texture, and add that special finishing touch.
That makes people ask "where did you buy that? with your professional flair.
Satin Stitch
While specialized stitches handle the functional aspects, the satin stitch brings artistry to your sewing projects.
The satin stitch adds smooth, ribbon-like artistry, turning everyday sewing projects into stunning, polished creations.
This closely spaced zigzag creates smooth, ribbon-like lines perfect for Edge Finishing and Applique Techniques.
For stunning satin stitches:
- Adjust stitch width to 2-4mm and density to nearly zero
- Select quality thread that complements your fabric
- Use stabilizer underneath to prevent puckering
- Practice tension adjustments on scraps first
You’ll master this decorative stitch quicker than you can thread your needle!
Scallop Stitch
The scallop stitch transforms plain fabric edges into elegant curves reminiscent of seashells.
You’ll find this decorative option on mid-range to advanced machines, though results vary by machine compatibility.
Adjust your stitch tension carefully when working with different fabric choices—lightweight materials typically yield the best results.
Perfect for edge embellishment on napkins, pillowcases, or children’s collars, this sewing machine functionality adds a touch of whimsy to everyday projects, making it a great option for those looking to add a unique flair with the scallop stitch.
Shell Tuck Stitch
While scallop stitches create defined curves, the shell tuck stitch offers a softer, vintage elegance to your projects.
You’ll love how this delicate stitch creates tiny shell-like tucks along fabric edges. It works beautifully on lightweight fabrics and knits.
Simply fold under a narrow hem, select the vari-overlock or reverse blind hem stitch, and make certain your needle swings just off the edge. Perfect for childrenswear and heirloom sewing projects!
Consider how thread selection matters for ideal results.
Insertion Stitch
The insertion stitch, also known as the faggoting stitch, creates elegant bridges between two fabric pieces.
You’ll find this decorative technique perfect for both visual appeal and practical fabric joining. When working with stretch fabrics, it provides flexibility while maintaining a decorative effect.
For best results, use paper guidance underneath to keep your spacing consistent. Most modern sewing machines include this stitch option in their decorative stitches menu, making it easily accessible for a variety of projects with practical fabric joining.
Serging Techniques
You’ll find serging techniques transform your fabric edges from frayed disasters into clean, professional finishes that make your projects look store-bought.
With options from 4-thread serging for stretchy garments to rolled hems for delicate fabrics, you’ll master that polished look that separates homemade from handcrafted.
4. thread Serging
While decorative stitches add visual interest, 4-thread serging offers unbeatable seam strength for your stretchy fabric projects.
This powerhouse stitch uses four threads to create narrow, flexible seams perfect for activewear applications like leggings and T-shirts.
You’ll need to adjust your differential feed and thread tension correctly on your serger.
The result? Professional-looking overlock stitches that won’t pop when stretched – a game-changer for anyone sewing performance wear.
3. thread Serging
While 4-thread serging creates strong seams, 3-thread serging offers the perfect balance between strength and flexibility.
It’s ideal for finishing raw edges on woven fabrics with a professional look that prevents fraying.
When using 3-thread serging, remember these key points:
- Adjust tension properly for balanced stitches
- Use different thread colors for decorative effects
- Maintain your serger regularly for consistent results
- Practice on scraps before working on your project
Overcasting Stitch
I’ll help create content about overcasting stitch in the specified format, focusing on the technical aspects while keeping it accessible and engaging.
Shield your fabric edges from fraying with the versatile overcasting stitch, which mimics a serger’s finish without the specialized machine. You’ll need an overlock foot for best results, though a zipper foot works in a pinch.
This stitch is perfect for edge neatening on both woven and knit fabrics.
| Setting | Woven Fabrics | Knit Fabrics |
|---|---|---|
| Stitch Width | 5-7mm | 3-5mm |
| Tension | Medium-High | Medium-Low |
| Foot Type | Overlock Foot | Overlock Foot |
| Speed | Moderate | Slow-Moderate |
| Thread | All-Purpose | Polyester/Stretch |
The overcasting stitch wraps thread around the edge while securing the seam, preventing those annoying little threads that seem to multiply in your washing machine, using an overlock foot for the best finish.
Blind Hem Stitch
While overcasting finishes edges, the blind hem stitch creates nearly invisible hems.
Your sewing machine’s blind hem stitch combines small and large zigzags that catch just a thread or two of fabric.
You’ll need a special presser foot and proper stitch settings for different fabric types.
It’s like magic – the finished hem shows only tiny dots on the right side, mimicking professional hand stitching without the time investment.
Rolled Hem Stitch
The delicate whisper of a rolled hem stitch transforms plain edges into professionally finished borders on lightweight fabrics. This technique creates ultra-narrow, thread-wrapped edges perfect for scarves and delicate garments.
Rolled hems add a flawless, delicate finish to lightweight fabrics, turning simple edges into elegant borders perfect for scarves and fine garments.
Sergers are known for their ability to create durable, fray-free seams, making them ideal for rolled hems.
To achieve the best results with a rolled hem, consider the following tips:
- Use a hemmer foot attachment for consistent results on your sewing machine
- Reduce tension slightly when working with slippery fabrics
- Practice on scraps before tackling your final project
- For best results, trim edges evenly before feeding into the foot
Frequently Asked Questions (FAQs)
What is the best stitch for a sewing machine?
You’ll find the straight stitch is your go-to workhorse for most projects.
It’s perfect for construction, topstitching, and hemming woven fabrics.
For stretchy materials or edge finishing, you’ll want the zigzag stitch instead.
What is the best setting for a sewing machine?
Your ideal sewing machine setting includes medium tension (4-5), stitch length of 5mm for regular sewing.
Slower speed is recommended for beginners, and proper needle size for your fabric is also crucial.
You’ll need to adjust settings as you sew different materials.
What is the most effective stitch?
Straight stitches stand superior for most sewing situations.
You’ll find this fundamental feature forms fantastic seams, hems, and repairs.
With a 0-5mm length, it’s your go-to for creating tough, durable connections between fabrics.
How to maintain proper stitch tension?
Check your tension by testing on fabric scraps first.
Adjust your upper dial if stitches are loose or puckered.
You’ll need balanced tension where top and bottom threads meet in the fabric’s middle.
When to change sewing machine needles?
You should change your sewing machine needle after 8-10 hours of sewing, when it’s dull, bent, or when you hear a popping sound. Also, switch needles when changing fabric types.
Can bobbin thread affect stitch quality?
While invisible to many, your bobbin thread works just as hard as top thread.
It can substantially affect stitch quality when tension is incorrect, thread quality is poor, or winding isn’t even, which makes stitch quality a crucial aspect to consider.
Best thread types for different fabrics?
For delicate fabrics, you’ll want polyester or silk thread.
Cotton works best on natural fibers, while heavy-duty nylon or polyester suits denim.
Always match thread weight to fabric weight for balanced stitches.
How to troubleshoot skipped stitches?
Isn’t it ironic that perfect stitches vanish when you’re most inspired?
Replace your dull needle, rethread your machine, adjust tension, and clean lint buildup.
You’ll get back to smooth sewing in no time, with perfect stitches.
Conclusion
Mastering these best sewing machine stitch options is like having a secret weapon in your creative arsenal.
You’ll save time and frustration by knowing exactly which stitch serves your project best.
Don’t be afraid to experiment—your machine offers more versatility than you might realize.
Keep this guide handy, practice regularly, and you’ll soon tackle any sewing challenge with confidence.
Remember, the perfect stitch isn’t just functional—it’s what transforms your projects from ordinary to extraordinary.

