This site is supported by our readers. We may earn a commission, at no cost to you, if you purchase through links.
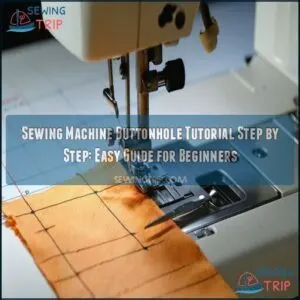
Select the buttonhole stitch setting and adjust the length to suit your fabric.
Mark your buttonhole’s start and endpoints on your fabric—masking tape can help keep everything steady.
Align the fabric under your needle, then stitch the first bar tack (the short horizontal line).
Next, sew down one side of the buttonhole, followed by the top bar tack and the second side.
Finish by carefully cutting the center open with a seam ripper.
Want smoother stitches? Check tension and thread type for the perfect result!
Table Of Contents
- Key Takeaways
- Sewing Machine Preparation
- Buttonhole Types Explained
- Measuring Button Placement
- Sewing Automatic Buttonholes
- Manual Buttonhole Technique
- Buttonhole Troubleshooting
- Customizing Buttonholes
- Hand Sewing Buttonholes
- Advanced Buttonhole Techniques
- Buttonhole Tips and Safety
- Frequently Asked Questions (FAQs)
- Conclusion
Key Takeaways
- Attach the correct buttonhole presser foot, mark start and endpoints, and adjust your sewing machine settings for neatly stitched buttonholes.
- Use interfacing to stabilize the fabric, and test stitches on scrap material to avoid puckering or uneven results.
- For durability, sew bar tacks at the ends of buttonholes, and carefully cut through the center using a seam ripper.
- Test thread tension and stitch settings based on fabric type, and practice techniques like one-step buttonholes for professional finishes.
Sewing Machine Preparation
Before you start sewing buttonholes, make sure your machine is ready with the right tools and settings.
Choosing the correct presser foot, threading your machine properly, and adjusting settings precisely will help you achieve professional results.
Choosing the right presser foot and precise settings transforms your sewing into a seamless journey toward achieving professional, polished results every time.
Choosing The Right Presser Foot
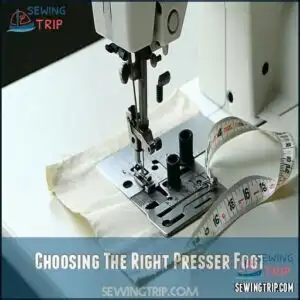
Choosing the right presser foot for your sewing machine buttonhole tutorial is key.
Different feet handle various fabrics and shank types.
Here’s how to pick:
- Check Foot Compatibility: Match the foot to your machine.
- Identify Shank Type: Low or high shank matters.
- Consider Button Size: Larger buttons need bigger feet.
- Try Specialty Feet: Some work better for tricky fabrics.
A buttonhole presser foot can greatly improve buttonhole quality.
Setting Up The Sewing Machine
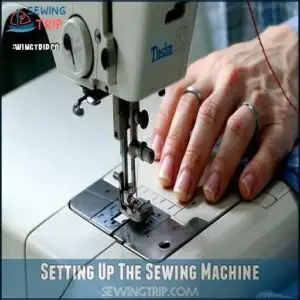
Start by consulting your sewing machine manual to set up correctly. Attach the presser foot and make certain your bobbin thread is wound neatly.
Adjust the sewing machine settings, including thread tension, for smooth stitching. Test on practice fabric to check alignment and stitch quality.
Proper machine setup confirms accuracy and makes sewing buttonholes easier and stress-free, which is crucial for achieving professional results with smooth stitching.
Selecting The Correct Thread
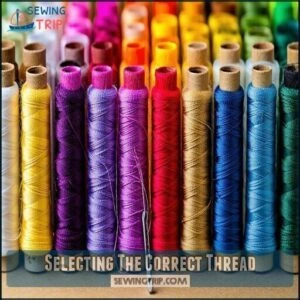
The right thread brings your buttonholes to life.
The right thread transforms buttonholes into stunning details, enhancing your project with durability, style, and a professional finish.
Pick a thread weight compatible with your fabric—light for delicate fabrics, heavier for sturdy ones. Match thread strength and fiber type to your project.
For beginners, color matching is key for clean results.
Thread weight impacts fabric compatibility, so choose wisely.
Specialty threads can add flair but check thread tension and sewing machine settings to avoid snags or breaks, ensuring a clean finish.
Buttonhole Types Explained
Understanding the different buttonhole types helps you choose the best style for your sewing project.
Each option brings unique benefits based on fabric and button size.
- Eyelet buttonholes: Perfect for lightweight fabrics or decorative designs, they feature a small round opening for delicate buttons.
- Keyhole buttonholes: Ideal for coats and jeans, they’ve a rounded end that accommodates larger buttons or shanks.
- Corded buttonholes: Enhance durability and add a professional finish, perfect for custom garments.
- Stretch buttonholes: Designed for knits or elastic fabrics but less durable for heavy use.
Whether using a buttonhole foot, automatic buttonhole settings, or trying hand-stitched techniques, experiment on scrap fabric first.
Understanding the hand-sewn buttonhole process requires precision.
Matching a buttonhole type to your project guarantees a clean, functional, and polished finish.
Measuring Button Placement
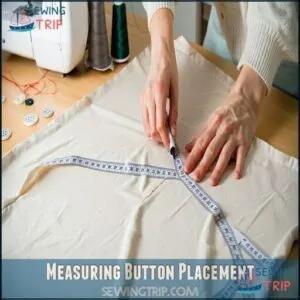
Measuring button placement guarantees your buttonholes are evenly spaced and aligned for a polished look.
Start by marking clear points for each buttonhole based on the button size and the garment’s design.
Calculating Buttonhole Length
To calculate buttonhole length, use this formula: button diameter + button height.
For thicker fabric, add a little extra to guarantee smooth buttoning. Interfacing impact matters too—reinforce fabric first for better results.
When sewing buttonholes, your sewing machine and buttonhole foot usually include a guide, but always test on scrap fabric to confirm accuracy. Adjust as needed to ensure smooth buttoning and achieve the desired outcome with better results.
Marking Buttonhole Start and End Points
Use marking tools, like a fabric pen, to accurately place buttonhole start and end points.
Reinforce the area with interfacing for clean results during buttonhole sewing. Mark points resembling a capital I for clarity.
Focus on even spacing to achieve professional-looking buttonholes.
Hand-sewn buttonholes offer enhanced durability.
A steady hand and careful measurements guarantee your sewing machine and buttonhole foot deliver precise, polished results.
Using Masking Tape for Multiple Buttonholes
After marking the start and end points, masking tape is great for precise alignment when sewing multiple buttonholes.
It keeps spacing consistent and works with most fabrics, depending on tape types. Choose tape that won’t leave residue and gently secure it as your spacing guide.
This sewing tutorial trick simplifies buttonhole placement, turning sewing techniques into step-by-step success on your sewing machine.
Sewing Automatic Buttonholes
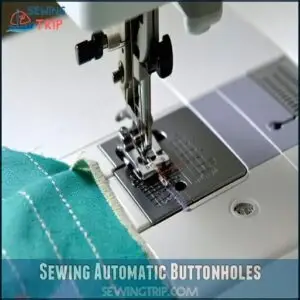
To sew automatic buttonholes, you’ll need to attach the buttonhole foot and set your machine to the correct stitch settings.
The machine will handle most of the work, guiding the stitches to create neat and accurate buttonholes effortlessly.
Attaching The Buttonhole Foot
Begin by checking the foot compatibility of your sewing machine.
Slide the buttonhole foot onto the presser foot bar, ensuring the lever positioning matches your machine’s guide.
Secure it in place with screw tightening for stability.
Align the foot’s built-in sensor with your settings.
Test the attachment by slowly running the machine to verify smooth movement before sewing, ensuring the buttonhole foot is working correctly.
Setting The Machine for Automatic Buttonholes
Once the buttonhole foot attachment is secure, it’s time to set the sewing machine for automatic buttonholes.
Follow these simple steps:
- Check your manual for the automatic settings specific to your machine.
- Verify the bobbin thread is full and tension control is balanced.
- Select the buttonhole stitch option.
- Position machine indicators to match the stitch direction.
Sewing The Buttonhole
Place the fabric under the buttonhole foot and lower it.
Let the sewing machine handle the rest as it stitches each side, secures the T bars, and guarantees buttonhole neatness.
Check thread tension and stitch density for stability.
Cut open the buttonhole using a seam ripper carefully. Your automatic buttonhole is complete—seamless and reinforced with stabilizers!
Manual Buttonhole Technique
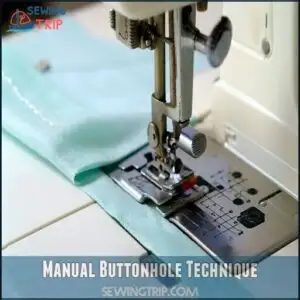
When sewing manual buttonholes, you’ll adjust the stitch width and length yourself to create each side.
This method gives you more control over the process, making it perfect for garments that require a custom touch.
Setting The Stitch Width and Length
Set your sewing machine to the right stitch width and length for best results.
Both settings affect the buttonhole’s look and strength.
- Stitch Width Effects: Wider stitches create stronger edges.
- Length Tension Balance: Shorter stitches improve durability.
- Fabric Type Impact: Adjust width for stretch or thickness.
- Button Size Correlation: Match length to button dimensions carefully.
Sewing The First Side of The Buttonhole
Align your fabric under the sewing machine, guaranteeing the needle position matches your marked start point.
Adjust the stitch width for a consistent stitching line, then lower the buttonhole foot. Guide the fabric feed gently to maintain control.
With proper tension control, sew the first side carefully, keeping stitches even. This step-by-step process guarantees a neat result in your sewing tutorial.
Creating The T Bar
Now that you’ve sewn the first side of your machine buttonhole, it’s time to form the T bar. Adjust the bar tack width to 5.0 and set stitch density to 0 for a firm finish. Secure the short end neatly.
- Position fabric under the buttonhole foot.
- Use manual adjustments for precision.
- Sew forward over the short end.
- Reinforce with tight stitches.
- Trim loose threads carefully.
Buttonhole Troubleshooting
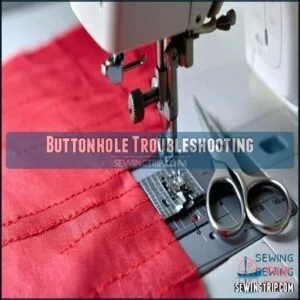
When your buttonholes aren’t turning out right, you can fix most issues with a few adjustments to your machine or technique.
Whether it’s uneven stitches or fabric puckering, checking tension, stitch length, and proper cutting can help.
Common Issues With Buttonholes
Buttonhole sewing problems like skipped stitches, uneven buttonholes, or fabric puckering can be frustrating.
Check your buttonhole foot—it might need recalibrating. Rethreading the sewing machine and using a sharp needle often fixes skipped stitches.
For fabric puckering, adjust tension or add stabilizer. Double-check buttonhole size by testing on scrap fabric to avoid surprises during sewing machine troubleshooting.
Adjusting Stitch Length and Tension
Getting your stitch length and sewing machine tension just right can fix buttonhole hiccups like puckering or skipped stitches.
Before tackling your main project, test samples on scrap fabric. Adjust tension and stitch density until the buttonhole looks clean and even.
- Match stitch length to fabric thickness for balance
- Avoid tight tension causing ripples
- Use your buttonhole foot for symmetry
Using a Seam Ripper to Cut The Buttonhole
Once your sewing machine finishes the buttonhole, it’s time to carefully open it.
Use a seam ripper for precision—start at one end and work toward the middle, then repeat from the opposite side.
To avoid cutting stitches, place a straight pin at each end as a safety stop.
These cutting techniques and proper seam ripper types prevent damage and guarantee a clean finish.
Consider using a specialized tool for buttonholes.
Customizing Buttonholes
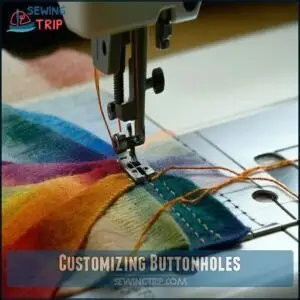
You can give your buttonholes a unique touch by experimenting with different shapes, sizes, and stitch patterns.
Adding decorative elements or adapting the design for stretch fabrics allows you to match your projects’ style and function perfectly, which can be considered a key aspect of giving your buttonholes a unique touch.
Using Different Buttonhole Shapes
Different buttonhole shapes offer flexibility and design flair. Keyhole buttonholes handle heavy fabrics or shank buttons. Rounded buttonholes look neat on lightweight materials. Rectangular buttonholes work well for most garments. For flair, try decorative buttonholes with bold threads.
- Choose buttonhole size by the button’s diameter.
- Use a buttonhole foot for precision.
- Practice on scrap fabric.
- Test different sewing machine settings.
- Stitch carefully for clean results.
Creating Stretch Buttonholes
When sewing stretch buttonholes on knit fabrics, stabilize the area with lightweight interfacing or buttonhole stabilizers.
Use your sewing machine’s zigzag stitch for added elasticity.
Test settings on scrap fabric to prevent tears.
A buttonhole foot guarantees precision in this step-by-step process.
Remember, the stretch buttonhole must flex with the fabric for durability and a polished look.
Adding Decorative Elements
You can jazz up your sewing buttonholes! Adding decorative elements makes your projects unique.
Here’s how:
- Use different thread colors for a checkerboard effect.
- Try a bold 12wt cotton thread.
- Add a gimp thread for lift.
- Use tear-away stabilizer for home décor.
Experiment with button embellishments and fabric combinations. Decorative stitching and unique buttonhole shapes add flair.
Your sewing machine, buttonhole foot, and buttonhole attachment are your best friends! These sewing machine accessories will help you create eye-catching designs.
Hand Sewing Buttonholes
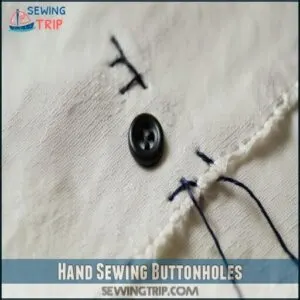
If you want to hand sew buttonholes, start by measuring and marking the buttonhole length carefully.
This technique adds a personal touch and requires precise stitches to secure the edges neatly.
Measuring and Marking The Buttonhole
Why is buttonhole placement so vital? Start by calculating the length: button diameter plus height.
Use marking tools like fabric pens or tailor’s chalk to mark start and end points. Reinforce the area with interfacing for durability. Hand sewing buttonholes provides a durable finish.
Keep spacing even for professional results. Here’s a quick checklist:
| Task | Tool/Tip |
|---|---|
| Measure button | Ruler or tape measure |
| Mark start/end | Fabric pen or chalk |
| Add interfacing | Fusible interfacing |
| Maintain even spacing | Tape or template |
| Verify measurements | Scrap fabric for testing |
Sewing The Buttonhole by Hand
A handsewn buttonhole adds charm and precision.
Start by placing marks for buttonhole placement.
Use these steps:
- Thread a needle with doubled thread and secure it.
- Make small running stitches to outline the space.
- Use buttonhole stitch types for firm edges.
- Anchor each end tightly for durability.
Practice improves your hand sewing techniques!
Securing The Edges of The Buttonhole
Once you’ve finished sewing buttonholes, securing the edges guarantees durability and a polished look.
Use a Blanket Stitch to reinforce the raw edges, gently rolling them for a tidy finish.
For added sturdiness, consider Corded Edges or apply Fray Check.
Whether you’re hand stitching or using a sewing machine with a buttonhole foot, clean edges prevent fraying and improve usability.
Advanced Buttonhole Techniques
You’re ready to take your buttonholes to the next level with advanced techniques.
Learn how to create professional finishes using one-step buttonholes, the four-step method, and corded designs for added durability.
One-Step Buttonhole With a Buttonhole Foot
A one-step buttonhole with a buttonhole foot makes sewing effortless! It’s ideal for shirts and coats.
Follow these steps:
- Attach the buttonhole foot to your sewing machine.
- Insert the button to set the size.
- Adjust settings for automatic buttonholes.
- Choose stitch quality for your fabric type.
- Sew step-by-step, letting the machine handle precision.
Four-Step Buttonhole Process
The four-step buttonhole process is perfect for older machines and beginners mastering manual stitching.
Start by adjusting the sewing machine for each step with precision. Align the buttonhole foot, ensuring your measurements follow the tutorial step-by-step.
Consistency challenges? Practice is key to smooth results.
Remember, step adjustments and patience are essential for even, professional buttonholes every time!
Corded Buttonhole Technique
A corded buttonhole adds strength and flair to your sewing projects.
Here’s the step-by-step process:
- Choose a decorative cord and check foot compatibility.
- Secure the cord in the buttonhole foot’s guides.
- Adjust tension settings on your sewing machine.
- Stitch slowly while the cord is encased for a polished finish.
Master this for durable and stylish effects!
Buttonhole Tips and Safety
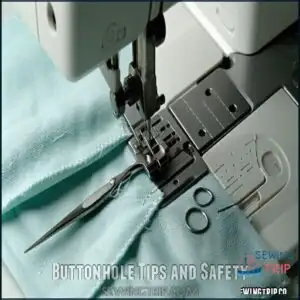
Using the right needle and thread helps prevent skipped stitches and fabric puckering when sewing buttonholes. Always handle scissors and needles carefully to avoid accidents and guarantee precise results.
Using The Right Needle and Thread
Pairing the right sewing machine needle and thread with your fabric avoids messy buttonholes.
Use a 70/10 needle for lightweight fabrics or an 80/12 for medium ones.
Match thread type to fabric—for cotton, use cotton thread; for synthetics, pick polyester.
Correct tension settings stop skipped stitches.
Specialty threads can add flair but test on scrap first.
Choosing the right combination often involves considering proper fabric thread pairing.
| Fabric Type | Needle Size | Thread Type | Example Projects | Compatibility Tips |
|---|---|---|---|---|
| Lightweight | 70/10 | Fine Cotton | Shirts & Blouses | Requires lower tension |
| Medium-weight | 80/12 | Polyester | Dresses & Slacks | Test for puckering |
| Stretch Fabrics | Stretch 75 | Stretch Nylon | Activewear | Use ballpoint needles |
| Heavy-weight | 90/14 | Strong Poly | Coats & Upholstery | Slower machine speed |
| Specialty Fabrics | Microtex 80 | Silk Thread | Decorative Details | Test specialty threads |
To ensure the best results, it’s crucial to follow these guidelines carefully, especially when working with delicate fabrics or specialty threads, and always consider the fabric type and thread compatibility.
Avoiding Fabric Puckering and Snagging
Fabric puckering can ruin buttonholes, but it’s easy to avoid.
Follow these steps:
- Apply lightweight interfacing—fabric stays stable while stitching.
- Use the right sewing machine needle. Fine fabrics? Try a 70/10.
- Adjust thread tension; tight stitches cause ripples.
- Place tissue paper under fabric to prevent snagging.
- Take it slow. Let the sewing machine foot guide you evenly to achieve a smooth finish and prevent fabric puckering.
Handling Needles and Scissors Safely
Keep sharp objects like scissors and needles away from children to avoid poking hazards.
Always store needles safely, like in a pincushion, and dispose of broken ones properly.
Maintain scissors by keeping them sharp and clean for precise cuts.
Use controlled, focused movements while cutting fabric.
Handle all tools with care to prevent accidents and guarantee safe sewing practices.
Frequently Asked Questions (FAQs)
How do I sew a buttonhole?
Start by marking your buttonhole’s position.
Attach a buttonhole foot, set your machine, and sew. Use interfacing for stability.
Cut the center carefully with scissors or a seam ripper. Practice first to perfect it!
Can you add a buttonhole to a sewing machine?
It’s funny how many don’t realize this, but you don’t “add” a buttonhole to a sewing machine.
Instead, machines come with buttonhole settings or attachments to create them.
Check your manual for setup instructions!
How to sew a buttonhole with Brother Sewing Machine?
Attach the buttonhole foot, insert a button into the foot’s slot, and select the buttonhole stitch.
Position your fabric, lower the presser foot, pull down the lever, and let the machine sew automatically.
How do you sew a buttonhole with a vintage machine?
Old-school machines require love.
First, mark your fabric for button length. Set zigzag width and stitch length manually.
Sew the first side, bar tack, second side, then finish the bar.
Practice guarantees perfection!
How do you tack a buttonhole in a sewing machine?
To tack a buttonhole, set your machine to a narrow zigzag stitch with zero length.
Sew small bar tacks at each buttonhole end.
This reinforces edges, prevents fraying, and guarantees your buttonhole stays durable.
Does a sewing machine have a buttonhole function?
Most sewing machines have a buttonhole function, letting you sew them automatically or manually with a buttonhole or zig-zag foot.
Check your machine’s manual for settings and methods—it’s surprisingly straightforward with practice!
What tension should I use for buttonholes?
Think of tension like the salt in a recipe—it needs balance.
For buttonholes, keep tension moderate, around your machine’s default setting (typically 4).
Test on scrap fabric to verify neat, even stitching.
What is 4 step buttonhole?
A 4-step buttonhole requires you to manually adjust your sewing machine for each stage.
This process includes stitch one side, create a bar tack, stitch the opposite side, and finish with another bar tack.
What is the best stitch for a buttonhole?
The best stitch for a buttonhole is a balanced zig-zag stitch with equal tension.
It provides strong, clean edges and works well on most fabrics, ensuring durability and a professional-looking finish every time.
How to sew buttonholes on thick fabrics?
Start by adding fusible interfacing to reduce bulk and stabilize the fabric.
Use a sharp needle, heavy-duty thread, and a buttonhole foot.
Go slow, adjust stitch tension, and test settings on scrap fabric first.
Conclusion
Learning how to make buttonholes with your sewing machine doesn’t have to be intimidating.
By following this sewing machine buttonhole tutorial step by step, you can create precise, professional-looking buttonholes every time.
Remember to choose the correct presser foot, adjust your settings, and mark your fabric carefully.
Practice improves your technique, so don’t hesitate to test on scrap fabric first, and with the right tools and tips, you’ll master buttonholes quickly and add confidence to your sewing projects!

