This site is supported by our readers. We may earn a commission, at no cost to you, if you purchase through links.
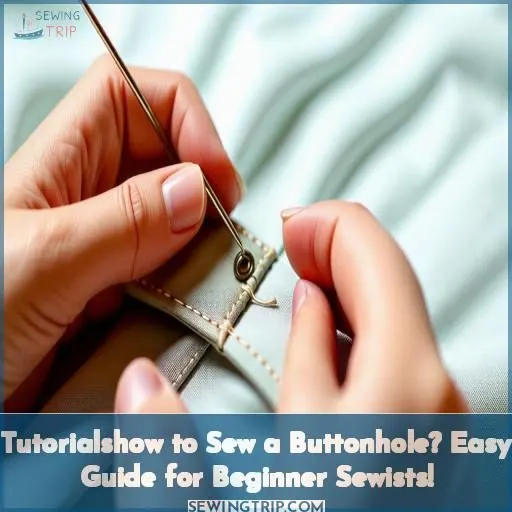 To sew a buttonhole like a pro, follow these steps:
-
Prepare the Fabric
Start by stabilizing your fabric and choosing the right needle and thread.
-
Mark the Buttonhole Placement
Measure your button diameter and add 1/8 inch to determine the buttonhole placement.
-
Use a Buttonhole Foot
For the tutorial, attach a buttonhole foot and adjust the stitch settings according to your project.
-
Sew the Buttonhole
Follow the marked lines to sew the buttonhole, pivoting and securing the ends.
-
No Buttonhole Foot? No Problem
If you don’t have a buttonhole foot, mark parallel lines, stitch the sides, and reinforce the ends.
-
Troubleshoot Uneven Stitches
Adjust the tension and check for puckering if you encounter uneven stitches.
Table Of Contents
- Key Takeaways
- Preparing Your Fabric and Tools
- Marking Buttonhole Placement
- Using a Buttonhole Foot
- Sewing a Buttonhole Without a Foot
- Sewing Horizontal Vs. Vertical Buttonholes
- Sewing a 4-Hole Button
- Finishing the Buttonhole
- Troubleshooting Common Issues
- Reinforcing Buttonholes
- Practicing and Perfecting Your Technique
- Frequently Asked Questions (FAQs)
- Conclusion
Key Takeaways
- Properly prepare the fabric, stabilize it, and choose the right needle and thread to ensure successful buttonhole creation.
- Mark the buttonhole placement accurately, considering the button diameter and adding 1/8 inch to determine the ideal buttonhole length.
- Use a buttonhole foot for consistent and professional-looking buttonholes, adjusting the stitch settings according to the project.
- Troubleshoot uneven stitches by adjusting tension and addressing fabric puckering, ensuring the buttonholes turn out flawless.
Preparing Your Fabric and Tools
To guarantee your buttonhole turns out flawless, start by stabilizing the fabric area with a fusible interfacing or tear-away stabilizer. Then, select the appropriate needle size and thread weight for your fabric – a sharp needle and polyester thread work well for woven fabrics.
Stabilizing the Fabric
When sewing buttonholes, stabilizing the fabric is vital to prevent fraying and guarantee clean, professional results. Choose the appropriate stabilizer type based on your fabric, such as fusible, tearaway, or wash away options, to support the fabric during buttonhole sewing on a machine. This step lays the foundation for successful buttonhole creation.
Selecting the Right Needle and Thread
When sewing buttonholes, choose a needle and thread that complement your fabric weight. For lightweight fabrics, opt for a finer needle and thread. Heavier fabrics require a sturdier needle and thread. For hand-sewn buttonholes, select a heavy-duty thread to guarantee durability. The right needle and thread combination is key to achieving professional-looking results.
Gathering Essential Sewing Supplies
Gather the essential sewing supplies for buttonhole success. Choose high-quality thread that matches your fabric weight. Select the appropriate needle size and type. Keep fabric scraps on hand for practice. Equip yourself with sharp scissors, a seam ripper, and a pressing tool. An expanding sewing gauge and buttonhole foot will also prove invaluable.
Marking Buttonhole Placement
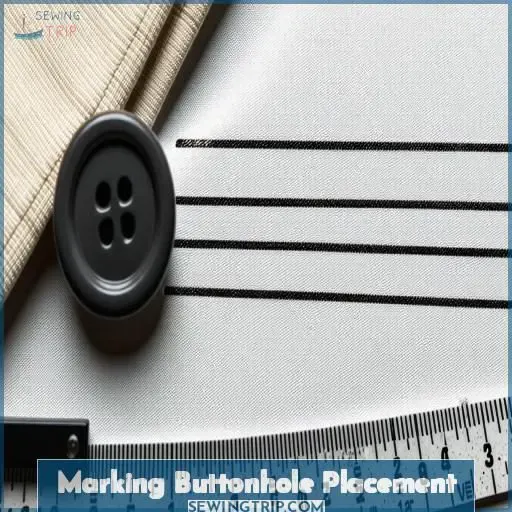
To guarantee a properly fitted buttonhole, start by measuring the diameter of your button and add 1/8 inch to determine the ideal buttonhole length. Once you have the measurement, mark the buttonhole position on your garment, keeping in mind the desired overlap and button placement.
Measuring Button Size
When measuring button size for buttonholes, take into account the button shape, material, weight, color, and style. Verify that the button fits comfortably in the buttonhole space while considering automatic or one-step buttonhole settings. Mark the position accurately to align with the chosen button specifications for seamless button functionality.
Determining Buttonhole Length
Now that you’ve measured your button, it’s time to determine the ideal buttonhole length. As a general rule, the buttonhole should be just slightly larger than the button itself – about 1/8 inch longer on each side. This allows the button to pass through easily without gaping. Consider the fabric type, garment style, and desired closure when selecting the perfect buttonhole size.
- Choose a buttonhole length that accommodates your button size and fabric weight.
- Guarantee the buttonhole is long enough for the button to pass through without strain.
- Adjust the length as needed to achieve a secure, professional-looking closure.
Marking Buttonhole Position
To mark buttonhole placement, first consider your garment type and design. For multiple buttonholes, use an expanding sewing gauge for even spacing. Mark the center of each buttonhole, ensuring proper closure placement. Stitch a box around the marked area, then cut open the center to create the buttonhole opening.
Using a Buttonhole Foot
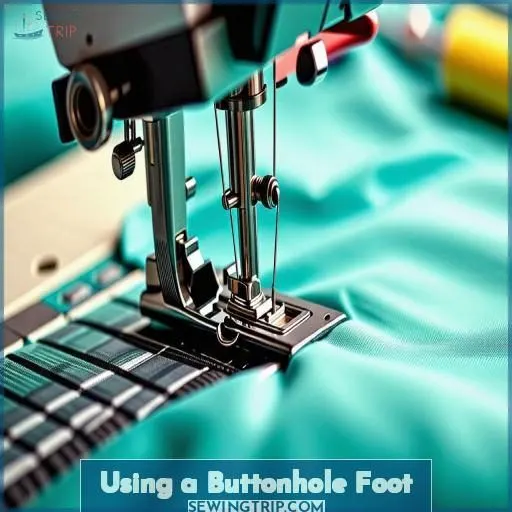
To sew buttonholes using a buttonhole foot, attach the specialized foot to your machine according to the manufacturer’s instructions. Adjust the stitch width and length settings to match the size of your buttons, ensuring dense stitching for a durable buttonhole.
Attaching the Buttonhole Foot
Attach the buttonhole foot to your sewing machine, ensuring it’s compatible with your model. This specialized foot guides the fabric and creates consistent, professional-looking buttonholes. Maintain the foot by keeping it clean and free of lint. If you encounter issues, consult your machine’s troubleshooting guide or consider alternative methods like hand-sewing buttonholes.
Adjusting Stitch Width and Length
Adjust your machine’s stitch width to match your button size and stitch length to a dense satin stitch for a secure buttonhole. Experiment on scrap fabric to find the ideal settings for your fabric thickness. Consult your machine manual for specific guidance on buttonhole stitch adjustments.
- Set stitch width to accommodate button size
- Adjust stitch length to 0.5-1mm for dense stitching
- Test settings on scrap fabric to achieve ideal density
- Refer to machine manual for model-specific buttonhole settings
Sewing the Buttonhole
With your buttonhole foot attached and settings adjusted, it’s time to sew! Lower your needle into the fabric at the start of the marked line. Gently guide the fabric as the machine stitches the first side. Pivot at the end, sew the bartack, then stitch the second side. Finish with a final bartack for a professional touch.
| Stitch Type | Thread Tension | Fabric Choice |
|---|---|---|
| Satin | Balanced | Stable |
| Zigzag | Slightly Loose | Stretchy |
| Straight | Slightly Tight | Denim |
Practice on scraps to perfect your technique. Sewing buttonholes takes patience, but with the right tools and a steady hand, you’ll be a pro in no time! For jeans, flatten thick areas with a hammer before sewing. Cording can add extra stability to buttonholes.
Sewing a Buttonhole Without a Foot
Mark the buttonhole by measuring the length needed based on your button size and drawing parallel lines on the fabric. Stitch straight lines along the marked sides, ensuring even spacing, then reinforce the ends with tight stitches or bar tacks.
Marking the Buttonhole
When marking buttonholes without a foot, select a suitable fabric and consider design aesthetics and buttonhole types for a professional finish. Measure and mark buttonhole placement accurately with the appropriate tools, ensuring they align with your garment’s design. Thoughtful placement contributes to a polished and functional outcome (Source).
Stitching the Sides
- Next, stitch up the sides of the buttonhole using a narrow zigzag stitch.
- Adjust your machine’s stitch length to around 0.3-0.5mm and the width to 2-3mm, depending on your fabric type.
- Sew slowly and carefully, maintaining even stitch density and direction as you work your way up each side.
- Use a contrasting thread color to make the stitching more visible.
Reinforcing the Ends
To reinforce the ends, switch to a wider zigzag stitch and sew 3-4 stitches across the end of the buttonhole. This secures the threads and prevents unraveling. Adjust your stitch length and width as needed to accommodate the thickness of your fabric and thread weight for best results (Source).
Sewing Horizontal Vs. Vertical Buttonholes
Horizontal buttonholes are generally preferred as they tend to be more secure and durable, especially for garments that experience stress or pulling forces. However, vertical buttonholes may be necessary in some cases, such as for certain design elements or when working with tightly fitted garments.
In these instances, you’ll need to exercise extra care during the sewing process to guarantee proper alignment and reinforcement.
Advantages of Horizontal Buttonholes
Horizontal buttonholes offer several advantages over their vertical counterparts. The horizontal orientation distributes stress more evenly, enhancing seam strength and button stability. This layout also complements the natural drape of the fabric, creating a more seamless, aesthetically-pleasing design. Additionally, horizontal buttonholes are generally easier to sew, as the buttonhole foot can move smoothly along the fabric without the risk of catching on edges. For garments that experience frequent opening and closing, the horizontal buttonhole is the preferred choice for its durability and clean, professional appearance.
- Stress distribution
- Seam strength
- Button stability
- Fabric drape
- Design aesthetics
Sewing Techniques for Vertical Buttonholes
When sewing vertical buttonholes, take into account stress points, fabric choice, and closure type to enhance garment functionality. Seam allowances and buttonhole positioning impact design aesthetics, guaranteeing a polished look. Carefully mark, stitch, and reinforce vertical buttonholes for durability. Test on scrap fabric to confirm settings for different materials. Horizontal buttonholes may be more secure in certain applications. Practice precision for professional results.
| Sewing Vertical Buttonholes | ||
|---|---|---|
| Take into Account Stress Points | Choose Suitable Fabrics | Test on Scrap Material |
| Guarantee Durability | Enhance Design Aesthetics | Practice Precision |
Sewing a 4-Hole Button
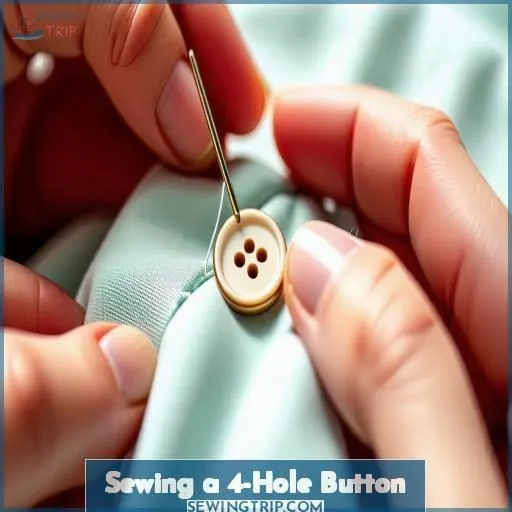
Once you’ve sewn the buttonhole, accurately mark where the 4-hole button should be positioned using a fabric marker or chalk. Secure the button by stitching through each hole multiple times, ensuring the threads are knotted on the underside for reinforcement.
Marking Button Placement
When marking button placement, consider the design of your garment, the type of closure, and the desired aesthetic appeal. Space buttons evenly, taking into account the garment’s closure location and your personal preferences. This guarantees a polished, professional look that complements the overall style.
- Evaluate garment design
- Determine closure placement
- Space buttons thoughtfully
- Consider aesthetic appeal
- Measure and mark carefully
Securing the Button
When securing a 4-hole button, choose a sturdy thread for durability, matching the needle size to your fabric weight. Guarantee knot security by looping the thread multiple times. Consider the button shank thickness for proper fit. Explore finishing options like simple knots or securing with a backstitch for a polished look.
| Thread Choice | Needle Size | Knot Security |
|---|---|---|
| Sturdy Thread | Match to fabric | Looping |
| weight |
Reinforcing the Stitches
To reinforce the stitches when sewing a 4-hole button, start by marking the button placement through the center of the finished buttonhole. Then, secure the button with a few stitches, ensuring the thread passes through all four holes. For added strength, consider using a heavier thread that matches the fabric weight.
Finishing the Buttonhole
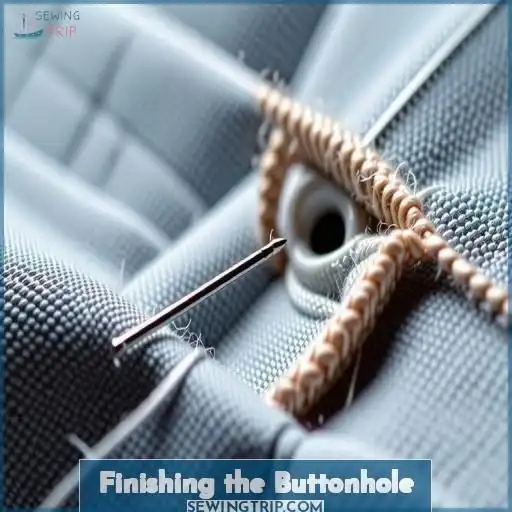
After sewing the buttonhole, carefully cut open the stitched area using sharp scissors or a seam ripper, taking care not to snip the stitches. To prevent fraying on the raw edges, apply fray check or reinforce them with a dense zigzag stitch or blanket stitch by hand.
Cutting the Buttonhole Opening
Now that you’ve carefully stitched your buttonhole, it’s time to open it up. Use a sharp buttonhole chisel or small scissors to carefully cut along the marked line, taking care not to snip into the stitching. Apply a drop of fray check to the raw edges to prevent unraveling. Safety pins can help hold the fabric taut as you cut.
Preventing Fraying
To prevent fraying around the buttonhole, consider your fabric choice and seam finishes. Interfacing is essential, especially for delicate fabrics. Apply a fusible interfacing to the wrong side of the fabric, then use a fray check product along the raw edges of the buttonhole opening. This will help secure the threads and maintain a clean, professional finish.
Securing the Edges
Once you’ve carefully cut open the buttonhole, it’s time to secure the edges. Apply a small amount of fray check or similar product to the raw edges to prevent unraveling. Then, use a dense blanket stitch or bar tacks to reinforce the buttonhole opening for a polished, long-lasting finish.
Troubleshooting Common Issues
If you’re encountering uneven stitching or puckered fabric when sewing buttonholes, the culprit may be an incorrect thread tension or stitch length setting. For buttonhole size adjustments, refer to your machine manual and make incremental changes to the stitch width until you achieve the desired fit for your button.
Uneven Stitching
Uneven stitching often results from tension issues. Guarantee balanced tension by adjusting your machine settings. Use a quality needle and thread suited for your fabric. Stabilize delicate fabrics to prevent puckering. Maintain your machine regularly for peak performance. With some troubleshooting, you’ll be sewing perfect buttonholes in no time!
Puckered Fabric
If your fabric is puckering around the buttonhole, try using a lightweight interfacing to stabilize the area. Adjust your machine’s tension and presser foot pressure to guarantee even stitching. Double-check your thread quality and stitch length – a longer stitch may help prevent puckering.
Buttonhole Size Adjustments
If your buttonhole is too tight for your button, simply lengthen it by adjusting the stitch length on your machine. For oddly-shaped buttons, experiment with the buttonhole size on scrap fabric to find the perfect fit. Consider the fabric thickness, button shape, and closure stress when determining the ideal buttonhole size for your project.
- Adjust stitch length to lengthen buttonhole
- Test on scrap fabric for perfect fit
- Consider fabric, button shape, and closure stress
- Experiment to find ideal buttonhole size
Reinforcing Buttonholes
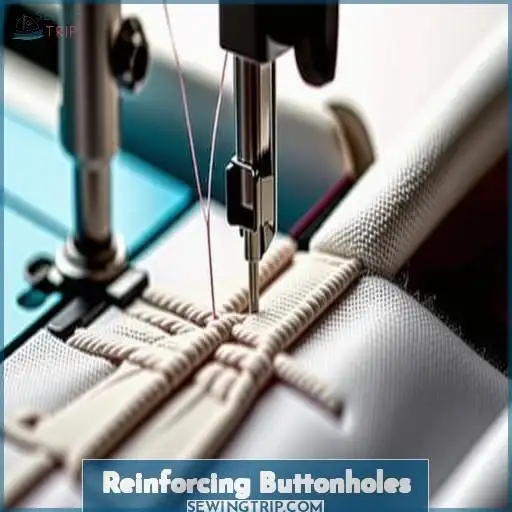
To reinforce your buttonholes and prevent them from prematurely fraying or unraveling, double stitch them by sewing around the buttonhole a second time. Additionally, sew bar tacks—dense, reinforcing stitches—at each end of the buttonhole opening for extra durability.
Double Stitching
To enhance the durability and appearance of your buttonholes, consider double stitching. This technique involves sewing around the buttonhole twice, using a tight zigzag stitch. Choose a thread type and stitch width suitable for your fabric to guarantee a secure and professional finish. Experiment with different combinations to find the perfect match for your project.
| Fabric Type | Thread Choice | Stitch Type | Stitch Width | Appearance |
|---|---|---|---|---|
| Lightweight | Fine thread | Tight zigzag | 2.0 mm | Delicate |
| Medium | All-purpose | Tight zigzag | 2.5 mm | Balanced |
| Heavyweight | Heavy thread | Tight zigzag | 3.0 mm | Sturdy |
Bar Tacks
To reinforce buttonholes, use bar tacks for added durability and strength.
- Bar Tack Definition: Bar tacks are short, dense stitches made at the ends of the buttonhole to prevent fraying.
- Stitch Density Importance: Maintain tight and even bar tacks for lasting buttonholes.
- Thread Color Choice: Match or contrast thread color for functional or decorative options.
- Machine vs. Hand Stitching: Explore machine variations and hand stitching techniques for diverse bar tack styles.
Corded Buttonholes
Corded buttonholes add extra strength and visual interest. Choose a cord that complements your fabric and design. Adjust the buttonhole width to accommodate the cord thickness. Historically, cords were used to reinforce buttonholes on military uniforms. Today, they elevate the look of any garment. Get creative with cord types, colors, and thicknesses to achieve your desired aesthetic.
| Cord Type | Color Selection | Thickness Variations | Historical Usage | Design Aesthetics |
|---|---|---|---|---|
| Cotton | Neutral | Thin | Military | Subtle |
| Silk | Contrasting | Medium | Formal | Elegant |
| Metallic | Matching | Thick | Decorative | Statement |
| Embroidery | Complementary | Varied | Couture | Unique |
Practicing and Perfecting Your Technique
Now that you’ve mastered the basics of sewing buttonholes, it’s time to refine your skills and achieve professional-looking results every time. The key to sewing perfect buttonholes lies in practice and attention to detail.S
tart by choosing the right fabric and thread for your project. Heavier fabrics may require a thicker thread, while delicate materials benefit from a finer thread weight. Experiment with stitch density to find the perfect balance between secure stitching and a clean, polished appearance.
- Practice on fabric scraps before tackling your final garment. This allows you to test different settings, troubleshoot any issues, and build confidence in your buttonhole sewing technique.
- Pay close attention to the positioning and alignment of your buttonholes. Consistent spacing and placement can make a significant difference in the overall look and functionality of your finished project.
- Don’t be afraid to experiment. Try different buttonhole styles, such as horizontal or vertical, to find the most suitable option for your garment. With each practice session, you’ll become more skilled and comfortable sewing perfect buttonholes.
Frequently Asked Questions (FAQs)
How to sew a buttonhole for beginners?
Like a well-kept secret, sewing buttonholes can seem challenging—but you’ll be button savvy in no time! Stabilize fabric, mark sizes precisely, follow machine settings diligently, and practice—your garments will soon sport perfectly polished buttonholes.
How to sew a buttonhole without a buttonhole foot?
Use a tight zigzag stitch for the buttonhole’s outline and ends. Mark the buttonhole size, sew the zigzag outline, then carefully cut the center open with sharp scissors or a seam ripper. Reinforce the holes’ ends with dense stitches.
How do you sew a buttonhole vertical or horizontal?
Orient buttonholes horizontally for extra stability. Vertical placement can work for lightweight fabrics but risks pulling open with stress. Mark placements carefully, considering garment fit and ease of closure before stitching.
How to sew a 4 hole button with a sewing machine?
Start by setting your machine buttonhole stitch and size. Place the button in the buttonhole foot and sew the first buttonhole. Leave thread tails, then carefully sew three more buttonholes using the first as a guide.
How do I prevent fabric puckering when sewing buttonholes?
Like steering a winding river, preventing puckered buttonholes requires a steady hand and some strategic maneuvering. Stabilize the fabric with interfacing, and sew over tear-away stabilizer to tame the unruly threads.
What are the alternatives to using a buttonhole foot when sewing a buttonhole?
If you don’t have a buttonhole foot, consider these alternatives: using a dense zigzag stitch, hand-sewing the buttonhole, or employing specialized vintage attachments compatible with your machine.
How can I reinforce buttonholes for increased durability?
You’ll reinforce buttonholes by sewing around them multiple times or using a dense zigzag stitch. For extra strength, stitch a bar tack at each end.
What are the considerations for sewing horizontal versus vertical buttonholes?
Theoretically, horizontal buttonholes endure more stress than vertical ones. However, you’ll find vertical buttonholes hold up well on garments without extreme pulling forces. Consider the garment’s design and movement to determine the most suitable/ideal/best buttonhole orientation for secure closures.
Are specific techniques recommended when sewing buttonholes on denim or thick fabrics?
For thick denim, flatten it with a hammer before sewing. You’ll also want to stabilize the fabric using interfacing and grade any seams to reduce bulk. Consider a dense zigzag stitch if your buttonhole foot struggles with the thickness.
Conclusion
Ultimately, sewing a buttonhole like a pro takes practice, but this tutorialshow to sew a buttonhole provides a solid foundation. Don’t worry if your first attempts aren’t perfect; refining your technique comes with experience. Regularly revisit this guide, and you’ll soon master buttonholes, adding a professional touch to your sewing projects with ease.

