This site is supported by our readers. We may earn a commission, at no cost to you, if you purchase through links.

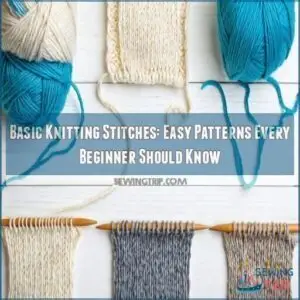
Next, master the stockinette stitch, alternating knit and purl rows, which creates a smooth, classic look. Don’t skip reverse stockinette—it’s just flipping the texture for a bit of flair.
Ribbing stitches, like 1×1 or 2×2, add stretch and are great for cuffs or edges. Ready for texture? Try the seed stitch, alternating knits and purls within rows.
Each stitch is like a puzzle piece, building toward bigger, more exciting projects, and with practice, you’ll unlock a world of creative possibilities!
Table Of Contents
Key Takeaways
- Start with the garter stitch by knitting every row to create a stretchy, beginner-friendly fabric.
- Alternate knit and purl rows for the stockinette stitch, but watch for edge curling and block your fabric if needed.
- Ribbing stitches, like 1×1 or 2×2, add stretch and structure, making them perfect for edges like cuffs and collars.
- For texture, try the seed stitch, which alternates knits and purls within rows, creating a versatile bumpy pattern.
Basic Knitting Stitches
When you’re starting out with knitting, learning the basic stitches is the first step to creating beautiful projects.
The garter stitch, stockinette, and reverse stockinette are simple patterns that every beginner can master with a little practice.
Garter Stitch Basics
The garter stitch is a go-to for beginners.
It uses the knit stitch on every row, making it a simple, repeatable technique.
Known for being stretchy, its reversible fabric lays flat and works great for beginner projects.
For those just starting, garter stitch is easiest to master.
Plus, you won’t stress about stitch count—it’s forgiving and versatile, perfect for scarves, dishcloths, or other basic knitting ideas.
Stockinette Stitch Fundamentals
The stockinette stitch, a beginner favorite, alternates knit and purl stitches.
It creates a smooth texture on one side and purl bumps on the other. Watch for edge curling—blocking stockinette helps!
Practice consistent stitch tension to avoid ladders between rows. Use a gauge swatch before starting projects to guarantee size accuracy.
Blocking with mats can guarantee proper shape. Master these knitting stitches for polished results.
Reverse Stockinette Stitch Techniques
Reverse stockinette stitch flips the classic stockinette stitch, showcasing a textured appearance with purl rows facing out.
It’s adaptable for many projects, offering great fabric drape and neat edge finishing.
Follow these steps:
- Knit the first row, then purl the next.
- Repeat alternately.
- Experiment with pattern adaptations to create unique knitting stitches for depth and texture, using reverse stockinette stitch to achieve the desired effect.
Knit Stitch Essentials
The knit stitch is the foundation of nearly every knitting project, making it essential to learn.
The knit stitch forms the backbone of all knitting—simple yet transformative, unlocking endless creative possibilities for every project.
It creates a smooth texture and is the key to patterns like garter and stockinette stitch.
Definition and Purpose of Knit Stitch
The knit stitch is the heart of knitting, simple yet versatile. Its roots trace back centuries, showcasing timeless charm.
You’ll control stitch tension to keep your fabric smooth. Different needle sizes affect knit fabric properties, from stretchy scarves to dense blankets.
Whether crafting basics or exploring knitting for beginners, mastering this stitch opens endless project possibilities.
| Skill | Description | Benefits |
|---|---|---|
| Stitch Tension | Adjusting tightness | Consistent fabric flow |
| Needle Impact | Influences size/texture | Customize your project |
| Applications | Scarves, hats, etc. | Practical versatility |
Identifying Knit Stitch on Needles
Spotting a knit stitch on your needles is simple once you know how. Look for a “V” shape facing you, signaling the stitch orientation.
Hold the knitting needles so the yarn position stays consistent with your tension control. Check the needle angle if stitches feel tight.
Identifying mistakes saves time and keeps your basic knitting smooth. Selecting the right knitting needle size is essential for gauge and overall quality, ensuring your project turns out as expected with the right knitting needle size.
Common Knit Stitch Abbreviations
Reading patterns is easier when you know standard knitting abbreviations. For the knit stitch, you’ll often see “k,” while “p” indicates a purl stitch.
Common instructions like “k2tog” (knit two together) or “ssk” (slip slip knit) reduce phrasing and streamline directions. Regional variations exist, but digital resources explain these neat shorthand terms, making pattern instructions simpler to follow.
Learning the seed stitch is a great way to practice, as it involves alternating knit and purl. This is because it allows for a practical application of the previously mentioned knitting abbreviations, and helps in understanding the importance of standard instructions in knitting patterns.
Ribbing Stitches Explained
Ribbing stitches alternate knit and purl stitches to create stretchy, textured patterns that are both functional and decorative.
They’re perfect for edges like cuffs, hems, and collars while adding clean, structured lines to your projects.
1×1 Ribbing Pattern
The 1×1 ribbing stitch is simple yet versatile.
By alternating a knit stitch and a purl stitch, you create a stretchy, reversible pattern perfect for edge applications like cuffs or collars.
Its stretch factor guarantees a snug fit.
Keep your stitch count even, focus on tension control, and enjoy the reversibility benefits for neat, polished projects every time.
2×2 Ribbing Technique
Looking to expand beyond 1×1 ribbing? Try the 2×2 rib for added elasticity and style.
Expand your skills with the 2×2 rib stitch—perfect for cozy projects, combining stretch, style, and versatility effortlessly!
By alternating two knit and two purl stitches, you’ll create a thicker rib stitch that’s perfect for scarf ribbing or blanket ribbing.
Understanding reverse stitching techniques can also enhance the durability of your knitted items.
Maintaining consistent ribbing tension is key, especially as you tackle this advanced ribbing technique for warm, cozy projects with a clean, polished look.
Broken Rib Stitch Variations
The broken rib stitch is a versatile take on the classic ribbing stitch, adding texture and character with ease.
It’s reversible, doesn’t curl, and works for projects that need reduced stretch.
Many knitters find inspiration in unique pattern designs.
- Fabric Drape: Light yet structured.
- Stitch Density: Balanced for scarves or hats.
- Edge Finishing: Smooth and clean.
- Colorwork Integration: Perfect for bold contrasts.
- Pattern Design: Simple two-row repeat.
Textured Stitch Patterns
Textured stitch patterns add depth and dimension to your knitting projects, making even simple designs more eye-catching.
By mastering stitches like seed, moss, and basket weave, you’ll create beautiful fabrics with unique, tactile appeal.
Seed Stitch Combination
How does the Seed Stitch stand out? By offsetting patterns of knit and purl stitches, you’ll create a bumpy texture that’s versatile and beginner-friendly.
Perfect for scarves or blankets, this stitch pairs well with chevron seed stitch designs.
Compared to the moss stitch, seed stitch offers a simpler finish, making it a must-know in knitting stitch patterns.
Moss Stitch Alternation
Many knitters confuse moss stitch with seed stitch, but moss stitch uses a four-row repeat pattern.
You’ll alternate knit and purl stitches for two rows, then switch the pattern for the next two rows.
This creates a denser texture than seed stitch.
The stitch count must be even for proper row variations.
Wool yarn enhances the texture density, making it perfect for scarves or blanket borders.
Basket Weave Stitch Technique
The basket weave stitch creates an illusion of woven fabric that’s surprisingly simple to execute.
You’ll alternate between knit and purl stitches in blocks of 4-8 columns, typically working in multiples of 6 stitches.
This textured knitting pattern switches every four rows, producing a stunning woven look that’s perfect for scarves and blankets.
Like dobby weave patterns, this technique creates geometric textures.
Though not reversible, it’s an ideal project for beginners wanting to practice stitch combinations.
Advanced Knitting Stitches
Once you’ve mastered the basics, you’ll find advanced stitches like Andalusian, Bamboo and Cable patterns waiting for you.
These techniques add texture and visual interest to your projects, transforming simple knitting into impressive handcrafted items.
Andalusian Stitch Pattern
The vintage-inspired Andalusian stitch pattern adds elegant texture to your projects with minimal effort.
This symmetrical pattern combines knit stitch and purl stitch in a simple four-row repeat.
You’ll create a grid-like texture that works beautifully for blankets, sweaters, and scarves.
Named after Southern Spain, this easy knitting stitch can be worked flat or in the round with stitch variations for different project ideas, making it a versatile choice for various crafting projects.
Bamboo Stitch Elegance
I need to provide information about bamboo stitch elegance in knitting based on the facts provided. Since this is a technical knitting topic with specific instructions, I’ll create content directly from the available facts without requiring a web search.
How elegant is the bamboo stitch with its distinctive woven texture resembling bamboo shoots? This easy pattern uses slipped stitches and yarn overs to create firm, flat fabric.
Master this bamboo texture with just a few steps:
- Cast on multiples of 2 stitches
- Alternate between knit stitch rows and yarn over rows
- Practice passing slipped stitches over for that unique bamboo ribbing stitch pattern
Cable Stitch Techniques
After mastering the elegant bamboo stitch, you’re ready to try cable stitch techniques.
Cables create beautiful twisted rope patterns by working stitches out of order. You’ll need cable needles to hold stitches while you work others first.
Cable charts show CF (cable front) or CB (cable back) directions. Start with simple 2/2 cables before attempting complex cables like Celtic knots or honeycomb patterns.
The braiding effect adds impressive dimension to your knitting projects.
Frequently Asked Questions (FAQs)
What types of yarn are beginner-friendly?
Soft acrylic yarns bring simplicity, while cotton yarn offers durability.
Choose worsted-weight yarn—neither too thick nor thin—for easy handling.
Stick with light-colored options so you can see your stitches clearly and correct mistakes effortlessly, using worsted-weight yarn.
How do I fix a dropped stitch?
To fix a dropped stitch, use a crochet hook to pull the loose loop through each row above it, recreating the stitches.
Secure it back on your needle, and you’re good to go!
What is the purpose of circular needles?
Circular needles are like the multitools of knitting—they let you create seamless rounds for hats or sweaters, handle larger projects like blankets.
They’re a game-changer!
How do I measure gauge in knitting?
To measure gauge, knit a 4-inch square swatch with your yarn and needles.
Count the stitches and rows in 1 inch.
Adjust needle size if your measurements don’t match the pattern’s gauge.
What are the best tools for knitting?
Knitting without the right tools is like painting without a brush.
Start with quality needles, yarn, scissors, a measuring tape, stitch markers, and a tapestry needle.
Add a row counter and knitting gauge for precision.
Conclusion
Each basic knitting stitch is like a thread in a tapestry, weaving your path to endless creative projects.
By mastering these foundational stitches—like garter, stockinette, ribbing, and seed stitch—you’re setting the stage for any knitting adventure.
Practice is key, so don’t be afraid to make mistakes; it’s how you grow.
With time and patience, these basic knitting stitches will inspire confidence, opening doors to more intricate techniques and truly unique creations.
Now, grab your yarn and create!


