This site is supported by our readers. We may earn a commission, at no cost to you, if you purchase through links.

Understanding pattern symbols, transferring markings correctly, and making fit adjustments before cutting saves time and fabric. Your machine’s stitch settings must match your fabric weight, while organized pattern storage prevents future headaches.
The real magic happens when you learn to read fabric behavior and adjust your technique accordingly.
Table Of Contents
- Key Takeaways
- Choose Patterns That Match Your Skill Level
- Prepare Your Fabric Before Cutting
- Master Pattern Layout and Cutting
- Understand Pattern Markings and Symbols
- Make Accurate Pattern Adjustments
- Set Up Your Machine Properly
- Handle Tricky Fabrics Successfully
- Troubleshoot Common Sewing Machine Problems
- Create Professional Seam Finishes
- Organize Your Pattern Collection
- Frequently Asked Questions (FAQs)
- Conclusion
Key Takeaways
- You’ll get professional results by matching pattern difficulty to your current skill level and carefully reading pattern envelope information before starting any project.
- You’ll avoid costly mistakes by pre-washing and pressing your fabric, then planning an efficient layout that maximizes fabric usage while maintaining proper grain alignment.
- You’ll achieve a perfect fit by taking accurate body measurements, making necessary adjustments before cutting, and creating test garments with muslin to identify issues early.
- You’ll maintain consistent stitch quality by setting the correct thread tension, choosing appropriate needles for your fabric type, and adjusting stitch length based on material weight and stretch.
Choose Patterns That Match Your Skill Level
You’ll save time and avoid frustration by choosing sewing patterns that match your current abilities. Starting with beginner-friendly patterns builds confidence while teaching essential techniques before moving to complex designs.
Smart sewing starts with patterns that match your skills—master the basics before tackling advanced designs
Understanding Pattern Envelope Information
Look beyond flashy cover photos—pattern envelope information holds the keys to success. Study fabric requirements, yardage charts, and notions lists before shopping. Pattern size charts differ from ready-to-wear sizing, so measure yourself accurately. Envelope instructions reveal difficulty levels, suggested fabrics, and construction techniques.
This roadmap prevents costly mistakes and helps you’re equipped for smooth sewing. Understanding the pattern basics guide is essential for choosing the right pattern and achieving perfect results.
Starting With Basic Silhouettes
After studying the pattern envelope details, you’ll want to master basic shapes first. Simple Basic Silhouette designs build your Garment Construction skills without overwhelming complexity. These foundational Sewing Patterns teach Pattern Fitting fundamentals while you develop confidence with Pattern Pieces and Fabric Selection.
- A-line skirts offer forgiving fits and straightforward seaming
- Button-up shirts teach collar attachment and buttonhole placement
- Straight-leg pants introduce waistband construction and zipper installation
Prepare Your Fabric Before Cutting
Proper fabric preparation prevents costly mistakes and guarantees your pattern pieces align correctly with the grain. Pre-washing removes shrinkage and chemical finishes that can distort your finished garment’s fit and drape.
Pre-washing and Pressing Techniques
Pre-washing eliminates fabric shrinkage up to 15% and removes chemicals that cause stiffness. Steam ironing creates fabric relaxation for accurate cutting. These pre-treatment methods prevent post-sewing disasters and guarantee professional results. Proper fabric care tips are essential for achieving the best outcomes in sewing projects.
| Fabric Type | Shrinkage Rate | Pressing Temperature |
|---|---|---|
| Cotton | 3-10% | Medium-High Heat |
| Linen | 5-15% | High Heat with Steam |
| Wool | Up to 10% | Low Heat with Press Cloth |
| Viscose/Rayon | 8-13% | Low-Medium Heat |
Your pressing tools matter—use the right temperature to avoid melting synthetics or scorching natural fibers. Test settings on scraps first.
Identifying Fabric Grain Direction
Before cutting your fabric, you’ll need to identify its grain direction for proper sewing pattern making. The lengthwise grain runs parallel to the selvage edge, while crosswise grain runs perpendicular. Test by gently pulling – lengthwise grain has less stretch due to higher thread count and tighter weave types.
Proper grain alignment guarantees your finished garment hangs correctly and maintains its shape through wear. Understanding the fabric grain tool basics is vital for achieving professional results, utilizing a fabric grain analysis.
Layout Planning for Pattern Pieces
Beyond simple pattern placement, strategic fabric layout transforms your sewing efficiency. Arrange pattern pieces with fabric optimization in mind—group similar grain directions together and nest smaller pieces between larger ones. This spatial arrangement increases fabric usage while maintaining proper seam allowances.
Your cutting strategies should prioritize pattern efficiency, ensuring each piece aligns correctly for professional results.
Master Pattern Layout and Cutting
You’ll transform your fabric from a flat piece into a perfectly positioned pattern piece with the right layout strategy. Proper cutting technique means the difference between a garment that fits like it was made for you and one that looks homemade in all the wrong ways.
Pinning Techniques for Accuracy
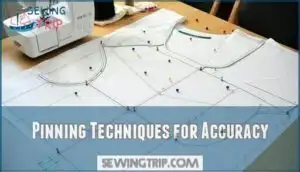
Lay pattern pieces down with purpose—smooth wrinkles first, then secure every corner and curve. Your pinning strategies determine seam precision later.
Place pins perpendicular to cutting lines for fabric control, spacing them two inches apart on straight edges and closer on curves. Pattern pieces stay put when you pin within seam allowances, protecting your cutting accuracy.
Cutting Tools and Blade Maintenance
Sharp tools make all the difference between frustration and satisfaction. Your rotary cutter needs fresh blades every 8-10 projects, while scissors demand regular sharpening to maintain precision cuts. Smart tool storage protects your investment and keeps blades performing like new. Proper rotary cutter maintenance is essential for extending the life of your cutting tools.
- Replace rotary cutter blades at the first sign of skipping or catching on fabric
- Store sharp scissors in protective sheaths to prevent dulling and nicks
- Clean cutting mat regularly with mild soap to remove fabric fibers and adhesive buildup
- Invest in professional scissor maintenance every 6-12 months for superior performance
Matching Plaids and Directional Prints
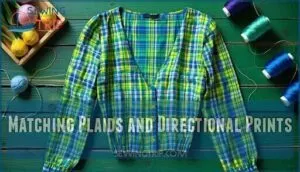
Plaid matching requires strategic planning before your first cut. Purchase extra fabric—half yard minimum—to achieve perfect stripe alignment across pattern pieces. Position key garments sections at dominant plaid lines, marking directional arrows on each piece. Cut one layer at a time for precision, pinning every few inches.
Horizontal stripe continuity across chest and sleeves creates professional symmetry techniques that transform ordinary sewing patterns into expertly crafted garments. Understanding fabric nap rules is essential for a successful sewing project.
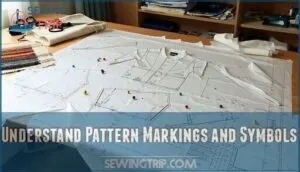
Understand Pattern Markings and Symbols
Pattern markings are your roadmap to professional-looking garments, so you’ll need to transfer them accurately from paper to fabric.
These symbols tell you exactly where to place darts, match seams, and align pieces for a perfect fit every time.
Transferring Darts and Notches
After cutting your pattern pieces, you’ll need precise dart transfer and notch marking for professional results. Use pattern tracing wheels or carbon paper for dart transfer onto fabric. Mark notches with small snips or chalk—never cut beyond seam allowances.
These accuracy tips guarantee perfect seam alignment when assembling your sewing machine pattern pieces together.
Seam Allowance Guidelines
Standard seam allowances in sewing machine pattern pieces usually measure 5/8 inch, though some patterns use 1/2 inch margins. **Check your pattern envelope for specific measurements before cutting.
** Consistent seam margin width prevents fabric shrinkage issues and cutting errors.
**Understanding sewing tolerances helps maintain pattern ease throughout your project.
** Accurate seam allowances guarantee proper fit in sewing pattern creation. To achieve professional results, consider the sewing stitch selection guide for various fabrics and projects.
Grainline and Fold Indicators
Beyond seam allowances lies Fabric Orientation mastery. Pattern Alignment depends on reading grainline arrows and fold indicators correctly. These markings control how your sewing machine pattern pieces lay on fabric, affecting drape and fit.
Master Grainline Management with these steps:
- Align arrows parallel to fabric selvage for proper Fold Line Accuracy
- Measure distance from grainline to selvage at both arrow ends
- Place fold indicators exactly on fabric fold for Seam Matching
- Double-check placement before cutting Sewing Pattern Creation pieces
Make Accurate Pattern Adjustments
Even the best-fitting patterns often need tweaks to match your unique body shape perfectly. You’ll save time and fabric by making these adjustments before cutting, turning potential sewing disasters into custom-fitted successes.
Taking Body Measurements Correctly
Accurate measurements are key to proper garment sizing and fitting techniques. Use quality measurement tools and take readings with a partner for better accuracy.
Measure your bust, waist, and hips in the morning while wearing minimal clothing. Keep the tape parallel to the floor and record measurements immediately on your sewing pattern help chart for reliable pattern making and altering patterns success.
Common Fit Modifications
You’ll master fit adjustment through three essential garment alterations: lengthening or shortening pieces, adjusting bust and waist placement, and modifying shoulder width. These measurement techniques transform store-bought patterns into custom-fitting masterpieces.
Smart pattern making involves understanding your body proportions, then applying targeted sewing pattern fitting methods. With proper altering patterns skills and sewing tips and tricks, you’ll achieve professional results every time.
Creating Test Garments With Muslin
After making fit adjustments, muslin fabric becomes your safety net for pattern testing. Create test garments using inexpensive muslin to identify fit issues before cutting expensive fabric.
This garment prototyping process lets you perfect sewing pattern fitting through multiple iterations. Smart sewers use muslin toiles to fine-tune pattern pieces and avoid costly mistakes on final projects.
Set Up Your Machine Properly
Your
Thread Tension Adjustments
Proper thread tension transforms your sewing machine from frustrating to fabulous. Start with your machine’s default setting, then test on fabric scraps. Upper thread should lock with bobbin thread between fabric layers—not visible on top or bottom surfaces. Adjust incrementally, testing each change.
Clean bobbin area regularly for consistent stitch regulation and superior sewing machine performance.
Choosing Correct Needle Types
Selecting the right needle transforms your sewing experience from frustrating to perfect. Your fabric dictates needle choice—universal needles handle most cottons, while ballpoint needles prevent runs in knits and stretch fabrics.
- Universal needles (size 80/12) work for most woven fabrics and basic sewing projects
- Ballpoint needles slide between fibers in knits without causing fabric damage or runs
- Microtex needles pierce dense fabrics cleanly, ensuring thread compatibility with tight weaves
Replace needles every 6-8 hours of sewing time to maintain ideal sewing speed and precision. Proper needle selection involves understanding sewing needle types to achieve professional results.
Stitch Length Settings for Different Fabrics
After selecting your needle type, adjust stitch length based on fabric weight and stretch. Use 2.5 mm for standard cotton, 1.5-2.0 mm for lightweight fabrics, and 3.0-4.0 mm for heavyweight materials. Knit stitch settings require 2.5-3.0 mm to maintain fabric stretch control.
Proper thread tension tips and fabric density guide your sewing machine basics for professional results.
Handle Tricky Fabrics Successfully
Certain fabrics test even experienced sewers’ skills, but you can master them with the right techniques. Your machine settings and handling methods make the difference between professional results and frustrating fabric battles.
Working With Stretch Knits
You’ll love how stretch knits move with your body, but they need special handling. Knit fabric selection starts with understanding recovery—how well the fabric bounces back. Choose ballpoint needles and stretch stitch options like zigzag for flexible seams.
Transform your knit sewing with these breakthroughs:
- Use fabric stretch gauges to measure stretch percentage accurately
- Apply spray adhesive instead of pins to prevent fabric distortion
- Install a walking foot for even feeding through your machine
- Try knit pattern hacking by removing darts for smoother shaping
- Set stitch length to 2.5-3mm for ideal seam recovery
Understanding fabric stretch percentage is essential for choosing the right fabric.
Knit seam construction requires patience, but mastering these sewing techniques opens up endless possibilities for comfortable, professional garments.
Managing Slippery Silks and Satins
Silks and satins demand respect—they’ll slip away faster than your patience on a Monday morning. Use sharp fabric scissors for smooth cutting methods and pin within seam allowances to avoid holes.
Choose a universal needle and reduce presser foot pressure. **Your sewing machine pattern success depends on proper silk fabric handling and delicate seam construction techniques.
Sewing Delicate Lace and Sheers
Lace and sheer fabrics demand gentle handling and specialized techniques. Your sewing machine becomes an artist’s tool when working with these ethereal materials that seem to float between your fingers.
- Use microtex needles (size 60/8-70/10) – Sharp points pierce cleanly without snagging delicate fibers
- Select fine silk thread choices – Cotton thread can cut through fragile lace fabric; care requires matching weight
- Adjust to shorter stitch length (1.5-2.0mm) – Prevents puckering while securing beaded embellishments properly
- Place tissue paper underneath – Aids sheer sewing tips and prevents fabric from being pulled into feed dogs
Handle beaded embellishments with extra caution during delicate stitching to avoid damaging your sewing machine.
Troubleshoot Common Sewing Machine Problems
Machine troubles can derail your sewing project faster than you can say "bobbin jam." Understanding how to diagnose and fix common issues like skipped stitches, thread bunching, and tension problems keeps your creative momentum flowing smoothly.
Fixing Skipped Stitches
Even experienced sewists face skipped stitches that disrupt perfect seam lines. Start with Needle Selection – replace your needle every project since dull needles cause 70% of skipped stitches. Check Thread Tension and rethread completely, solving 45% of cases. Regular Machine Cleaning removes lint that blocks proper stitch formation.
| Quick Fix | Success Rate |
|---|---|
| Replace needle | 80% improvement |
| Rethread machine | 50% of cases |
| Clean feed dogs | 38% reduction |
Preventing Thread Bunching
Thread bunching happens when your sewing machine’s bobbin management goes awry, creating bird’s nests underneath your fabric. To regain stitch regulation control, check these four areas:
- Clean your bobbin case – Remove lint that disrupts thread flow
- Insert bobbin correctly – Follow your machine’s threading direction exactly
- Use quality thread – Cheap thread breaks down and tangles easily
- Adjust fabric friction – Hold fabric taut but don’t pull during stitching
Proper thread tension settings are essential to prevent thread bunching and achieve smooth stitches.
Resolving Tension Issues
Why does your sewing machine’s thread tension seem impossible to master? Understanding thread tension adjustments resolves nearly sixty percent of seam puckering complaints.
Check your machine calibration first, then test stitch regulation on fabric scraps. Proper bobbin management and matching your fabric stretch to stitch settings creates perfect seams every time.
Create Professional Seam Finishes
Professional seam finishes separate amateur projects from expertly crafted garments. You’ll transform raw edges into polished details that prevent fraying and add structural integrity to every pattern you sew.
Seam Finishing Techniques
Professional seam finishing transforms your projects from homemade to haute couture. Zigzag stitches prevent fray on most fabrics, while serger techniques create durable overlocked edges. French seams encase raw edges completely—perfect for delicate materials. Flat-felled seams deliver industrial strength for heavy-duty garments.
Choose your seam binding method based on fabric weight and desired durability for impeccable results.
Pressing for Clean Results
Beyond basic construction, proper pressing transforms amateur work into polished finesse. **Master these ironing techniques and seam pressing fundamentals for professional-quality results.
Set your iron to match fabric heat settings—cotton withstands high temperatures while delicate synthetics need gentle warmth. **Press seams flat first, then open for crisp lines.
Steam helps stubborn wrinkles surrender without damaging fibers.
Adding Interfacing Correctly
Interfacing acts as your fabric’s backbone, providing essential structure and stability. Proper stabilizer selection prevents stretching and maintains crisp edges throughout construction. Choose fusible methods for quick application, matching interfacing types to your fabric weight.
- Fusible Methods: Apply with dry iron using press-and-lift motions, avoiding sliding that creates bubbles
- Interfacing Types: Match weight to fabric—lightweight for cotton, medium for wool, heavy for structured garments
- Stabilizer Selection: Use tear-away for temporary support, cut-away for permanent reinforcement on stretch fabrics
- Fabric Support: Pre-test adhesion on scraps to guarantee proper bonding without damaging delicate materials
Organize Your Pattern Collection
A well-organized pattern collection saves hours of searching and prevents damage to your valuable templates. You’ll work more efficiently when every pattern piece has its designated place and tracking system.
Digital Pattern Storage Systems
Cloud Storage Solutions transform how you manage digital sewing patterns and organize your Virtual Sewing Libraries. Upload PDF patterns to platforms with Automated Backup Systems for instant access across devices.
Digital File Management eliminates physical clutter, while Pattern Organization Tools let you categorize by designer, garment type, or difficulty level for efficient sewing machine pattern retrieval.
Tracking Pattern Modifications
Once you’ve organized your digital patterns, tracking every modification becomes your secret weapon for sewing success. Smart sewers maintain detailed Pattern Versioning records that transform chaos into control. Document each alteration with Modification Logs that include dates, measurements, and specific changes made to your sewing machine pattern pieces.
- Create Update Management files linking original patterns to revised versions with clear revision numbers
- Record Change Tracking notes directly on pattern tissue using removable labels for future reference
- Maintain Revision History spreadsheets documenting fit adjustments and fabric-specific modifications for each sewing patterns project
This systematic approach prevents repeating mistakes and builds your personal fitting database over time.
Maintaining Pattern Pieces
Keep pattern pieces flat in large manila envelopes or pattern storage boxes to prevent folding creases. Label each piece clearly with fabric scrap samples attached for quick reference.
Store cutting mats vertically to save space. Replace worn seam guides that affect accuracy.
Proper piece labeling saves time when using sewing patterns repeatedly on your machine.
Frequently Asked Questions (FAQs)
What are some sewing tips?
Pre-wash fabric to prevent shrinkage. **Choose patterns matching your skill level.
**
Test tension settings on scraps first. Use sharp needles for clean stitches.
Press seams as you sew for professional results.
How to sew on a sewing machine?
Set up your machine: thread the needle, insert the bobbin, and select appropriate stitch settings.
Practice on fabric scraps first.
Keep steady speed, guide fabric gently, and let the machine do the work.
What do you need to make a sewing machine?
You’ll need metal components like a motor, gears, and frame, plus electrical parts including wiring and controls.
Manufacturing requires precision tooling, assembly equipment, and quality testing systems to create reliable machines.
How do you use a sewing pattern?
Measure twice, cut once—you’ll transfer pattern markings to fabric, cut carefully along lines, and follow step-by-step instructions while adjusting thread tension for professional results.
How do you start a sewing machine?
Turn on your machine using the power switch, then check that the needle’s threaded correctly. Select your desired stitch type and adjust tension settings if needed. You’re ready to start creating!
How do you make a stitch on a sewing machine?
Place fabric beneath the needle, lower the presser foot, and gently press the foot pedal. You’ll create even stitches by maintaining steady pressure and guiding fabric smoothly.
How do you resize patterns between different sizes?
Like Goldilocks finding the perfect fit, pattern grading requires precise adjustments. Blend sizes by drawing smooth connection lines between size lines, adding or subtracting measured differences proportionally across pattern pieces. Keep grainlines straight throughout.
Can vintage patterns work with modern fabrics?
Vintage patterns absolutely work with modern fabrics, but you’ll need to adjust your approach. Choose fabrics with similar weight and drape to the original recommendations, and always make a muslin test first to check fit.
Whats the difference between multisized and individual patterns?
Multisized patterns include several sizes on one pattern piece with different cutting lines, while individual patterns contain only one size per piece. You’ll cut along your specific size line with multisized patterns, but individual patterns come pre-cut for your exact measurements.
How do you modify patterns for different heights?
Tailoring patterns is like adjusting a recipe for different appetites. You’ll lengthen or shorten the torso and sleeves at designated adjustment lines, usually marked on patterns. Simply add or subtract length evenly across these lines to maintain proper proportions.
Conclusion
Like a master craftsman with perfectly calibrated tools, you’ll transform from beginner to pro when you apply these sewing machine pattern tips consistently. Success comes from understanding your machine’s capabilities, respecting fabric properties, and maintaining organized workflows.
You’ve learned to read patterns accurately, adjust for proper fit, and troubleshoot common issues before they derail your project. These foundational skills will serve every future sewing adventure, turning challenging patterns into achievable goals with professional-quality results.
- http://andreasnotebook.com/keep-scissors-sharp/
- https://www.makeit-loveit.com/using-the-double-needle-without-the-2nd-spool-holder/
- http://www.raegunramblings.com/2012/06/how-to-gathering.html
- https://www.pinterest.com/andreapannell/sewing-tutorials-inspiration/
- http://katrinakaycreations.com/how-to-calculate-wearing-ease-for-a-better-fitting-plus-size-pattern/

