This site is supported by our readers. We may earn a commission, at no cost to you, if you purchase through links.
A perfectly threaded machine can still fight you the whole way through a seam—and nine times out of ten, the culprit isn’t the tension dial or the bobbin case. It’s a mismatched needle and thread.
Wrong needle thread combination problems are behind more shredded seams, skipped stitches, and maddening thread breaks than most sewers ever realize, because the symptoms point everywhere except the obvious source.
The good news: once you understand why needle size and thread weight need to work as a system, diagnosing the problem takes minutes.
What follows will help you read the signs, find the mismatch, and correct it for good.
Table Of Contents
Key Takeaways
- A mismatched needle and thread—not tension or the bobbin—is behind most skipped stitches, thread breaks, and puckered seams.
- Needle size and thread weight run on opposite scales, so heavier thread needs a larger needle, while finer thread demands a smaller one.
- Every fabric type needs a specific needle point—ballpoint for knits, microtex for delicates, denim needles for heavy canvas—because the wrong tip damages fibers no matter how perfect your tension is.
- When problems persist, work through one fix at a time—rethread, swap the needle, clean the bobbin area, then test on scrap—before touching timing or calling a technician.
Wrong Needle Thread Combination Symptoms

Your machine is trying to tell you something — you just need to know what to listen for. A wrong needle and thread combo doesn’t fail silently; it leaves clear, repeatable clues.
Once you spot the pattern, cross-referencing it against a guide like sewing machine error code solutions turns a frustrating mystery into a quick, actionable fix.
Here are the most common symptoms to watch for.
Thread Breaking at The Needle Eye
Thread breaking at the needle eye usually points to one clear culprit: a mismatch between thread weight and needle size. Eye burrs on a worn needle shred thread with every pass. Heavy thread forced through a small eye creates dangerous friction — especially at higher speeds where heat builds quickly.
Factoring in fabric lint build-up around the eye makes breakage inevitable.
Follow needle and thread compatibility guidelines, match thread weight selection to needle size selection, and consider thread lubrication for specialty fibers. A regular visual inspection(https://www.janomesewingcentre.com.au/why-does-my-sewing-machine-thread-break/) of the take‑up lever channel can catch burrs before they cause breakage.
Skipped Stitches and Uneven Stitch Formation
Skipped stitches are often the first sign your needle and thread combo is off. The upper thread misses the bobbin loop — and gaps appear without warning.
Stitch gap analysis usually reveals a pattern: skips cluster on dense seams or at higher speeds.
Watch for these red flags:
- Uneven stitches with inconsistent stitch length consistency across the seam
- Skipped stitches that worsen when machine speed calibration is too high for heavy fabric
- Poor feed dog synchronization causing fabric slip detection failures mid-seam
Loops, Nests, and Bunching Under Fabric
When skipped stitches go unfixed, the problem compounds fast. Upper thread slack lets the top thread bypass the bobbin thread catch entirely, and suddenly you’ve got thread loops pooling underneath.
That’s birdnesting — thread nests and thread bunching caused by needle tension imbalance, poor tension disk cleanliness, or needle eye misalignment.
Even feed dog alignment affects how thread bunching builds beneath the needle plate.
Seam Puckering and Fabric Distortion
Birdnesting isn’t the only sign something’s off. Seam puckering and fabric distortion often follow the same root cause — poor needle and thread compatibility guidelines are ignored.
- Tension balancing failures ripple seams along the stitch line
- Inadequate fabric stabilization lets edge fibers shift and gather
- Wrong stitch length optimization compresses dense weaves into visible puckers
Adjusting needle and bobbin tension for balanced stitches — alongside presser foot pressure and seam allowance design — stops bias distortion before it sets.
Needle Shredding, Fraying, or Snapping Thread
When your needle and thread combo is off, the thread itself pays the price. Forcing heavy thread through a fine needle creates brutal friction at the eye — that’s needle thread breakage in slow motion.
Rough edges from a burr-ed eye, dirty tension discs skipping Tension Disc Maintenance, or poor Thread Lubrication accelerate fraying fast. Needle Eye Polishing and matching thread weight to needle size stops the snapping cold.
Visible Holes, Snags, or Pulled Fabric Fibers
A wrong needle punches through fabric instead of parting it cleanly — and the evidence shows up quickly.
Hole Pattern Analysis reveals pin-sized punctures clustered along seam lines. Snag Detection Techniques catch raised fiber loops before they ladder.
Fiber Pull Indicators and Surface Texture Inspection confirm distortion from incorrect needle types. Following needle and thread compatibility guidelines eliminates snags or burrs, preventing fabric damage before it spreads.
Why Needle and Thread Mismatches Happen
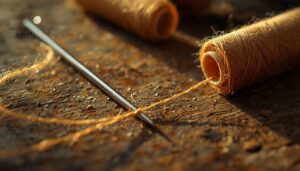
Most needle and thread problems don’t come out of nowhere — they trace back to a few specific mismatches that are easy to overlook. Once you know what causes them, fixing the issue becomes straightforward.
Here’s what’s usually behind the trouble.
Needle Too Small for Heavy Thread
Think of it like forcing a rope through a keyhole.
Lifting the presser foot lever is the key move that releases tension on the thread path, as explained in this guide to threading a Brother sewing machine.
Threading heavy thread through a fine needle is like forcing a rope through a keyhole
When you run heavy thread in a fine needle, Eye Clearance Issues create friction that shreds fibers before they even reach the fabric. Shank Clearance Problems add resistance, causing Thread Friction Heat that weakens the thread fast.
Stitch Bulkiness Effect follows — uneven, stiff seams that signal your needle size chart needs a two-to-three size jump up.
Needle Too Large for Fine Thread
Going too big creates its own set of headaches. An Eye Size Mismatch — where a needle too thick swamps a fine thread — leads to Thread Fraying Risks, Stitch Density Issues, and Fabric Distortion Effects almost immediately.
Watch for these warning signs:
- Fine thread shreds inside an oversized eye
- Bobbin thread bunching beneath the fabric
- Tension Compensation Strategies fail to stabilize stitches
- Needle and thread compatibility guidelines ignored cause thread breakage
- Lightweight fabrics distort from unnecessary needle displacement
Incorrect Thread Weight for Fabric Thickness
Thread weight and fabric thickness have to speak the same language. Use lightweight 60–80 weight thread on sheer or delicate fabrics, 40–50 for midweights, and 30–40 for heavy materials like denim.
Weight-Thickness Matching and Thread Bulk Management aren’t optional — they’re what keep your seams flat and strong.
Fabric Weight Guidelines, and you’ll fight puckering, fraying, and stitch failures every step of the way.
Wrong Needle Point for Fabric Type
Every needle point is engineered for a specific fabric structure — and using the wrong one is like cutting bread with a butter knife.
A ballpoint needle protects Stretch Knit Ballpoint fabrics by sliding between fibers. Silk Microtex Selection prevents fraying on delicate weaves. Lace Needle Precision avoids tearing network threads. Velvet Nap Preservation needs a rounded tip. Canvas Hole Avoidance demands a sturdy denim needle.
Dull, Bent, or Burred Needles
A damaged needle wrecks your work quietly — no warning, just bad stitches.
Watch for these signs of needle point wear:
- Dull needle: scuffs fabric, frays fine thread at stitch exits
- Needle bending: causes needle misalignment and skipped stitches mid‑seam
- Needle burrs: snags thread, raises heat on synthetics
- Bent needle detection: run your fingernail across the tip — roughness means replace it
Preventive needle replacement every 6–8 hours beats troubleshooting every time.
Poor-quality or Old Thread Causing Breakage
Old thread breaks for the same reason old rubber bands snap — the material just gives out.
UV Degradation weakens fiber tensile strength; Moisture Damage promotes mildew that eats through core fibers.
Polymer Coating Wear strips smoothness, causing jams. Fiber Brittleness turns thread snapping into a pattern mid-seam.
Spool Contamination from dust or metal shelves adds micro-abrasions that kill thread durability fast.
Check thread quality before blaming your needle.
Match Needle Size to Thread Weight
Getting needle size and thread weight right is less complicated than it sounds — once you understand how the numbers actually work. The two systems run in opposite directions, which trips up a lot of sewers.
Here’s what you need to know to match them correctly every time.
How Sewing Needle Sizes Work
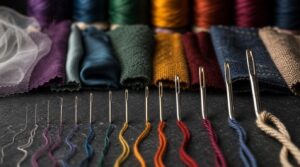
Needle sizing follows a straightforward logic once you understand the system. metric size conversion gives you the needle’s diameter in hundredths of a millimeter — so a size 80 is 0.8mm wide.
US/UK sizing equivalents run parallel but aren’t identical; a European 80 matches roughly a US 12.
Larger numbers mean thicker needles.
Match your needle gauge to fabric weight, and stitch quality improves immediately.
How Thread Weight Numbers Work
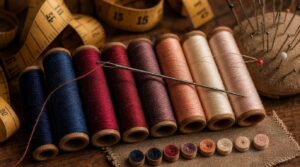
Thread weight numbers run opposite to needle sizing — and that trips up a lot of sewers. 30 wt thread is heavier than a 60 wt.
Think of it as an indirect system: the number reflects how many meters fit into a standard weight, so higher means finer.
50/2 label? That’s 50 weight, two plies — ply strength impacts how seams lay and tension behaves.
Best Needle Sizes for Fine Threads
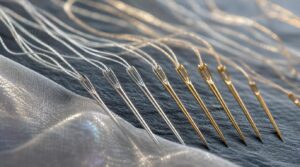
Fine threads — anything from 60 wt to 80 wt — need a needle that keeps pace. A 60/8 or 70/10 is your go-to here.
eye diameter tolerance on these smaller needles stays under 0.6 mm, which prevents fraying. Microtex needle benefits shine on silk and organza: their needle taper length and sharp point precision deliver thread feed consistency without punching visible holes in delicate weaves.
Best Needle Sizes for Medium Threads
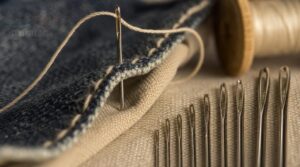
Medium weight threads — think Tex 60–90 or standard 40–50 wt cotton — hit their stride with a needle in the 80/12 to 90/14 range.
That’s your reliable baseline for midweight fabric pairing: denim, twill, canvas, and cotton blends.
Needle size range matters here because thread compatibility directly shapes your sewing quality metrics.
When in doubt, start at 80/12 and adjust from there.
Best Needle Sizes for Heavy Threads
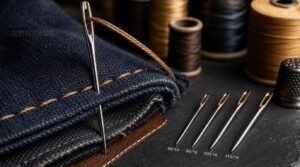
Heavy fabrics demand a needle that can actually keep up. For thick upholstery thread or strong topstitching thread, start at size 90/14 and move toward 100/16 or 110/18 as thread thickness increases.
Eye Diameter Guidelines matter here — heavy-duty needle types need a wider bore and solid Shaft Clearance Tips to cut drag.
Point Strength Selection ensures clean penetration, keeping Stitch Quality Factors solid throughout.
Quick Needle and Thread Pairing Chart
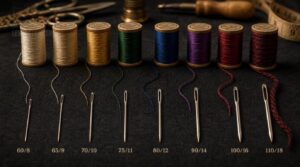
Think of this as your go-to Visual Reference Grid — a Quick Lookup Table that cuts guesswork quickly. The Weight-to-Needle Mapping runs from 60/8 paired with 60 wt silk up to 110/18 for 12–24 wt heavy thread.
Use this Color-Coded Scale and Adjustable Pairing Chart as your baseline for needle and thread compatibility guidelines, then confirm every pairing on scrap fabric first.
When to Change Needle Size Mid-project
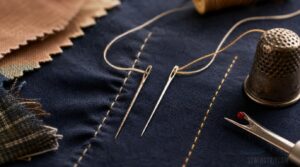
Mid-project needle changes aren’t failures — they’re smart adjustments. Watch your Stitch Quality Indicators: if Thread Break Frequency rises or Seam Line Consistency starts wavering, that’s your Real-time Needle Assessment signal.
Fabric Tension Shifts — like sudden puckering — mean your current needle isn’t keeping pace. Swap sizes immediately, test on scrap, and you’ll often see smoother results within just a few seams.
Choose Needles for Fabric Types
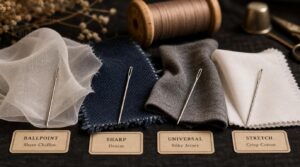
Needle size is only half the equation — point style matters just as much. Different fabrics need different tips to avoid damage, skipped stitches, or pulled fibers.
Here’s how each needle type lines up with the fabric it’s built for.
Universal Needles for Woven Fabrics
Universal needles are your everyday workhorse for woven fabrics — from cotton broadcloth to twill.
Their needle point design features a slight rounding that respects fabric weave structure without gouging threads apart.
Sizes 70/10 through 90/14 cover most weights, and pairing them correctly is foundational to stitch quality control.
Follow basic needle selection guidelines here, and thread breakage becomes rare.
Ballpoint Needles for Knits and Stretch Fabrics
Knits need a different approach. A ballpoint needle’s rounded tip slides between fibers instead of piercing them — that’s your first line of defense against runs and skipped stitches on stretchy fabrics.
For thread compatibility, pair polyester core-spun thread with sizes 70/10 to 90/14 depending on fabric weight. Change the needle every project to keep stitch quality consistent.
Denim Needles for Jeans, Canvas, and Duck Cloth
Heavyweight fabrics like denim, canvas, and duck cloth demand a needle built for resistance. Denim needles feature needle shaft reinforcement and eye size compatibility for threads in the Tex 70–90 range — reducing friction and improving thread heat resistance during long seams.
- size 90/14 to 100/16 for jeans and jackets
- Step up to 110/18 for multiple duck cloth layers
- stitch length to 2.0–2.5 mm for stitch length optimization
- Incorrect needle size causes skipped stitches on heavy fabrics
- bobbin tension interaction after switching to heavier thread
Thread compatibility and fabric weight compatibility both shift when materials stack up — always test first.
Microtex Needles for Lightweight Delicate Fabrics
Where denim needs brute force, delicate fabrics need finesse. A microtex needle delivers exactly that — its sharp point geometry pierces silk, organza, and chiffon cleanly without snagging fibers.
The thin shaft advantage reduces visible holes on fine weaves.
Use size 70/10 to 80/12, pair with 60–80 weight thread for proper thread compatibility, and slow your speed down on sheer layers.
Add tissue for fabric stabilization when needed.
Sharp Needles for Precise Stitch Penetration
Fine fabrics need finesse — but so do precise, clean stitches on any structured woven. Sharp needles cut through dense fibers with minimal force, and their tip geometry optimization means thread seats accurately on the first pass.
Needle sharpness directly affects penetration force measurement; a dull point drags, distorts, and invites thread breakage. Check needle condition before every project — right needle matters more than most sewers realize.
How Fabric Weight Affects Needle Choice
Fabric density drives everything about weight-based sizing — ignore it, and you’re fighting your machine from the first stitch. Match needle size to fabric weight using this quick guide:
- Lightweight fabrics (organza, chiffon): sizes 60/8–70/10 for thread compatibility without visible holes.
- Medium fabrics (cotton, linen): sizes 80/12–90/14 balance fabric density impact with clean stitch quality effects.
- Heavy fabrics (canvas, denim): sizes 100/16–110/18 prevent needle breakage and deflection.
Needle point matching completes the picture — choosing the right needle and thread together is your real needle size chart based on fabric weight.
Signs Your Needle Type is Wrong
Your machine usually tells you when needle type is wrong — you just have to listen. Skipped stitches and fabric skewing are the first red flags.
Run your fingernail along the shaft; needle shaft roughness or eye margin damage means it’s done.
Thread burrs cause thread tension fluctuation mid‑seam. A needle too small shreds thread; an incorrect needle type snags knits. Replace it.
Fix Needle Thread Combination Problems
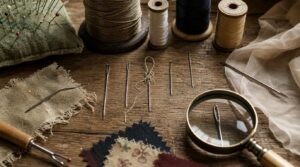
Most needle and thread problems come down to a short list of fixable mistakes. Once you know where to look, the solutions are straightforward and don’t require special tools.
Work through these steps in order and you’ll track down the culprit fast.
Rethread The Upper Thread Path Correctly
A misthreaded upper thread is behind more tension problems than most sewers realize. Start with a full Thread Path Inspection — remove the thread completely and begin fresh.
- Place the spool with proper Spool Cap Alignment to prevent erratic thread delivery
- Pull through every Thread Guide Routing point in sequence, no shortcuts
- Confirm Tension Disk Clearance — thread must seat fully inside the discs
- Loop through the Take-Up Lever Path last, then down to the needle
Clean routing fixes most threading and tension problems instantly.
Raise The Presser Foot Before Threading
Before you thread a single inch of upper thread, lift that presser foot. This one step unlocks Foot Lift Benefits most sewers overlook — it opens the tension discs fully, giving you true Thread Path Clearance through every guide and the take-up lever.
Proper presser foot usage for accurate threading ensures Visual Thread Seating, you can actually confirm.
Skip it, and your tension starts wrong before you sew a stitch.
Check Upper Tension and Bobbin Tension
Tension is the quiet variable most people ignore until something goes wrong. Start with Upper Tension Indicators: loops on the underside mean your upper tension is too loose, while pulled or shredded top thread signals it’s too tight.
Check Bobbin Spring Tension next. Use Incremental Dial Adjustments — quarter turns only — testing each change on scrap fabric.
A clean Balanced Stitch Appearance confirms your Tension Troubleshooting Flow is working.
Replace Damaged or Incorrect Needles
A worn needle is often the culprit hiding in plain sight. Replace yours every 8–12 hours of sewing — that’s your Replacement Timing Guidelines baseline.
Before inserting, do a quick Needle Orientation Check: flat side facing back. Hand‑tighten with Clamp Screw Tightening, then stop.
For Proper Needle Disposal, use a sharps container. Follow Needle Storage Tips — sort by size — to avoid grabbing an incorrect needle mid‑project.
Clean Lint From The Bobbin Area
Needle swapped? Good. Now check what’s lurking underneath.
Lint buildup in the bobbin case is a quiet tension killer. After needle plate removal, you’ll often find woolly fibers packed tight behind the case — enough to throw off stitch quality completely.
Follow this bobbin case cleaning routine:
- Power off before any bobbin case inspection and replacement procedures begin
- Use lint brush selection wisely — a dedicated, clean brush prevents oil smearing
- Apply spring cleaning technique: sweep front to back along tension springs
- Bobbin case brushing clears debris from grooves in under 60 seconds
- Set a cleaning schedule — every 2–3 bobbins keeps lint removal consistent
Test Stitches on Scrap Fabric First
With the bobbin area clean, don’t head straight into your project. Run a quick scrap fabric prep first — cut a 3×6-inch swatch, pre-washed to match your final material.
Testing stitches on scrap fabric before projects reveals tension issues, skipped stitches, and needle thread pairing problems instantly. Do a stitch length test from 2.0 to 3.5 mm, and compare results across fabric weight comparison swatches.
Adjust One Setting at a Time
Once your scrap test reveals a problem, resist the urge to fix everything at once. Change one variable — upper thread tension, stitch length, or presser pressure — then re-test.
Single parameter debugging is the fastest path to a clean seam.
Adjust upper tension in 0.5 increments, run a stepwise stitch length check, and isolate tension before assuming incorrect threading or an incorrect needle is the cause.
When to Inspect Hook Timing or Service The Machine
Sometimes, one stubborn variable isn’t tension or thread — it’s timing. If skipped stitches and thread breakage persist after all your adjustments, hook timing may have drifted.
- Run a Timing Drift Detection check after any jam or belt pulley timing service.
- Perform a Hook Alignment Test by hand-rotating to confirm the hook meets the needle just above the eye.
- Schedule an Annual Hook Inspection for high‑use machines.
- Service After Impact immediately — a dropped machine needs sewing machine timing verified before your next project.
Hook timing adjustment for reliable stitch formation is a job for a technician when diagnosing skipped stitches and fabric distortion doesn’t resolve through standard fixes.
Frequently Asked Questions (FAQs)
Can thread color affect needle performance or tension?
Thread color doesn’t change needle performance or tension. Darker dyes create a color thickness illusion, but actual diameter stays the same.
Thread tension adjustment should always be based on weight, not visual thread contrast.
How does humidity affect thread and needle behavior?
Humidity quietly shifts how your thread behaves.
Moist air boosts Thread Flexibility, aids Needle Heat Dissipation, and stabilizes tension.
Dry air increases Lint Accumulation Rate and raises Bobbin Tension Shift risk—adjust accordingly.
Can sewing speed worsen needle and thread problems?
Yes, sewing speed absolutely worsens existing problems.
Speed Induced Heat builds at the needle tip, while Rapid Stitch Tension and Thread Friction Velocity intensify thread breaking, needle breakage, and improper tension settings faster than you’d expect.
Does thread storage affect its strength over time?
Like wine left in the wrong cellar, thread degrades quietly.
Humidity Impact, Temperature Effects, and Light Exposure all weaken fibers — affecting thread tension, thread breaking risk, and ultimately your thread weight selection and thread type selection decisions.
Conclusion
Think of your sewing machine as a conversation between needle and thread—when one stops listening, the whole seam falls apart.
Most wrong needle thread combination problems aren’t mysterious; they’re just mismatches waiting to be corrected. You now know the symptoms, the causes, and the fixes.
Change the needle, match the weight, test on scrap first. A few deliberate adjustments separate a frustrating project from a clean, professional result every single time.