This site is supported by our readers. We may earn a commission, at no cost to you, if you purchase through links.
Before sewing machines, every quilt told a story stitch by stitch—and that intimacy between maker and fabric never disappeared; it just got harder to find. Hand pieced traditional blocks bring that connection back, trading speed for something more lasting: precision you can feel, seams you control, and the quiet satisfaction of a craft that travels anywhere you do.
needle, thread, and a few carefully marked patches are all you need to build blocks that have anchored American quilt traditions for centuries.
Whether you’re drawn to the humble geometry of a Nine Patch or the crisp angles of an Ohio Star, mastering the basics of cutting, marking, and stitching by hand opens a world of pattern-making that no machine setting can replicate.
Table Of Contents
Key Takeaways
- Hand piecing gives you stitch-level control that machines can’t replicate, letting you ease tension, guide seams around curves, and nail tricky intersections every time.
- Accurate templates, marked stitching lines, and a consistent quarter-inch seam allowance are the three prep steps that determine whether your finished block lies flat or fights you.
- The Sixteen Patch block teaches every core hand-piecing skill in one project — cutting, layout, running stitch, nesting seams, and pressing — making it the ideal starting point.
- Three tools carry most of the weight: a fine sharp needle, long-staple cotton thread, and precision micro-tip scissors — get these right and everything else falls into place.
Hand Pieced Traditional Blocks Basics
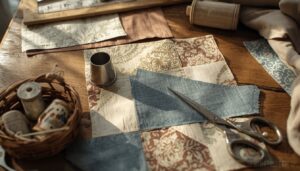
Hand piecing is one of those skills that looks complicated from the outside but makes complete sense once you understand a few core ideas. Before you cut a single square of fabric, it helps to know what you’re working with and why it matters. Here’s what every beginner should understand about the basics.
If you want to see how precision and flexibility come together in practice, this foundation paper piecing tutorial for beginners shows exactly how even scrap fabrics can yield clean, complex designs.
Why Hand Piece Quilt Blocks
There’s something almost meditative about sitting down with a needle, thread, and a stack of fabric squares. Hand piecing gives you control that no machine can match — every stitch lands exactly where you want it.
Hand piecing is meditative precision — every stitch lands exactly where you want it
It relies on a precise 1/8‑inch running stitch to form uniform seams.
Here’s why quilters keep coming back to it:
- Mindfulness through stitching quiets a busy mind
- Portable quilting sessions mean you can stitch anywhere
- Heirloom block quality comes from deliberate, gentle seams
- Fabric stress reduction — no presser foot pulling or shifting layers
- The tactile sensory experience of needle and fabric is genuinely calming
Traditional Block Pattern Examples
Once you feel comfortable with the rhythm of hand piecing, the next natural question is: which block do you actually make first?
| Block Name | Best Known For |
|---|---|
| Nine Patch Family | Simple 3×3 grid, great for scrap fabric |
| Churn Dash Block | Half-square triangles with classic contrast |
| Ohio Star Block | Flying geese units forming a bold star |
Start there — then explore the Friendship Star or Shoo Fly Pattern as your confidence grows.
Hand Piecing Versus Machine Piecing
So you’ve chosen a block — now comes the question every new quilter faces: should you sew it by hand or feed it through a machine?
Hand piecing gives you control that a machine simply can’t match. You adjust your stitch length as you go, ease tension around curves, and guide each seam exactly where it needs to land — especially at tricky points and intersections.
Best Beginner-friendly Block Styles
If hand piecing feels right to you, start with blocks that reward patience rather than punish beginners. The Nine Patch and Rail Fence are perfect first projects — simple grids, straight seams, no curves.
Ready for a small challenge? Try the Sixteen Patch block or Half Square Triangle blocks. The AQS Block by Block series maps out each step clearly.
Templates, Fabric, and Seam Allowances
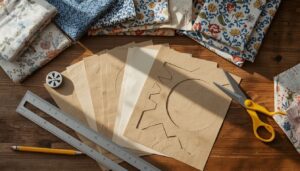
Getting your templates and fabric ready before you sew a single stitch makes everything easier down the line. There are a few foundational steps that set you up for clean, accurate blocks — and skipping any one of them shows up later in your seams. Here’s what you need to know before you cut anything.
Cardboard Template Preparation
A good cardboard template is the foundation every hand piecing project depends on.
Trace your template onto fabric suited for outdoor cushion sewing to ensure your seam allowances hold up through sun and weather.
Cut yours from clean, smooth cardboard using a precision knife for true, crisp edges. Label each piece clearly with the block name and size. Inspect for nicks before each use.
Store templates flat in labeled folders to prevent warping between sessions.
Marking Accurate Stitching Lines
Precise pencil lines are what separate a polished block from a frustrating one.
Place your cardboard template face-down on the fabric’s wrong side. Trace around it using a sharp erasable pencil, pressing firmly enough to leave a clean, visible line. Always choose a marking tool that contrasts with your fabric color — a white chalk pencil on dark prints, a standard graphite pencil on light solids.
| Tool | Best For | Key Benefit |
|---|---|---|
| Graphite pencil | Light fabrics | Fine, precise lines |
| White chalk pencil | Dark fabrics | High contrast visibility |
| Water-soluble pen | All fabrics | Rinses away cleanly |
Use a clear acrylic ruler to verify your traced lines run straight and even. After tracing, double-check every corner intersection — that’s your stitching path, and accuracy here sets up everything that follows.
Cutting With Extra Fabric Margin
Once your stitching lines are traced, cutting comes next — and leaving yourself a little breathing room makes all the difference.
- Cut ¼ to ½ inch beyond your traced line on every side
- Add a slightly wider buffer on slippery fabrics to prevent shifting
- Use a clear ruler and rotary cutter for consistent, straight edges
- Keep all margins uniform across every patch for cleaner seam alignment
Managing Quarter-inch Seam Allowance
A quarter inch sounds tiny — but in hand piecing, it’s everything.
Seam allowance in hand piecing sits exactly 0.25 inches from your marked stitch line to the fabric edge. A scant allowance — around 0.22 to 0.24 inches — is common in practice. Either works, but stay consistent across every patch.
| Seam Allowance Check | What to Watch |
|---|---|
| Needle Position Guide | Align needle to marked line, not the fabric edge |
| Fabric Edge Prep | Trim fraying threads before you begin |
| Thread Tension Balance | Avoid pulling too tight — puckers shift measurements |
| Press Seam Technique | Press flat after each seam to lock accuracy |
With consistent hand stitching techniques, your blocks will stay within 1/16 inch of each other over time.
Organizing Patches Before Sewing
Before a single stitch goes in, take a moment to arrange your fabric patches on a flat surface or design board. Group them by color family, alternating light and dark values so no one area feels too heavy.
Photograph your final layout — that snapshot becomes your map when sewing pulls your attention away from the bigger picture.
Step-By-Step Sixteen Patch Block
The Sixteen Patch block is one of the best places to start because it teaches you every core hand-piecing skill in one small project. You’ll work with sixteen 2-inch squares arranged in four rows, alternating printed and solid fabrics to create that classic checkerboard look.
Here’s exactly how to build it, step by step.
Choose Alternating Fabric Squares
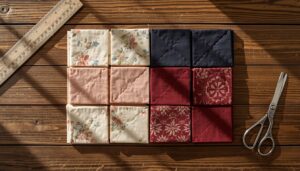
The whole charm of a Sixteen Patch block comes down to one simple idea: light and dark squares taking turns. For each block, you’ll need sixteen 2-inch squares — half in a light fabric, half in a dark one.
Strong value contrast is everything here. Hold your fabrics side by side. If they blur together, swap one out.
Lay Out Four Rows
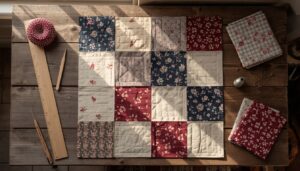
Now that your squares are sorted by value, it’s time to arrange them into a piecing layout before a single stitch is made.
Place your sixteen patches on a flat surface in four rows of four. Alternate light and dark in a checkerboard pattern. Label each row — Row 1 through Row 4 — so nothing shifts out of order once you pick them up.
Stitch Patches Right Sides Together
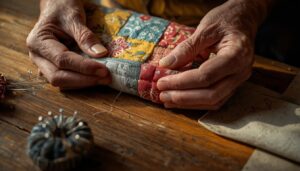
With your layout set, pick up the first two patches in Row 1 and place them right sides together — printed faces touching. Run your finger along the edges to feel that they’re flush.
Pin through both layers about ¼ inch from the edge, then stitch along your marked seam line using a fine running stitch, keeping each stitch roughly ⅛ inch long.
Join Rows With Matched Seams
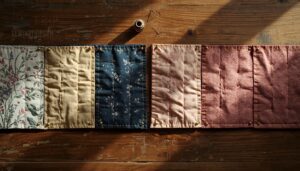
Once your rows are stitched, it’s time to bring them together. Lay Row 1 and Row 2 right sides together, then line up every seam intersection carefully — this is where nesting seams do their job.
Press your seam allowances in opposite directions before pinning so they lock snugly against each other. Pin each intersection, then sew through with a firm running stitch.
Press Seams Flat Carefully
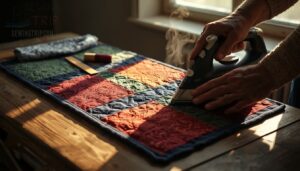
Now that your rows are joined, it’s time to press seams flat. Set your iron to a low to medium heat suited to your fabric. Press from the right side first, then flip and press the wrong side. Always press toward the darker fabric to hide thread lines.
- Use a pressing cloth on delicate fabrics
- Apply brief steam bursts to reduce bulk
- Press center outward along each seam
- Let seams cool completely flat before moving on
Essential Hand Piecing Stitches
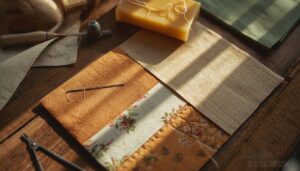
Once you’ve got your patches cut and ready, the real magic happens at the needle. Hand piecing relies on just a handful of stitches, but learning each one well makes all the difference in how your blocks hold together. Here are the essential stitches every beginner needs to know.
Making a Quilter’s Knot
Think of the quilter’s knot as your thread’s anchor — tiny but mighty.
Thread your hand sewing needle, then hold the tail against the needle. Wrap the thread 3 times around the needle for standard cotton thread, or just twice for heavier thread.
Pinch the coils, pull the needle through, and slide the knot snug against the fabric.
Running Stitch Seam Lines
Once you’ve anchored your thread with that quilter’s knot, the running stitch becomes your main workhorse.
- Space stitches 1/8 to 1/4 inch apart for a neat, dashed line seam
- Keep thread tension light — tight stitches pucker fabric
- Follow your marked seam line consistently across every patch
This steady rhythm is what makes hand piecing so satisfying — simple, controlled, and entirely yours.
Backstitch for Stronger Seams
While the running stitch carries your seam forward, the backstitch locks it in place — and that’s a difference worth understanding.
| Situation | Use Backstitch |
|---|---|
| Every 4–5 running stitches | Reinforcement lock |
| Seam start and end | Anchoring security |
Keep stitch length between 1.5–2.5 mm and tension steady — never too tight, or your fabric will pucker.
Securing Corners Neatly
Corners are where hand piecing either holds together or quietly falls apart.
When you reach a corner, use a tailor’s lock stitch — take two tiny stitches in the same spot, loop through, and pull snug. Follow with a firm back stitch to anchor it.
Press the seam allowance flat afterward so every corner lies crisp and clean.
Crossing Seams Without Catching
When your needle crosses an existing seam in hand piecing, don’t catch the seam allowance — pass just above it so it stays free for pressing later.
- Pin perpendicular to the intersection before stitching
- Use a backstitch at the crossing for security
- Trim stray threads to reduce bulk
- Check both sides for puckering before moving on
Top 3 Hand Piecing Supplies
The right tools make all the difference between a frustrating first project and one you actually enjoy. Before you cut a single piece of fabric, it’s worth knowing which three supplies will carry you through every stitch. Here’s what belongs in your hand-piecing kit.
1. Bohin Sharps Hand Needle Size 9
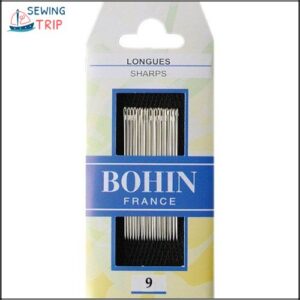
Regarding hand piecing, your needle is everything. The Bohin Sharps Size 9 is a favorite among quilters for good reason — its finely honed, sharp tip glides through light to medium fabrics with almost no resistance.
Each pack holds twenty needles made from nickel-plated steel, so they stay strong and corrosion-free. One honest heads-up: the eye is small, so keep a needle threader nearby if you’re just starting out.
| Best For | Hand quilters, English paper piecers, and sashiko stitchers who want a reliable, sharp needle for detailed work on light to medium-weight fabrics. |
|---|---|
| Primary Material | Stainless steel |
| Intended Use | Hand quilting |
| Skill Level | Beginner to advanced |
| Fabric Compatibility | Light to medium-weight |
| Project Type | Hand sewing |
| Durability Rating | Bend-resistant |
| Additional Features |
|
- Sharp, fine tip glides through fabric smoothly with minimal resistance
- Stainless steel construction keeps needles strong and bend-resistant over time
- Twenty needles per pack gives you plenty to work with before restocking
- Small eye can be tricky to thread, especially if you’re new to hand sewing
- Not a good fit for heavy or thick fabrics — too fine for that kind of work
- Tiny packaging makes it easy to misplace when unpacking your supplies
2. Aurifil Light Beige Cotton Thread
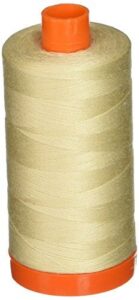
Once your needle’s threaded, the thread you choose matters just as much. Aurifil Light Beige 2310 is a 50-weight, two-ply cotton spun from long-staple Egyptian fibers — meaning it’s strong, smooth, and almost lint-free.
That neutral beige shade blends with a surprisingly wide range of fabrics without showing through seams. Each large spool holds 1,422 yards, so you won’t stop mid-block to restock.
Your stitches will lie flat, your knots will hold firmly, and your seams will stay crisp.
| Best For | Quilters and embroidery enthusiasts who want a reliable, low-lint cotton thread that blends seamlessly across a wide range of fabrics. |
|---|---|
| Primary Material | Egyptian cotton |
| Intended Use | Machine quilting |
| Skill Level | Beginner to advanced |
| Fabric Compatibility | Light to medium-weight |
| Project Type | Piecing and quilting |
| Durability Rating | Low lint, smooth |
| Additional Features |
|
- Long-staple Egyptian cotton keeps stitches smooth and nearly lint-free, so your work stays clean as you go.
- 1,422 yards per spool means fewer interruptions — great for big projects or batching multiple bobbins.
- The light beige shade plays well with tons of fabrics without peeking through seams.
- It’s pricier than standard cotton thread, which adds up if you go through a lot of it.
- A few users have run into loose thread tangled inside the spool, which can be a frustrating mid-project surprise.
- No polyester blend option, so if you need extra strength for heavier fabrics, you’ll have to look elsewhere.
3. Westcott Titanium Micro‑Tip Fabric Scissors
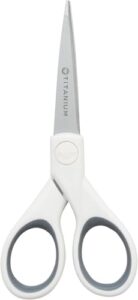
Your thread is smooth and strong — now your scissors need to match. The Westcott Titanium Micro-Tip scissors make thread trimming and small fabric cuts feel smooth.
Their titanium-bonded blades stay sharp project after project, three times harder than standard steel. The pointed micro-tip gets into tight seam corners cleanly.
Soft, ergonomic grips mean your hand won’t tire during long stitching sessions. At 5 inches, they’re lightweight enough to tuck right into your block kit.
| Best For | Sewers, embroiderers, and hobbyist crafters who need precise, comfortable scissors for detailed trimming and small fabric cuts. |
|---|---|
| Primary Material | Titanium-bonded steel |
| Intended Use | Fabric cutting |
| Skill Level | Beginner to advanced |
| Fabric Compatibility | Light to medium-weight |
| Project Type | Sewing and crafting |
| Durability Rating | 3x harder than steel |
| Additional Features |
|
- Titanium-bonded blades stay sharp way longer than standard steel — fewer replacements, more crafting
- The micro-tip gets into tight corners and seam allowances without any fuss
- Ambidextrous and lightweight, so they work for pretty much anyone and travel easily
- Not great for heavy fabrics or thick materials — the micro-tip isn’t built for that kind of stress
- Adhesive from tape or stickers can build up on the textured blade over time
- At 6.5 inches overall, they run smaller than what some users expect
Frequently Asked Questions (FAQs)
How do I fix puckered seams after hand piecing?
Puckered seams usually mean your thread tension ran too tight. Relax your grip, stitch evenly, and press with light steam. Don’t pull the fabric taut — let each stitch settle naturally.
Can I wash hand-pieced blocks before assembling?
Yes, you can — but most quilters skip this step. Washing blocks before assembly risks warping and misalignment. If you must, use cold water and mild detergent, then lay flat to dry.
How long does one quilt block typically take?
Like baking your first loaf of bread, expect to spend 2 to 6 hours on a beginner block. With practice, that drops closer to 1 to 3 hours per block.
What needle size works best for thicker fabrics?
For thicker fabrics, a size 100/16 needle is your best bet. It pierces dense layers cleanly without deflecting or skipping stitches, keeping your seams smooth and tight.
How do I store finished blocks without distortion?
Block finished blocks flat in acid-free boxes lined with tissue paper. Keep humidity between 40–60% and limit stacks to 2–3 high. Check every 6–12 months and reblock if needed.
Conclusion
Like Harriet Powers, who stitched entire histories into her quilts one careful seam at a time, you’re now part of a lineage that values hands over shortcuts.
Your hand pieced traditional blocks carry that same quiet intention—every running stitch a deliberate choice, every matched corner a small triumph.
You don’t need a machine to make something meaningful. You just need a needle, a little patience, and the willingness to slow down and truly make something yours.
- https://tourmalinethymequilts.com/history-of-pieced-quilts
- https://quiltwithmarcibaker.com/foundation-piecing-techniques-new-video-and-a-brief-history
- https://www.redpepperquilts.com/2020/03/a-hand-pieced-trip-around-world-quilt.html
- https://www.americanquilter.com/hand-piecing-sixteen-patch-block-by-block-series
- https://sewliloquies.com/piecedquilt