This site is supported by our readers. We may earn a commission, at no cost to you, if you purchase through links.
Quilters have been stitching square blocks since the 1800s—and the same handful of patterns keeps showing up across generations. That’s not a coincidence.
A Four-Patch sewn in 1870 and one sewn today use the same logic: simple geometry that produces something worth keeping.
Traditional square quilt blocks don’t stick around because they’re easy. They stick around because they work.
Whether you’re cutting your first fabric or ready to tackle a Bear’s Paw, knowing these foundational blocks gives your quilting real direction—and a thread connecting you to every quilter who came before.
Table Of Contents
Key Takeaways
- Traditional square quilt blocks like the Four-Patch and Nine-Patch have lasted for generations because their simple geometry produces reliable, beautiful results every time.
- Value contrast — how light or dark your fabrics are — matters more than color choice, so always test swatches together before you cut anything.
- Learning blocks in order, from strip piecing to flying geese to curved seams, builds your skills naturally, so each new pattern feels less intimidating than the last.
- How you arrange finished blocks — straight set, on-point, or Barn Raising — can make the same blocks look like a completely different quilt.
Traditional Square Quilt Blocks to Try
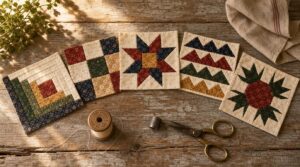
Some quilt blocks have been around for generations — and for good reason. Whether you’re just getting started or adding to your repertoire, these five classics are worth knowing. Here are the traditional square blocks to put on your list.
If you want to dig deeper, traditional patchwork block patterns offer a rich starting point for understanding how these timeless designs came to be.
Four-Patch Block
The 4 patch quilt block is one of the oldest units in traditional quilt patterns. It’s just four equal squares in a 2×2 grid. Simple, but powerful. It is recognized as a classic beginner quilting unit that introduced children to sewing.
Here’s what makes it work:
- Value contrast — pair two light and two dark patches
- Strip piecing — sew long strips, then cut to size
- Nest seams — press center joints to align perfectly
- ¼-inch seam allowance — non‑negotiable for accuracy
Nine-Patch Block
Step up from the 4-patch and you’ll meet its close cousin. The nine-patch block arranges nine equal squares in a 3×3 grid — simple rows, joined together. It’s one of the fastest blocks to chain piece, meaning you sew pieces back-to-back without lifting the presser foot.nnCenter square emphasis matters here. A bold center color draws the eye, while surrounding squares create contrast through light and dark value placement.nn| Position | Fabric Value | Role |n|———-|————-|——|n| Center | Dark or bold | Focal point |n| Corners | Light | Frame |n| Edges | Medium | Connector |nnReady to experiment? Try the disappearing nine-patch — slice and rearrange your finished block for an entirely new pattern.
Log Cabin Block
The Log Cabin block builds outward from a center square, wrapping rectangular strips — called logs — in a spiral. Strip width variation changes how detailed or bold your block looks.
Light and dark strips create diagonal contrast across your quilt.
Your center square choices set the whole mood, so pick something that stands out.
Ohio Star Block
The Ohio Star quilt block is a classic among traditional quilt patterns. It arranges a center square, four plain squares, and four quarter-square triangles in a 3×3 grid to form a crisp eight-pointed star.
Common standard block sizes are 8 or 12 inches.
For an authentic color palette, pair earthy reproduction fabrics with high contrast.
Square-in-a-Square Block
The Square-in-a-Square block puts a smaller center square inside a frame of four corner triangles. Cut your center square first — finished size guides every other cut.
Watch for bias stretch on diagonal edges; use stable fabric and press carefully.
Common finished sizes run 4 to 12 inches, making it flexible for almost any pattern library or quilt layout.
Beginner-Friendly Square Block Patterns
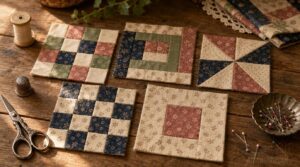
Starting simple is the smartest move you can make as a new quilter. These five beginner-friendly blocks will help you build real skills without the frustration of complicated cuts or tricky angles. Pick one and get your needle moving.
Plus Sign Block
The Plus Sign block is one of the most approachable traditional quilt patterns you’ll find. It’s built on a simple nine-patch grid — nine equal squares arranged three across and three down. Your cross forms from the center square and four adjacent squares.
If you want to push beyond basics, foundation piecing patterns for precise quilt blocks can help you keep those nine-patch seams perfectly aligned.
Use two-color or three-color schemes for sharp contrast.
Chain piecing the seams saves time and keeps everything tidy.
Pinwheel Block
The Pinwheel block is built from four half-square triangles — two fabrics, two colors, one spinning effect.
Triangle assembly starts with the two-at-a-time HST method: pair your fabrics’ right sides together, stitch, cut, and press.
Seam alignment at the center is everything. When those four points meet cleanly, the kinetic motion comes alive.
Use a strong light-dark color pairing for best results.
Courthouse Steps Block
The Courthouse Steps block is basically a Log Cabin’s calmer cousin.
You build outward from a center hearth square by adding fabric strips to opposite sides — top and bottom first, then left and right.
Keep your ¼-inch seam allowance consistent. Press seams as you go.
Scrappy palettes shine here. Rotate blocks 90° for column or lantern effects.
Simple Strip Piecing
Strip piecing is one of the fastest shortcuts in quilting. You sew long fabric strips together — ¼-inch seam allowance throughout — to form one wide strip set.
Then you cut that set into uniform segments. Each cut gives you a ready-made block unit.
Chain piecing multiple segments keeps things moving. Press seams to one side to keep everything flat and accurate.
Straight Seam Practice
Every great quilt starts with one straight seam. Align your fabric edge to the needle plate guide and sew at a steady pace — eyes just ahead of the needle.
- Use sharp needle selection for woven cotton
- Adjust presser foot pressure so fabric feeds evenly
- Backtack at start and end to secure stitches
- Test tension on scrap fabric first
Practice this, and accurate piecing follows naturally.
Intermediate and Advanced Block Ideas
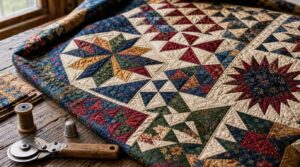
Once you’ve got the basics down, it’s time to stretch your skills a bit. These next blocks bring in sharper angles, tighter piecing, and more pieces per block — so your seam allowance accuracy really starts to matter. Here’s what to try next.
Flying Geese Units
Flying geese units bring directional energy to any quilt. Each unit pairs one large "goose" triangle with two smaller "sky" triangles.
Try the four-at-a-time method — it cuts one large square and two smaller ones into four perfect geese at once. Always trim to size after sewing.
Strong contrast between goose and sky fabric keeps your points sharp and visible.
Bear’s Paw Block
The Bear’s Paw block is a step up from flying geese — same precision, more pieces. It dates to 19th-century American quilting and mimics a clawed paw print.
Build each paw unit separately before joining them to the central square. Use high-contrast fabrics to keep the paw shapes crisp.
It usually finishes at 6 or 9 inches.
Honey Bee Block
The Honey Bee block brings a whole new challenge. It uses dark and light fabrics to form a stylized bee shape inside a square frame.
The bee body is built from triangles and squares. Wings are set in pale fabric on each side for balance.
Finished sizes run 6 to 12 inches, with a ¼-inch seam throughout.
Double Wedding Ring Motifs
The Double Wedding Ring is a step up from the Honey Bee’s straight seams. Here, you’re working with curves. The interlocking rings symbolize unity — two lives joining — making it a classic for wedding quilts since the 1920s–1940s.
Smooth results come from careful curved seam alignment. Use templates or pre-cut rulers to keep your ring widths consistent throughout.
Quarter-Square Triangle Skills
Quarter-square triangle skills take your block construction methods to the next level. Start with two equal squares — one light, one dark. Sew diagonally, cut, press, then sew again perpendicular to the seam. You get four matched triangles from one pair.
- Precision Cutting keeps every tip sharp
- Seam Alignment prevents gaps at intersections
- Point Accuracy defines your star points
- Triangle Assembly order matters every time
- Pressing Techniques reduce bulk at joins
Use these in Ohio Star blocks for clean, crisp results.
Fabric Selection and Block Sizing
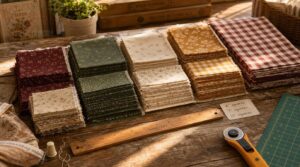
The fabric you pick and the size you cut your blocks will shape how your whole quilt comes together. Getting these two things right saves you time, money, and a lot of ripping out seams. Here’s what to keep in mind before you cut a single square.
Choosing Color Contrast
Color contrast makes or breaks a quilt block. Value difference — how light or dark a fabric is — matters more than the actual color. A pale blue and soft yellow can look nearly identical from across the room.
| Strategy | Why It Works |
|---|---|
| Neutral base | Lets bold fabrics pop clearly |
| Swatch testing | Shows true contrast in real light |
Always test fabric swatches together before cutting.
Using Scrap Fabrics
Scraps are goldmine material. Sort them by value from light to dark before you sew — this is called scrap value sorting, and it keeps your blocks looking intentional.
- Cut scraps into 2-inch squares for easy nine-patch reuse
- Use chain piecing to sew faster with less thread waste
- Press seams flat to one side for neat, accurate blocks
- Stitch binding from leftover scraps to use every bit
Reproduction Fabric Palettes
Reproduction fabric palettes are like a time machine in textile form.
Civil War colors — dusty blues, muted browns, and soft creams — give traditional quilt blocks an authentic 1860s feel. Colonial dye hues like cranberry and indigo evoke early American homespun. Feed sack neutrals such as mellow yellows and oatmeal bring 1930s warmth.
From dusty Civil War blues to feed sack yellows, reproduction fabrics carry history in every thread
Modern versions use safe, stable dyes while preserving every period detail.
Common Block Sizes
Block size shapes everything. Six-inch blocks suit detailed designs but mean more seams. Eight-inch blocks work well for lap and twin quilts. Nine-inch blocks are a go-to for classic 9-Patch layouts. Twelve-inch blocks are the most popular — fewer blocks, less work. Common sizes at a glance:
- 6-inch blocks — high detail, high seam count
- 8-inch blocks — balanced for most bed quilts
- 9-inch blocks — ideal for 9-Patch and Log Cabin
- 12-inch blocks — standard for Ohio Star and Square-in-a-Square
- 15-inch blocks — fastest to finish
Calculating Fabric Requirements
Getting your yardage calculations right saves you from mid-project panic. Start with your block size, then count how many blocks you need. Add 5 percent for fabric waste and seam allowances. Don’t forget binding yardage — measure your quilt’s perimeter, then add 10 inches.
| Quilt Part | Estimate Needed |
|---|---|
| Top fabric | 8–9 yards |
| Backing | 6–7 yards |
| Binding | ¼–1 yard |
| Seam buffer | +5% |
| Directional prints | +1–2% extra |
Layouts for Square Quilt Blocks
Once your blocks are done, how you arrange them changes everything. The same blocks can look completely different depending on the layout you choose. Here are five arrangements worth knowing.
Straight Set Layouts
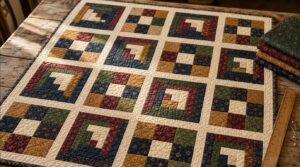
A straight set layout is the simplest way to arrange your square blocks. Blocks sit in aligned rows and columns — no rotation needed.
Here’s what keeps it sharp:
- Use ¼-inch seam allowances consistently
- Add sashing (fabric strips between blocks) to define the grid
- Pin at every intersection for seam matching
- Keep uniform margins around the outer edges
- Press all seams one direction for grid flatness
On-Point Arrangements
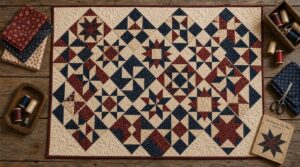
Rotating your blocks 45 degrees — called an on-point arrangement — instantly gives a quilt a more energetic feel than a straight set.
Each block becomes a diamond shape, and the overall grid rotation creates diagonal lines that pull the eye across the quilt. It’s a simple shift that changes everything about how the design reads.
To fill the gaps along the edges, you’ll need setting triangles — half- and quarter-square triangles that square off the quilt’s border. Press each diagonal seam carefully to keep points crisp and corners true.
Alternating Solid Squares
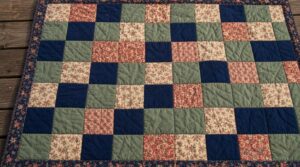
Another easy layout trick is alternating solid squares — swapping patterned blocks with plain solid ones in a checkerboard contrast across your grid rhythm. This creates instant visual breathing room.
- Use a fabric ledger to track color placement
- Aim for strong value placement — light against dark
- Standard finished squares: 2 or 4 inches
- Pairs well with basic patchwork quilt blocks
- Keeps traditional quilt patterns clean and readable
Secondary Pattern Effects
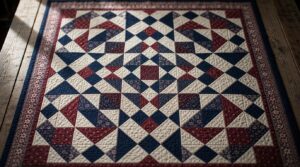
When your patterned and solid blocks sit next to each other, something unexpected happens. Secondary pattern effects emerge — new shapes appear without adding a single extra block. This is the Pattern Depth Illusion.
High contrast between light and dark fabrics makes it stronger. Even small misalignments weaken it, so keep your seams consistent.
Barn Raising Layouts
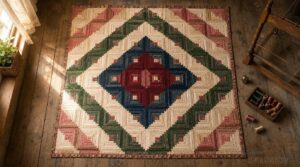
The Barn Raising layout arranges Log Cabin blocks in concentric rings, moving from dark to light — like bayed wall frames rising outward from a center point. Workers follow clear pathways between sections, so your eye travels naturally across the quilt. This load distribution effect creates balance. Place blocks precisely to maintain windward geometry and strong scaffolding anchors throughout.
- Start from the quilt center
- Alternate light and dark rings
- Keep seams consistent
- Use square block assembly order
- Step back often to check symmetry
Frequently Asked Questions (FAQs)
How do I fix uneven seams after sewing?
Reseam only the misaligned section — don’t redo the whole seam. Press seams flat, check your stitch length (5–3mm), and use a seam guide to keep your ¼-inch allowance consistent.
What tools do beginner quilters actually need?
The right tool makes the job easier." You really only need four things: a rotary cutter, a self-healing mat, a quilting ruler, and an iron. That’s your starter kit.
How do I wash and care for finished quilts?
Wash your finished quilt in cold water on a gentle cycle. Use mild detergent. Air dry flat away from sunlight. Spot clean stains by blotting — never scrubbing. Store in a breathable bag.
Can I mix modern and traditional block styles?
Yes, you can. Mix modern and traditional styles by keeping a unified color palette and consistent block sizes. Use neutral backgrounds to tie everything together without visual clash.
How do I display or hang a quilt wall?
Hang your quilt using a fabric sleeve on the back. Slide a rod through it. Center it 57–60 inches from the floor. Avoid direct sun. Keep humidity between 40–60%. Rotate displays every 6–12 months.
Conclusion
Every quilter who ever lived started with a single square—and that one square quietly changed everything. Traditional square quilt blocks aren’t just patterns; they’re a blueprint for thinking in geometry, color, and intention.
Pick one block. Cut it. Sew it.
Then watch how fast a skill becomes instinct. The bear’s paw doesn’t learn itself, but you’ll learn it—and every block after that gets easier, faster, and more yours.
- https://alanteatherquilting.com/archives/175124
- https://www.nps.gov/home/planyourvisit/quilt-discovery-experience.htm
- https://johnsonheirloom.com/blogs/the-heirloom-quilter/the-ohio-star-quilt-block-history-and-how-to-make-it
- https://suzyquilts.com/everything-need-know-ohio-star-quilt-pattern
- https://createwhimsy.com/projects/how-to-make-the-ohio-star-quilt-block