This site is supported by our readers. We may earn a commission, at no cost to you, if you purchase through links.
A 14-foot longarm frame eats up 196 square feet before you even sit down to quilt. That spare bedroom you’re eyeing? It might not cut it.
How much space does a quilting machine need depends on which machine you’re picturing. A stationary Moxie ST on a 38" table fits in a corner. A full Gallery2 frame wants a room of its own, with clearance on every side for walking, loading, and reaching the back rails.
Grab your tape measure. You’re about to find out exactly what your space can handle.
Table Of Contents
- Key Takeaways
- Most Quilting Machines Need 2–4 Feet
- Longarm Frames Need The Most Room
- Room Sizes by Frame Length
- Stationary Machines Need Less Space
- Throat Space Affects Quilting Area
- Leave Clearance Around The Machine
- Plan Height and Ergonomics
- Choose The Right Setup Size
- Frequently Asked Questions (FAQs)
- Conclusion
Key Takeaways
- Longarm frame sizes range from 5 to 14 feet, and floor space needs to scale up accordingly, with a 14-foot Gallery2 frame requiring a room at least 14 by 16.5 feet.
- Every setup needs a minimum of 2 feet of walking clearance on all sides, plus extra front and back space for loading fabric and managing the pantograph.
- Stationary machines like the Moxie ST and Amara ST fit on compact 38" x 38" tables, making them ideal for small rooms or spare bedrooms where a full frame won’t work.
- Throat space, ranging from 15 to 24 inches depending on the model, determines how large a quilt block you can stitch before repositioning the fabric.
Most Quilting Machines Need 2–4 Feet
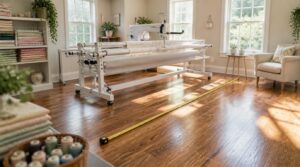
Before you start measuring your room, you need a basic rule of thumb. Most quilting setups need somewhere between 2 and 4 feet of open space around them to work safely and comfortably. Here’s how to break that number down into a plan you can actually use.
Once you’ve got your room mapped out, dial in the stitching itself by following this guide on how far apart quilting lines should be for even, balanced results.
Measure Machine Footprint First
Grab your tape measure and start with the widest point of your machine, then find the furthest rear point.
That’s your true machine footprint — not just the base, but any protruding accessories too. Table extensions count!
Most quilting setups need 2 to 4 feet of floor space once you’ve accounted for every jutting handle, arm, or attachment in your installation zone. This term accurately describes the physical space required by any piece of machinery.
Add Walking Clearance
Once you’ve got your footprint measured, don’t stop there. You need 2 feet of clear space on every side for safe movement — that’s your walking clearance.
This isn’t just about comfort. It prevents tripping hazards, keeps corridors wide enough for two people to pass during workshops, and creates real workflow, not a squeeze-by situation.
Plan Front and Back Access
Walking clearance covers the sides, but you still need a clear path in and a clear path out. Think front entry visibility — your quilting workspace entrance should be obvious and well lit, not tucked behind boxes.
Keep service routes separate from where you walk daily. A back door for loading? Smart. Add weather protection and non-slip signage, and you’ve got a safer, more accessible longarm setup.
Include Storage Space
Once you’ve got your paths clear, don’t forget the stuff that keeps your quilting studio setup running smoothly. Fabric organization systems, vertical bolt storage, and a small thread color sorting station all need a spot near your machine.
Notions accessibility matters too — keep pins, needles, and rulers close by. Fabric protection methods, like labeled bins, round out a smart quilting footprint.
Longarm Frames Need The Most Room
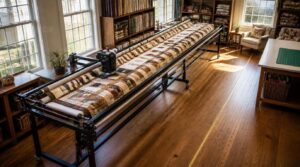
Longarm frames take up more floor space than any other setup in your sewing room. The length you need depends on which frame you choose, and frame sizes range from 5 feet all the way up to 14 feet. Let’s walk through each option so you can find the right fit for your space.
5. foot Little Foot Frame
Small room? The Little Foot Frame fits tight spots and still accommodates a 14"x48" quilting footprint.
- Adjustable 33"-44" height
- Modular construction, sub-30-minute assembly
- Leveling feet for uneven floors
- Swap feet for wheels—mobile setup
- Fits most machine dimensions to 16" tall
Weighing 60-80 lbs, it’s a true longarm frame with minimal space needed for a full quilting setup.
8. foot Loft Frame
Ready to graduate from a hobby setup? The 8-foot Loft Frame gives you a real longarm frame with 24 inches of throat space and leveling feet stability on uneven basement floors.
Rails resist vibration for cleaner stitching, and there’s room for accessory mounts. Footprint tolerance stays tight, so your sewing room layout won’t shift once you’re set up.
10. foot Loft Frame
Twelve feet of length once you add extensions, and that’s the real story here. The 10-foot Loft Frame accommodates king size quilting without re-bedding, thanks to a carriage travel distance around 100-130 inches.
Anti-vibration feet keep stitching clean, and modular assembly steps mean bolt-together setup in hours. Your quilting workspace optimization depends on this frame fitting your sewing room layout comfortably.
12. foot Gallery2 Frame
Now we’re talking serious real estate for your quilting studio. The Gallery2 Frame at 12 feet uses solid steel construction for a rock-stable, freestanding setup that won’t wobble mid-stitch.
Zinc plated hardware resists corrosion, while continuous track design keeps fabric gliding smoothly. DuoLoad versatility lets you switch loading methods, and optional casters add mobility when you need to shift your workspace around.
14. foot Gallery2 Frame
Two extra feet of track make the biggest difference for quilters tackling king-size projects. The 14-foot Gallery2 Frame adds a 14-foot extension kit while keeping the same steel construction and rolling carriage strength as its shorter sibling.
You’ll still get DuoLoad flexibility, self-leveling feet, and canvas leaders for quick setup. Just plan for a room at least 16 by 8 feet, with clearance on all sides.
Room Sizes by Frame Length
Now that you know why longarm frames take up more room, let’s get specific. Every foot of frame length changes what your room needs to handle it comfortably. Here’s a breakdown by size, so you can match your space to the right frame.
8. foot Frame Room Size
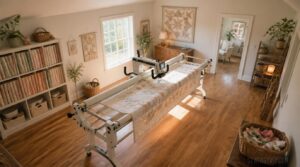
An 8-foot frame needs a minimum floor area of 10 by 12 feet, giving you room to walk both sides. Keep 2 feet of walking path clearance and 3 to 4 feet up front for loading fabric.
Ceiling height should clear 8 feet, and don’t tuck the frame into a corner—it’ll block the carriage every time.
10. foot Frame Room Size
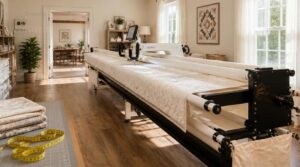
Bump up to a 10-foot longarm frame, and your room needs to grow with it—figure 11 by 14 feet minimum. That extra rail length means adding 3 to 4 feet for front and back fabric loading, plus your standard 2 feet of walking clearance on each side.
Keep doorways at least 32 inches wide, and skip corner placement entirely—you’ll need full access all around.
12. foot Frame Room Size
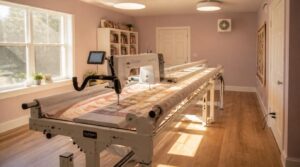
12-foot Gallery2 frames need a room roughly 12 to 14 feet wide, with 2 feet of walking clearance on both sides. Keep front and back access open for fabric roll management and loading.
An 8-foot ceiling provides enough room for standing comfortably, and you’ll want a dedicated 110-120 volt circuit for your machine and lighting. Ventilation matters here—longer sessions build up heat fast.
14. foot Frame Room Size
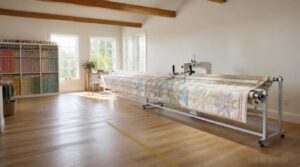
Going up to a 14-foot Gallery2 frame means stepping up your floor area requirements to roughly 196 square feet. Your room should measure at least 14 by 16.5 feet against a wall.
- 3 feet walking clearance around most sides
- 2-3 feet front and back access
- Outlets within 6 feet of the frame
- 9-foot ceiling height minimum
- Perimeter storage along one wall
Wall Placement Considerations
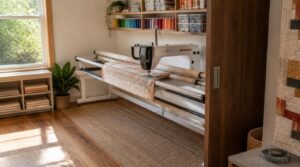
Once you’ve settled on room size, think about the wall itself. Corner mounting can save floor space in a tight quilting studio, while wall-mounted storage keeps thread and notions handy without eating into your walking clearance. Sliding panels hide the frame when you’re not working.
If space is tight, free-standing setups give you flexibility other quilting machine dimensions won’t allow.
Stationary Machines Need Less Space
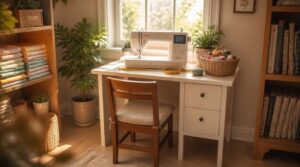
Not everyone needs a full frame stretching across the room. If your machine sits on a table instead, your space needs shrink fast. Here’s what to expect from each table setup.
Moxie ST Table Size
The Moxie ST sits on a compact 38" x 38" Insight Table, giving you a mid-sized quilting area without eating up your whole room.
Quick specs:
- Footprint: 38" x 38"
- Machine: 42"L x 26"W x 17"H
- Weight: ~70 lbs
- Throat: 18"
- Speed: 2,100 stitches/min with stitch regulation
That’s real portability for tight workspaces!
Amara ST Table Options
Two table choices come with the Amara ST: the 38" x 38" InSight or the Lift Table. Both align seamlessly with the machine for smooth quilting space.
The Lift Table stands out for height adjustment features — push a button, and it moves for sitting or standing work. That’s real ergonomic flexibility for longarm quilting machine users who want comfort built right into their adjustable tables.
Insight Table Dimensions
Wondering how much desk space your longarm quilting machine actually needs? The Insight comes in 36, 42, or 48-inch widths with 24 or 30-inch depths. Steel framing keeps it rock-solid.
- Small rooms: 36" width
- Medium setups: 42" width
- Large quilts: 48" width
Height adjusts 28–31 inches, matching your sewing machine footprint comfortably for planning surface area around your frame.
Lift Table Dimensions
Want your table to rise and fall with your body, not the other way around? The Lift table does exactly that. Push a button and it moves through Ergonomic Height Adjustments for sitting or standing work, easing strain on your quilting equipment space.
| Feature | Detail |
|---|---|
| Compatible size | 38" x 38" |
| Height control | Button-adjustable |
| Works with | Amara ST |
| Casters | Optional |
| Benefit | Sit/stand comfort |
Fold-down Table Extensions
Need a bigger table without a bigger room? Fold-down extensions add 18 inches of width to your Insight or Lift table, and two of them stack up to 36 inches total.
- Stability stays solid, even fully extended
- Leaves fold flat for storage
- No extra floor space required
- Sturdy construction holds up to daily use
- Quick setup, quick stow
They tuck away clean, keeping your quilting space tidy between projects.
Throat Space Affects Quilting Area
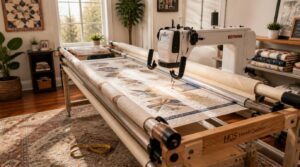
Throat space isn’t just a number on a spec sheet. It decides how big a quilt block you can stitch in one pass before you have to shift the fabric. Here’s how the options stack up.
15. inch Moxie Throat
Fifteen inches across the needle line — that’s your free-motion playground on the Moxie. Plenty of room for baby quilts and lap-sized projects without constant repositioning.
| Feature | Detail | Benefit |
|---|---|---|
| Throat space | 15" | Fits smaller quilts |
| Stitch regulation | Cruise, Precision, Manual | Control options |
| Speed | Up to 1,800 spm | Faster finishes |
Stitch regulation modes and a high-speed rotary hook keep your quilting space efficient.
18. inch Moxie XL Throat
Bump up to the Moxie XL and you pick up three extra inches — 18" of throat space total. That’s real room for large block handling, up to 12" blocks with breathing space around them.
More clearance means:
- Less backtracking on wide panels
- Smoother ruler navigation
- Better batting clearance
Same reliable maneuverability, just a bigger playground.
20. inch Amara Throat
Step over to the Amara longarm and you’re working with a full 20 inches of throat space — plenty of room for wide design maneuvering without constant repositioning.
QuiltMaster LED lighting keeps the area bright for clear visibility, while the Pinpoint Needle Laser gives you precision positioning along your guidelines. With speeds up to 2,500 stitches per minute, large design efficiency comes standard.
24. inch Amara Throat
Go bigger with the Amara 24, and you get a full 24 inches of throat space — the largest in the lineup, built for king-size quilts.
Needle precision control stays sharp even at top stitch speeds, and integrated lighting packages keep every inch visible.
It’s ready for automated quilting workflows too, so your longarm quilting machine combats big projects without cramping your room layout.
Usable Quilting Space
Numbers only tell half the story. Usable quilting space depends on how throat depth, table height, and body position work together.
- Fabric Maneuverability — more throat means less bunching
- Elbow Angle Comfort — proper height prevents strain
- Thread Spool Clearance — leave room above the bed
- Pattern Repositioning Ease — bigger throats mean fewer stops
- Vertical Workspace Height — check clearance for rolled fabric
Leave Clearance Around The Machine
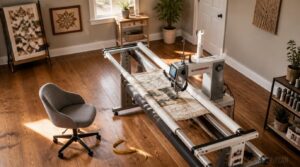
Fitting the machine into your room is only half the job. You also need room to move around it while you work. Here’s what to check before you settle on a spot.
Two-foot Minimum Perimeter
Two feet. That’s your baseline, no matter what long arm quilting machine you own.
No matter which longarm machine you own, two feet of clearance is the non-negotiable baseline
This two-foot minimum perimeter gives you room to move fabric, dodge cords, and reach tools without snagging anything. Check corners and edges too. Skip a nearby outlet? You’ll be crawling under the frame later. Good space management now saves headaches during every quilting session down the road.
Eighteen-inch Side Clearance
Eighteen inches along each side keeps your long arm quilting machine running smoothly. That gap gives you Operator Arm Movement room and Fabric Handling Space for smoothing quilt tops before you stitch.
It also helps with Safety Obstruction Prevention, keeping rolling carts and stools out of your path, plus Maintenance Access Zones for quick cleaning. Good space management means Tool Placement Needs—rulers, scissors, spray baste—stay handy without crowding your quilting equipment space.
Rear Access for Loading
Ever tried loading a basted quilt sandwich with no room to step back? Keep at least 12 inches of clearance behind your longarm quilting machine for fabric handling and thread tails.
Good rear lighting cuts glare so you see backing alignment clearly. Add a low-profile bumper for loading safety, plus a rear shelf for rear storage—rulers, pins, and clamps stay within reach for ergonomic loading.
Front Space for Quilting
Give your quilt somewhere to go. Front space needs 2 to 4 feet for fabric roll clearance and smooth pantograph movement.
Keep 24 inches open as your maneuvering zone for loading batting. Add task lighting overhead, keep floors stable, and set reach distances within 12–18 inches. This ergonomic setup protects your quilting space and keeps your longarm quilting machine running snag-free.
Door and Pathway Clearance
Don’t forget the door itself. Your doorway needs a 32-inch clear width so the frame and table pieces fit through without a fight.
Keep an 18-inch maneuvering zone clear near the latch side, and check threshold safety, no lips or bumps to trip over. Plan your path from door to frame so cords, bins, and fabric don’t create congestion in your textile workspace.
Plan Height and Ergonomics
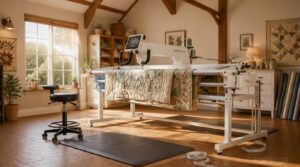
Space isn’t the only thing to plan for. Your comfort matters just as much once you’re standing at the frame for hours at a time. Here’s what to think through before you settle on a setup.
Adjustable Frame Height
Height range matters more than you’d think. Most adjustable frames run from about 22 inches up to 60 inches, so you’ll find a fit whether you sit or stand.
Look for these features:
- Motorized adjustment systems
- Manual height controls
- Locking mechanisms
- Second-stage height presets
- Sturdy mounting plates
This adjustability helps with ergonomic posture benefits and shared studio versatility across users.
Sitting Versus Standing
That range you just set matters for one more reason: it decides whether you sit or stand while quilting.
Standing burns more calories and works your legs and midsection harder. Sitting eases joint strain.
Alternating between both improves blood sugar control and cuts fatigue. Set your frame to switch easily — your sewing room should support both postures.
Handlebar Comfort
Your hands do the real work, so the handlebars need to fit them well. Wrist posture matters most here — an upright grip cuts strain during long sessions.
Look for:
- Ergonomic adjustability with quick-release clamps
- Foam or leather grip materials
- Proper handlebar width matching shoulders
- Built-in vibration damping
- Contoured shape for even pressure
Good ergonomics in crafting means less fatigue, more control.
Lighting Around The Frame
Good grips won’t matter if you can’t see your stitches clearly. Strategic light placement around the frame cuts glare and shows true fabric color.
Aim fixtures at roughly a 30 degree angle to dodge reflections. Stick with high CRI bulbs (90+) in the 2700K-3500K range for color temperature accuracy and less fabric glare on satin or shiny threads.
Storage Under Rails
That empty spot beneath your rails is prime real estate. Add a cabinet with 12 to 18 inches of depth for fabric bolts, and you’ve solved half your sewing room organization headache.
Go with steel or powder coated finishes for durability. Modular storage kits let you add drawers as needs grow, while smart rail accessory organization keeps bobbins and notions within easy reach, no extra floor space required.
Choose The Right Setup Size
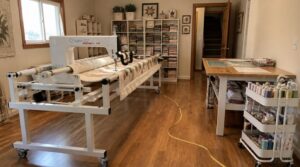
Every room is different, and your setup should fit the space you’ve got, not the other way around. Small rooms, spare bedrooms, and basements each come with their own quirks to work around. Let’s look at what fits where, and how to keep room to grow.
Small Sewing Rooms
Small sewing rooms can absolutely work for a longarm quilting machine—you’ll just need to plan smart. Stick with a stationary machine or 5-foot frame.
Use foldable work surfaces, mobile tool carts, and vertical fabric organization to keep floors clear. Mount lighting overhead, not just at the frame, and stash tools in compact bins near your workspace for easy sewing room organization.
Spare Bedroom Studios
Turn a spare bedroom into your quilting studio, and you’re working with 60 to 180 square feet depending on layout. Your studio floor plan needs a dedicated sewing zone, storage shelving, and a 6 to 8 foot work surface.
Add a dedicated 15-20 amp circuit for electrical circuit needs, plus 3500K-4000K lighting for accurate fabric colors and a comfortable ergonomic setup.
Basement Quilting Spaces
Ever thought your basement could be the perfect quilting hideaway? It can, but you’ll need a dehumidifier removing 20-30 pints daily, plus vents keeping air moving.
Set up three-point lighting: overhead, task, and spotlights at 4000K-5000K. Sound-dampening panels cut machine noise.
Zone your cutting, sewing, and pressing areas separately, and add modular storage shelves to stay organized.
Mobile Frame Options
Not every quilting space stays put forever—and that’s fine. Optional casters turn any frame into a rolling setup, giving you real caster mobility benefits for tight rooms.
- Rolling frames tuck against walls
- Casters lock for stable stitching
- Frames disassemble for storage
- Compact storage between projects
- Movable longarm machines suit shared rooms
Moving large frames takes two people. Run a quick space calculator before buying casters!
Future Upgrade Planning
Buying a frame today doesn’t mean you’re stuck with it forever. Smart craft room planning leaves wall space and outlets for a bigger Gallery2 later, or room for casters if your quilting business setup grows.
Build a simple upgrade roadmap now: note current dimensions, check compatibility reviews before adding Pro-Stitcher, and set aside budget allocation. Planning ahead beats costly change management down the road.
Frequently Asked Questions (FAQs)
What is the rule of 7 in quilting?
Picture a quilt spread across your table like a garden in bloom. The rule of 7 means picking 2–3 theme fabrics, 2–3 coordinators, and 1–2 anchors—balancing scale, color, and contrast for a well-matched, shopping-friendly palette.
What is dirty quilting?
Dirty quilting means improvisational piecing, spontaneous fabric picks, and expressive stitching over perfect points. It embraces mistakes as design features, easing perfectionism pressure.
On stationary longarm machines with generous throat space, free motion quilting lets that loose, confident style shine.
How far apart should machine quilting be?
Like an old telegraph operator spacing dots and dashes, your spacing choice sends a message. Straight lines: ¼ to ⅜ inch. Stippling: ⅛ to ½ inch. Pantographs: 2 to 6 inches. Batting thickness dictates it all.
What is frogging in quilting?
Frogging means removing stitched work with a seam ripper to fix seam errors, correcting free motion quilting mistakes, or revising patterns—named for the "rip it, rip it" sound. Work gently to avoid fraying, then re-pin and re-baste before restitching.
Can a longarm machine fit in a garage?
Yes, if it’s a dedicated, organized space with a level, reinforced floor, good ventilation, dust collection, a dedicated electrical circuit, and temperature control—your longarm quilting machine and frame will run smoothly for years.
How much does casters mobility affect space planning?
Casters change everything for your longarm quilting machine setup. Check caster load ratings, floor compatibility, and locking mechanism stability first.
Add a 3-4 foot repositioning path, since swivel radius efficiency and workshop organization depend on smooth, unobstructed movement around your ergonomic quilting space.
Whats the speed difference between hobby and professional machines?
Funny how "more speed" doesn’t always mean more space—but it does mean more machine. Hobby models run 1,000–1,500 stitches per minute; professional-grade longarms hit 2,000–3,000, thanks to higher motor torque and sturdier frames that hold quality steady.
Can I quilt in a shared or multi-use room?
Multi-use rooms work fine with smart zoning shared spaces.
Set up a portable sewing zone, add a fiber-catching mat for lint control, and manage fabric odors with good ventilation. Sound dampening mats help too, turning any corner into a quiet quilting sanctuary.
Conclusion
Nobody buys a longarm dreaming of measuring tape and doorway angles, yet here you’re, tape in hand, plotting square footage like a general planning a campaign. That’s the quilting life.
How much space does a quilting machine need isn’t a trick question anymore—you know your frame, your throat size, your clearance.
A 38" table fits a corner. A 14-foot frame wants a room. Measure once, quilt for years. Your space just found its purpose.