This site is supported by our readers. We may earn a commission, at no cost to you, if you purchase through links.
Skip a single oiling cycle and you’ll hear it before you see it: a faint grinding hum from the rotary hook, then skipped stitches that ruin an otherwise perfect design. Embroidery machines run tight tolerances, and dust, dried thread lint, or the wrong lubricant can throw off tension discs in a single afternoon.
Most shop owners lose money not from big breakdowns but from small neglect that compounds over months. A $12 bottle of the right oil and ten minutes with a lint brush beat a $200 technician visit every time.
Learning how to maintain an embroidery machine properly means building habits, daily brushing, correct lubrication, and scheduled checks, that keep your stitches clean and your motor humming for years.
Table Of Contents
Key Takeaways
- Daily habits—brushing lint, checking thread paths, and clearing needle plate debris—prevent the small neglect that causes most costly breakdowns.
- Always use machine-specific sewing oil (never WD-40, motor oil, or household oils) applied sparingly to the rotary hook and color slots, then wipe away excess to avoid residue buildup.
- Replace needles every 8–10 hours, clean tension discs regularly, and inspect the bobbin case monthly to keep stitch quality consistent and avoid thread jams or breakage.
- Beyond daily care, schedule weekly deep cleanings, monthly wear checks, periodic greasing, firmware updates, and professional servicing every 6–12 months to extend the machine’s lifespan to 8–15 years.
Gather Maintenance Tools First
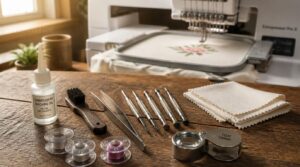
Before you touch a single bobbin, set yourself up with the right toolkit, since good maintenance habits start with having the essentials within arm’s reach. You don’t need a huge collection, just a handful of reliable items that cover cleaning, oiling, and quick repairs.
If you’re still getting familiar with your machine’s parts, this guide on understanding what a sewing machine bobbin is and how it works makes spotting wear and damage much easier.
Here’s what every embroidery machine operator should keep close by.
Soft Lint Brush
Before you touch a single screw, grab a soft lint brush for daily dust and lint removal around the bobbin area and needle plate. Choose natural or synthetic bristles—both work gently on delicate fabrics without scratching components.
Reusable brushes save money long-term. Store yours in a dry spot, and use a light, single-direction cleaning brush technique to protect surrounding parts from debris buildup.
Machine-specific Oil
Once your brush experiences the dust, keep a bottle of machine-specific oil nearby—never generic household lubricant. Look for light mineral or synthetic sewing machine oil with low viscosity for quick film formation at oil ports like the rotary hook.
Synthetic resists oxidation better for heavy use; mineral suits occasional stitching. Apply sparingly to avoid oil migration into color slots, and wipe residue immediately to prevent fabric staining. Choosing oil with a high viscosity index ensures consistent performance across temperature ranges.
Screwdriver and Tweezers
Oil controls the film, but you’ll still need hands-on tools for mechanical adjustment and disassembly. Keep a precision screwdriver set with interchangeable heads, plus fine-tipped, ESD-safe tweezers for delicate threading channels—selecting tip types matters here, since stripped screws mean trouble later.
Ergonomic maintenance gear reduces fatigue during longer sessions, and spring-loaded, magnetic tips offer precision handling features that prevent dropped screws in tight spaces.
Dust Cover
Screwdrivers open the machine up; a dust cover keeps it sealed against dirt when you’re done. Pick tightly woven or nonwoven fabric with UV protection for sunlit shops, breathable panels for humid ones. Prioritize snug fit and accessibility, elastic hems with cord cutouts, over generic drapes.
- Fit
- Material
- Environment
Wipe surfaces first, then cover—this simple habit adds real equipment longevity.
Maintenance Log
A notebook won’t stitch a single hexagon, but skip it and you’ll forget when you last oiled the hook.
A notebook can’t stitch a hexagon, but without one you’ll forget when you last oiled the hook
Your maintenance log should track service details, parts usage, technician names, and how long each task took.
Documenting observed issues—lint buildup, tension drift—turns a simple maintenance checklist into a real preventive maintenance schedule, one that catches problems before they cost you production time.
Clean Your Machine Daily
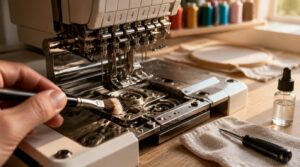
Once your tools are within reach, daily cleaning becomes the habit that keeps your machine stitching at its best. This isn’t a once-a-week chore, it’s a five-minute routine you’ll run before and after every shift. Here’s exactly where to focus your attention each day.
Before you dive into your project, it’s worth running a quick check on whether your denim needs a special needle so your daily fabric scrap tests actually reflect real-world conditions.
Brush Bobbin Area
Unplug the machine first, then sweep the bobbin area with a soft-bristled brush, working lint from the race and case without forcing debris deeper. Rotate the handwheel slowly to expose hidden lint, brushing again as it surfaces.
For stubborn threads, a low-powered vacuum attachment helps.
Skip metal scrapers entirely — they scratch surfaces and misalign the shuttle mechanism, undoing your careful work in seconds.
Clear Thread Paths
Once the bobbin area’s clean, trace every thread from spool to needle. Follow spool routing in numerical order through each guide, checking tension alignment at the discs.
Color-coded guides speed verification and catch path obstructions before they cause thread jams. A quick tug confirms proper seating — this prevents thread breakage, skipped stitches, and stray thread tangling mid-project.
Remove Needle Plate Lint
Power off and pull the plug before touching the needle plate screws, then remove them carefully, setting each one in a small container so nothing rolls away.
Lift the plate and brush away lint from the feed dogs — never blast compressed air into the housing, since it just pushes debris deeper. Wipe with a microfiber cloth, reinstall the plate, and align it with the notches before tightening.
Inspect Moving Parts
Rough sounds during operation almost always mean trouble brewing. Run through this quick check:
- Listen for grinding near bearings
- Test belt tension for slack
- Check X and Y rail movement
- Watch drive belts for cracking
Confirm rotary hook timing stays smooth, and linkage pivots move freely. Catching wear early keeps stitches accurate and downtime minimal.
Cover After Use
Think of the cover as a raincoat for your machine—cheap insurance against dust and moisture. Once you’ve switched things off and let the machine cool, wipe it down and drape a breathable fabric cover snugly over the top.
This simple habit blocks stray fibers, curbs moisture buildup, and shields electronic components, extending machine life. Wash the cover regularly to keep it doing its job.
Oil and Lubricate Correctly
Once your machine’s clean, oil becomes your next line of defense against friction and wear. Getting lubrication right isn’t complicated, but it does demand the correct oil, the correct spots, and the correct timing. Here’s exactly where and how to apply it.
Check The Manual
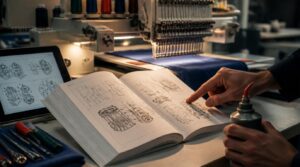
Before you reach for the oil can, pull up your user manual and confirm you’ve got the right one. Machines vary by model, so verify:
- Model identification and revision date
- Approved lubricants and quantities
- Recommended service intervals
Keep a digital backup handy—it beats hunting through a maintenance checklist mid-shift when troubleshooting guide details matter most.
Oil Rotary Hook
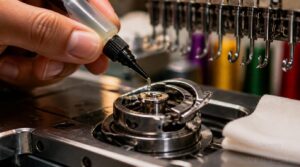
Once the manual confirms your oil type, apply one drop to the rotary hook at the start of each shift, or every four hours during continuous runs. This single habit cuts friction, protects the hook race, and keeps the bobbin race spinning cleanly.
Wipe excess oil immediately at this and every lubrication point—residue attracts lint faster than you’d expect.
Lubricate Color Slots
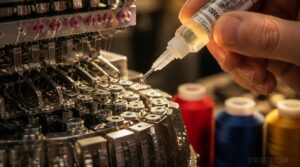
Color slots need the same attention as the rotary hook—apply a few drops with a fine oiler, then rotate the color carrier by hand to spread it evenly. Use light synthetic oil matching your machine’s viscosity grade to avoid lubricant compatibility issues.
Squeaky slots signal dryness; oil seepage means you’ve overdone it. Check slots daily and reapply every 8–40 hours based on usage.
Wipe Excess Oil
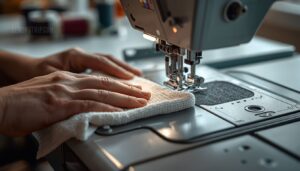
Once you’ve oiled the color slots, grab a lint-free microfiber cloth and wipe away pooling before it migrates into thread paths. Power the machine off first, wipe in one direction, and target the hook housing and needle plate underside.
- Power off the machine
- Wipe hook housing
- Check needle plate
- Confirm bobbin area is residue-free
Avoid Household Oils

Grabbing whatever’s under the sink might seem convenient, but WD-40, motor oil, and salad oil cause real damage. These lubricants have the wrong oil viscosity for tension discs and leave sticky residue buildup.
| Product | Safe for Machine? | Consequence |
|---|---|---|
| Sewing machine oil | Yes | Smooth operation |
| WD-40 | No | Residue, corrosion |
| Motor oil | No | Clogged tension |
| Salad oil | No | Rancid buildup |
Stick to machine-specific oils only.
Maintain Needles and Thread Tension
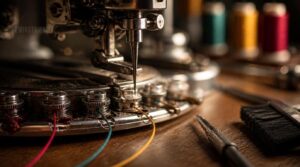
Needles and tension discs work together to form every stitch, so neglecting either one shows up fast in your fabric. A dull needle or dirty tension disc won’t just slow you down, it’ll wreck hours of embroidery work in seconds.
Here’s what you need to check and maintain to keep your stitches clean and consistent.
Replace Dull Needles
A dull needle punches, not pierces, dragging fabric and skipping stitches. Watch for fraying, burrs, or bent tips—worn needles breed thread breaks.
Replace after 8–10 hours or per project. Fresh needles boost tracking through metallics, cut tension swings, and prevent breakage. Keep replacements stocked; monitoring needle condition consistently protects both stitch quality and your machine’s long-term performance.
Check Needle Alignment
Before you run another stitch, raise the needle to its highest position and lift the presser foot for a clear view. Confirm Needle Eye Orientation faces left, then match Visual Alignment Marks on the needle bar.
Verify Clamp Torque Precision—snug, not overtightened.
Run a Scrap Fabric Testing pass to catch drift before it causes needle breakage.
Clean Tension Discs
Those two metal discs do more work than most stitchers realize, and lint is their biggest enemy. Fleece, terry, and other high-shedding fabrics pack fibers into the gap fast, creating uneven tension and dragging down stitch quality.
Lower tension to zero, then slide a business card between the discs to lift stubborn debris. Follow with a dry microfiber wipe—this keeps friction consistent and prevents thread tension issues before they start.
Inspect Bobbin Case
Bobbin case integrity deserves a monthly close look, not just a glance. Pull it free and check tension spring strength, seating alignment in the shuttle race, and surface burrs along the edge.
Cracks or nicks mean thread path obstructions waiting to happen. Cloudy discoloration signals wear too—swap it out before it triggers thread jams during your next production run.
Prevent Thread Shredding
Shredding rarely comes from one bad part—it’s usually three small things stacking up. Check needle size selection against your thread weight, verify spool unwinding mechanics run smooth, and confirm stabilizer weight matches fabric density.
- Frustration from constant thread breakage mid-design
- Wasted stabilizer and fabric on failed runs
- Pride in a clean, jam-free stitch line
Adjust tension, monitor needle condition, and store thread properly to prevent jams.
Schedule Deeper Preventive Care
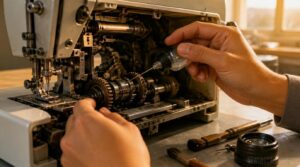
Daily wiping and needle checks only get you so far, since some wear hides deeper in the machine’s gears and cams. Catching that damage early means building a bigger-picture maintenance rhythm, not just a daily one. Here’s what that deeper care routine should include.
Weekly Deep Cleaning
Setting aside 90 minutes each week for deep cleaning catches what daily wiping misses—dust behind appliances, grime inside vent grilles, and grease hiding in cabinet corners.
Follow a deep cleaning checklist: move furniture, vacuum machine vents, launder cabinet contents, then restore everything to its original position.
Log the date, areas cleaned, and products used in your maintenance log immediately afterward for accurate tracking.
Monthly Wear Checks
Once your deep clean wraps up, turn your attention to component wear.
Listen for unusual gear or bearing sounds past 3 decibels, check vibration readings against baseline, and watch for temperature spikes over 5°C.
Measure gear mesh backlash and lubricant film thickness (minimum 1.0 micrometer). Inspect belts and your X and Y rails—catching wear early keeps replacements on schedule, not emergencies.
Grease Moving Mechanisms
Once wear checks confirm your gears and cams are sound, apply fresh grease before problems start. Grease your X and Y axis mechanisms every 3-6 months using lithium complex or polyurea grease for shear resistance at precision slides.
- Match viscosity grade to operating temperature
- Wash away old grease before recharging
- Apply thin coats—overgreasing raises heat and drag
- Keep ports sealed from dust contamination
Update Machine Software
Grease keeps mechanisms moving, but firmware security patches keep your machine’s brain safe. Check for a new software update monthly, since updates bring AI hoop detection improvements, design file encryption, and better USB compatibility.
Enable automated update deployment during idle hours, and always confirm firmware versioning matches across networked machines.
If something goes wrong, software rollback features restore your previous version instantly.
Book Professional Servicing
Trusting daily upkeep only goes so far—booking professional servicing every 6 to 12 months catches what your eyes can’t. A certified technician verifies motor torque, checks belt tension, and runs stitch pattern diagnostics to confirm timing accuracy.
You’ll walk away with a stamped maintenance report documenting parts replaced, supporting warranty traceability and protecting your equipment warranty long-term.
Frequently Asked Questions (FAQs)
Do I need to oil my embroidery machine?
Some machines beg for oil, others reject it entirely—check your manual first.
Sealed, oil-free models need zero lubrication, while traditional rotary hooks demand regular drops.
Skipping required oiling invites grinding noise and premature wear, so match your oil frequency to your model’s exact specs.
What is the lifespan of an embroidery machine?
Well-maintained machines usually last 8–15 years commercially, or beyond 15 in boutique settings.
Heavy factory usage vs longevity trade-offs matter—overhaul timing often hits 6–10 years without preventive maintenance, proper lubrication, and consistent component wear monitoring extending your equipment’s service life.
What are some common mistakes to avoid when doing embroidery?
Improper hoop tension, mismatched needle types, and incorrect stabilizer selection top the list.
Skipping sample tests, calibration checks, and lubrication invites thread jams and needle breakage.
Build a maintenance checklist, and preventive maintenance stays simple, saving your fabric and your schedule.
How to lubricate an embroidery machine?
A dry hook grinds; a lubricated one glides. Identify your lubrication points—hook race, needle bar felt—apply sewing machine oil every 8-12 hours, wipe seepage, run a test stitch, then log it.
How often should air filters and tension felts be replaced?
Swap air filters weekly to curb dust accumulation, and replace tension felts annually for consistent thread flow. Log both dates in your maintenance log—accurate records prevent skipped cycles and protect air quality alongside stitch performance.
What causes skipped stitches even with a sharp needle?
Ironic, isn’t it—a razor-sharp needle still skipping stitches? The real culprits: improper needle seating, tension disc debris, thread weight mismatch, timing synchronization drift, or feed dog movement disrupting stitch quality despite that perfect point.
Why does the machine need a surge protector connected?
Power surges cause voltage spike damage to motors and control boards.
A surge protector diverts excess energy to ground, preventing firmware corruption, stabilizing motor performance, and reducing electrical noise, keeping your embroidery machine’s electronics running safely and smoothly.
How does storage environment affect embroidery machine performance?
Keep humidity near 45–55% and temperature between 15–25°C to prevent corrosion, lubricant breakdown, and static-drawn dust. Use a dust cover and UV-blocking storage to protect electronics, seals, and thread color from degradation over time.
Conclusion
A well-tended machine runs like a well-tuned engine, quiet, precise, and ready the moment you need it.
Mastering how to maintain an embroidery machine isn’t about grand gestures; it’s about small, consistent habits—brushing lint, checking oil, tightening tension discs—that add up over months.
Skip a step, and you’ll pay for it later. Stick with the routine, and your machine rewards you with clean stitches, fewer breakdowns, and years of dependable, steady service.
- https://embroiderylegacy.com/how-to-do-embroidery-machine-maintenance
- https://www.disenmachinery.com/How-to-Maintain-an-Embroidery-Machine-id44493126.html
- https://drdtg.com/feeds/blog/embroidery-machine-maintenance
- https://www.maggieframes.com/cs/blogs/embroidery-blogs/how-do-embroidery-machines-work-the-2025-expert-guide-to-mechanics-techniques-pro-tips
- https://www.screenprinting.com/blogs/news/daily-and-weekly-embroidery-machine-maintenance