This site is supported by our readers. We may earn a commission, at no cost to you, if you purchase through links.
That old pair of jeans sitting at the bottom of your closet, too snug in the waist or frayed past saving, still has one good garment left in it. Denim doesn’t wear out evenly, and the parts that survive (waistband, back yoke, sturdy topstitching) are exactly what makes a skirt hold its shape for years.
This jeans into skirt tutorial skips the guesswork, walking you through cutting, insert panels, and hemming so your scissors land in the right spot the first time. Grab your seam ripper. That "ruined" denim is closer to finished than you think.
Table Of Contents
Key Takeaways
- Choose high-waisted, low-stretch, heavyweight denim and prewash it before cutting to prevent shrinkage and ensure accurate sizing.
- Mark your cutting line with 1 to 4cm of hem allowance beyond your target length, since the marked line should never be the actual cutting line.
- Save the leftover leg fabric from your cut jeans to patch the front and back triangle gaps left after opening the crotch and center seams.
- Finish your skirt with a double-fold hem for a polished look, a frayed edge for a rebellious style, or added trim, patches, or embroidery for personal flair.
Choose Jeans and Gather Supplies
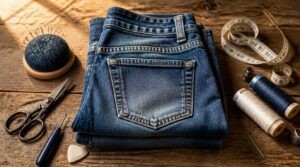
Before you touch a single seam, you need the right jeans and the right toolkit on hand. Not every pair or needle works the same way on thick denim, so a little prep saves you a lot of frustration later. Here’s exactly what to grab before you start cutting.
Once your denim and tools are gathered, this step-by-step guide to sewing jeans walks you through pretreating, cutting, and marking each piece the right way.
Best Jeans for Refashioning
Grab high-waisted jeans with little to no stretch (0-2% elastane)—they hold structure once cut. Dark, heavyweight denim (12oz+) hides seams and resists fraying. Don’t toss torn or damaged pairs; ripped knees still yield usable panels.
Match color washes for a consistent repurposed clothing look, and always prewash to prevent shrinkage before your DIY denim skirt takes shape.
This process is a great way to prevent textile waste while updating your wardrobe.
Denim Needles and Thread
Once your jeans are picked, gear up your sewing machine with a size 16 or 18 denim needle—regular needles skip stitches on thick layers. Match heavyweight polyester thread (not cotton) to your original topstitching for durability. Adjust tension and stitch length settings beforehand, and always test on scrap denim first. Proper needle-thread pairing prevents skipped stitches before you cut a single seam.
Cutting and Marking Tools
Grab a white chalk pencil or fabric pen for marking, plus sharp fabric scissors for clean cuts.
Build your kit with these:
- Tailor’s chalk (erasable)
- Fabric scissors
- Seam ripper
- Measuring tape
- Straight pins
Rotary cutters speed up straight lines—cut away from yourself. Keep blades sharp and use a cutting mat to protect surfaces and tool edges alike.
Sewing Machine Settings
Your machine needs a few tweaks before it grips denim. Swap in a size 90 or 100 denim needle, set stitch length to 3–3.5mm, and test tension on scrap fabric first.
A walking foot helps feed thick layers evenly, while topstitching with matching heavyweight thread keeps seams looking sharp and professional.
No-sew Glue Option
Skip the sewing machine entirely if needles intimidate you—fabric glue works too. Choose a denim-friendly formula, test it on scraps first for colorfastness, then prep surfaces by cleaning and lightly sanding edges.
Apply thin, even layers, clamp for 30-60 seconds, and let cure 24-48 hours. Check heat resistance limits (some handle 180°F) before ironing your refashioned denim skirt.
Mark Your Denim Skirt Shape
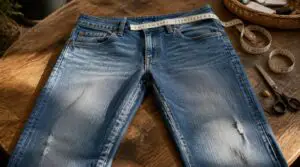
Before any scissors come out, your jeans need a solid plan. This is where you turn a pair of pants into a skirt on paper (well, denim) first. Here’s exactly what to nail down before you cut.
Wash Jeans Before Cutting
Skip the temptation to cut first, wash second — that shortcut backfires fast. Denim shrinks 1 to 3 percent on its first wash, and prewashing locks in consistent sizing before you mark a single line.
Once your denim’s prewashed and cut, slow down at the machine and follow these tips for sewing heavy fabrics to avoid jammed seams and uneven stitching.
- Turn jeans inside out for color preservation
- Use cold water to slow dye bleeding
- Add vinegar to the rinse for set color
- Air dry for fabric stability
- Let fibers relax before cutting
Decide Skirt Length
How short is too short? That’s the real question here. Try the jeans on and picture your life in them—mid-thigh to knee suits curvy figures, while knee-length flatters nearly everyone.
Taller frames pull off longer hems easily; petite builds often look best above the knee. Factor in season, occasion, and footwear (sneakers love mini, boots love midi) before marking anything.
Add Hem Allowance
Here’s a rule that saves plenty of redos: your marked line isn’t your cutting line.
Remember: the line you mark is never the line you cut
Add 1 to 4cm of hem allowance beyond your target length before cutting anything. Heavier denim eats up more allowance for topstitching, while lighter weight needs less. This extra fabric prevents fraying, avoids bulk, and gives you room to fold and hem the skirt cleanly once you’ve settled on your finishing style.
Align Side Seams
Ever wonder why one skirt hangs straight while another twists around your legs? It usually comes down to grainline alignment at the side seams.
Lay your jeans flat, matching hip notches and inseam edges before pinning. Keep seam allowance consistent top to bottom—this prevents seam distortion and keeps your denim skirt hanging true once you finish sewing jeans into a skirt.
Mark With Fabric Chalk
Grab a white chalk pencil or fabric pen for dark denim—light colors show up best here. Test on a hidden seam first to confirm easy removal.
Mark your waist and hips lightly, then draw your cutting line:
- Use light pressure for precision
- Choose contrasting chalk color
- Mark wrong side when possible
- Brush away excess before cutting
Open The Jeans Seams
Time to grab that seam ripper and get to work. Marks are set, so now you’re breaking the jeans down into a flat piece you can actually shape into a skirt. Here’s exactly where to unpick, cut, and trim to get there.
Unpick Inner Leg Seams
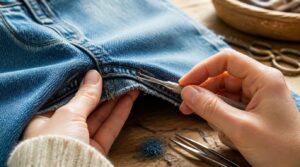
Time to free those legs from each other. Slide your seam ripper under the first stitch and work slowly, top to bottom, snagging one thread at a time to dodge frayed edges.
| Tool | Purpose |
|---|---|
| Seam ripper | Lifts stitches cleanly |
| Tweezers | Removes thread tails |
Support the crotch curve underneath as you go, preventing accidental holes.
Open Front Crotch Seam
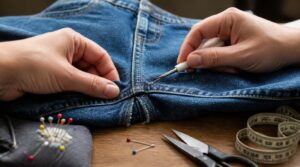
Once you unpick the inner seam legs apart, the front crotch seam is next on the list. This curved seam defines your rise, so work slowly to avoid fabric tearing.
- Follow the curve exactly
- Keep seam allowance even
- Watch for the triangular gap forming
- Support fabric to reduce bulk
That gap becomes your insert zone, so maintaining seam symmetry here shapes your finished drape later.
Open Back Center Seam
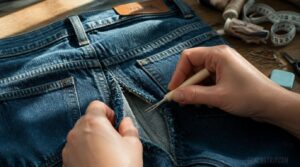
Now flip to the back center seam, right up to mid-pocket level, using your seam ripper for clean, controlled openings.
Match fabric grain here so panels sit flat without twisting.
| Seam Zone | Purpose | Finish |
|---|---|---|
| Center back | Ventilation, movement | Topstitch |
| Top edge | Reinforcement | Bar tack |
| Insert point | Prevents puckering | Overlapping edges |
That triangular gap forming? It’s your next insert zone, shaping the skirt’s finished silhouette.
Trim Bulky Crotch Fabric
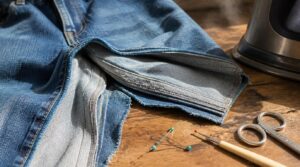
That crotch seam packs several fabric layers, and denim fibers compress then relax after cutting, sneaking bulk right back in.
- Trim 1/4 to 3/8 inch along the inseam
- Grade seam allowances, leaving edges staggered
- Smooth the crotch curve into hips
- Manage seam tension so nothing puckers
- Press seams open to flatten layers
Recheck the rise before you continue—flat now saves headaches later.
Cut Legs Evenly
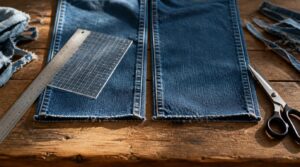
Grab those two cutoff pant legs and lay them together, outer edges aligned, for a quick symmetry check before your final trim.
| Check | Tool |
|---|---|
| Length | Ruler |
| Angle | Square |
| Marks | Chalk pencil |
| Edges | Fabric scissors |
Cut slow and steady—precision beats speed. Rushed scissors mean fraying and a crooked hemline. Verify leg length twice; happy sewing depends on it!
Sew The Denim Insert Panels
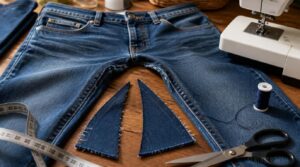
Once your legs are cut apart, you’ll notice gaps where the crotch seam used to be. Don’t worry, those leftover leg pieces you set aside are about to become your best friend. Here’s how to patch things up like a pro.
Use Leftover Leg Fabric
Those cut-off legs? Pure gold, not garbage — don’t toss them.
Save every scrap for panel inserts:
- Reduces fabric waste dramatically
- Matches original color and weight perfectly
- Makes it easy to use geometric shapes like triangles or wedges
- Lets you plan a color gradient for texture
Leftover denim keeps your upcycled skirt looking consistent, giving that DIY fashion project real visual depth without buying extra material.
Fill Front Triangle Gap
That awkward triangle under the zipper is where clothing upcycling gets tricky.
Match fabric weight to the leftover leg scrap you saved, pin it beneath the folded edge, and stitch two parallel rows for a smooth, hidden insert technique.
Trim excess flaps, keep stitching gap edges tight, and press flat—minimizing bulkiness matters most here for sewing jeans into a skirt smoothly.
Fill Back Triangle Gap
Your backside deserves better than a saggy gap, so this seam matters as much as the front.
Cut a curved panel from leftover leg fabric, tapering 2 to 4 inches wide at the waist down toward the hem. Align its inner edge with the original back seam, matching fabric grain to avoid twisting. This keeps waistband integrity intact while your upcycled skirt hugs curves smoothly, not stiffly.
Pin Panels Securely
A shaky pin job now means puckered seams later, so slow down here.
Slide straight pins perpendicular to the raw edge, spacing them every inch through both panel and gap fabric. Match grainlines so nothing warps once you’re sewing. Clamps work too if your denim’s thick. Keep those triangular gaps fully covered edge-to-edge, no gaps peeking through before your topstitching locks everything permanently into place.
Topstitch Denim Seams
This is where your skirt earns its authentic jeans look. Switch to a denim sewing needle, set stitch length to 3.0-3.5mm, and loosen thread tension slightly to prevent puckering.
Sew two parallel rows through all layers using matching thread for durability, or try contrast thread for a bold statement. A walking foot keeps thick layers feeding evenly—no shifting, no drama.
Hem and Customize Your Skirt
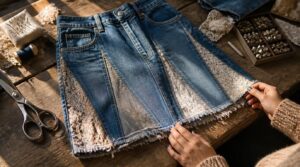
Your panels are in place and the skirt is really taking shape now. This is where you get to decide its whole personality, from the hemline down to the finishing touches. Here are your options for making it truly yours.
Sew a Clean Double Hem
Ready for a hem that looks store-bought? Fold your raw edge up 3/4 inch twice, press with a hot iron between folds, and pin along the crease before stitching close to the inner fold.
- Keep hem width consistent for symmetry
- Adjust thread tension to avoid puckers
- Backstitch at start and end
Sew slowly on your machine—crisp folds mean a polished denim skirt hemline every time.
Create a Frayed Hem
Want that lived-in, rebel-worn look instead? Skip the fold-and-stitch method entirely.
Cut your raw edge straight, then use a seam ripper or comb to tug threads loose, controlling fray length as you go. A brush roughs up fibers for texture. Trim uneven strands to balance the edge. Wash and dry to deepen the fray—your upcycled denim skirt only gets bolder with wear.
Add Ruffle Denim Trim
Prefer soft over frayed? Sew a gathered denim or lightweight cotton strip along the hem for instant flirt-factor.
- Pick trim width (1-3 inches) based on desired fullness
- Baste-stitch the top edge, then gather before pinning
- Topstitch close to the edge for a durable, visible finish
Mixing fabric textures adds contrast without bulk—your refashioned denim skirt gets movement and personality in one seam.
Add Patches or Embroidery
Denim trim adds movement, but patches and embroidery are where your skirt gets a real personality.
Sew-on patches outlast iron-ons in high-wear zones, so anchor them near pockets or hemlines with a dense edge stitch. Try satin stitch embroidery for solid shapes, running stitch for clean outlines. Center bold designs on the front panel, and keep placement clear of stretch or seam bulk.
Press Seams for Finish
Grab your iron and give those seams the respect they deserve, since a good press is what separates homemade from handmade. Work from the wrong side first, using a seam roll to avoid shine on bulky areas.
- Press seams flat before topstitching
- Apply steam heavily but lift, don’t slide
- Use a tailor’s ham for curves
- Try a clapper for crisp edges
- Let cool before wearing—happy sewing!
Frequently Asked Questions (FAQs)
How long does it take to make a denim skirt?
You could sew a thousand denim skirts and no two timelines would match. Realistically, a basic beginner skirt takes 2-4 hours, while upcycling old jeans with panels and topstitching stretches to 4-6 hours, depending on your complexity and skill level.
Can I make a skirt without a sewing machine?
Absolutely — fabric glue and fusible webbing replace stitching entirely. Bond hems with heat, secure a no-sew waistband tunnel, and finish edges cleanly. It’s a beginner-friendly, thrifty flip requiring zero hand sewing skills.
What size elastic works best for a waistband?
Comfort is key, hold is key, durability is key. For denim waistbands, go with 1 to 1½ inch wide elastic at medium stretch, measured at your waist minus 2 to 4 inches for that snug, no-sag fit.
How do I fix uneven hems after finishing?
Spot high spots with tailors chalk marking while trying it on a body form. Rip only that section and re-stitch, then finish with steam pressing techniques to press the seam flat and even.
Can old jeans with holes still be used?
Denim fibers around holes still hold fabric load capacity, so patching worn areas or trimming frays works great.
This is peak fashion upcycling—turn a thrift flip into a skirt using visible mending art, extending garment life through smart textile repurposing.
Conclusion
Picture that denim pile transformed: frayed hems swaying, topstitched panels catching the light, waistband sitting proud where old belt loops once sagged. That’s the payoff of a jeans into skirt tutorial done right.
You didn’t just cut fabric, you rescued it, stitch by stitch, choice by choice. Your seam ripper earned its keep today.
Hang this skirt beside store-bought clothes, and it’ll outshine them every time. Bold moves start with bold scissors. Happy sewing, friend.
- https://www.beaniesandweeniescrochet.com/blog/diy-denim-skirt-turn-your-old-pair-of-jeans-into-a-skirt
- https://mallorywhitfield.com/blog/how-to-make-a-jean-skirt-recycled-denim-diy
- https://www.upstyledaily.com/diy/skirts/decorate-restyle-or-refashion/how-to-make-shorts-into-a-skirt-44417467
- https://thedailysew.com/blog/2017/06/how-to-turn-jeans-into-a-skirt