This site is supported by our readers. We may earn a commission, at no cost to you, if you purchase through links.
Most quilters remember the exact moment a 9-inch domestic throat space started to feel like a straightjacket. That squeeze between needle and machine body, forcing you to bunch and shove a king-size quilt through a tiny gap, is precisely why so many stitchers graduate to a longarm frame with 14 to 18 inches of open room to maneuver.
If you’re learning longarm quilting basics, the equipment matters, but the real transformation happens in how you move, load, and think about fabric altogether. You’re trading cramped, awkward angles for sweeping arm motion and genuine creative control.
Mastering this shift takes patience, a bit of daily practice, and a clear roadmap from setup to your first confident pantograph.
Table Of Contents
Key Takeaways
- Longarm machines offer 14-18 inches of throat space versus a domestic machine’s 9 inches, making it far easier to maneuver large quilts and reduce bunching.
- Proper setup—including a stable frame, correctly tensioned quilt loading, and an organized, well-lit workspace—directly determines stitch quality and prevents puckering or shifting.
- Building skill requires progressive daily practice, starting with wiggly lines and curlicues before advancing to name-writing, free-motion control, and pantograph patterns.
- Beginner setups typically cost $5,000-$10,000, and most quilters reach comfortable control within 2-3 months of consistent practice, faster with computerized machines.
Start With Longarm Quilting Basics
To release a truly life-changing skill, understanding the fundamentals of longarm quilting sets the stage for everything else you’ll learn.
Once you’ve got the basics down, exploring how to convert a quilt pattern to paper piecing opens the door to sharper, more precise designs.
You’re about to see how this craft differs from what you’ve known, and why it opens up so much creative freedom.
Let’s break down the basic ideas that’ll get you thinking, moving, and quilting like a pro.
What Longarm Quilting Means
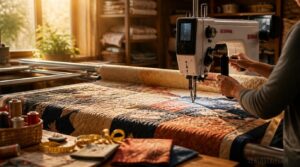
Picture three separate layers—quilt top, batting, and backing—fused into one durable, unified fabric through skilled needlework. That’s the heart of longarm quilting: a quilting sandwich stitched together using a large movable machine head mounted on a fixed frame.
Unlike hand-guided methods, this approach lets you master free motion quilting and other quilting techniques while building the foundation professional quilting services rely on daily.
You can also use computer-guided machines to execute automated stitching through digital designs.
Domestic Versus Longarm Machines
So how does a longarm quilting machine actually stack up against the domestic machine sitting in your sewing room?
The gap comes down to throat space—longarms offer 14 to 18 inches versus a domestic’s cramped 9, transforming fabric maneuvering on king-size projects.
Add built-in stitch regulation and dedicated workspace scale, and you’re looking at a bigger upfront investment that unlocks serious quilting freedom.
Why Frames Make Quilting Easier
That extra throat space only pays off once your quilt sits taut on a quilting frame, which locks all three layers in place and stops shifting mid-stitch.
This stability improves stitch consistency, reduces puckering, and holds your work at a comfortable height—easing physical strain while you build real confidence through structured long arm quilting lessons.
Key Beginner Quilting Terms
Before your first stitch, get comfortable with the vocabulary that’ll anchor every lesson ahead. Mastering quilt layers starts with knowing your backing, batting, and quilt top—plus understanding batting loft for warmth and drape.
Add managing seam allowances, rotary cutting precision, and selecting thread types, and you’ve got the foundation beginners need before tackling free motion quilting or stitch regulation on your long arm quilting machine.
Choose Beginner-Friendly Longarm Equipment
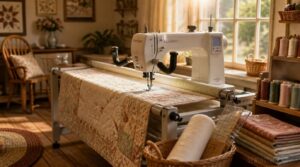
Choosing your first longarm setup, the right equipment can make every practice session feel exciting instead of overwhelming. You don’t need the fanciest machine on the market, just one that matches your space, budget, and goals as you’re building proficiency. Here’s what to weigh before you invest.
Throat Space Explained
Throat space is simply the gap between the needle and the machine body—your Machine Body Distance—and it dictates Maneuvering Capacity for every project you tackle.
More room means smoother Project Movement across larger quilts.
For Beginners exploring Long arm quilting lessons, understanding Needle Clearance early sets the foundation for confident, unrestricted work within your Quilting Space on any long arm quilting machine.
Frame Size Basics
Picture your frame as the stage where every quilt performs—choose wisely, and you’ll find true Maneuvering Capacity.
Frame Width Impact shapes your workflow: wider frames (26-30") suit queen and king projects, while 20-24" balances portability with everyday Quilt Size Compatibility.
Modular Frame Options let you expand incrementally, and Frame Material Strength (steel or aluminum) ensures your long arm quilting machine stays stable through years of ambitious, freedom-filled quilting.
Stitch Regulation Benefits
Think of a stitch regulator as your steady hand on days your speed wavers—it reads your movement and keeps every stitch length uniform, whether you’re crawling through a tight curve or cruising a pantograph.
That consistency sharpens pattern precision, deepens motif density evenly, and unlocks confident, fatigue-free stitching, freeing you to focus on design instead of managing hand speed.
Essential Starter Supplies
Your longarm quilting machine deserves a supporting cast: neutral polyester thread in 1000-1100 yard spools cuts down rethreading fuss.
Round out your quilting accessories with sharp fabric scissors, a 24×18 self-healing mat, and a 6×24 acrylic ruler for cutting precision.
Add basting spray, longarm pins, safety glasses, and a lint brush—these humble tools quietly make for smoother, safer sessions every time you quilt.
Budget and Value Considerations
Sticker shock happens fast with longarm quilting machine prices ranging from $1,500 entry models to $15,000 beginner packages.
- Entry throat space: $1,500–4,000
- Mid-range frames: $5,000–9,000
- Leasing: $150–350/month
- Annual upkeep: $300–1,200
- Resale recovery: 40–60%
Budget wisely—total ownership costs and electrical upgrades ($100–400) add up beyond the sticker price.
Set Up Your Quilting Space
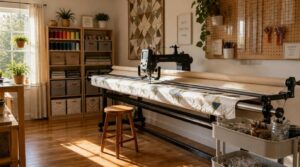
Before you ever thread a needle, the room around your machine deserves just as much attention as the machine itself. To build real proficiency, a well-organized space keeps your movements smooth and your confidence intact. Here’s what you’ll want to sort out before your frame goes anywhere near a wall.
Measure Your Available Room
Grab a tape measure before you touch a machine — your room’s dimensions determine everything else. Record wall measurement accuracy, note ceiling height, and calculate floor area.
| Measurement | Why It Matters | Target Range |
|---|---|---|
| Wall length | Frame reach | 8-10ft |
| Doorway clearance | Loading access | 3ft min |
| Ceiling height | Slope detection | Consistent |
| Floor area | Traffic flow | Open layout |
Position The Quilting Frame
Once you know your room’s dimensions, put that data to work. Set your quilting frame on a level, flat surface, checking rail alignment with a square tool to keep corners true.
Adjust stand height for a natural wrist angle, face the frame’s front toward you, and anchor it firmly—stability now prevents skewed stitching once you’re loading a quilt.
Organize Thread and Tools
A tidy thread station saves you from mid-project scrambling. Color code your cotton and polyester spools separately, since mixing them muddles quick grabs when tension issues strike.
- Color-coded bobbins in labeled bins by brand
- Magnetic strip for scissors and rippers within reach
- Spare bobbin winder ready for backup thread
Keep a swatch book for color planning, and you’ll enjoy smoother, more confident sessions ahead.
Check Lighting and Comfort
Once your thread station gleams, turn your attention upward—lighting quality shapes every stitch you’ll ever throw. Aim for 300-500 lux with 3500-4100K bulbs for true color rendering. Position fixtures above and slightly forward to prevent shadows across your throat area.
Anti-glare diffusers reduce eye strain, letting your home sewing studio support hours of confident, ergonomic practice.
Prepare Practice Quilt Sandwiches
Grab scrap fabric and build practice sandwiches before touching a real quilt top. Layer backing right-side down, batting centered with generous margins, then your top—squaring each layer prevents puckers later.
- Freedom to mess up without fear
- Confidence that grows with every wobble
- Muscle memory unlocking true creativity
- Calm control replacing quilting anxiety
Smooth wrinkles outward, baste lightly, and start unlocking genuine proficiency.
Learn to Load a Quilt
Loading your quilt correctly is where real longarm confidence begins, transforming a stack of fabric into a project ready for stitching. To master this stage, you’re unlocking smoother movement and fewer headaches down the line. Here’s what you’ll want to know before you start rolling.
Prepare Backing and Batting
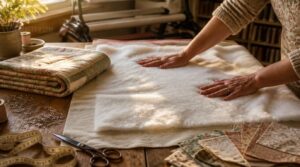
Every great quilt begins long before the needle ever touches fabric—it starts with backing fabric basics and smart batting choices.
Cut your backing 4 to 6 inches larger than your top on all sides, then choose batting loft matching your design goals.
Align layers from center outward, smoothing wrinkles, before basting securely.
This foundation determines whether your quilting journey unfolds smoothly or fights you every stitch.
Pin Fabric to Rollers
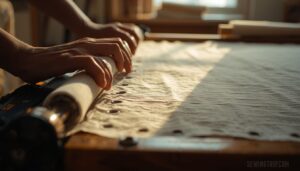
Anchoring your quilt starts with webbing attachment methods, sewing or stapling fabric securely to retention strips so nothing shifts mid-project.
Focus on:
- Roller spacing accuracy
- Even stretcher placement
- Achieving drum tightness
- Tension ripple prevention
Tap the fabric—that satisfying drum-like resonance confirms you’ve mastered proper tension across your long arm quilting machine’s frame.
Tap your quilt taut—that satisfying drum-like resonance means the tension is finally right
Keep Layers Smooth
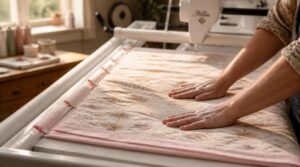
Smooth, wrinkle-free layers are what separate crisp stitching from puckered disappointment. Before you stitch a single line, check that your backing, batting, and top all lie flat, with no distortion tugging them sideways. Gently align edges and use finger pressure to erase bumps.
Fabric preparation matters here just as much as basting will in the next step.
Baste Before Quilting
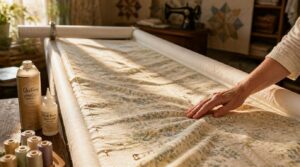
Think of basting as the quiet insurance policy behind every perfect stitch. Thread basting, pins, spray, or glue each hold your layers together, but preventing layer shifting is the real goal.
Beginners often favor thread or spray for easy cleanup, while glue basting allows repositioning if wrinkles sneak in. Choose your tool, then baste with confidence before quilting begins.
Secure The Quilt Edges
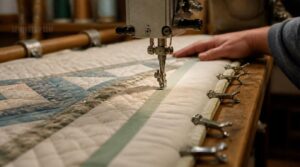
A quilt’s edges take the most abuse during loading, so give them a fighting chance before you fire up the machine. Run a 1/8 inch stabilizing stitch around the perimeter to lock everything in place, keeping tension balanced to avoid puckering.
Watch for bias stretch, use clips to steady things, and know your binding or facing will conceal this groundwork once quilting’s complete.
Practice Simple Quilting Movements
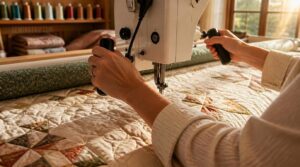
With your quilt loaded and ready, it’s time to get your hands moving and your confidence building. This is where the real fun starts, as you begin unlocking the natural rhythm between your hands and the machine. Here are five simple exercises to help you build that essential muscle memory.
Stitch Wiggly Lines
Wiggly lines are your gateway into free-motion confidence, teaching amplitude control before anything fancier enters the picture.
- Keep spacing between ¼–½ inch
- Maintain steady tension and speed
- Use stitch regulation for even length
- Try interlocking passes for smooth texture
Consistent practice builds the muscle memory every longarm quilting lesson depends on—your foundation for Free Hand Feathers later.
Try Loops and Curlicues
Once wiggly lines feel natural, curlicues open the door to real stitch design—start small, then let your loops widen gracefully. Keep spacing between ¼–½ inch, vary line weight for contrast, and watch thread tension closely.
This drill progression builds directly toward Free Hand Feathers, Ribbon Stipple, and Landscape Stipple designs down the road.
Practice Writing Your Name
Once curlicues loosen your wrist, signing your own name at the machine puts every skill to the test at once.
- Uneven baselines that wobble like a shaky signature
- Mismatched capitals that swallow the letters after them
- Crowded spacing that blurs your name into a smudge
Keep stroke width steady, exit strokes smooth, and stitch regulation on—precision stitching starts with letters you can actually read.
Learn Free-motion Control
Signing your name proves you can steer, but real freedom comes once you stop guiding the fabric and start trusting your hand speed.
Free-motion control means lowering feed dogs, engaging your presser foot, and letting stitch length follow your rhythm, not the machine’s.
Keep wrists neutral, shoulders relaxed, and let your stitch regulator smooth out the inconsistencies while your confidence catches up.
Use Short Daily Sessions
How you practice matters more than how long. Fifteen to twenty minutes daily builds skill retention and momentum better than weekend marathons—reducing fatigue while reinforcing muscle memory.
Consistency habits form fast when goals stay small.
- Trace a pantograph
- Practice tension tests
- Repeat name-writing
- Review yesterday’s stitches
- Try one new curve
Longarm University and online video classes make daily basic machine quilting techniques accessible for beginners building real proficiency.
Build Skills With Patterns
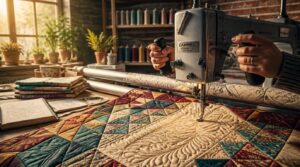
Once those wiggly lines start feeling natural, you’re ready to build real, usable skills. This is where longarm quilting starts transforming from practice into proficiency, one pattern at a time. Here’s what to focus on as you grow more confident behind the machine.
Start Edge-to-edge Designs
Ready to level up? Edge-to-edge quilting turns your whole quilt top into one flowing design, no block-by-block stopping. Smooth pattern alignment keeps motifs connecting cleanly, while consistent stitch length and motif scaling prevent crowding near borders.
Practice sandwiches let you test alignment and corner motif adjustments safely. Master stitch regulation here, and edge-to-edge patterns become your gateway into confident, professional-looking long arm quilting lessons.
Try Beginner Pantographs
Unlocking a beginner pantograph feels like discovering training wheels that actually make you faster. Choose forgiving motifs—bubbles, gentle swirls—sized 6 to 8 inches for balanced texture.
Compare digital vs paper formats based on your machine compatibility, since throat space determines repeat size limits. Smaller repeats suit shorter arms, so match pattern scale wisely as your proficiency grows through consistent long arm quilting lessons.
Practice Straight-line Quilting
Nail straight lines first, and every fancy pattern afterward gets easier. Mark guides with a Hera marker or chalk, spacing lines a consistent ¼ to ½ inch apart.
Sew from center outward to avoid fabric drift, using a walking foot and stitch regulation for uniform length. Quilt five to seven lines before crosshatching—these straight line drills build the muscle memory every longarm quilting lesson depends on.
Test Tension Before Projects
Skipping tension testing is like driving blind—you won’t see trouble until it’s stitched into your quilt. Build a practice sandwich matching your project’s fabric and batting, then test with identical thread weights.
Watch for loops or skipped stitches, adjusting incrementally. Keep a tension log noting settings, since humidity and thread weight shift results. Consistent machine calibration here prevents thread breakage and guarantees stitch consistency across your whole project.
Maintain Your Machine Regularly
Your long arm quilting machine deserves the same devotion you pour into your patterns. Weekly cleaning keeps dust from fouling belt grooves, while lubrication schedules every 50-100 hours protect the needle bar and carriage wheels.
Don’t overlook tension calibration, bobbin alignment, or electrical safety checks on cords and pedals. Address troubleshooting early, replace worn belts promptly, and you’ll enjoy consistent, reliable stitching for years ahead.
Frequently Asked Questions (FAQs)
How long does it take to learn longarm quilting?
Think of it like learning to drive stick shift: awkward stalls at first, then sudden fluidity. Most beginners find comfortable control within 2 to 3 months, practicing 4 to 6 weekly hours—computerized machines often shrink that curve to just 6 to 12 weeks.
What are common mistakes beginners make when quilting?
Beginners often stumble with tension setting errors, fabric grain misalignment, or skipping practice sandwiches entirely. Poor lighting and rushed stitching speed compound mistakes.
Quality longarm quilting lessons address these fundamentals early, building confidence through ergonomic workspace habits and disciplined thread tension checks before tackling real projects.
How much does a beginner longarm setup cost overall?
Budget $5,000–$10,000 for an entry-level long arm quilting machine, plus frame, thread, and starter kit expenses. Factor in ongoing software fees and essential maintenance costs too—used machine value often stretches your dollars further while you’re building skills.
Can I teach myself longarm quilting without classes?
Absolutely, yes—self-teaching is entirely possible through practice sandwiches, online tutorials, and rented machine time. Consistent short sessions build muscle memory, while sewing tutorials and structured longarm lessons fill knowledge gaps traditional classes would otherwise cover for motivated, self-directed learners.
How often should I replace my quilting needles?
A dull needle is a quiet saboteur, wearing down stitch quality before you notice.
Replace needles every 8-10 hours of stitching, sooner with heavy thread friction, to prevent thread breakage, fabric snagging, and tension trouble on your quilting machine.
Conclusion
Imagine this: fabric flowing smoothly beneath your hands, needle gliding, and a finished quilt unfurling like a story finally told. That image is what waits on the other side of practice.
Learning how to learn longarm quilting basics isn’t about memorizing steps; it’s about building muscle memory and confidence, session by session. Your stitches will wobble, then steady. Your frame will feel foreign, then familiar.
Keep loading, keep stitching, keep showing up—mastery is simply consistency wearing a fancier name.
- https://www.stringandstory.com/blog/how-to-start-longarm-quilting
- https://www.bsewinn.com/blogs/inspiration/long-arm-quilting-machines-for-beginners
- https://leahday.com/blogs/machinequilting/longarm-quilting-videos
- https://www.longarmuniversity.com/Tutorials/Tutorial-Page.html
- http://www.pinholequilting.co.uk/