This site is supported by our readers. We may earn a commission, at no cost to you, if you purchase through links.
I once dumped a whole tin of mixed needles into my sewing drawer, figuring I’d sort them out "later." Three months later, later still hadn’t come, and I was digging through rusty points with my fingers, hoping not to get stuck. Sound familiar?
Needles seem simple until you own thirty of them in five sizes and can’t tell a jeans needle from a universal by looking. That mix-up snaps needles, snags fabric, and wastes good thread.
Learning how to store sewing machine needles properly fixes all of that, and it’s easier than you’d think. A little sorting, labeling, and the right container turn chaos into a system you can trust.
Table Of Contents
Key Takeaways
- Sort needles by type and size (Universal, Stretch, Jeans, Microtex, embroidery, quilting) so you always grab the right one without guessing.
- Label containers clearly with type, size, and color codes to make finding and identifying needles fast and foolproof.
- Choose sturdy, sealed storage like clear plastic boxes, carousels, or locking travel cases to keep needles safe from damage and loss.
- Protect needles from rust and dulling by keeping storage dry, using silica gel packets, avoiding concrete floors, and separating used needles from new ones.
Sort Needles by Type and Size
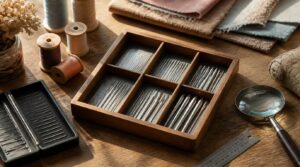
Before you organize a single container, you need a plan for what goes where. Sorting by type and size first saves you from digging through a jumbled mess later. Here’s how to break your needles into groups that actually make sense.
Start by grouping needles by type—hand-sewing, machine, embroidery, or specialty—since knowing what needles are typically included in sewing kits makes it much easier to spot gaps or duplicates in your collection.
Universal, Stretch, Jeans, Microtex
Four needles, four jobs, one drawer that finally makes sense. Needle type selection starts here: Universal for wovens, Stretch for knits, Jeans for heavy denim, Microtex for silky wovens.
Denim fabric compatibility matters when stitching stretch fabrics—Jeans needles punch through 9-12 oz denim without snapping. Microtex material benefits show in smooth microfiber stitching. Sort by size and type for real needle management while organizing your sewing machine needles.
Embroidery and Quilting Needles
Once your wovens and knits have a home, embroidery and quilting needles need their own drawer space, sorted separately by job.
- Embroidery needles: larger eye size, smooth passage for rayon or metallic thread
- Quilting needles: sharp point cuts through layered fabric fast
- Metallic needles: polished surface cuts thread friction
Grouping by size and type keeps your needle gauge organization sane—no more guessing which needle’s loaded when you’re storing sewing machine needles.
Sizes 70/10 to 100/16
Numbers like 70/10 or 100/16 aren’t random—they’re the sizing system standards for fabric weight matching. The first number tracks needle diameter impact on your fabric; bigger numbers mean thicker needles for heavier weaves.
| Size | Best For |
|---|---|
| 70/10 | Chiffon, silk |
| 80/12 | Cotton, linen |
| 90/14 | Midweight blends |
| 100/16 | Denim, twill |
Pair size with proper thread weight pairing to protect stitch integrity.
Separate New and Used Needles
Once you’ve matched sizes to fabric, don’t toss used needles back with the fresh ones. Keep a separate labeled container just for used needles, and try color-coding it so you spot it fast. This prevents cross-contamination and mix-ups mid-project.
Log how many you retire each session, then drop them straight into a sealed sharps container—needle safety matters, even for dull ones. You can also implement a needle management process to track usage through visual markings.
Discard Bent or Dull Needles
Hold each needle up to the light before every project—see a rounded tip or flattened edge? That’s tip deformation, and it’s your cue to toss it.
Bent or dull needles snag fabric, strain your machine’s harp and plate, and tire your hands fighting resistance.
Swapping in a fresh needle takes just a minute, and this guide on how to change a sewing machine needle walks you through doing it correctly.
Wrap it in paper for safe sharps disposal. Skipping this step risks real machine damage down the road.
Label Every Needle Storage Container
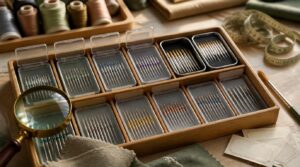
Sorting your needles is only half the battle, because a mystery container will trip you up just as fast as a messy drawer. Once everything has a type and size, labeling turns that system into something you can trust at a glance. Here are five simple ways to label your containers so you always grab the right needle the first time.
Use Clear Type Labels
Ever squint at a needle label under bad lighting and just guess? Clear Type labels fix that with bold sans-serif text and high-contrast colors—dark letters on white backgrounds work best.
Choose durable, laminated material so smudges don’t blur your labels. Good printing resolution keeps edges crisp, so when you organize your sewing machine needles, every label stays readable at a glance.
Add Needle Size Markings
Grabbing a needle that "looks right" is how snagged seams happen. Size markings need both metric and numeric numbers, like 90/14, printed or etched right on the shank or pack.
Etching outlasts printing when handling and washing wear labels down. Either way, keep markings high-contrast for legibility under low light, so organizing your sewing machine needles stays foolproof and prevents fabric damage down the road.
Try Color-coded Sections
Color turns guesswork into a glance. Assign blue for universal needles, red for denim, green for embroidery — five colors max, so your brain doesn’t overload.
- Blue: all-purpose/universal
- Red: denim/heavy duty
- Green: embroidery/microtex
- Yellow: quilting
Keep a small legend nearby. This trains fast recognition and adds accessibility for anyone scanning your sewing notions organization at a glance.
Use Dry-erase Labels
Sticky labels get messy fast, but a dry erase surface saves the day. Wipe it clean, write new contents, done—no ghosting, no peeling.
They stick to plastic, glass, or metal, so your sewing notions storage stays flexible. Try magnetic labeling on metal bins for quick rearranging.
This means rapid inventory updates whenever your needle stash changes.
Mark Currently Loaded Needle
Which needle’s actually in your machine right now? That’s the one detail most sewists forget to track.
A quick tag or Grabbit organizer showing the loaded needle saves guesswork. Note size, type, and thread compatibility, then run a test stitch on scraps to confirm needle seating before your real seam. This tiny habit protects your sewing kit essentials and keeps needle storage genuinely useful, not just tidy.
Choose Safe Needle Storage Containers
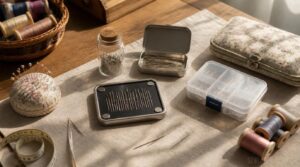
Once your needles are sorted and labeled, they need a real home, not just a random drawer. The container you pick matters more than you’d think, since a flimsy box can crack or spill and send needles rolling everywhere. Here are five safe, sturdy options worth trying in your sewing space.
Clear Plastic Storage Boxes
A see-through box beats a mystery box every time. You spot every needle type without popping a single lid, which saves precious cutting time mid-project.
Impact-resistant plastic stands up to daily use, and stacking bins vertically keeps your table clear. Look for:
- Snap-lock lids for moisture sealing
- Nesting designs for compact storage
- Wipeable surfaces for quick cleaning
Compartment Carousel Organizers
Give the lazy Susan treatment to your needle stash. A carousel spins on a smooth bearing, so one hand can rotate straight to the jeans needle section without knocking anything over.
Durable acrylic trays hold up to daily spinning, and clear sides give instant visual inventory.
| Feature | Why It Helps |
|---|---|
| Rotating base | One-handed access |
| Clear compartments | Quick visual check |
| Labeled sections | No guessing games |
| Small footprint | Fits tight desks |
Trading Card Sleeve Binders
Ever notice how trading card collectors never lose a single card? That’s the secret behind this trick.
A 9 pocket page binder holds up to 360 sleeved needles, and side-loading pockets keep them from sliding out when tilted. Zippered closures add extra security, while archival-safe, acid-free pages protect metal from corrosion—perfect for travel-friendly craft storage.
Locking Travel Containers
Locking travel containers step things up when you’re flying to a class or workshop. Look for impact resistant polycarbonate cases with ergonomic latch designs—one-hand opening, even with gloves on. Many include tamper evident features, so you’ll know if it’s been opened.
Bonus: stackable container efficiency makes packing a breeze, and most meet airline security compliance for carry-on travel.
Small Tins or Spice Jars
Raid your spice rack before buying anything new. Mini glass jars and Altoid tins make surprisingly great needle storage solutions—airtight seals keep out moisture that causes oxidation, and clear sides let you spot sizes fast.
They’re perfect for compact travel kits, too. Just label small containers clearly (size and type), and your craft supplies storage stays rust-free and grab-and-go ready.
Make DIY Needle Organizers
Store-bought containers work fine, but sometimes you want something that fits your exact stash, and making your own gives you that control.
Plus, homemade organizers travel well and make gifting your extra needles a lot more personal.
Here are five simple projects you can put together with stuff you probably already have lying around.
Felt Needle Book
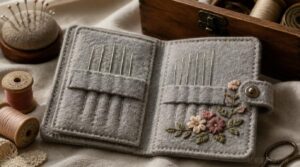
A soft wool felt book keeps needles safe like a blanket keeps out the cold. Interior pages hold needles by pocket or slot, and a snap closure seals everything shut.
Handy features:
- Needle tip protection from felt fibers
- Pockets sized for hand needles up to 3 inches
- Space for personalizing needle covers with embroidery
Sturdy stitching means this needle case lasts years, not months.
Vinyl Pocket Organizer
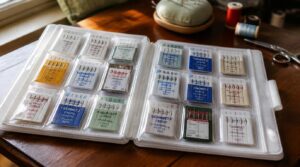
Clear vinyl pockets turn needle hunting into a quick glance instead of a dig-through. Each slot holds one needle pack, so you spot types at a glance without unzipping anything.
These fit standard 3-ring or 7-ring binders, slide into project bags, and survive plenty of pin-poking without tearing. Wipe them clean, roll them up, and toss them in your sewing bag for class days without a second thought.
Altoid Tin Storage
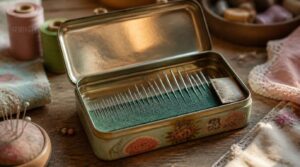
Got an empty mint tin lying around? That’s basically a free needle case waiting to happen. The tin-plated steel body resists crushing, and the hinged lid seals out moisture and dust, keeping needles rust-free for weeks.
Paint it, add stickers, toss in a silica packet for extra moisture protection—instant, compact travel kit. Upcycling metal tins this way costs nothing and organizes your sewing needles beautifully.
Pleather Needle Wallet
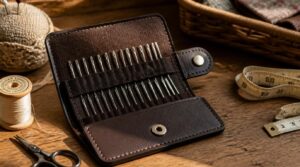
Want something sturdier than fabric but still pocket-sized? A pleather needle wallet fits the bill, roughly 90x80mm with a soft interior lining that won’t snag your needles.
The polyurethane coating resists water and stains, so a damp cloth keeps it clean. Snap closures make it grab-and-go portable—perfect for tucking into your sewing accessories bag alongside other hand sewing tools.
Embroidered Needle Case
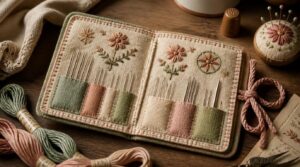
Ever notice how the prettiest sewing accessories often get used the most?
An embroidered needle case proves that point—stitch a woven wheel or lazy daisy motif onto felt with light batting for structure, add interior pockets for organized needle holders, and tie it shut.
Compact enough for travel, sweet enough for gifting to any hand sewing tools lover in your life.
Protect Needles From Damage
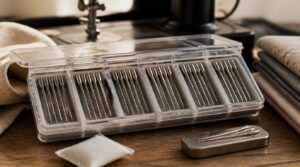
You’ve sorted, labeled, and stashed your needles in something sturdy, so now it’s time to think about what could still sneak up and ruin them. Rust, moisture, and mixing up new with used needles are sneakier threats than you’d think. Here are five simple habits that keep your needles safe and sharp for the long haul.
Keep Needles Dry
Rust is the silent needle killer, and moisture is its best friend. Keep your storage bone-dry, away from bathrooms, basements, or steamy kitchens.
Rust is the silent needle killer, so keep your storage bone-dry and far from moisture
Wipe steel needles with a microfiber cloth before tucking them away, and let them air dry fully first. Check your stash now and then for rust spots. A little humidity control now saves your fabric from snags later.
Add Silica Gel Packets
Wiping needles down only goes so far, so give them backup: tuck silica gel packets right into your storage containers. These little packets pull moisture from the air, keeping rust away.
- 1-2 packets for small boxes
- 2-4 for bigger totes
- Watch for color-indicator types showing saturation
- Recharge beads in a low oven, then reuse
Swap them out regularly for lasting protection.
Avoid Concrete Floor Storage
Concrete floors act like a sponge, pulling ground moisture upward into anything sitting on them. That’s bad news for your needle organizers.
Set storage on a shelf or pallet instead, leaving a couple inches of airflow underneath. This elevation gap stops condensation from creeping into your tins and boxes, keeping every needle holder in your sewing room dry and rust-free.
Use Magnetic Needle Keepers
Off the floor is only half the battle, since loose needles on a magnetic strip can lose their grip over time. That’s where magnetic keeper bars come in, sitting across the poles to complete the magnetic flux closure and stop demagnetization.
Look for soft iron construction, since it grips stray fields best. Keep these away from pacemakers or hard drives for basic magnetic keeper safety.
Store Active Needles Separately
Grab a wine cork or a little pincushion just for the needle you’re using right now, so it doesn’t wander back into the fresh stash. This keeps tip contamination away from your good needles and makes visual distinction dead simple.
A quick sort routine helps:
- Left side for used needles
- Right side for new
- Velcro dot marks the loaded needle
- Retire anything dull immediately
Frequently Asked Questions (FAQs)
What is the best way to store sewing needles?
Sort by type and size in a labeled needle case, keep humidity below 60%, and separate used from new. This keeps your sewing supplies management simple, your workspace efficient, and every needle holder ready for travel without rust surprises.
How long is a sewing machine needle good for?
Plan on 6 to 10 hours of sewing per needle, less for denim or canvas thanks to fabric thickness and friction. Watch for dull points, thread breaks, or skipped stitches, since poor thread quality speeds up wear too.
How do you store a sewing machine when not in use?
Clean off lint, oil the moving parts, and cover it with a breathable dust cover in a cool, dry spot below 60% humidity. Keep it off concrete, elevated on a shelf, away from swings in temperature.
How to organize sewing supplies in a small space?
Small space? Think vertical. A pegboard layout frees up your table, while a compact rolling cart with drawer dividers tucks tools away. Add a desktop tray for daily needles and thread, plus hanging organizers for fabric scraps.
How often should I replace sewing machine needles?
Follow the eight-hour rule as your baseline, but watch for skipped stitches or thread breaks. Heavier fabrics wear needles faster, so swap needles at project milestones too, keeping your sewing setup running smoothly and stitch quality consistent.
Can I reuse a needle after cleaning it?
Reusing a sewing needle is like recycling a good idea, fine as long as it still holds up. If it’s sharp, clean, and rust-free, go for it. Bent, dull, or corroded? Toss it, no cleaning fixes that.
How long do unused needles last in storage?
Sealed sewing needles can last years with intact packaging, low humidity, and no rust. Check seals yearly, watch for corrosion signs, and keep them cool and dry—your needlework organization depends on it.
What size needle works best for beginners?
Here’s a secret that saves beginners tons of frustration: the wrong needle size fights you every stitch.
Go with US 6 to 8 (0-0mm) paired with worsted weight yarn. It builds tension control without hand fatigue, letting you actually see your stitch definition as you learn.
Should I store needles separately by fabric type?
Knit vs woven matters—ball point needles glide between knit fibers preventing snags, while sharp microtex needles cleanly pierce woven threads.
Matching tip selection to fabric weight preserves needle point integrity, so keep your textile tools sorted by fabric type, not just size.
Conclusion
Sorted needles, labeled boxes, dry storage—that’s the trio that saves your sanity. Once you master how to store sewing machine needles, that rusty junk drawer becomes a system you trust. You’ll grab the right size in seconds, not minutes, and your seams will thank you. No more guessing, no more snapped needles mid-project.
Think of your needle case as a tiny toolbox: everything has its place, and every place has its purpose. That’s mastery worth keeping.
- https://thewoodwhisperer.com/articles/rust-prevention
- https://nancyzieman.com/blog/quilting-2/organize-your-needles-easily
- https://www.thelaststitch.com/diy-sewing-machine-needle-storage-system-tutorial
- https://www.hubindustrial.com/resources/tool-maintenance-and-optimization/5-ways-to-prevent-tool-corrosion-in-humid-environments.html
- https://www.instructables.com/how-to-sew-a-needle-book/