This site is supported by our readers. We may earn a commission, at no cost to you, if you purchase through links.
Your machine ticks like it’s hitting something solid, the thread snaps for the third time this hour, and that seam you just finished looks like it puckered in the wash. Nine times out of ten, the culprit isn’t your tension settings or your fabric choice. It’s the needle.
A needle dulls faster than most sewers expect, sometimes within a single long project, and once it does, every stitch after that fights against damaged metal instead of piercing cleanly through fibers. That’s how skipped stitches, snagged silk, and bent tips start showing up in the same afternoon.
Learning to spot these signs you need a new needle before they wreck your fabric saves you time, thread, and a fair amount of frustration.
Table Of Contents
Key Takeaways
- Most stitching problems—skipped stitches, thread breaks, puckering, popping sounds, and snagged fabric—trace back to a dull, bent, or mismatched needle rather than tension settings.
- You should replace your needle every 6–8 (or up to 10) hours of sewing, after finishing a major project, or immediately after hitting a pin, since worn or damaged tips cause cascading fabric and stitch damage.
- Matching needle type and size to your fabric matters most, since ballpoint needles suit knits while sharp needles suit wovens, and delicate fabrics like silk or chiffon need fine Microtex needles.
- Ignoring early warning signs like popping sounds or a visibly bent shaft risks permanent fabric damage and can also strain your machine’s timing, belts, and gears over time.
Skipped Stitches Keep Appearing
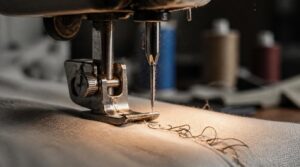
Skipped stitches are one of the clearest signs your needle needs attention, and they rarely happen for just one reason. Before you touch a single dial or setting, it helps to know what’s actually going on beneath the fabric. Here’s what to look for when stitches start skipping on you.
A quick check against a sewing machine needle types chart can reveal whether you’re simply using the wrong needle for your fabric.
Uneven Stitch Formation
Why do your stitches suddenly look ragged instead of smooth? A worn needle disrupts stitch formation the same way a scratched record causes audio distortion — skipping and jumping instead of clean tracking.
Before blaming tension, rule out:
- Improper needle depth
- Dirty tension disc contacts
- Bobbin tension imbalance
Worn feed dogs can mimic these symptoms too, causing mistracking across your seam. You should also check for incorrect thread tension that might be affecting your results.
Needle Missing Fabric Loops
A dull point can’t grab the fabric loop cleanly, so it slides past instead of catching thread on the upstroke. That’s often mistaken for tension trouble when it’s really a timing and contact problem.
Check the needle tip for burrs or flattening, and confirm proper depth. If the point isn’t meeting the hook consistently, replacement solves it faster than any adjustment ever will.
Common Stretch Fabric Issue
Jersey and other stretch knits make skipped stitches worse because a standard needle just isn’t built for the job. Here’s why it happens:
- Elastane content below 5% reduces recovery, letting loops shift oddly.
- Ballpoint tips matter—regular ones snag fibers.
- Fabric weight affects stability under the needle.
- Even thread type changes how loops form.
Check Before Adjusting Tension
Before touching that tension dial, rule out the real culprits first. Confirm fabric type verification and stitch density, check bobbin winding quality, and verify presser foot pressure and hook timing.
| Skip Before Adjusting | Why It Matters |
|---|---|
| Needle condition | Bent or dull tips cause resistance |
| Thread path | Snags mimic tension problems |
| Bobbin tension | Uneven feed skews readings |
Thread Keeps Breaking
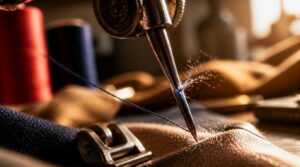
If your thread snaps every few stitches, the needle is usually to blame, not your tension settings. A damaged or incorrect needle creates friction and stress points that fray or cut the thread as it passes through. Here’s what to check before you keep rethreading your machine.
Frayed Upper Thread
Ever notice tiny fuzz building up around your stitches like miniature lint balls? That’s your upper thread fraying before it even breaks.
Needle eye burrs cause this, scraping the thread every pass. Rough threading paths, wrong tension, or cheap thread worsen it. Left unchecked, fraying turns into full breakage. Replace the needle promptly, since a smooth eye keeps thread intact and stitches clean.
Snapping Near The Needle
Thread snapping right at the needle usually means something’s fighting the thread as it feeds through. Improper thread tension—too tight or too loose—stops smooth passage, while needle alignment issues create sharp contact points. Fabric feed imbalance adds strain too. Watch for:
- Sudden snaps mid-seam
- Fraying just before the break
- Snapping worse on knits
- Tension dial needing constant adjustment
Rough Needle Eye
Why does thread shred right where it enters the needle? Often it’s metal texture irregularities from manufacturing quality defects, not tension.
| Symptom | Cause |
|---|---|
| Fraying | Burrs |
| Snagging | Rough walls |
Run thread through slowly, inspecting eye walls for shine or catches. Eye burr removal rarely works—replace the needle to cut thread snagging risks.
Wrong Needle Size
Sometimes thread breakage has nothing to do with the needle’s condition and everything to do with its size. A needle too small for your thread causes thread fraying at the eye with every pass, while one too large creates excess needle hole damage and fabric distortion.
Matching needle size to thread weight is just one piece of the puzzle, so it’s worth walking through proven techniques for preventing thread breakage alongside checking your bobbin alignment.
Match needle size to both thread weight and fabric type—this preserves seam strength and stitch density, preventing snaps before they start.
Fabric Starts Puckering
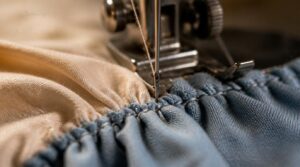
When your fabric bunches up in tiny gathers along the seam instead of lying flat, your needle is usually the culprit. This puckering often points to a dull tip or a mismatch between needle and material, not a tension problem you can fix by twisting a dial.
Here’s what’s actually causing that rippled, gathered look in your stitching.
Tiny Fabric Gathers
Small, unwanted ripples along a seam often trace back to the needle itself, not your gathering technique. If you’re deliberately creating tiny fabric gathers with basting stitches, a worn needle snags threads unevenly, distorting fullness ratios. Pucker forms when stitch length can’t stay consistent.
Check your needle before blaming the fabric or stabilizer—pressing won’t fix what a dull point already damaged.
Needle Too Dull
A blunted tip won’t cleanly part fibers anymore, so it drags and deflects instead of piercing straight down. This fabric piercing resistance forces uneven stitch spacing, gathering material into tiny puckers as the needle fights its way through.
Run a finger gently along the point. Any flat or rounded feel confirms blunt tip detection—time to swap the needle before it damages more seams.
Lightweight Fabric Problems
Chiffon, silk, and georgette punish a dull needle fast because low fabric density means fewer fibers holding the weave together under tension. Seam slippage risks climb, edges shed fibers, and material tension stress causes visible dimensional instability.
Watch for:
- Fraying at cut edges
- Yarns separating near seams
- Puckering at waistlines
- Fiber shedding along stress points
Pair With Correct Thread
Even the sharpest needle can’t fix a mismatched thread pairing. Thread diameter needs to align with your needle’s eye size, and pitch compatibility matters when tension builds across delicate weaves.
Verify thread standard against fabric weight before stitching—material strength alignment prevents snapping, and avoiding cross threading at the needle eye keeps puckering from creeping back into your seams once you’ve dialed in the right needle.
You Hear Popping Sounds
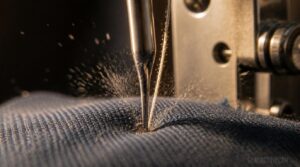
A popping sound as the needle enters your fabric isn’t just noise you can ignore, it’s a clue about what’s happening below the fabric line. That sharp little snap usually points to resistance the needle shouldn’t be fighting in the first place. Here’s what’s really going on when you hear it, and why it matters more with certain fabrics than others.
Needle Piercing Resistance
Why does that faint popping sound show up mid-seam? It’s usually piercing resistance fighting back against a dull point.
- Sharp tips concentrate stress for easy entry
- Stiffer fabrics demand more force to puncture
- Smaller needle radius eases fiber deformation
- Rough tips increase friction and snagging
- Beveled edges change entry angle and resistance
Worn needles lose that geometry, so fibers deflect instead of parting cleanly.
Dull Needle Warning
That popping sound is your warning sign, not background noise. It means audible piercing resistance has replaced clean entry, and fabric tension instability usually follows close behind.
Grab a magnifier and check the tip. Thread shredding signs and a rough, blunted point under magnified tip inspection confirm what your ears already told you: needle entry resistance has crossed the line into replacement territory.
Knits and Woven Fabrics
Why does that popping sound louder on some fabrics than others? Fabric structure plays a big role. A jersey knit flexes around a dull point, but rib or interlock structures resist more, amplifying the pop.
Woven fabrics behave differently too. Twill weave’s tight diagonal threads and satin’s dense, low-loft face both fight back against a blunted tip, especially in heavier-weight material.
Stop Before Fabric Damage
Hearing that pop is your cue to pause, not push through. Stop stitching immediately and check for these warning signs before continuing:
- Visible resistance when the needle enters fabric
- Fabric pulling or puckering at the needle
- Snags or pulled threads around the stitch line
- Any bend or burr on the needle tip
Catching this early prevents permanent holes and saves your fabric from lasting damage.
The Needle Looks Bent
Sometimes the damage isn’t in your stitches at all, but right there in front of you, plain as day. A bent needle rarely fixes itself and almost always gets worse the longer you keep sewing with it. Here’s what to look for, and why you shouldn’t wait to swap it out.
A bent needle never fixes itself—it only gets worse the longer you keep sewing with it
Visible Curve or Tilt
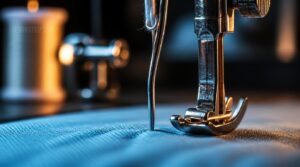
Hold your machine up to eye level and watch the needle as it lowers into the fabric — a straight shaft should stay straight, not bow.
Needle deflection happens when a wornout needle meets fabric resistance or an improper insertion angle pushes it off-center. This visual inspection catches distortion early: a curved shaft causes uneven stitch baselines and signals real wear and tear before bigger damage follows.
Needle Hitting The Plate
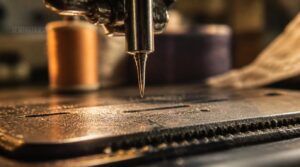
A ticking or scraping sound as the needle drops means metal is meeting metal, and that’s a costly habit to ignore. Loose clamp screws let the needle drift sideways, while needle plate wear or improper needle orientation guides it straight into the hole’s edge.
Check for burrs on the plate immediately — continued contact will chip your needle and scratch the plate itself.
Uneven Stitch Direction
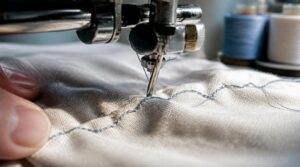
A bent needle doesn’t just sound off — it stitches off, angling each pass so seams zigzag instead of running straight.
That crooked path comes from poor fabric feeding and mismatched needle-to-fabric fit, both throwing off consistent angles.
Watch for:
- Slanted stitch rows
- Uneven thread bite
- Puckered seam edges
- Visible needle wobble
Replace Immediately
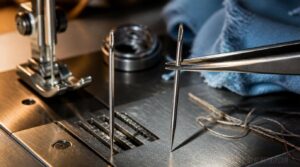
Once you spot that curve, don’t wait for another skipped stitch or snapped thread — swap the needle out now. Continuing to sew risks fabric tears, eye injury, and stress on your bobbin system and presser foot alignment.
Immediate replacement keeps downtime low and prevents cascading failures. A quick check for straightness and proper clocking before you resume sewing protects both your fabric and your machine.
Your Fabric Gets Snagged
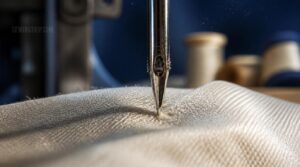
A snagging fabric usually means something on your needle isn’t as smooth as it should be. This kind of damage often catches you off guard, especially on delicate materials that show every flaw instantly. Here’s what usually causes it and which fabrics are most at risk.
Pulled Threads
Ever notice small tugs or loose loops appearing along your stitch line? A burred needle tip catches individual threads instead of sliding cleanly between them, dragging fibers out of position rather than piercing the weave. This disrupts natural fabric tension control, distorting what should be smooth, even stitching.
Unlike intentional openwork techniques that create lattice patterns on purpose, these snags are accidental damage — a clear sign your needle needs replacing now.
Runs in Delicate Fabric
Silk, nylon, and fine knits suffer worst when a snagged needle causes fiber loop unraveling, creating that telltale vertical ladder. Sheer, single-layer construction offers little resistance, so one caught loop spreads fast.
Aggressive washing machine agitation makes it worse post-snag. Matching correct needle size to lightweight fabric is your best snag prevention — check the tip before your next delicate project.
Burrs on Needle Tip
Not every snag traces back to fabric type — sometimes the needle itself is the problem. Burrs are tiny rough edges left from grinding or manufacturing defects, and they catch fibers on entry. Run a finger along the tip to check for roughness.
Mechanical deburring can restore smooth piercing efficiency, but if tip geometry looks compromised, replace the needle instead.
Silk and Jersey Warning
Some fabrics deserve extra caution, and silk jersey tops that list. Delicate fiber snagging happens fast against a rough needle eye, pulling threads and leaving visible marks. Jersey’s stretch means knit fabric distortion occurs easily too.
For proper silk texture care and jersey stretch management, use a fresh, fine ballpoint needle — lightweight fabric handling demands smoothness a worn needle simply can’t offer.
Seams Look Uneven
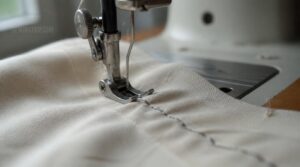
A crooked seam usually isn’t a sewing mistake at all—it’s often your needle sending you a warning sign. When stitches wander off course or bunch up unevenly, the problem usually traces back to how the needle interacts with the fabric. Here’s what to check when your seams stop lining up the way they should.
Inconsistent Stitch Length
Look at a seam and see stitches shrink then stretch within the same row? That’s inconsistent stitch length, usually caused by tension imbalance, feed dog slippage, or thread path friction as it feeds unevenly.
- Tight thread pulling stitches short
- Loose bobbin tension causing gaps
- Slipping feed dogs
- Bulky seams slowing fabric
- Machine timing errors
A dull, bent needle deflects thread, worsening the pattern.
Crooked Stitch Lines
Why does your seam veer off like it’s got a mind of its own? Often it’s needle alignment drift, paired with stitch tension imbalance or uneven presser foot pressure pulling fabric sideways.
| Cause | Effect |
|---|---|
| Needle drift | Sideways skew |
| Tension imbalance | Tilted stitches |
| Uneven foot pressure | Fabric pull |
| Feed dog slippage | Irregular spacing |
| Dull needle | Persistent angle |
Poor Fabric Feeding
Why does your fabric crawl or stutter under the needle? Worn feed dogs lose grip, so layers slip and stitches wander. If presser foot pressure isn’t set right, you’ll see bunching or drifting. Tension disc buildup and misaligned timing disrupt steady feeding, especially with thick seams. When the needle struggles, seams go wavy—swap it before uneven feeding ruins your project.
Needle and Fabric Mismatch
Ever wonder why your stitches zigzag or seams go wonky? Needle and fabric mismatch is often the culprit. A sharp needle cuts woven fibers cleanly, while a ballpoint separates knit fibers without damage. Always test on a scrap swatch to avoid visible holes or skipped stitches.
- Ballpoint versus sharp for fabric type
- Needle eye sizing for thread
- Swatch testing importance
Needles Break More Often
If your sewing machine needles are snapping more than usual, it’s usually a sign that something isn’t right. This problem can stem from a few different causes that are easy to overlook. Let’s walk through the main reasons your needles might be breaking more often than they should.
Wrong Needle Type
If you’re seeing needles break more often, the culprit may be using the wrong needle type for your fabric. Ballpoint needles are designed for knits, while sharp needles suit woven materials. Needle mismatch causes skipped stitches, fabric feeding errors, and compromised stitch quality. Here’s a quick guide:
| Needle Type | Best for Fabrics |
|---|---|
| Ballpoint | Knits, Jersey |
| Sharp | Wovens, Cotton |
| Universal | Mixed materials |
| Heavy Duty | Denim, Canvas |
| Specialty | Leather, Vinyl |
Thick Seam Stress
Thick seams push your needle to its limits. When you hear popping sounds or notice uneven stitches, high seam stress is likely to blame. As the needle struggles through dense layers, resistance grows and the risk of breakage climbs. Check for:
- Bent needles
- Skipped stitches
- Thread breaks
- Fabric grip loss
- Presser foot pressure issues
Pulling Fabric While Sewing
If you’re tugging fabric to help it feed, that’s a red flag for needle wear or misfit. Often, upper thread tension is too tight, or presser foot pressure is off. Use this quick reference:
| Problem | Solution |
|---|---|
| Fabric drag | Adjust foot pressure |
| Slippery fabric | Try a walking foot |
| Feed issues | Clean feed dogs |
| Needle snag | Replace with correct type |
Too much manual pulling stresses the needle, making breaks frequent. Let your machine do the work—if you’re always pulling, swap the needle and review your setup.
Check Needle Installation
Before you blame fabric or thread, look at needle clamp integrity. If the shank isn’t aligned or the clamp screw lacks proper torque, breakage happens fast. Make sure the needle sits perpendicular—no wobble.
Double-check the thread path accuracy and that the needle scarf orientation matches your stitch type. A loose clamp or misaligned needle leads directly to trouble.
Replace Needles Before Problems Start
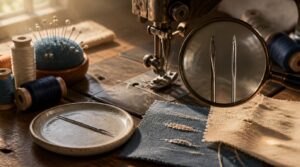
Changing your needle before trouble starts is the best way to protect both your machine and your projects. There are a few simple moments when swapping out the needle makes sense. Here’s what to keep in mind as you plan your sewing routine.
After Every Major Project
Almost always, a fresh needle is your best insurance after finishing a major project. Each big batch of sewing stresses the needle’s point and shank, which can lead to microscopic wear or bending.
Swapping in a new needle now prevents skipped stitches, puckered fabric, and even accidental snags on your next project, so your results stay consistent and your machine runs smoothly.
Every 6–8 Sewing Hours
If you want to keep your stitches tight and your fabric safe, swap out your needle every 6–8 sewing hours. This habit catches:
- needle deformation before it ruins seams
- tension drift that creeps up after long runs
- fabric friction heat that dulls the tip
- needle plate burrs from repeated punctures
Document each change for consistent quality.
Before Delicate Fabrics
How do you keep silk from snagging or chiffon from tearing? Always switch to a fresh Microtex needle—size 60/8 or 70/10 for most delicate fabrics. Using a dull or wrong needle risks runs and damage. Test on scrap first; check for smooth stitch. Here’s a quick reference:
| Fabric Type | Needle Size | Avoid |
|---|---|---|
| Silk | 60/8–70/10 | Ballpoint |
| Chiffon | 60/8–70/10 | Dull Needle |
| Lace | 70/10 | Large Needle |
| Organza | 60/8–70/10 | Rough Tip |
| Tulle | 70/10 | Bent Needle |
After Hitting a Pin
Strike a pin while sewing, and your needle’s tip can flatten, chip, or even bend. That tiny impact risks needle tip damage and throws off your stitch line. For safety and quality, follow these steps:
- Stop sewing immediately
- Remove the needle
- Inspect for bends or burrs
- Replace with a new needle
Never risk your fabric or machine.
Match Needle to Fabric
Why risk your project when the wrong needle can ruin fabric or stitch quality? Always match needle to fabric—use a ballpoint for knits, a sharp universal for wovens, and adjust needle size for material thickness. Specialty fabrics like leather or silk need dedicated needles.
Swapping needles as you change fabrics keeps audio fidelity and stitch clarity at their highest.
Frequently Asked Questions (FAQs)
How do I tell if my needle needs replacing?
Skipped stitches, popping sounds, frayed thread, snagged fabric — these all point to one culprit. Check for microscopic tip damage, needle eye burrs, or bent shafts. Listen for stitching resistance and unusual auditory cues; they signal it’s time to replace your needle.
How to tell if a needle is bad?
Check for a visual tip inspection first: look for burrs, corrosion, or bending. Test eye smoothness with thread, confirm shank stability in the machine, and watch for micro-crack detection after hitting pins or hard objects.
How do I tell if my needle is worn out?
Fraying fibers and fabric friction give it away fast. Feel stitching resistance, inspect the tip for micro-nicks, and test thread passage quality—if the eye feels rough or sound turns to popping, it’s worn out.
How often should I replace my needle?
Every 8 to 10 hours of active sewing is the general rule, but fabric type matters, too — switch sooner for denim or knits. Starting a new project with a fresh needle keeps stitch quality consistent from the first seam.
How long does a sewing machine needle typically last?
Most needles hold up for 6 to 10 hours of sewing, though denim and multi-layer projects wear them down faster. Fabric density and abrasion speed up sharpness decline, so track your hours and swap needles before quality slips.
Can a dull needle damage my sewing machine itself?
Yes — that dull tip fights the fabric with every stitch, straining the motor, stressing belts, and wearing gears prematurely. Left unchecked, this friction causes timing drift and vibration damage that shortens your machine’s working life a lot.
Whats the difference between universal and specialty needles?
Universal needles handle mixed wovens and light knits with a medium tip. Specialty types differ: ballpoint vs universal rounds fibers apart for stretch, microtex sharp pierces delicate silk cleanly, and denim needle strength powers through heavy layered seams.
How do I know which needle brand to trust?
Trust is earned in the details, like a diamond in the rough. Look for ISO 9001 certification, clear lot traceability, tamper-evident packaging, and solid user reviews—these separate reliable brands from cheap imitations that dull fast and damage fabric.
Should I change needles between different sewing projects?
Switching projects often means switching fabric weight or type, so matching your needle to the material matters more than reusing one out of convenience. A fresh needle per project prevents snags, puckering, and uneven stitches before they start.
Conclusion
A fresh needle costs less than two dollars, so skipping the swap only ever costs you more fabric and patience. Once you recognize the signs you need a new needle, you stop guessing and start fixing the real problem instead of chasing tension dials or thread brands.
Keep spares on hand, replace them on schedule, and your machine rewards you with clean, quiet stitches every time. A sharp needle isn’t a luxury. It’s the foundation your project stands on.
- https://www.quiltingboard.com/main-f1/how-do-you-know-when-your-sewing-machine-needle-dull-t196.html
- https://www.eobquiltdesign.com/blog2/e2s6px8yjr8jsczaewgf33g46zp4r5
- https://sewingmastery.com/15-reasons-why-a-sewing-machine-needle-breaks
- https://wunderlabel.com/en-gb/blog/p/17-common-sewing-machine-problems-solve
- https://thesewinggallery.net/blogs/the-sewing-gallery/how-often-should-you-change-your-sewing-machine-needle