This site is supported by our readers. We may earn a commission, at no cost to you, if you purchase through links.
Your Brother machine won’t read that Tajima file, and no amount of wishful clicking fixes it. Every embroidery machine speaks its own language: DST, PES, JEF, VP3, each one built for a specific brand and stitch engine. Buy a design online and you’ll often get one format when your machine needs another.
That’s where file conversion comes in. Get it wrong and you risk shifted hoops, tangled color stops, or puckered fabric. Get it right, and your design loads clean, stitches true, and runs without a hitch on the first try.
Table Of Contents
Key Takeaways
- Every embroidery machine reads its own file format—DST for commercial machines, PES/PEC for Brother, VP3 for Husqvarna Viking, and JEF for Janome/Elna—so matching the format to your machine is the first step to avoiding stitching errors.
- Online conversion tools let you upload, convert, and download files instantly with no registration, typically supporting 40+ formats and a 16MB file size limit.
- After converting, always check stitch density, hoop size, and thread color mapping, since these details can shift during conversion and cause puckering, cropped edges, or color mismatches.
- Before loading your design onto the machine, format your USB drive correctly, follow proper folder structures, and run a test stitch to catch any issues before committing to the final fabric.
Choose The Correct Embroidery File Format
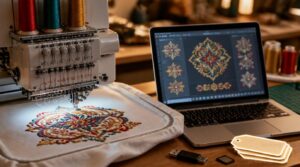
Every embroidery machine reads its own file format. Picking the wrong one can turn a clean design into a stitching error. Here’s how to match your file to the right machine.
If you’re unsure where to start, this embroidery file format compatibility guide breaks down which formats work best with popular machine brands.
DST for Commercial Machines
When your design heads to an industrial machine, DST is usually the format doing the work. Short for direct stitch transfer, DST stores stitch coordinates in tight binary code built for Tajima, Barudan, and Happy machines.
- DST file structure uses 3-byte stitch coordinates
- DST color commands mark thread changes
- DST hoop alignment sets stitch placement
- DST stitch density controls fabric puckering
- DST machine calibration matches tension settings
PES and PEC for Brother
Own a Brother or Babylock machine? You’ll be working with PES and PEC files. PES holds the design layout, while PEC carries color stops and stitch commands the machine reads directly. Brother PE Design software edits PES easily. PEC can also stand alone for direct machine loading, giving you flexibility across Brother embroidery formats.
The PES file structure includes a header, stitch data, and optional preview block for machine compatibility. PES file structure is essential for understanding how embroidery designs are stored and processed by Brother machines.
VP3 for Husqvarna Viking
Husqvarna Viking machines run on VP3, a format built for that system’s software and firmware. VP3 controls color mapping, hoop compatibility, and stitch density in one file.
It also carries design transfer data, so files move cleanly between compatible Viking programs. VP3 file editing works best inside Viking’s own software suite.
JEF for Janome and Elna
Once you leave Viking’s world, Janome and Elna machines call for JEF, their native format. JEF stores stitch coordinates, hoop size limits, and color mapping in one file, so your machine reads it without extra conversion.
Most Memory Craft and Horizon models accept JEF directly. Newer models also support JEF+ for larger hooped designs, giving you more room to work with.
EXP, U01, and XXX
Older machines and archival projects often bring you face-to-face with EXP, U01, and XXX. These formats need legacy format conversion before use today.
- EXP: Melco’s compact stitch and color data
- U01: Barudan’s jump stitch and trim commands
- XXX: Singer’s basic satin and fill stitches
Always back up originals first, and check hoop size compatibility before converting.
Convert Embroidery Files Online Step by Step
Converting a file online doesn’t take long once you know the steps. You move through a few simple screens, from upload to final download. Here’s what the process looks like from start to finish.
Upload Your Embroidery File

Everything starts with your file. Drag it into the upload box or click to browse, no registration needed.
Once your design is uploaded, you can browse a full range of sewing machine embroidery designs to compare stitch density and layout before finalizing your project.
The tool reads over 40 embroidery formats, so file format compatibility isn’t something you need to double-check first. Files stay under 16MB, and nothing gets stored on a server. You’ll get an instant download link once conversion starts.
Select The Target Format
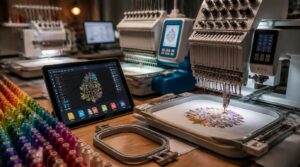
Once your file’s uploaded, pick the format your machine actually reads. Format compatibility check matters most here.
- DST for commercial machines
- PES for Brother
- JEF for Janome
- EXP for Melco
- XXX for Singer
This step sets up color mapping accuracy, hoop size alignment, and stitch sequence preservation, so choose based on machine-specific requirements, not guesswork.
Customize Colors and Background
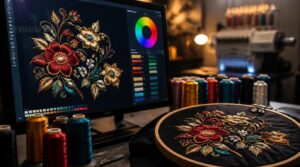
Color choices affect more than looks. Assign a distinct thread color to each design element for clean color layer assignment and less blending on dense fills.
Use a color wheel for color balance basics, and save your palette as a named scheme for reuse later.
Pick backgrounds with strong contrast for visibility, especially on dark fabric.
Start The Instant Conversion
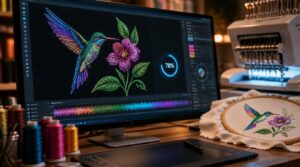
Once you pick a target format, conversion starts on its own. This is real-time processing — no extra button needed.
Watch the progress indicator climb in 5% steps. Most jobs finish in seconds thanks to fast file upload speed.
An instant preview feature shows stitch paths before download:
- Stitch count
- Color sequence
- Hoop size
- Density
- Jump stitches
Convert Without Registration
No account, no email, no waiting around. Most online embroidery tools work with drag drop conversion and real-time processing, deleting files right after.
| Feature | What It Means | Why It Matters |
|---|---|---|
| No registration | Skip signup forms | Convert instantly |
| Drag drop | Upload by dragging | Faster workflow |
| Privacy protection | Files auto-delete | Design stays yours |
| Instant download link | Ready in seconds | No delays |
| Free to use | No cost, no limits | Convert anytime |
Preserve Design Quality During Conversion
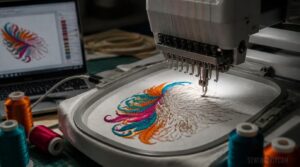
Converting a file doesn’t always mean the design stays the same. Stitches can shift, colors can change, and details can get lost along the way. Here’s what to check before you trust the new file.
Avoid Resizing Stitch Designs
Once you convert a file, resist the urge to resize it. Maintain original scale whenever you can, since stitch count and density were built for that exact size.
Proportional scaling risks include thread breaks and lost detail in small elements. Check stitch density before and after resizing to protect design integrity and conversion accuracy across machine-specific formats.
Check Hoop Size Compatibility
Size matters just as much as scale. Your embroidery hoop size must exceed the design’s Bounding Box Measurement, or edges will crowd and threads will break.
- Distorted stitches ruining months of practice
- Cropped edges wasting good fabric
- Thread snaps mid-project
- Puckered fabric nobody wants to gift
- Wasted stabilizer from guesswork
Machine Manual Verification and Hoop Library connection confirm compatible frames, while Design Centering Tips protect design integrity.
Review Thread Color Changes
Hoop size protects the frame. Thread colors protect the design itself.
Hoop size protects the frame, but thread color protects the design itself
Check Palette Translation after conversion, since machines map thread colors to their own index. Your custom thread colors may shift to nearby shades.
Watch Color Change Timing and jump stitch placement for thread path optimization. Run Quality Check Steps on a test hoop before final stitching.
Inspect Stitch Density
Colors aren’t the only thing that shifts. Stitch density can drift too, changing how the design feels on fabric.
Check stitches per inch (SPI) across the seam, not just one spot. Match density to fabric weight to prevent puckering.
- Count stitches under magnification
- Compare density in multiple sections
- Adjust density before final stitching
Keep The Original File
Before you convert anything, save a copy of your file untouched. This is your byteperfect file, the true record of your machine embroidery work.
Use an archive folder with clear version naming, keep backup redundancy on a second drive, and preserve metadata. Add a short readme noting format conversion limitations for future reference.
Preview and Export Converted Designs
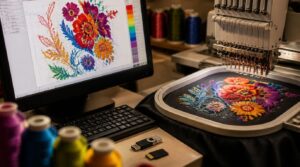
Once your file converts, you don’t just download it blind. You get a chance to check the design and pull it in the right format for your needs. Here’s what that step covers.
Preview Stitches Before Downloading
Never download blind. The Real-time Stitch Preview shows every stitch segment in order, so you catch problems before they cost you thread.
The Stitch Density Heatmap flags puckering risk, Color Mapping Preview and Thread Change Alerts catch bad color jumps, and Hoop Fit Check confirms placement. Preview free no signup, live preview appears instantly during realtime conversion.
Download Machine-ready Formats
Once your preview looks right, download starts immediately. The embroidery file converter delivers instant embroidery file download in JEF, DST, PES, or any of the 40+ supported machine embroidery formats.
Before transferring, run a quick machine compatibility check:
- Confirm your machine reads the chosen format
- Match hoop size to the design
- Verify thread color count
This machine-ready embroidery output saves time during USB drive prep later.
Export PNG or SVG
Want a flat image instead of a stitch file? Export to PNG for raster export or SVG for vector graphics.
PNG works well for sharing previews, with adjustable PNG Transparency Settings and background color choices. SVG uses vector export and SVG Vector Scaling, so designs resize without pixelation.
Both support Color Palette Export and File Size Optimization. Layered Export Options keep complex designs organized.
Export CSV, JSON, TXT
Sometimes you don’t need a stitch file at all, just the raw data behind it.
CSV works well for CSV Color Mapping and spreadsheet review.
JSON stores JSON Stitch Arrays for coordinates and color, supporting Data Structure Compatibility with other software.
TXT Export Options give plain-text logs.
All three support File Import Connection and reliable data interchange.
Check The Converted Design
A converted file that looks right isn’t always right. Run three checks before trusting it:
- Generate Preview Image to inspect the stitch path
- Validate Color Mapping against your original design
- Test Machine Load to confirm the format opens without errors
Also audit non-stitch data like labels and layer names. This catches problems before the needle ever touches fabric.
Transfer Converted Files to Your Machine
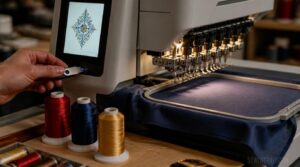
Your design is converted and ready, but the job isn’t done yet. Getting it onto your machine takes a few careful steps, from your USB drive to the final stitch. Here’s what you need to know to get it there safely.
Format The USB Drive
Before copying anything, format the USB drive right. File system selection matters most: use exFAT for large designs across Windows and Mac, or FAT32 if your machine needs it.
| Factor | Recommendation |
|---|---|
| File System | exFAT or FAT32 |
| Drive Naming | 11 characters max |
| Format Speed | Quick (data backed up) |
| Capacity | 4GB–64GB |
| Post Format Checks | Test file read |
Copy Files to USB
With the drive formatted, drag your JEF, DST, or PES files straight onto it, or use Ctrl C and Ctrl V. Watch the copy progress bar for errors. Check file sizes match the source. Remove any hidden system files first.
Once done, use safe ejection before unplugging to protect the transfer.
Follow Required Folder Structures
Your machine won’t find files buried in the wrong spot. Stick to a three level hierarchy: main folder, project folder, then a design subfolder for your stitch file conversion output.
Keep a central inbox folder for new files. Use consistent folder naming conventions, and set permission access controls if others share the drive. Run a quarterly audit checklist to catch stray files early.
Open Files on Machine
With folders sorted, it’s time to load the design. Use the touchscreen to find the import option, then pick your USB source if more than one drive shows up.
Highlight your file and confirm with the load command. Check the preview thumbnail first, then verify the format matches JEF, DST, or PES before opening.
Run a Test Stitch
Before running your full design, stitch a small sample on the same fabric and stabilizer. This test stitch catches puckering, thread breaks, and density issues early.
Run a Fabric Pull Test, check Stitch Direction, and confirm Satin Stitch quality. Adjust underlay or tension as needed, then re-test until your machine-ready output stitches cleanly and matches your design preview.
Frequently Asked Questions (FAQs)
How to convert a file for embroidery?
Upload your design, pick the target format like DST or PES, then convert. Check color stops and stitch density afterward. This basic embroidery workflow works for image to DST or image to PES conversions alike.
How do I open an embroidery file?
Your software determines this. Check file extension recognition: DST, PES, and JEF need matching programs. Confirm embroidery machine compatibility, complete software installation steps, and verify device driver setup if opening errors appear.
What format does an embroidery file need to be?
Your machine needs its native machine language: DST, PES, JEF, EXP, or XXX. These brand-specific formats encode stitch data and color information, so pick the one matching your machine, staying under typical file size limits.
How to transfer embroidery files to USB?
Grab a formatted USB drive (FAT32 or exFAT), keep original file extensions, and place designs in one labeled folder. Drag files over, confirm the transfer finished, then eject safely before testing on your machine.
Is there a limit on file size for conversion?
Yes. Most tools cap uploads at 16MB per file, plenty for home embroiderers. Commercial embroidery designs with dense stitching may push closer to that limit, so check size restrictions before your USB embroidery file transfer to keep files machine ready.
Are my uploaded embroidery files stored on your servers?
Nearly 60% of users avoid online tools over privacy fears. Uploaded files follow a no data retention policy here. Conversion happens in transient memory, files delete immediately after processing, and no user authentication is required.
Do I need to create an account to convert files?
No registration required for basic conversions. Upload, convert, and download instantly, free to try, no credit card needed. Temporary file handling keeps things private. An account only helps if you want saved history or higher daily limits.
How many files can I convert per day?
No stitch limits here, no daily deadlines. This tool is free to use with unlimited downloads and no daily conversion cap, since realtime processing and no queue management strategy controls your files instantly, one at a time.
What happens to my files after conversion completes?
Your machine-ready file stays on the server briefly under the site’s data retention window, usually 24 hours, protected by encryption and a strict file deletion policy before permanent removal.
Conclusion
What’s the point of a perfect design if your machine can’t read it? Once you know how to convert embroidery files, that problem disappears.
You’ve picked the right format, checked stitch density, and previewed every color stop before committing to fabric. That’s not luck. That’s control.
Copy the file, load your USB, and run a test stitch. Your machine hums, the needle drops true, and the design you imagined becomes the one you hold.