This site is supported by our readers. We may earn a commission, at no cost to you, if you purchase through links.
You plug in the USB drive, load your file, and the machine just… won’t read it. No error message. No design. Nothing.
This happens more than you’d think. Machines read stitch data differently depending on brand, format, and even firmware version. A file that stitches perfectly on your neighbor’s Brother won’t always load on your Janome.
That’s where an embroidery machine file compatibility guide earns its keep. Below, you’ll find the format differences, machine quirks, and quick fixes that turn "why won’t this load" into designs that stitch right the first time.
Table Of Contents
- Key Takeaways
- What Are Embroidery Machine File Formats?
- Compare Common Embroidery File Types
- Check Compatibility by Machine Brand
- Match Designs to Hoop Sizes
- Convert Images and Embroidery Files
- Transfer Designs With USB Drives
- Troubleshoot File Compatibility Problems
- Frequently Asked Questions (FAQs)
- Conclusion
Key Takeaways
- Your embroidery machine needs its own native file format—PES for Brother, JEF for Janome, EXP or VIP for Bernina—so always convert to that format instead of assuming one file works everywhere.
- Most "USB won’t read" problems come down to formatting your drive as FAT32 and placing files in the root directory, not in folders.
- Keep designs within 20% of their original size to protect stitch density, and always match design dimensions to your actual hoop size before stitching.
- Always run a test stitch on scrap fabric after converting or resizing a file, since color data and stitch accuracy can get lost or distorted in the process.
What Are Embroidery Machine File Formats?
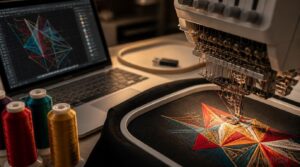
Every embroidery file carries instructions your machine needs to stitch a design right. Not all formats hold the same information, and that gap trips up a lot of projects. Here’s what actually makes up an embroidery file, piece by piece.
If you’re wondering which format your machine actually needs, this guide to embroidery file formats machines can read breaks down the differences so you don’t lose stitch data along the way.
Stitch Data and Machine Commands
Every stitch file is really a list of commands. Needle moves here, jumps there, trims thread, changes color.
Each command carries DX and DY values for exact needle placement. Machines read this as a stream: stitch, jump, trim, repeat.
Formats compress this data differently:
- Stitch order matters
- Stitch type matters
- Jump stitches skip fabric contact
Command compression keeps files small without losing accuracy.
For workflows involving Wilcom file automation, developers often use Python to preprocess images and convert designs for embroidery machines. Automating Emb Digitizing Workflow provides insights into streamlining this process with scripting and connection.
Thread Colors and Sequence Data
Stitch commands move the needle. Color data tells the machine which thread to load.
Your file carries a thread palette, capped at 24 or 96 colors depending on model. Each color gets a number, mapped to a spool.
Color change events mark stops. Sequence order sets stitching time. Duotone shading adds extra entries for gradients. Bad color mapping wrecks design accuracy.
Editable Versus Stitch Files
Once color mapping is set, the next question is whether you can still change your mind.
Editable files keep node points, curves, and edit history. Recolor, resize, reorder stitches anytime — non-destructive.
Stitch files lock final output. No native format underneath means retracing from scratch for design accuracy fixes. Know which one you’re saving before you commit.
How Digitizing Creates Embroidery Files
Knowing which file to save matters less than knowing how it got built.
Digitizing software converts artwork into stitch path planning — run, satin, fill. It assigns underlay stitch assignment for fabric stabilization, sets stitch type allocation per shape, and locks in color sequence mapping.
That process is what turns a picture into machine-readable instructions, ready for file format conversion into DST, PES, or other embroidery machine formats.
Expanded, Machine, and Native Formats
Three tiers matter here: expanded, machine-specific, and native.
Expanded formats hold extra stitch commands, color stops, density maps, underlay data. Built for format compatibility validation and cross-software transfer.
Machine-specific extensions add brand-tuned jump stitches, trim commands, hoop rotation data.
Native formats offer the highest stitch data preservation. Direct read, no conversion, built for tight embroidery machine connection with your specific model.
Compare Common Embroidery File Types
Different embroidery file types offer unique features for your machine and design needs. Understanding these formats helps you choose the right option every time. Here’s a quick look at the most common choices and what sets them apart.
PES Format
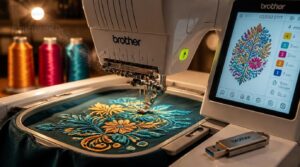
Think of PES format as the backbone for Brother embroidery machines. It packs stitch data, color sequences, and machine commands. Version tags like PES0030 matter—check your firmware. Always use native PES files for perfect results.
Preview images help you catch mistakes before stitching. If your USB won’t read files, format to FAT32 and place files in the root directory.
JEF and JEF+ Formats
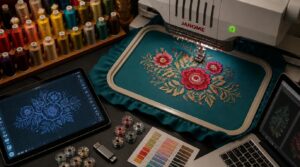
Precision matters with JEF and JEF+ formats on Janome embroidery machines. You get absolute stitch coordinates, color stops, and preserved stitch order. JEF+ lets you resize or move merged design objects. File conversion can lose editability. Always check hoop size limits and color palette alignment. For reliable results, use Janome software and save native files before converting.
- Absolute stitch commands
- Editable merged objects
- Janome thread palette
- Hoop size compliance
- Backup before conversion
ART and EXP Formats
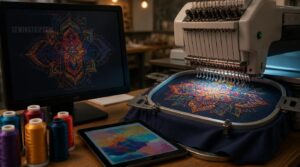
ART and EXP formats give you legacy compatibility and machine-specific commands. ART files carry stitch paths, color stops, and sometimes hoop settings. EXP uses compact binary encoding for needle moves plus basic color data. and sometimes hoop settings. EXP uses compact binary encoding for needle moves plus basic color data. Both let you convert designs with color mapping using modern software. If you switch formats, check for accurate thread palette and hoop size**.
DST Format
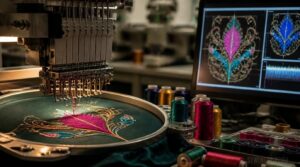
DST format runs the commercial show—compact binary stitch data, no color info inside. The DST header is 512 bytes, holding stitch count and name.
DST command structure means jump, trim, and end moves, parsed fast by most machines. Watch for stitch density; too dense, you risk issues.
DST compatibility testing is a must—always sample-stitch before production.
PES Versus DST
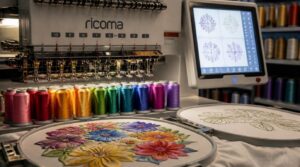
PES holds the crown for color sequencing and stitch details. It stores thread changes, underlay, and precise object orientation—essential for Brother machines.
DST travels light: just stitch spots, no color data. When you convert PES to DST, you lose color info and more complex stitch types.
Always use your machine’s native file format for reliable color, density, and cross-brand compatibility.
Check Compatibility by Machine Brand
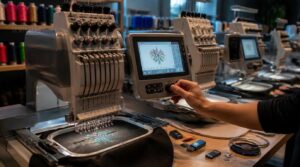
Every brand builds machines around its own file format. Load the wrong one and your machine won’t even show the design. Here’s what each major brand expects.
Brother File Requirements
Brother machines run on PES format as their native language. Stitch data, color stops, thread sequence — all built in.
DST works too, but skips color info. You’ll map thread by hand.
Check stitch count limits before transfer. Format your USB as FAT32, follow the 8.3 filename rule, and convert files to PES for best results.
Janome File Requirements
Janome runs on JEF format for stitch data. JEF+ adds editability — tweak stitches without redigitizing.
Master files differ: .Jan (Digitizer MBX 4.5 and earlier) or.Emb (V5+). Neither stitches directly.
USB not reading file? Three fixes:
- Format USB to FAT32
- Place file in root directory
- Use JEF, not PES or DST
Singer File Requirements
Quick word of caution: "Singer" also names a data format using Singer schema and Singer record messages in JSON lines for incremental loads. That’s unrelated to Singer sewing machines. Always use the machine’s native file format.
Format USB to FAT32, place file in root directory. Design not showing or USB not reading usually means wrong format, not protocol compatibility issues.
Bernina File Requirements
Bernina runs on its own system, and native files mean EXP or VIP, not PES or JEF.
- EXP: standard, stitch density and jump stitches
- VIP: high-end models, complex stitch data
- ART: supported via conversion
- USB: FAT32, root directory
Format USB to FAT32, place file in root directory. Same rule, different brand.
Legacy and Proprietary File Support
Old machines don’t play nice with new files. Legacy format conversion becomes necessary once firmware drops support for outdated codes.
Proprietary file limitations run deep. No public documentation means guesswork for cross-brand compatibility.
Firmware format support varies by model, so check before you buy.
For archiving legacy designs, save originals plus a DST backup. Legacy format preservation depends on it.
Match Designs to Hoop Sizes
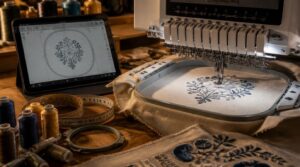
Right file format means nothing if the design doesn’t fit the hoop. Every machine has a stitching limit, and every design has to work inside it. Here’s what to check before you hit start.
Check Maximum Embroidery Area
Design too large for your hoop? Machine stops mid-stitch or rejects the file outright.
Check max area first, always:
- Home machines: 100mm–200mm range
- Mid-size hoops: up to 170mm x 200mm
- Large format: 400mm x 210mm
- Industrial: up to 1000mm x 1000mm
- Fabric limits cut usable area further
Usable area shrinks near seams, pockets, curves. Check specs before you digitize anything.
Compare Design and Hoop Dimensions
Fit matters more than size alone. Match design width and height to hoop diameter, not just the label.
| Hoop Size | Max Design Area | Clearance Needed |
|---|---|---|
| 4×4 in | 100x100mm | 1-2mm |
| 5×7 in | 130x180mm | 1-2mm |
| 6×8 in | 150x200mm | 2mm+ |
Check centering marks against hoop center. Mismatched dimensions cause puckering, thread breaks, uneven stitch density.
Avoid Excessive Design Resizing
Stretch a design too far and stitches pull apart at the seams.
Resize within limits — stay under 20% of original size. Beyond that, density and shape both suffer.
- Maintain aspect ratio
- Check hoop margins after resizing
- Validate stitch quality with a preview
When in doubt, resize design or match hoop size instead. Always re-export using PES, JEF, or the correct native format.
Preserve Stitch Density
Density holds a design together. Resize without care and stitches spread thin, leaving gaps.
Stitch count adjustment must scale with size. Pair correct fabric stabilizer and check thread tension balance too.
| Resize % | Density Risk |
|---|---|
| Under 20% | Low |
| Over 20% | High |
Fix underlay optimization before export. Run a density preview test first.
Preview Designs Before Stitching
Never guess. Run a hoop fit check before you stitch a single pass.
Preview accuracy matters: overflow, margins, color preview, stitch simulation all show up on screen first. Catch problems, make a design adjustment, resave in the machine’s native format.
Design not showing on machine? Use PES or JEF, not a mismatched file. Test your machine free designs this way every time.
Convert Images and Embroidery Files
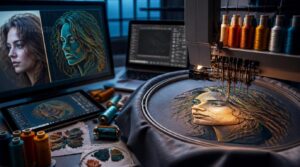
A picture on your screen isn’t a stitch file your machine can read. Getting from image to embroidery takes the right conversion path, and picking wrong costs you time and thread. Here’s what that path looks like, step by step.
A screen image isn’t a stitch file—reaching your machine takes the right conversion path, chosen carefully
Convert JPEG Through Digitizing
A JPEG is pixels, not stitches. Getting one onto a machine means running it through embroidery digitizing: image cleanup, color mapping, stitch path tracing, and underlay application before file format conversion.
Auto-digitizing works for simple shapes; detailed art needs manual tracing.
Always run test stitch verification on scrap fabric before trusting the final embroidery file.
Prepare SVG Artwork
Vector art skips the pixel problem entirely. SVG files use paths, not dots, so shapes stay clean going into digitizing software.
Before import: simplify paths, convert text to outlines, and organize layers by color. Group elements for thread mapping. Set explicit hex values per shape.
Fewer anchor points means fewer stitch errors. Clean vectors digitize faster than raster art ever will.
Convert Between Stitch Formats
Converting between machine embroidery formats takes more than just saving a file. Always start with your machine’s native file format. Map color stops, check stitch density, and preserve specialty stitches. Use software to validate file integrity—preview before stitching. If you lose colors converting DST, remap threads manually. Test on a scrap swatch to confirm the conversion works.
Choose Reliable Embroidery Software
Pick software with object based stitch editing and real time preview. You want cross-format export options—PES, JEF, DST, EXP. Check hoop area overlays for compatibility. Look for density and underlay controls.
Use workflow tools like version control and validation checks. Batch convert for speed. Always preview designs and simulate stitches before exporting to your machine-specific file format.
Hire a Professional Digitizer
When you hire a professional digitizer, you gain speed, precision, and reliability. They convert art into native file formats (PES, JEF, DST) and test stitch quality. You get:
- Cost control—pay per design, avoid high software fees
- Quality assurance—clean edges, stable underlay
- Workflow connection—fast turnaround
- Revision policies—free fixes
- Data security—protected files
Transfer Designs With USB Drives
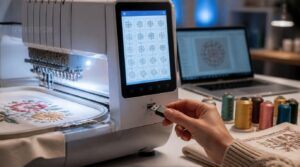
Getting your designs from computer to machine can feel tricky if you miss a step. It pays to know the basics before plugging in your USB drive. Here’s what you’ll want to check every time you transfer files.
Format Drives as FAT32
Want your files to show up every time? Format USB to FAT32. Most embroidery machines won’t read exFAT or NTFS. Use Windows File Explorer for drives up to 32GB. Need more? Try command prompt or third-party utilities. Place your embroidery file formats (PES, JEF, DST) in the root directory. Here’s a quick chart:
| Step | Result |
|---|---|
| FAT32 Formatting | Universal access |
| Root Directory | Easy detection |
| File Conversion | Format match |
| Compatibility Chart | Avoid errors |
Use Compatible Drive Capacities
If your USB drive is too big or too small, your machine mightn’t recognize it. Most embroidery machines handle 4GB to 32GB drives, formatted as FAT32. Newer models sometimes accept 64GB or 128GB if partitioned right. Choose USB 3.0 for faster transfers, but make sure it’s backward compatible. Reliable brands cut down corruption risk.
Place Files Correctly
Lost files? You probably missed the basics. Format USB to FAT32. Put your embroidery file—PES, JEF, DST—in the root directory, not buried in folders. Match the file format to your machine brand.
Keep your folder structure clear: separate by format, mirror it on your computer and USB. Back up every file before transfer. Double-check hoop size before copying.
Follow Safe Filename Rules
Safe naming practices keep your embroidery files readable on any machine. Use only letters, numbers, hyphens, underscores. Skip spaces—replace with hyphens. Stick to lowercase filenames under 31 characters. One clear extension, no double dots. No special characters—no!, %, or emoji. Avoid reserved names like CON or NUL. Always test filenames by copying to another computer before stitching.
Eject USB Drives Safely
Ever lost hours of work to a corrupted file? Always eject USB drives safely or risk embroidery disasters.
- Click “Eject” before unplugging.
- Wait for “Safe to remove” message.
- Close all programs using the drive.
- Never unplug during active file transfer.
Keep your FAT32-formatted drive in the root directory. Don’t skip safe removal—protect your PES, JEF, or DST files.
Troubleshoot File Compatibility Problems
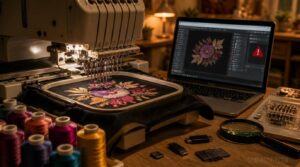
File issues can trip you up if you’re not sure what to look for. Some problems are simple to fix, while others need a bit more know-how. Here’s what you should check when your designs aren’t working as expected.
Designs Missing From Machine
If your design won’t show up, start with file format checks. Use the machine’s native format—PES for Brother, JEF for Janome. Format USB to FAT32 and place files in the root directory. Keep filenames simple—no slashes or punctuation.
Verify hoop size and stitch count. Update firmware. If all else fails, convert designs or test with a known good file.
Incorrect or Missing Thread Colors
Wrong colors usually mean a thread color mismatch or a color palette conflict. If you’re using DST, colors might vanish—machine defaults kick in. Color stop sequence errors can throw off the order.
Always check your design color mapping in preview mode. Poor lighting, dye lot changes, or fabric color can shift perceived shades.
Re-export designs in the machine’s native file format.
USB Read Failures
If your USB drive refuses to cooperate, think hardware first. Worn memory cells or bad connector contacts cause read failures—especially after repeated use. File system corruption, controller faults, or heat damage also ruin embroidery transfers. Format your USB to FAT32, stick to the root directory, and use native file formats. If errors persist, swap drives or cables.
- Unexpected file loss
- Machine stalls mid-read
- Inconsistent drive capacity
- Recovery tools flag bad sectors
Scaling and Stitching Errors
Bad drives aren’t the only gremlins in your workflow. Resizing a design past 20% distorts stitch density fast.
| Problem | Cause | Fix |
|---|---|---|
| Puckering | Thread tension imbalance | Adjust tension settings |
| Waviness | Needle deflection | Slow machine speed |
| Gaps | Fabric slippage | Check hoop tension |
Always confirm embroidery file conversion matches your machine before stitching.
Test Files Before Production
Never skip a test run. Load the file on your machine first, not the customer’s hoop.
Test design integrity, verify color accuracy, and check hoop alignment before anything hits fabric. Validate machine commands too—jump and trim sequences cause thread breaks.
Use PES, JEF, or the correct native format. Make sure production readiness with one clean test stitch. Skipping this step costs more than it saves.
Frequently Asked Questions (FAQs)
What file format do I need for an embroidery machine?
Your machine’s "native tongue" matters most. Brother needs PES, Janome needs JEF, both keeping color data intact. Match your brand’s native format for stitch accuracy, correct hoop size, and smooth USB transfer without missing colors.
Is PES or DST better?
Depends on your design. PES wins on color accuracy and complex shading. DST wins on file transfer speed and broad machine compatibility. For dense, multi-color art, pick PES. For quick, simple stitches, DST works fine.
How do I convert a jpeg to an embroidery file?
Your JPEG won’t magically become embroidery — no fairy dust involved. Clean up the image, run it through digitizing software for stitch type selection and color palette mapping, adjust density, then export in your machine’s native file format.
Can you use SVG files for embroidery?
Yes, but not directly. SVG to stitch conversion turns paths into stitch data first. Use digitizing software, check hoop size compatibility, then run a test sample before stitching your final design.
Can I use the same design file on multiple machine brands?
Think of it like a passport. It works everywhere, but each country stamps it differently.
Same design, different native file formats. Convert to PES, JEF, or DST for true cross-brand compatibility and reliable stitching.
How often should I update my embroidery machines firmware?
Check every 3 to 6 months with heavy use. Firmware updates boost stability, fix USB read errors, and expand format compatibility. Back up designs first, follow brand-specific guidance, then test the file on scrap fabric before production runs.
What causes a machine to freeze mid-stitch unexpectedly?
Five culprits stall a machine mid-stitch: dust accumulation in the bobbin area, overheating protection kicking in, bad thread tension, mechanical wear on gears or belts, and firmware issues misreading stitch commands. Clean, cool, and re-thread first.
Why does my machine reject files after a software update?
New updates, new rules. Stricter firmware file validation, altered header signature changes, tighter stitch density enforcement, or a broken design cache rebuild can all trigger rejections.
Reformat, reconvert, or rebuild your native file formats to restore machine compatibility.
Should I keep records of past file and hoop combinations?
Yes. File format logs and hoop size tracking save time. Note the native file format, hoop, fabric, and outcome for each job. This troubleshooting history speeds design reuse and cuts guesswork on future projects.
Conclusion
The simplest fix is often the hardest one to find. A machine that rejects a file isn’t broken—it’s just picky, and that pickiness is the whole story.
Once you match file type to brand, hoop, and drive setup, problems disappear fast. That’s the real payoff of an embroidery machine file compatibility guide: it turns guesswork into a repeatable process.
Get the format right, and your machine stitches exactly what you designed, every single time.