This site is supported by our readers. We may earn a commission, at no cost to you, if you purchase through links.
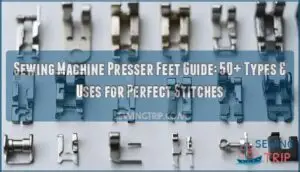 Your sewing machine presser feet guide starts with understanding that these little attachments are game-changers for your projects.
You’ll find essential feet like the zipper foot for smooth installations, walking foot for thick layers, and buttonhole foot for professional-looking closures.
Each presser foot serves a specific purpose—the blind hem foot creates invisible hems, while the gathering foot makes ruffles effortless.
Standard machines typically include 3-5 basic feet, but specialty feet can transform tricky techniques into simple tasks.
Think of presser feet as your sewing toolkit’s Swiss Army knife. The right foot makes the difference between wrestling with fabric and creating those crisp, professional finishes that’ll have everyone asking about your secret technique.
Table Of Contents
- Key Takeaways
- Types of Sewing Machine Presser Feet
- Functions and Uses of Presser Feet
- Presser Foot Kits
- How to Find The Correct Presser Feet for Your Machine?
- The Basic Presser Feet You (most Probably) Have
- Some Presser Feet Which Can Be a Heaven-Send for Your Sewing
- Presser Feet That Can Make Your Sewing More Beautiful
- Presser Feet That You May End Up Using Very Rarely
- Basic Standard Presser Foot/Zigzag Foot
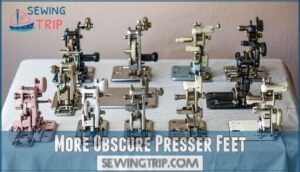
- More Obscure Presser Feet
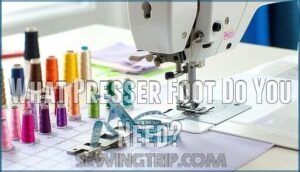
- What Presser Foot Do You Need?
- Frequently Asked Questions (FAQs)
- Conclusion
Key Takeaways
- You’ll transform basic sewing into professional results by understanding that each presser foot serves a specific purpose—from zipper feet for smooth installations to walking feet for thick layers and buttonhole feet for precise openings.
- You can build your presser foot collection gradually by starting with essentials like the all-purpose zigzag foot, zipper foot, and buttonhole foot, then adding specialty feet like walking or blind hem feet as your projects demand them.
- You’ll achieve better results by matching your presser foot to your fabric type and project complexity—use walking feet for thick materials like denim, Teflon feet for sticky vinyl or leather, and open-toe feet for decorative stitching where visibility matters.
- You can save money and expand your options by purchasing presser foot kits that bundle specialized attachments for specific purposes like quilting, garment construction, or home décor projects rather than buying individual feet separately.
Types of Sewing Machine Presser Feet
You’ll discover that presser feet come in more varieties than ice cream flavors, each designed to tackle specific sewing challenges with precision.
From basic straight-stitch feet to specialized buttonhole attachments, understanding these tools transforms your machine from a simple stitcher into a versatile crafting powerhouse.
Standard Presser Foot
Your sewing machine’s standard presser foot is the Swiss Army knife of your sewing arsenal, handling the majority of your everyday projects with reliable precision.
Your standard presser foot is the reliable workhorse that tackles 80% of your sewing adventures with effortless precision.
The standard presser foot is your gateway to effortless creativity, tackling everyday seams and stitches with confidence and ease.
This versatile attachment excels at maintaining proper foot pressure while ensuring consistent fabric feeding through your machine. Its wider opening accommodates both straight and zigzag stitches, making stitch consistency achievable across various projects.
You’ll find this workhorse perfect for basic seaming, simple hems, and gentle curves.
Here’s what makes your standard foot indispensable:
- Optimal needle position guidance for accurate stitching on most fabrics
- Reliable fabric feeding that prevents bunching or puckering
- Adjustable foot pressure compatibility for different material weights.
While specialized feet serve specific purposes, your standard foot tackles roughly 80% of typical sewing tasks.
Regular maintenance—just brushing away lint—keeps this essential component of your presser feet guide performing flawlessly for years.
Straight Stitch Foot
When precision becomes your top priority, the straight stitch foot delivers unmatched seam accuracy.
This specialized presser foot features a smaller needle hole that prevents fabric from tunneling into your sewing machine’s bobbin area.
Unlike standard presser feet, it provides superior fabric handling through focused foot pressure around the needle position.
Perfect straight stitching requires the right tool:
- Creates flawless seams on delicate silks without puckering
- Achieves professional topstitching on garment edges and pockets
- Prevents slippery materials from shifting during sewing
- Maintains consistent stitch length on challenging surfaces
- Guides specialty needles through thick denim effortlessly
The straight stitch foot is particularly useful for working with challenging fabrics, and its ability to maintain consistent stitch length is a major advantage.
It is an essential tool for any sewer looking to achieve high-quality results, especially when working with delicate or thick materials.
Zipper Foot
Beyond basic straight stitching, you’ll need specialized sewing machine feet for trickier tasks.
The zipper foot’s narrow profile lets you stitch incredibly close to zipper teeth without snagging. This versatile presser foot handles piping attachment and corded seams beautifully too.
You can explore options for piping foot products online.
| Zipper Types | Best Foot Position |
|---|---|
| Standard metal | Left or right side |
| Plastic coil | Either side works |
| Heavy-duty | Right side preferred |
| Lightweight | Left side easier |
| Specialty zippers | Adjustable guides help |
Position this essential sewing machine accessory on either needle side for perfect zipper types installation.
Adjustable Zipper Foot
While a standard zipper foot gets the job done, you’ll appreciate the flexibility that comes with an adjustable zipper foot.
This clever sewing machine accessory lets you tackle different zipper sizes and fabric types with ease.
The adjustable zipper foot slides left or right, giving you perfect needle position control for professional results.
It’s like having multiple sewing machine feet rolled into one smart tool.
Here’s how to make the most of this versatile addition to your sewing machine accessories:
- Adjust foot pressure based on your fabric thickness – lighter pressure for delicate materials, firmer for heavy fabrics
- Position the sliding mechanism to match which side of the zipper you’re sewing
- Use guide marks on the foot for consistent seam placement with specialty zippers
- Clean regularly to prevent lint buildup that affects smooth operation
You’ll wonder how you managed without it.
You can find an adjustable zipper foot online.
Invisible Zipper Foot
While adjustable feet handle standard zippers just fine, the invisible zipper foot transforms your sewing game completely. This specialized tool features two grooves on its underside that cradle zipper coils while keeping them open during installation.
You’ll find it works with most zipper brands and various fabric types, from delicate silks to sturdy cottons. The foot’s design guides coils right next to your stitching line, creating that sleek, hidden closure that screams "professional tailor made this."
Needle position stays consistent thanks to the grooves, preventing those heart-stopping moments when you accidentally hit metal teeth. Troubleshooting tip: always press your zipper flat before starting.
This simple step prevents puckering and guarantees smooth installation. Your invisible zipper foot handles the technical stuff while you focus on creating gorgeous garments.
Foot compatibility varies by machine brand, so check your manual first. You can find various invisible zipper foot brands online. Foot compatibility varies by machine brand, so check your manual first.
Buttonhole Foot
With just one attachment, you’ll turn buttonhole nightmares into sewing dreams.
The buttonhole foot creates precise openings automatically, handling various buttonhole types from basic to keyhole styles.
Foot adjustments guarantee perfect sizing, while fabric compatibility spans cotton to denim.
Control stitch density for professional results.
When troubleshooting issues arise, check thread tension and stabilizer placement for flawless sewing machine performance every time.
Sliding Buttonhole Foot
While automatic buttonhole feet handle the basics, the sliding buttonhole foot brings precision to buttonhole types across different fabrics.
This specialized sewing machine feet option transforms how you approach fabric compatibility challenges.
The sliding mechanism works like a ruler for your stitches:
- Foot adjustments let you customize buttonhole length by sliding the rear marker
- Stitch density controls guarantee consistent results on thick or delicate materials
- Troubleshooting issues becomes easier with clear size markings
Perfect for sewers wanting presser foot uses that deliver professional-grade buttonholes consistently.
One Step Buttonhole Foot
While the sliding buttonhole foot requires manual adjustments, the one step buttonhole foot takes automation to the next level.
This game-changing attachment uses your actual button to determine buttonhole sizes automatically—no measuring required!
Here’s how this clever presser foot transforms your sewing experience:
| Feature | Benefit | Result |
|---|---|---|
| Button-guided sizing | Perfect fit every time | No more loose or tight buttonholes |
| Transparent design | Clear placement visibility | Professional-looking results |
| Automatic calibration | Consistent measurements | Time saved on every project |
The foot calibration happens when you insert your button into the designated holder.
Your sewing machine then creates perfectly proportioned openings with ideal stitch density.
This buttonhole foot works with various fabric compatibility options, from lightweight cotton to heavyweight denim.
Troubleshooting failures becomes easier since the foot eliminates human error in sizing.
Among all types of presser feet, this one delivers the most foolproof presser foot uses for buttonholes.
Button Sewing Foot
Tired of fumbling with buttons while your fingers get in the way? The button sewing foot eliminates this frustration by securing buttons perfectly during stitching.
This specialized presser foot adapts to various button sizes and guarantees proper button alignment every time.
Your sewing becomes effortless with these key benefits:
- Stitch selection flexibility for different fabric thickness levels
- Clear visibility prevents missed holes during attachment
- Foot compatibility works with most standard sewing machine feet systems
Overedge/overcast Foot
After attaching buttons seamlessly, you’ll want to prevent fabric edges from unraveling.
The overedge/overcast foot transforms your sewing machine into a serger alternative for fray prevention.
This specialized foot creates professional edge finishing with overcast stitches that wrap thread around raw fabric edges. Its metal guide keeps fabric aligned while you stitch, making it perfect for knits, wovens, and delicate materials.
Overedge Foot Benefits
Different stitch options accommodate various fabric types, delivering durable seam finishes every time.
Even Feed/walking Foot
While overcast feet handle raw edges, the walking foot (even feed foot) solves fabric feeding problems that’ll make you want to toss your sewing machine out the window.
This quilting foot features built-in feed dogs that work with your machine’s regular feed system, creating synchronized fabric movement from top and bottom. Think of it as having an extra pair of hands guiding your fabric through tricky situations.
Walking foot maintenance involves occasional cleaning and oiling to keep those feed dogs moving smoothly.
- Quilting applications – eliminates shifting between batting layers during piecing
- Preventing puckering – stops stretchy knits from bunching up mid-seam
- Leather sewing – handles thick materials without skipping stitches
- Perfect topstitching – creates professional results on heavy denim jackets
Quarter Inch Foot
Seam Accuracy becomes effortless with the 1/4 inch foot. This precision tool maintains perfect quilting seams for your patchwork projects.
Among essential sewing machine feet types, it’s a quilter’s best friend. Built-in guides eliminate guesswork, while alignment markings help you pivot corners smoothly.
Common issues like uneven seams disappear when you use this specialized foot. Your quilt blocks will fit together perfectly every time.
Blind Hem Foot
The blind hem foot works like magic to create invisible hems that make your projects look professionally finished.
This clever presser feet attachment guides fabric through its metal flange, letting your sewing machine catch just a few threads from the main fabric. You’ll love how this blind stitch foot transforms amateur-looking hemlines into polished perfection.
- Stitch Adjustment: Fine-tune your needle position for perfect thread catches
- Fabric Types: Works beautifully on pants, curtains, and medium-weight materials
- Hem Width: Adjustable guide accommodates various fabric thicknesses
- Troubleshooting Hems: Check tension settings if stitches show through
- Sewing Machine Feet: Essential tool for professional-quality finishing
Narrow Hem Foot
Precision meets convenience when you discover the narrow hem foot‘s magic.
This specialized presser feet attachment creates consistently perfect rolled hems on lightweight fabrics without tedious measuring or pressing.
Perfect for delicate fabrics, the Narrow Hem foot creates flawless, tiny rolled edges effortlessly, adding a professional touch to every project.
The hemmer foot features a spiral-shaped funnel that automatically curls fabric edges under twice as your sewing machine stitches.
You’ll transform handkerchiefs, napkins, and delicate garments into professional-looking pieces.
This rolled hem foot comes in multiple sizes—typically 2mm, 4mm, and 6mm—letting you match hem width to your fabric weight.
Foot attachment methods vary by machine model, but most snap on easily.
When troubleshooting hemming issues, check that you’re feeding fabric straight through the funnel.
Hemming lightweight fabrics becomes effortless, and you can even create decorative hem finishes by using different thread colors.
No more uneven hand-rolled edges!
Edge Guide Foot
After mastering narrow hems, you’ll want the Edge Guide Foot for perfect seam alignment every time. This smart attachment features an adjustable arm that keeps fabric positioned exactly where you need it.
Think of it as your personal sewing GPS – it guides your fabric along predetermined paths for flawless results. The guide adjustability lets you customize distances from needle to edge, making it invaluable among sewing machine feet.
Here’s what makes this gauge presser foot shine:
- Creates consistent parallel stitching for professional-looking garments
- Delivers precise topstitching accuracy on collars, cuffs, and pockets
- Produces stunning decorative edges with ribbons, trims, and bindings
It’s like having training wheels for your topstitching adventures!
Functions and Uses of Presser Feet
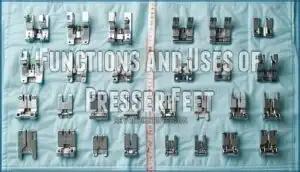
You’ll discover that each presser foot transforms your sewing machine into a specialized tool, making tasks like hemming, quilting, and gathering fabric almost effortless.
Think of presser feet as your sewing sidekicks—they hold fabric steady, guide your stitches perfectly, and turn tricky techniques into simple steps that’ll make you wonder how you ever sewed without them.
Open Toe Foot
Your open toe foot transforms tricky sewing projects into manageable tasks.
This clever sewing machine attachment features a wide opening that gives you unmatched visibility benefits right where your needle meets fabric.
Unlike standard presser feet, you’ll see exactly where each stitch lands, boosting stitch accuracy dramatically.
The clear plastic construction of most open toe foot designs makes decorative applications like appliqué and embroidery feel less like guesswork.
Fabric handling stays smooth while you guide specialty threads through detailed work with confidence and precision.
Hemmer Foot
Perfection comes with the hemmer foot, your secret weapon for professional-looking rolled hems. This clever attachment curls fabric edges twice, creating those crisp finishes you see on store-bought napkins and silk scarves.
Different hemmer sizes handle various fabric weights, while proper foot maintenance keeps everything running smoothly.
- Choose 3mm hemmer foot for lightweight fabrics like chiffon
- Use 6mm version for medium-weight cottons and linens
- Practice hemming techniques on scraps before tackling your project
- Troubleshoot uneven hems by adjusting your sewing machine’s tension settings
Quilting Foot
A quilting foot transforms your sewing machine into a precision quilting powerhouse.
This specialized presser foot maintains consistent seam allowance while guiding fabric layers smoothly through complex stitch patterns.
Whether you’re piecing blocks or mastering freemotion quilting techniques, it delivers professional results every time.
- Quilter’s hands gliding fabric under the needle with confident precision
- Perfectly aligned patchwork squares creating stunning geometric patterns
- Smooth fabric layers flowing effortlessly through intricate free-motion designs
Gathering Foot
Your gathering foot turns tedious hand-gathering into effortless magic. This sewing machine feet hero creates perfect gathers automatically while you sew.
Adjustable settings control gathering density on different fabric types, from lightweight cotton to heavier materials. The foot maintains even tension, preventing fabric stretching.
Regular foot maintenance keeps gathers consistent. When troubleshooting gathers, check tension and stitch length for ideal results. The key to successful gathering lies in maintaining even tension and using the right gathering density.
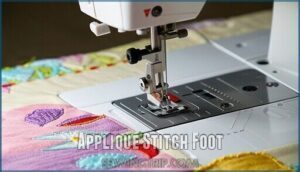
Applique Foot
When working with applique techniques, your applique stitch foot becomes the secret weapon for flawless fabric artistry.
This specialized sewing machine foot features a shorter toe that won’t catch on intricate shapes or decorative stitches. You’ll navigate tight curves and detailed patterns with confidence, making your sewing machine purr like a contented cat.
Picture yourself creating:
- Delicate flower petals curving gracefully around stems with perfect stitch settings
- Bold geometric shapes secured with blanket stitches using the right needle type
- Layered fabric designs supported by quality stabilizers for professional results
Your presser feet collection isn’t complete without this essential tool.
Overcast Foot
When applique work’s done, messy fabric edges can ruin your masterpiece. Enter the overcast stitch foot—your ultimate serger alternative for preventing fabric fraying.
This clever presser foot wraps thread around raw edges, creating professional finishes that rival expensive overlock machines. You’ll love how it transforms basic sewing machine feet into edge finishing powerhouses.
| Stitch Types | Best Fabrics |
|---|---|
| Overcast stitch | Cotton, linen |
| Zigzag overcast | Polyester blends |
| Multi-step overcast | Knits, stretchy materials |
| Blanket stitch | Fleece, felt |
Check foot compatibility with your sewing machine before purchasing. This affordable tool delivers clean, durable seams without investing in specialized equipment.
Blind Stitch Foot
Your blind stitch foot creates nearly invisible hems that’ll make you look like a sewing wizard.
This clever presser feet attachment guides fabric perfectly, letting your sewing machine work magic on hemming techniques across different fabric types.
- Pants and skirts get professional-looking hems without visible stitching
- Curtains and drapes maintain clean lines with hidden seams
- Needle position adjustments guarantee precise stitch placement every time
- Troubleshooting hems becomes easier with the foot’s built-in fabric guide
Walking Foot
When you’re wrestling with stubborn fabrics or thick layers, the walking foot becomes your best friend.
This specialized presser feet attachment transforms challenging sewing projects by providing superior fabric feeding and layer control. Unlike standard sewing machine feet, it grips fabric from above while feed dogs work below, ensuring puckering prevention and smooth material flow.
- Perfect for quilting applications with multiple batting layers
- Handles specialty fabrics like velvet, leather, and slippery satins
- Eliminates shifting between fabric pieces during construction
- Reduces pinning time while maintaining professional results
Your sewing machine deserves this quilting foot upgrade for flawless stitching.
Teflon Foot
Your Teflon foot conquers sticky fabrics that make standard presser feet struggle.
This non-stick marvel glides smoothly over vinyl, leather, and plastic without dragging or bunching.
It’s perfect for crafting purses, upholstery projects, or raincoats where regular feet would stick.
| Fabric Type | Challenge | Teflon Solution |
|---|---|---|
| Vinyl | Sticks to metal feet | Glides smoothly |
| Leather | Drags and bunches | Even feed motion |
| Plastic film | Tears easily | Gentle handling |
| Oilcloth | Leaves residue | Non-stick surface |
| Patent leather | Marks from pressure | Clean finish |
Braiding Foot
Five different braiding foot types exist to transform your sewing projects with professional decorative touches.
This specialized presser foot guides cords, ribbons, and braids up to 7mm wide for perfectly centered placement every time.
Here’s how it elevates your work:
- Straight-line couching – Attach decorative trim along seams for garment embellishment
- Curved applications – Follow fabric contours for artistic home décor accents
Adjust braid size settings based on fabric braid compatibility.
Regular maintenance of your braiding foot guarantees smooth operation across various sewing machine attachments and presser feet configurations.
Bias Binding Foot
Like a helpful assistant in your sewing room, the bias binding foot transforms tedious binding tasks into smooth operations.
This adjustable bias binder foot accommodates various binding tape types from ¼" to ¾" widths through simple foot angle adjustment.
Here’s your winning strategy:
- Thread bias tape through the foot’s guide for automatic fabric edge folding
- Stitch curves and straight edges for decorative binding uses
This sewing machine foot functions perfectly for professional-looking finishes every time.
Presser Foot Kits
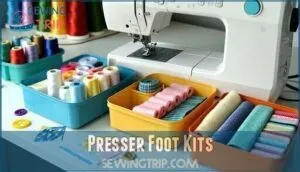
You don’t need to hunt down individual presser feet like you’re collecting trading cards—presser foot kits bundle the most useful attachments together in one convenient package.
These themed collections save you time and money while ensuring you’ve got the right tools for your specific sewing projects, whether you’re quilting, crafting, or tackling garment construction.
Presser Foot Kit
A presser foot kit transforms your sewing machine into a versatile powerhouse.
These extensive bundles include multiple sewing machine feet like hemming, zipper, and buttonhole attachments that would cost substantially more individually.
Kit Contents typically feature 10-32 specialized presser feet, each designed for specific techniques.
Check Foot Compatibility with your sewing machine’s shank system before purchasing.
The Kit Value becomes apparent when you tackle diverse Project Ideas – from quilting to garment construction.
Most kits include Storage Solutions like organized cases with labeled compartments.
Smart sewers know these sewing machine accessories guide their creativity while keeping costs reasonable.
Quilting Kit
Quilting kits pack specialized sewing machine feet that transform your projects from good to gorgeous.
These collections typically include a free motion foot for creative designs, walking foot for even feeding, and quarter-inch foot for precise seams.
Your kit contents work with various fabric selection and batting choices, while different thread types enhance each technique.
- Free motion quilting foot enables artistic stippling and custom patterns
- Walking foot prevents puckering when layering thick batting
- Darning foot creates detailed free motion work with complete control
Crafting Kit
Crafting kits release your creative potential with specialized sewing machine feet designed for artistic projects.
These Kit Essentials include non-stick feet for vinyl work, decorative stitching attachments, and appliqué tools that transform ordinary fabric into masterpieces.
Whether you’re tackling beginner Project Ideas or advanced techniques, proper Fabric Selection matches your Skill Level.
Smart Storage Solutions keep your sewing accessories organized, ensuring these versatile sewing tools stay accessible.
Your sewing machine becomes an artistic powerhouse with the right crafting kit supplies!
Garment Kit
When tackling garment construction, you’ll find a Garment Kit transforms your sewing from basic to brilliant.
These extensive collections include essential sewing machine feet for creating polished clothing with professional finishes.
Perfect for various fabric selection choices and skill level requirements, garment kits simplify complex construction techniques.
Whether you’re hemming dress pants or installing invisible zippers, these specialized tools deliver consistent results.
Essential kit contents typically include:
- Zipper foot for seamless zipper installation
- Buttonhole foot for precise button openings
- Blind hem foot for invisible hemming
- Overlock foot for clean seam finishing
- Walking foot for stretchy knit fabrics.
Your sewing foot guide expands dramatically with pattern options and customization ideas that elevate every project.
Home Decor Kit
While garment sewing focuses on clothing construction, Home Decor Kits open up exciting possibilities for transforming your living space.
These specialized presser feet collections make curtain projects, pillow covers, table runners, wall hangings, and fabric baskets surprisingly manageable.
You’ll find the piping foot creates professional edges, while the cording foot adds decorative details.
The blind stitch foot delivers invisible hems perfect for drapery.
These sewing machine feet turn ambitious decorating dreams into achievable weekend projects.
How to Find The Correct Presser Feet for Your Machine?
Finding the right presser feet for your sewing machine doesn’t have to feel like solving a puzzle blindfolded. Machine compatibility depends on several key factors that’ll save you from buying the wrong foot twice.
Your sewing machine’s shank type determines which presser feet will work. Most home machines use low-shank feet, while some older models need high-shank or slant-shank versions. Check your manual or measure the distance from the needle bar to the base – it’s usually about half an inch for low-shank machines.
Here’s your compatibility checklist:
- Identify your shank type by measuring or checking your manual
- Determine attachment method – snap-on or screw-on systems
- Consider brand variations since some manufacturers use proprietary designs
- Explore adapter usage to expand your foot options across different shank types
Brand-specific sewing machine feet often provide the best fit, but universal options work too. When in doubt, bring your machine’s model number to your local sewing store – they’ll help match you with compatible presser feet that maintain proper foot pressure for perfect stitches.
The Basic Presser Feet You (most Probably) Have
Most sewing machines come with three essential presser feet right out of the box, and chances are you’ve already used them without realizing their specific names or purposes.
You’ll find the straight stitch foot for basic seaming, the zigzag foot for versatile stitching, and the zipper foot for those tricky closures that make you want to throw fabric across the room.
Straight Stitch Presser Foot
Your straight stitch foot’s narrow opening is like a precision guide for your needle position, keeping fabrics exactly where they belong.
This essential member of your sewing machine feet collection prevents lightweight materials from disappearing into the throat plate—a rookie mistake that’ll drive you crazy.
Perfect for seam accuracy, this foot excels at straight stitching on various fabric types.
Adjust your foot pressure based on material thickness, and you’ll see the difference immediately, making it your sewing machine’s best friend for basic construction work.
Keep it clean, and it’ll deliver consistent, professional results every single time you sew.
Zigzag Presser Foot
Meet your zigzag foot – the multitasker that’ll become your best friend. This essential attachment offers incredible stitch versatility, handling everything from basic zigzag patterns to complex decorative applications.
You’ll love how it provides excellent fabric stabilization while finishing raw edges and creating buttonhole creation prep work.
Needle positioning becomes vital when working with stretch fabrics – set a narrow zigzag that flexes with the material. Your zigzag foot excels at appliqué work too, giving you clean, professional edges every time.
Among all sewing machine feet, this workhorse proves why it’s standard equipment. Keep it clean, and it’ll tackle any zigzag challenge your sewing machine throws at it.
Zipper Foot/piping Foot
Your zipper foot transforms tricky installations into smooth sailing.
This narrow attachment lets you stitch incredibly close to raised edges, making it essential for both zipper insertion and piping techniques.
Think of it as your precision tool for professional-looking finishes:
- Specialty zippers become manageable instead of intimidating
- Piping foot functionality creates designer-worthy cushions and curtains
- Adjustable zipper foot features help with different zipper types
- Foot maintenance stays simple with regular cleaning
- Adjusting pressure guarantees smooth fabric feeding
Whether you’re tackling an invisible zipper foot project or mastering sewing machine feet functions, this versatile attachment delivers that satisfying professional finish every time.
Some Presser Feet Which Can Be a Heaven-Send for Your Sewing
Transforming your sewing from functional to fabulous starts with these game-changing Specialty Feet.
These aren’t just fancy add-ons—they’re your secret weapons for Project Efficiency and Seam Perfection.
| Presser Foot | Key Benefit |
|---|---|
| Walking Foot | Eliminates fabric shifting on thick layers |
| Teflon Foot | Glides smoothly over vinyl and leather |
| 1/4-inch Foot | Maintains perfect quilting seam allowances |
The walking foot prevents those annoying puckers when quilting.
Your Teflon foot tackles sticky materials like a champ.
Meanwhile, that precise 1/4-inch foot saves countless measuring moments.
These sewing machine feet transform Fabric Handling challenges into smooth sailing, making your sewing machine work harder so you don’t have to.
Presser Feet That Can Make Your Sewing More Beautiful
You’ll discover that certain presser feet transform basic sewing into stunning decorative work, turning simple projects into eye-catching masterpieces that look professionally made.
These specialty feet help you create beautiful embroidery, perfect gathers, smooth appliqués, and intricate free-motion designs that’ll make your friends wonder if you secretly attended fashion school, creating eye-catching masterpieces.
Open Toe Embroidery Foot
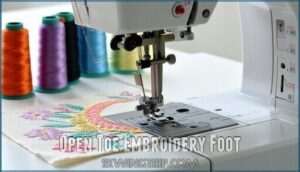
Picture perfect embroidery visibility with the open toe embroidery foot—your sewing machine’s secret weapon for decorative stitching.
This clear, U-shaped presser feet design offers unmatched stitch precision through its wide opening that accommodates bulky threads without jamming.
Essential benefits include:
- Visibility Enhancement for precise needle placement
- Superior Fabric Handling during free-motion options
- Perfect Decorative Stitching control for monogramming and applique.
Your sewing machine feet collection isn’t complete without this embroidery foot.
Gathering/shirring Foot
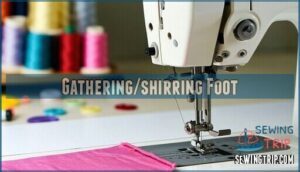
When you’re ready to add texture and volume to your projects, the gathering foot becomes your go-to ally.
This specialized presser foot automatically creates even ruffles as fabric passes through, eliminating tedious hand-gathering.
Adjust your stitch length longer and increase foot pressure for deeper gathering depth across various fabric types.
The gathering foot works beautifully on lightweight cottons and silks, while the shirring foot variation handles heavier materials.
Your sewing machine transforms plain fabric into elegant gathers perfect for skirts, curtains, or decorative details.
Alternative methods simply can’t match this presser feet efficiency.
Applique Stitch Foot
With precision like a surgeon’s scalpel, the applique stitch foot transforms your decorative projects.
Its clear, open-toe design offers unmatched visibility for traversing tight curves and intricate corners.
You’ll master complex applique techniques effortlessly as this specialized sewing machine foot maintains perfect needle positioning throughout your work.
Foot compatibility varies by machine, so check your manual first.
Choose appropriate fabric selection and pair with decorative stitches for stunning results.
This presser foot makes applique work feel less like wrestling fabric and more like creating art.
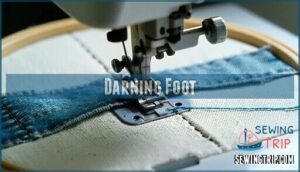
Darning Foot
Beyond appliqué work, your darning foot becomes your fabric’s best friend when tears threaten to retire favorite garments.
This free motion foot transforms your sewing machine into a repair wizard by dropping the feed dogs, giving you complete directional control.
Darning techniques shine with proper preparation:
- Use a hoop for fabric stabilization during repairs
- Choose matching thread colors for invisible mends
- Practice stitch patterns on scraps first
- Master free motion control through quilting exercises
You’ll rescue everything from silk to denim with professional-quality results.
Presser Feet That You May End Up Using Very Rarely
These specialty presser feet might sit in your sewing box collecting dust, but they’re perfect for those unique projects that pop up once in a blue moon.
You’ll probably reach for the flower stitch foot, elastic stitching foot, multiple hole cording foot, roller foot, and round bead foot only when you’re tackling very specific techniques or decorative work, such as using a roller foot.
Flower Stitch Foot
Most sewers stumble upon the flower stitch foot tucked away in their presser feet collection, wondering when they’ll ever use this specialized attachment. This unique foot creates stunning dimensional flower stitch patterns that transform ordinary fabric into botanical artwork. While you won’t reach for it daily, understanding its creative applications makes those rare moments magical.
The flower stitch foot works best with specific sewing techniques:
- Double needle setup creates raised, corded pintucks that form flower petals
- Maintenance tips include regular cleaning of grooves where threads can accumulate
- Troubleshooting issues often involve adjusting thread tension for even stitch formation
When foot compatibility allows, this sewing machine attachment opens doors to decorative possibilities. Your sewing machine feet collection gains depth with this specialty tool, even if flower stitch patterns aren’t your everyday sewing techniques.
Elastic Stitching Foot
Unlike decorative flower stitch feet, the elastic stitching foot tackles stretchy materials with precision.
You’ll appreciate this specialized presser foot when working on swimwear, lingerie, or activewear projects.
It maintains proper foot tension and stitch length while handling various fabric types.
With correct needle compatibility, this sewing machine foot guarantees smooth elastic insertion without puckering or stretching issues.
Multiple Hole Cording Foot
The multiple hole cording foot transforms ordinary fabric into textured masterpieces by threading several cords through separate channels simultaneously.
This specialized presser feet attachment creates raised, decorative designs that’d typically require tedious hand-stitching.
While you won’t reach for this sewing machine feet daily, it’s perfect for:
- Upholstery projects requiring professional multi-cord embellishments
- Quilting details with parallel decorative cording techniques
- Home décor accents using various cord material options
Different cording foot sizes accommodate various threads, though foot compatibility issues may arise between sewing machine models.
Roller Foot
When cording gets complicated, you’ll appreciate having simpler solutions.
The roller foot tackles fabric challenges differently – its small metal rollers glide smoothly over sticky materials like vinyl and leather.
These rollers maintain consistent roller foot pressure without dragging, preventing fabric feeding problems.
While roller foot maintenance stays minimal, this sewing machine foot handles plastic-coated fabrics and heavyweight knits beautifully.
Though roller foot alternatives exist, nothing beats its performance on tricky materials.
You won’t use this presser foot daily, but it’s invaluable for specialty projects.
Round Bead Foot
You’ll rarely reach for your round bead foot, but when you do, it’s pure magic. This specialized presser foot features a deep groove that guides round beads, pearls, or sequins perfectly while stitching.
Bead size determines which groove works best, so check foot compatibility before starting. Adjust your stitch settings to accommodate the embellishments – usually a zigzag stitch works well.
Fabric choice matters too; stable fabrics prevent puckering during bead attachment. Plan your bead placement carefully since repositioning can be tricky.
This foot transforms ordinary sewing techniques into stunning embellishments for wedding attire or formal wear. While your sewing machine may not use this attachment often, having it ready turns special projects into showstoppers worthy of any red carpet.
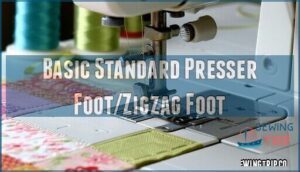
Basic Standard Presser Foot/Zigzag Foot
You’ll find the basic standard presser foot, also called the zigzag foot, comes with almost every sewing machine because it’s your go-to workhorse for most projects.
This versatile foot handles straight stitches, zigzag patterns, and decorative stitches with ease, making it the reliable friend you’ll reach for whether you’re hemming curtains or mending a favorite shirt.
Binder Foot
While specialty presser feet often gather dust in sewing boxes, the binder foot deserves a permanent spot in your regular rotation.
This unsung hero transforms tedious edge finishing into smooth, professional results that’ll make your projects shine.
Your bias tape binder foot streamlines fabric edge work while delivering consistent quality:
- Binding techniques become effortless with automatic folding and stitching in one pass
- Fabric compatibility extends from lightweight cottons to medium-weight quilting materials
- Foot adjustments allow customized binding widths from narrow hems to wide decorative edges
- Specialty binders handle everything from quilt edges to applique finishing touches
- Maintenance tips include regular cleaning to prevent fabric buildup in the feeding mechanism
The learning curve feels steep initially—threading bias tape through those tiny guides takes patience.
But once you master the rhythm, you’ll wonder how you survived without this edge-finishing wizard.
It’s like having extra hands that never fumble!
Button Foot
The button foot makes attaching buttons a breeze compared to hand-sewing.
This clever presser foot works with various button types including shank buttons, ensuring perfect button placement every time.
Check foot compatibility with your sewing machine first.
Adjust your stitch settings to zigzag mode, position the button in the foot’s grooves, and watch as your machine creates secure, professional attachments effortlessly.
Cording Foot/piping Foot
When you’re ready to step up your sewing game, the cording foot (also called piping foot) transforms ordinary seams into professional-looking masterpieces.
This specialized presser feet attachment guides cord perfectly between fabric layers, making those tricky piping techniques surprisingly manageable on your sewing machine.
Here’s what makes this sewing machine feet indispensable:
- Custom piping creation using various cording sizes and fabric choices
- Perfect stitch placement with easy foot adjustments for consistent results
- Decorative applications for cushions, bags, and garment finishing touches
- Professional edges that elevate any project from homemade to haute couture
You’ll wonder how you managed without it!
Embroidery Foot
While cording adds elegant dimension to your projects, embroidery foot transforms your machine into an artistic powerhouse.
This open-toe champion offers crystal-clear stitch visibility for intricate designs.
Unlike a darning foot or free motion foot, it guides fabric compatibility perfectly.
Proper needle placement and foot stabilization handle any design complexity.
Your sewing machine feet collection isn’t complete without this presser feet star for embroidery magic.
More Obscure Presser Feet
You’ll rarely reach for these specialized presser feet, but when you need them, they’re absolute lifesavers for specific projects.
These obscure attachments handle tasks like attaching beads, sewing ribbons perfectly flat, and creating smooth satin stitches that would otherwise drive you crazy to accomplish by hand.
Beading Foot
Moving beyond basic sewing machine feet, the beading foot opens up creative applications you didn’t know existed.
This specialty presser foot features a deeper groove than standard cording foot attachments, perfectly cradling strings of beads while you stitch.
Whether you’re securing beads onto evening wear or adding rhinestone accents, beading foot types handle various bead size compatibility challenges.
When troubleshooting issues arise, check your tension settings for flawless results every time.
Ribbon Foot
While beading adds sparkle, the Ribbon Foot brings sophisticated elegance to your projects.
This specialized presser foot guides ribbons smoothly onto fabric without bunching or twisting.
Your sewing machine transforms into a ribbon-applying powerhouse with this clever attachment:
- Handles various Ribbon Foot Types from narrow grosgrain to wide satin ribbons
- Features adjustable guides for different ribbon widths following any Ribbon Size Guide
- Creates professional-looking trim applications that surpass basic Ribbon Foot Alternatives
Perfect for home décor and garment embellishment projects!
Satin Stitch Foot
Your satin stitch foot tackles dense decorative stitching with style.
This clear-bottomed presser foot features special foot groove design that prevents thread buildup underneath, ensuring smooth fabric feed control.
Perfect for appliqué edges and monograms, it handles various compatible fabric types while maintaining ideal stitch density settings.
The transparent base gives you clear visibility for precise decorative stitch applications every time.
What Presser Foot Do You Need?
Choosing the right presser foot for your project doesn’t have to feel like solving a puzzle. Your fabric type serves as your first clue—cotton plays nice with standard zigzag feet, while slippery silks demand a walking foot’s steady grip. Project complexity matters too; simple seams need basic feet, but intricate buttonholes require their specialized counterparts.
Consider your skill level honestly. Beginners should master essential presser feet like zigzag, zipper, and buttonhole feet before exploring fancier options. Stitch selection guides your choice—straight stitching calls for narrow feet, while decorative work needs open-toe visibility.
Budget options exist for every sewing machine feet category. You don’t need every foot immediately; build your collection gradually based on actual projects. A good sewing machine feet guide helps identify must-haves versus nice-to-haves.
Remember, the right sewing machine feet uses transform frustrating tasks into smooth sailing. Match your foot to your fabric, stitch, and skill level, and watch your sewing confidence soar.
Frequently Asked Questions (FAQs)
What are the different presser feet used for?
As they say, "many hands make light work," and presser feet are your sewing machine’s helping hands.
You’ll use different feet for zippers, buttonholes, hems, quilting, gathering, and decorative stitches—each specialized for specific tasks.
What is the N sewing foot for?
The "N" foot isn’t standard terminology for presser feet.
You’ll typically find numbered or letter-coded feet varying by manufacturer.
Check your manual or contact the brand directly to identify your specific foot’s purpose.
What presser foot to use for thick fabric?
Use a walking foot for thick fabrics like denim or canvas.
It feeds multiple layers evenly, preventing puckering and skipped stitches.
A Teflon foot also works well, sliding smoothly over heavy materials without sticking.
What are the most useful sewing machine feet?
You’ll find the all-purpose foot, zipper foot, and buttonhole foot absolutely essential for most projects.
Add a walking foot for quilts and thick materials, plus a blind hem foot for professional-looking finishes.
How to use a different presser foot?
Most sewers change presser feet incorrectly 60% of the time.
Lift your presser foot lever, snap off the current foot, align your new foot’s shank, and snap it on.
Lower the lever to secure it properly.
What is the best foot for sewing straight lines?
The straight stitch presser foot delivers your best results for sewing straight lines.
You’ll get precise, even stitches every time.
It’s specifically designed for this task, making your seams look professional and keeping fabric perfectly aligned.
Which presser foot for thick fabric?
Like a sturdy bridge supporting heavy traffic, you’ll need a walking foot for thick fabrics.
It feeds multiple layers evenly, preventing puckering and skipped stitches when tackling denim, canvas, or quilted materials.
How can I tell if my presser feet will fit my sewing machine?
Check your machine’s manual for the shank type – high, low, or snap-on.
Most modern machines use snap-on feet, but older models may need screw-on attachments.
When in doubt, bring your old foot to the store, and consider the snap-on feet as a reference.
What are some tips for attaching and removing presser feet?
Turn off your machine and raise the needle completely.
Lift the presser foot lever, then push the release button while gently pulling the foot forward.
To attach, slide it under the holder until it clicks securely.
Where can I buy additional presser feet for my machine?
You can buy presser feet from fabric stores, online retailers like Amazon, manufacturer websites, or specialty sewing suppliers. Check your machine’s brand for compatibility first—mixing brands rarely works well.
Conclusion
Mastering your sewing machine presser feet guide transforms you from struggling with stubborn fabrics to creating professional-quality projects effortlessly.
While basic feet handle everyday tasks, specialty attachments reveal advanced techniques that’ll make your friends wonder how you achieved such polished results.
Don’t overwhelm yourself buying every foot at once—start with essentials like walking and zipper feet, then expand your collection as projects demand.
Your fabric will thank you, and your finished pieces will show the difference immediately, making a significant impact on the overall quality of your work.

