This site is supported by our readers. We may earn a commission, at no cost to you, if you purchase through links.
Start by choosing the right stabilizer for your fabric—interfacing prevents puckering and guarantees clean edges.
Mark your buttonhole placement carefully, measuring twice and cutting once.
Most modern machines offer automatic buttonhole functions, but you can also create them manually using zigzag stitches or hand-sewing techniques.
Test on fabric scraps first to perfect your tension and stitch length.
For heavy fabrics like denim, use a denim needle and adjust your machine’s pressure foot.
The secret lies in proper preparation and understanding your fabric’s behavior.
Master these fundamentals, and you’ll discover techniques that make even the trickiest buttonholes look effortless.
Table Of Contents
- Key Takeaways
- Types of Buttonholes
- Tips for Better Buttonholes
- How to Sew a One-Step Buttonhole Using a Buttonhole Foot
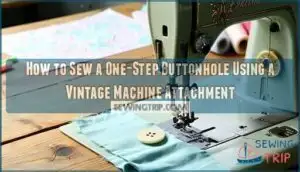
- How to Sew a One-Step Buttonhole Using a Vintage Machine Attachment
- How to Sew a Freehand Buttonhole Manually on a Sewing Machine
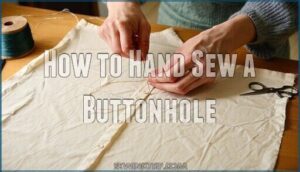
- How to Hand Sew a Buttonhole
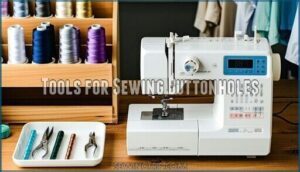
- Tools for Sewing Buttonholes
- Sewing Jeans Buttonholes
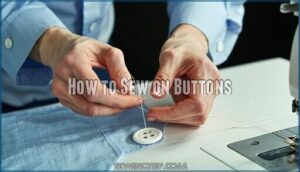
- How to Sew on Buttons
- How to Open The Buttonhole
- Frequently Asked Questions (FAQs)
- Conclusion
Key Takeaways
- Choose the right stabilizer for your fabric – You will prevent puckering and ensure clean edges by using interfacing behind the buttonhole area, especially on lightweight or stretch fabrics.
- Test your settings on fabric scraps first – You will perfect your tension, stitch length, and buttonhole placement before working on your actual garment to avoid costly mistakes.
- Select the appropriate buttonhole type for your project – You will get professional results by matching keyhole buttonholes to heavy fabrics, rectangular ones to standard buttons, and bound buttonholes to formal wear.
- Use proper tools and preparation techniques – You will achieve consistent, professional-looking buttonholes by marking placement carefully, using the right needle for your fabric weight, and taking your time with each step.
Types of Buttonholes
Understanding the different types of buttonholes transforms your sewing from basic to professional.
Each style serves a specific purpose, and choosing the right one makes all the difference in your garment’s function and appearance.
Keyhole buttonholes feature a circular end that accommodates button shanks perfectly.
They’re ideal for heavy fabrics like wool coats where buttons experience stress.
Rectangular buttonholes offer clean, straight lines and work well on most fabrics for standard buttons.
Bound buttonholes create an elegant, couture finish by wrapping fabric around the opening.
They’re perfect for custom jackets and formal wear.
Eyelet buttonholes have reinforced holes punched around the edges, making them suitable for lightweight fabrics.
Rounded buttonholes have tapered ends that prevent tearing on stretch fabrics.
Stretch buttonholes expand with knit materials, preventing distortion during wear.
Vertical buttonholes suit areas with minimal stress, while horizontal buttonholes handle strain better and prevent gaping.
Corded buttonholes add extra strength by incorporating thread or cord for reinforcement.
To master various sewing techniques, it’s vital to study types of buttonholes and their applications.
Choose based on your fabric weight, button type, and garment function.
Tips for Better Buttonholes
Now that you understand the different types of buttonholes available, let’s focus on the techniques that’ll transform your buttonhole sewing from acceptable to exceptional.
These tips will help you achieve professional-quality results every time.
Use interfacing behind the fabric area to stabilize it. This prevents the fabric from stretching during stitching. Make sure to use lightweight interfacing so the buttonhole’s still soft and flexible.
Here are two game-changing techniques for buttonhole stabilization:
- Layer tissue paper strips under the buttonhole while sewing. This prevents the fabric from getting caught in the feed dogs and creates smoother stitching.
- Sew over the buttonhole twice for a sturdier finish. This technique works especially well for fabrics that fray easily or when you need extra durability.
Test buttonholes first on fabric scraps identical to your project fabric. Check that the buttonhole placement, stitch quality, and tension control are suitable before sewing on your actual garment. Your fabric selection and thread choices directly impact the final result, so don’t skip this step.
Master these sewing techniques through practice, and you’ll achieve consistently professional buttonhole sewing results. Understanding thread tension techniques is essential for achieving flawless buttonholes every time.
How to Sew a One-Step Buttonhole Using a Buttonhole Foot
Modern buttonhole feet transform your sewing machine into a precision tool for professional results. This snap-on attachment measures your button automatically and creates perfectly sized buttonholes every time.
**Transform your sewing machine into a precision buttonhole powerhouse with the right attachment.
Here’s how to master the one-step buttonhole process:
- Insert your button into the foot’s holder to set automatic sizing – the foot measures diameter and thickness for perfect fit
- Position the foot over your buttonhole placement markings, ensuring proper alignment before lowering
- Select buttonhole stitch on your machine – this activates automatic satin stitch formation for sides and bartacks
- Maintain steady pressure while sewing at slow speed to prevent fabric bunching or skipped stitches
- Use interfacing on lightweight fabrics to prevent puckering and guarantee clean stitch formation
The foot handles stitch width and length adjustments automatically.
Keep fabric preparation simple – press flat and mark placement clearly.
Your sewing machine settings work with the foot to create consistent, professional buttonholes without manual intervention.
For best results, understand the buttonhole presser features and settings to achieve perfect buttonholes.
How to Sew a One-Step Buttonhole Using a Vintage Machine Attachment
While modern buttonhole feet deliver consistent results, vintage machine attachments offer unique character and precision that many sewists find irresistible.
Setting up your vintage machine attachment:
- Select the correct attachment size based on your button diameter
- Replace your regular presser foot with the vintage attachment
- Position the attachment fork over the needle bar for proper synchronization
- Lower or cover feed dogs to allow the attachment to control fabric movement
- Insert the appropriate template or cam for your desired buttonhole size
- Set your machine to straight stitch mode only
- Adjust stitch width using the attachment’s lever or dial
- Test tension settings on scrap fabric before starting
- Secure fabric under the attachment’s holding mechanism
- Complete the buttonhole in under 30 seconds with consistent stitching
These vintage attachments work with most low shank straight stitch machines, including Singer, Brother, and Kenmore models. The attachment moves fabric in all directions while your needle stays stationary, creating perfectly formed buttonholes.
Regular maintenance with sewing machine oil keeps these mechanical marvels running smoothly for decades. To achieve professional results, understanding buttonhole types is essential for selecting the right attachment and technique.
How to Sew a Freehand Buttonhole Manually on a Sewing Machine
Manual stitching a freehand buttonhole on your sewing machine gives you complete creative control. You’re not locked into predetermined sizes or shapes—you become the master of your buttonhole destiny.
Start by lowering your feed dogs and attaching a standard presser foot. Set your machine to a tight zigzag stitch with maximum width for bar tacks and narrow width for sides. Mark your buttonhole length with chalk, then begin sewing. Create a wide zigzag bar tack at one end, switch to narrow zigzag for the first side, add another bar tack at the opposite end, then complete the second side with narrow zigzag stitching.
For thicker fabrics, consider using keyhole buttonholes for extra room.
- Fabric preparation: Apply interfacing to prevent puckering and guarantee clean stitches
- Thread selection: Use heavyweight thread or buttonhole twist for durability
- Freehand techniques: Practice smooth, consistent movements on scrap fabric first
- Sewing machine setup: Lower feed dogs and adjust zigzag width between steps
- Manual buttonhole techniques: Test stitch density and tension before starting your project
How to Hand Sew a Buttonhole
When machine methods fall short, hand sewing gives you complete control over your buttonholes. This timeless technique works perfectly for delicate fabrics or when you want that custom couture finish.
Here’s your step-by-step approach:
- Mark your buttonhole placement using fabric markers or chalk. Draw both the length and width guidelines clearly on your fabric.
- Create foundation stitches by sewing tight running stitches along your marked lines. Use strong thread and secure with backstitches at each end.
- Cut the buttonhole slit carefully with sharp scissors. Stay within your marked lines and avoid cutting through your foundation stitches.
- Work the buttonhole stitch by bringing your needle up through one side, down through the other, creating loops that cover the raw edges completely.
Thread selection matters – choose buttonhole twist or heavy-duty thread for durability. To prevent fabric stretching, consider using fusible interfacing options. Hand-sewing needles should be sharp and appropriately sized for your fabric weight.
When securing stitches, weave thread ends through existing stitches on the fabric’s wrong side. Gimp usage strengthens handstitched buttonholes on heavier fabrics.
Practice makes perfect with handsewn buttonholes.
Tools for Sewing Buttonholes
Whether you hand-sew or use a sewing machine, having the right sewing tools transforms your buttonhole sewing from frustrating to flawless. Your success depends on selecting proper equipment before you start.
Buttonhole foot types vary by machine model. One-step feet handle everything automatically, while four-step feet require manual adjustments. Vintage machines often use special attachments that clamp onto the presser bar.
| Tool Category | Purpose | Impact on Results |
|---|---|---|
| Buttonhole foot | Guides fabric and controls stitch placement | Creates even, professional-looking buttonholes |
| Cutter types | Slices through fabric layers cleanly | Prevents fraying and maintains straight edges |
| Stabilizer options | Supports fabric during stitching | Eliminates puckering and distortion |
| Marking tools | Ensures accurate placement | Guarantees proper button alignment |
Thread selection matters substantially. Heavyweight buttonhole twist or silk thread creates durable results that withstand daily wear. Stabilizer options include tear-away, cut-away, and water-soluble varieties depending on your fabric weight. Many sewists now prefer computerized sewing machines for their ease of use.
Sharp buttonhole cutters slice through multiple layers without pulling threads. Quality marking tools help you position buttonholes precisely every time, ensuring accurate placement and proper button alignment with the right stabilizer options.
Sewing Jeans Buttonholes
Thick denim demands respect when you’re creating buttonholes. Your sewing machine will thank you for proper preparation, and your jeans will look professionally finished with these techniques.
Denim interfacing becomes your best friend on heavyweight fabrics. Apply it behind the buttonhole area to prevent distortion and support dense stitching. This step separates amateur work from professional results.
Here’s your game plan for perfect denim buttonholes:
- Use heavyweight thread in the needle with regular thread in the bobbin to prevent jamming
- Install a topstitching needle designed for thick fabrics and heavy thread
- Mark buttonhole placement precisely with chalk, accounting for seam allowances
- Choose shank buttonholes or keyhole styles to accommodate thicker jean buttons
- Apply reinforcement techniques like backing with extra fabric or interfacing
Manual buttonhole control works better than automatic functions on thick seams. Hand sewing offers a unique durable finish ideal for couture projects.
Your buttonhole foot gives you precise control over start and end points. Take your time – rushing leads to crooked, weak buttonholes that won’t stand up to daily wear.
How to Sew on Buttons
Once your buttonholes are perfectly sewn, attaching buttons securely completes your garment’s professional finish. Button placement accuracy determines how well your garment fits and functions.
Start by marking exact button positions using your completed buttonholes as guides. Thread your needle with matching thread, doubling it for extra strength. Position each button carefully and bring the needle up through one hole.
For flat buttons, create reinforcing stitches by passing through holes multiple times. Shank buttons require different handling – their built-in stems provide natural spacing. Always leave slight slack between button and fabric to prevent puckering.
Here’s your button-sewing toolkit:
- Sharp needles sized appropriately for your thread weight
- Matching thread that complements your fabric color perfectly
- Button placement markers like pins or washable chalk
- Thimble protection for your pushing finger during hand sewing
- Small scissors for trimming thread ends cleanly
- Seam ripper for correcting mistakes without fabric damage
Button security depends on proper technique. Wrap thread around the button’s base several times, creating a thread shank that allows smooth buttonhole operation. Finish with small anchor stitches on the fabric’s wrong side. For everyday clothes, consider using all-purpose thread for a secure hold.
When sewing buttons by machine using a buttonhole foot, consult your manual for specific zigzag settings and presser foot positioning.
How to Open The Buttonhole
Once your buttons are perfectly attached, the final step brings your buttonhole project to life.
Opening the buttonhole requires precision and the right tools to avoid cutting mistakes that could ruin hours of careful work.
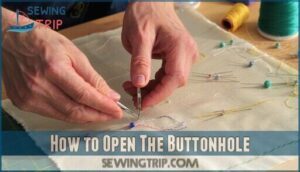
Place glass head pins at each end of your sewn buttonhole to prevent overcutting. A seam ripper works best for most fabrics – insert the point in the center and push toward one end, then repeat for the other side.
For heavy fabrics, a buttonhole cutter provides cleaner cuts than scissor techniques. A durable cutting mat is essential to protect your workspace.
Use a cutting mat underneath to protect your work surface and fabric. Check for stray threads after opening and trim for a professional finish.
Common opening tools and their benefits:
- Seam ripper – Precise control prevents fraying on delicate fabrics
- Buttonhole cutter – Clean, crisp cuts through multiple fabric layers
- Sharp scissors – Backup option when other tools aren’t available
- Glass head pins – Your safety net against accidental overcutting disasters
Frequently Asked Questions (FAQs)
Can you sew a buttonhole with a sewing machine?
Yes, you can absolutely sew buttonholes with a sewing machine.
Most modern machines include a buttonhole foot and automatic settings.
Simply attach the buttonhole foot, mark your placement, select the buttonhole stitch, and let your machine work its magic.
How to sew on a button and buttonhole?
Start by measuring your button’s diameter and marking the buttonhole placement with chalk.
Attach the buttonhole foot to your machine, then stitch around the marked area.
Cut open carefully with a seam ripper, then hand-sew the button securely.
How do you sew a buttonhole?
Picture yourself threading a needle with confidence, ready to create the perfect gateway for your buttons.
You’ll mark placement, attach your buttonhole foot, and stitch precise bars at top and bottom.
Then sew parallel sides, carefully cut between the stitches, and voilà—you’ve mastered this essential skill!
How do you stitch a buttonhole on a sewing machine?
Attach your buttonhole foot, mark placement, and select the buttonhole setting. Position fabric, press the foot pedal, and let your machine automatically stitch the rectangular frame and bars.
What stitch do you use for buttonholes?
You’ll use a dense zigzag stitch, also called satin stitch, for buttonholes.
Set your machine’s stitch width to match your button size and reduce stitch length to nearly zero for tight coverage.
What size buttonhole for different button types?
Button size determines your buttonhole length: tiny shank buttons need 1/8-inch extra space, flat buttons match their diameter, while thick coat buttons require 1/4-inch additional room for easy threading.
How to prevent buttonhole thread from breaking?
Thread breakage happens when you’re pushing too hard, too fast.
Lower your machine’s tension settings, slow down your stitching speed, and use quality buttonhole thread.
Check your needle’s sharp and properly sized for your fabric weight, to prevent issues and ensure a smooth process with quality thread.
Can you make buttonholes on stretch fabrics?
Like taming a wild horse, stretch fabrics need special handling for buttonholes.
You’ll need stabilizers to prevent distortion and use a stretch or ballpoint needle.
Test first on scraps, then sew carefully with proper tension adjustments.
What stitch length works best for buttonholes?
Set your machine’s stitch length to "satin" or near zero for precise control. This creates dense, closely-spaced stitches that form a solid, professional-looking buttonhole edge that won’t fray or gap.
How to repair torn or damaged buttonholes?
Fix torn buttonholes by carefully removing damaged stitches with a seam ripper.
Apply interfacing behind the area, then re-stitch using a zigzag or satin stitch.
You’ll reinforce the repair and prevent future tearing.
Conclusion
Like ancient tailors perfecting their craft with bone needles, mastering how to sew buttonholes elevates your sewing skills dramatically.
You’ve now learned ten professional methods that’ll transform your projects from amateur to expert-level.
Whether you’re using automatic machine functions or hand-sewing techniques, proper preparation and practice make perfect buttonholes achievable.
Don’t rush the process—take time to test on scraps first.
With these proven methods, you’ll create clean, durable buttonholes that’ll last for years.
- http://www.lauramaedesigns.com/2012/08/bound-buttonholes-tutorial.html
- https://patternscissorscloth.com/2012/07/26/teal-jacket-bound-buttonholes-a-pictorial/
- https://www.thesewingacademy.com/2015/07/hand-sewn-buttonholes/
- https://blog.closetcorepatterns.com/sew-perfect-buttonholes/
- https://www.ageberry.com/how-to-use-buttonhole-foot/

