This site is supported by our readers. We may earn a commission, at no cost to you, if you purchase through links.
That iron-on Velcro you slapped on your bag strap? It peels off within a month. Adhesive fails under stress, but stitches don’t.
Knowing how to sew on Velcro turns a flimsy fix into a fastener that outlasts the fabric around it. Costume makers, upholsterers, and gear repair pros all skip the sticky-back stuff for one reason: thread holds. With the right needle, a bit of thread tension, and steady hands, you’ll get a closure that snaps shut hundreds of times without budging.
Grab your supplies, and let’s get those strips locked in for good.
Table Of Contents
Key Takeaways
- Sewn Velcro outlasts adhesive-backed Velcro because stitches resist stress that peels iron-on or sticky-back fasteners off within weeks.
- Getting durable results depends on matching the right supplies to the job: sew-on (non-adhesive) Velcro strips, high-tenacity polyester thread, and a size 14 or 16 needle for dense fabric.
- Proper prep and stitch technique matter as much as materials, so always place the loop side toward the body, trim corners, and use a short straight stitch (1.5-2.0mm) with backstitched ends for a secure hold.
- Both machine and hand sewing can produce a lasting bond when you reinforce corners with box stitches, keep tension even, and troubleshoot common issues like needle gumming, shifting strips, and fabric puckering.
Gather Velcro Sewing Supplies
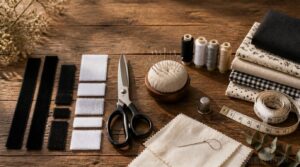
Before you thread a single needle, get your supplies lined up on the table. A smooth Velcro project depends on having the right materials on hand, not just the right technique. Here’s exactly what you’ll need to get started.
Grab sharp needles, smooth thread, and sturdy Velcro strips, then brush up on tips for neat and even stitching so your seams stay clean from the very first stitch.
Sew-on Velcro Strips
Grab sew-on Velcro strips before you start; they’re the fabric-backed fasteners that stitch directly onto garments, no adhesive required.
- Widths: 1-inch or 3/4-inch
- Black or white to match fabric
- Woven backing for easy sewing
- Pre-finished edges resist fraying
- Durable hook-loop engagement
Choose non-adhesive versions. Adhesive gums up needles and weakens closure strength over time, hurting fastener longevity. These non-adhesive fasteners feature a woven flat backing for better connection.
Strong Polyester Thread
Once your Velcro strips are cut and ready, thread choice makes or breaks the job. Skip regular thread—high tenacity polyester takes daily stress without snapping.
| Feature | Why It Matters | Spec |
|---|---|---|
| Tensile strength | Resists tearing | 16-30 lb breaking load |
| Abrasion resistance | Outlasts cotton | 2-3x stronger |
| UV resistance | No sun fading | 90%+ colorfast |
Brands like Rasant or Guterman work great for sewing machines and hand stitching alike.
Size 14 or 16 Needle
Thread strength won’t help if your needle can’t handle the job. For hook and loop fabric, pick a size 14 or 16 needle—both punch through dense layers without bending.
- Size 14: medium fabrics, less perforation
- Size 16: heavy denim, canvas
- Universal points: work on most weaves
Match needle size to thread weight so stitches stay even and snag-free.
Clips, Pins, or Tape
Once your needle’s ready, you need something to hold Velcro still while you stitch. Fabric clips with nickel or zinc plating resist bending. Silk pins offer precise placement on delicate fabric without leaving holes. Basting tape temporarily secures strips before sewing.
Magnetic clips work well for tracing, while knit tape stretches with jersey fabric during fastener attachment.
Chalk and Sharp Scissors
A sharp tailor’s chalk is what turns a wobbly cutting line into a clean, accurate guide. Keep a chalk sharpener or blade handy to maintain a fine edge for precise marking—dull chalk skips and smears.
If your marks start looking thick or faint, this quick guide on how to sharpen sewing chalk will get your edge crisp again in seconds.
Pair it with stainless steel scissors; they resist rust and stay sharp for cutting Velcro cleanly. For dark fabrics, choose white chalk for visibility. Wipe both tools clean after each project.
Prepare and Position The Velcro
Before you thread a needle, your Velcro needs a little prep work. A few small steps now will save you crooked stitches and scratchy surprises later. Here’s exactly what to check and do before pinning anything in place.
Identify Hook and Loop Sides
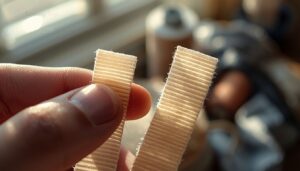
Grab both strips and rub them between your fingers—one feels rough, the other soft. That’s your first clue.
- Hook side: rigid, scratchy prongs
- Loop side: soft, plush fibers
- Hooks snag delicate fabric if misaligned
- Loop side belongs against skin
Always place the loop side toward your body when sewing Velcro onto wearable items. Comfort and safety start here.
Match Width to Project
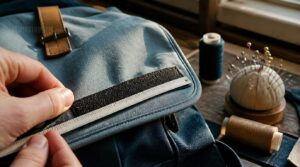
Width isn’t a guessing game—it’s math. Match your Velcro strip to the fabric opening, staying within 1/8 inch to avoid bulk. Small closures need 1-inch strips; larger openings call for 1.5 or 2 inches.
Think scale vs. function: a doll dress and a backpack flap have different jobs. Keep hook and loop widths identical for even engagement, and align strip edges with fabric edges before pinning.
Cut Equal Strip Lengths
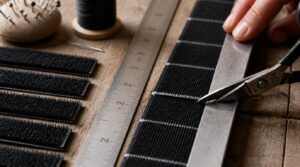
Math beats guesswork here. Divide your total Velcro length by the number of strips you need, then add a hair extra for blade kerf—the tiny bit lost to each cut. Mark each length with chalk, double-check with a ruler, and cut all strips in one pass using a straightedge for identical, waste-free pieces every time.
Math beats guesswork: divide, mark, measure, then cut every strip in one identical pass
Trim Sharp Corners
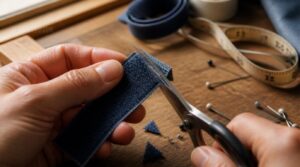
Those pointy corners will snag on everything from sweaters to skin. Round them off by cutting a small beveled corner on each end—snip at an angle instead of leaving a hard point.
For side seam corners especially, this beveling helps the strip lay flat without lifting. If edges feel rough, a light sand removes burrs before you sew Velcro in place.
Mark Placement Before Sewing
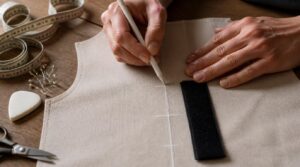
Skip the guesswork — a fabric marking pencil beats eyeballing every time. Mark placement lines at pattern anchor points before a single stitch goes in.
- Center line for balance
- Notch alignment for matching pieces
- Seam allowance edges kept clear
Precise marking prevents crooked Velcro and puckered fabric later. This one habit saves your whole project.
Sew Velcro by Machine
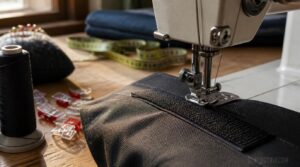
When you’re ready to sew Velcro by machine, a few small adjustments make all the difference between a fastener that holds and one that pops loose after a few washes.
Your machine can handle this tough material just fine, as long as you set it up the right way first.
Here’s exactly how to get a strong, clean result every time.
Test Stitches on Scraps
Grab a scrap of your project fabric before touching the real thing. Sew a short test line with your planned needle, thread, and tension to check stitch density and spot any puckering or needle marks. If a stabilizer’s involved, test that too.
This quick trial saves you from thread breaks and uneven tension once you’re stitching the actual Velcro edges.
Use a Zipper Foot
Once your test stitch looks clean, swap in a zipper foot before you touch the Velcro. Its narrow shape lets the needle ride close to the hook or loop edge without the presser foot bumping over those stiff ridges.
- Slim profile hugging the Velcro’s raised edge
- Needle gliding right along the border
- No fabric bunching under a bulky foot
- Even seams on backpacks or doll clothes alike
- Clean stitch lines with no snagging
Set Short Straight Stitch
With your zipper foot ready, dial in a short straight stitch, between 1.5 and 2.0 millimeters. This tighter stitch density locks the seam against constant pulling.
Nudge tension slightly higher than normal to handle the stiff backing, and slow your feed dogs for control.
Clean lint from the bobbin area often, since short stitches build it up fast.
Sew Around The Edges
Now guide the fabric slowly around all four sides, keeping your stitch line just inside the Velcro’s edge so you never catch a hook or loop. This edge stitching style locks fibers down and prevents fraying at the border.
Watch for stitching through bulk at corners, where layers stack up. Pause, pivot with the needle down, then continue for a flush, puckerfree seam allowance.
Backstitch to Secure Ends
Reaching the end of a seam without locking it invites unraveling, and Velcro takes enough stress that this step really matters.
Before lifting your foot, backstitch:
- Reverse 2-3 stitches at the start
- Sew forward past your first stitches
- Reverse again at the finish
Keep tension even to avoid puckering. This technique works for both machine and hand sewing Velcro, locking threads securely without adding bulk.
Sew Velcro by Hand
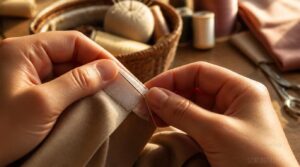
No sewing machine? No problem. Hand sewing Velcro takes a bit more patience, but it holds up just as well when you follow the right steps. Here’s how to get it done, from securing the strips to tying off your final knot.
Secure Strips With Clips
Pins leave holes and tape leaves residue, so clips are your best friend when sewing Velcro by hand.
Spring-loaded clips grip fabric edges without slipping, while magnetic clips work well on thinner materials. Choose corner clips for aligning edges precisely.
Space clips every 2 to 3 inches to prevent sagging and fabric distortion. Pick clip materials that won’t snag delicate fabrics, and remove them only after you finish stitching.
Use Strong Backstitches
Grab your needle and thread, because this is where the real strength happens.
The backstitch is one of the toughest hand stitches you can use, overlapping each pass to prevent unraveling under tension. It works great with Velcro on:
- Cotton twill
- Denim
- Canvas
- Felt
- Leather alternatives
Keep stitch spacing even and thread tension controlled for a durable, machine-like seam that reinforces every edge.
Stitch Around The Perimeter
Now work your way around the entire edge, not just one side. Keep stitches even and close to the border for a clean perimeter seam.
At corners, pause with your needle down, pivot the fabric, and continue—this keeps edges sharp instead of rounded. Watch your tension as you go; stitches that pull too tight will pucker the fabric around your textile fastener.
Add Box Stitch Reinforcement
Corners take the most abuse, so strengthen them with a box stitch: a small square with an X through the middle. This spreads stress across all four sides instead of one weak point.
Use 40-50 weight thread and a size 14 needle for clean penetration. Keep the box within 1-2mm of the Velcro edge, backstitching start and end points for lasting seam strength.
Knot on Fabric Side
Where you finish your knot matters as much as how you tie it. Always end on the fabric side, never the Velcro side, so nothing shows or snags.
- Pull thread snug before the final loop
- Backstitch once for reinforcement
- Trim tails close to reduce bulk
- Weave delicate fabrics’ tails back in
- Avoid puckering by not overtightening
Fix Common Velcro Sewing Problems
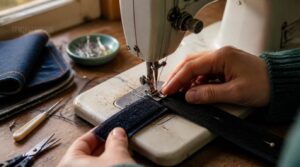
Even careful sewists hit a few snags with Velcro, and that’s completely normal. Sticky needles, shifting strips, and puckered fabric all have simple fixes once you know what to look for. Here’s how to solve the five problems that trip people up most.
Prevent Needle Gumming
Sticky buildup on your needle usually comes from adhesive-backed basting tape. Wipe the needle with an alcohol wipe every few passes, or run it through a bar of soap first.
Choose low-tack tape, sew slower, and swap needles often. A little needle lubricant and a steady maintenance routine keep stitches clean and skip-free.
Stop Velcro From Shifting
Loose Velcro doesn’t stay put after a few washes—it starts to skew. Anchor strips with masking tape or double-sided tape before stitching, then:
- Sew close to the edge with a zipper foot for a snug frame.
- Backstitch corners to resist rolling.
- Press the area after sewing to set it flat and stable.
Reduce Bulky Edges
Once your Velcro sits flat and secure, you may still notice a stiff ridge underneath. Trim excess bulk by cutting the fabric layers beneath the fastener close to the stitch line. On thicker projects, try grading seam layers so each edge sits at a slightly different width.
Clipping seam allowances along curves also helps everything lie smoother.
Avoid Fabric Puckering
Little folds around your stitching usually mean the fabric got pulled in unevenly while you sewed. Stabilizing fabric backings and aligning Velcro along the fabric grain both help.
- Balance top and bobbin tension
- Adjust presser foot pressure
- Match stitch length to fabric weight
- Slow your sewing speed
- Keep fabric layers matched in texture
Test on scraps first, since tension balance troubleshooting saves your final project from surprises.
Keep Velcro Clean After Sewing
Even after sewing Velcro perfectly, lint builds up fast and weakens its grip. Regular cleaning keeps hooks and loops working.
| Task | Tool | Frequency |
|---|---|---|
| Lint removal | Lint roller, tweezers | Weekly |
| Deep clean | Soft brush, toothbrush | Monthly |
| Washing | Fasten shut, gentle cycle | Each wash |
Air dry always—heat deforms hooks and ruins your textile fasteners over time.
Frequently Asked Questions (FAQs)
What is the best stitch to sew on Velcro?
For sewing techniques, a zigzag stitch beats straight stitch for durability: it grips loops firmly, prevents edge fraying, and adds reinforcing corner security. Set width 0-0mm, length 0-5mm—this stitch length optimization minimizes bulk while covering both hook and loop edges completely.
Can you sew Velcro with a sewing machine?
The toughest fabric can feel like butter once your machine’s set right. Yes — with a size 14–16 needle, short straight stitch, and steady thread tension, plus a walking foot for stable feed, machines handle Velcro cleanly and securely.
How do you sew Velcro?
Position your fabric, pin the strips, then stitch around the edges with a short straight stitch and backstitch at both ends. For hand sewing, use strong backstitches around the perimeter. Always test tension on scrap fabric first.
How do I use Velcro®?
Press the loop side (soft) against skin-facing fabric, and the hook side (scratchy) on the outer flap. Line them up squarely, then press firmly—each closure withstands thousands of attachment cycles when kept lint-free and properly oriented.
What is velcro used for in sewing?
Think of it as fabric’s handshake — quick to grab, easy to let go. You’ll use it for adjustable garment fit, durable strap closures, elastic replacement in cuffs, and accessible fastenings that help kids or those with limited dexterity dress independently.
How to sew velcro tape?
Pin strips in place, then backstitch by machine or hand around all edges. Adjust thread tension for thick backing, lubricate your needle, and match stitch length to your fabric weight for lasting, snag-free hold.
Can you sew Velcro on cotton?
Funny enough, cotton is one of the easiest fabrics to work with. Yes, you can sew Velcro on cotton — its tight weave grips stitches well. Match your thread weight, sew a clean perimeter, and it’ll hold strong through regular washing.
Why won’t my sewing machine sew through Velcro?
Usually it’s needle drag from dense hook-and-loop fibers, wrong sewing machine needles, or adhesive residue buildup clogging the eye. Loose thread tension and poor fabric feeding cause skipped stitches too—swap to a denim needle and slow down.
What is the best way to attach Velcro to fabric?
The strongest bond can also be the most temporary: adhesive holds fast today, fails tomorrow.
For lasting durability through washing, sewing beats adhesive every time. Stitching directly through fabric survives hundreds of wash cycles, especially at stress points on frequently opened items.
How does sew on Velcro work?
Two sides do all the work: tiny stiff hooks grab soft loop fibers when pressed together, creating mechanical fastening. That interlocking surface design holds fast until you pull it apart with deliberate, perpendicular force—not a light tug.
Conclusion
Thread is stubborn, glue is a quitter. Once you know how to sew on Velcro, you’ll never trust a sticky backing again. Your stitches lock hook and loop into the fabric itself, so the bond survives washing, stretching, and hundreds of rips apart.
Check your seams, snip loose threads, and press the strips flat. That’s it. You’ve built a fastener that outlasts the bag, jacket, or costume it’s sewn to. Sew once, trust it forever.
- https://www.wikihow.com/Sew-Velcro-by-Hand
- https://wunderlabel.com/en-gb/blog/p/12-tips-sewing-velcro
- https://www.velcro.com/news-and-blog/2023/09/mastering-how-to-sew-with-velcro-brand-fasteners-a-quick-guide
- https://blog.moodfabrics.com/tips-tricks-for-sewing-with-velcro
- https://qcmachinery.com/how-to-machine-sew-velcro/