This site is supported by our readers. We may earn a commission, at no cost to you, if you purchase through links.
Using a sewing machine doesn’t have to be hard. With some basic knowledge and practice, you’ll be sewing like a pro in no time. Start by familiarizing yourself with the machine’s parts and functions, then master threading the upper and lower threads.
Next, learn to properly load the bobbin and select the right stitch settings. Prepare your fabric by pressing and pinning, then sew a straight seam with forward and backstitching.
While there may be a few hiccups along the way, troubleshooting common issues and maintaining your machine regularly will make sewing a breeze. Keep reading to discover 10 simple steps to master the sewing machine.
Table Of Contents
- Key Takeaways
- How Hard to Use Sewing Machine?
- Understanding the Sewing Machine: Parts and Functions
- Threading the Machine: Upper and Lower Threads
- Loading the Bobbin: Insertion and Winding
- Selecting the Stitch: Types and Settings
- Preparing the Fabric: Pressing and Pinning
- Sewing a Seam: Forward and Backstitching
- Troubleshooting Common Issues: Thread Tension and Jamming
- Maintenance and Cleaning: Regular Care for Your Sewing Machine
- Safety Precautions: Keeping Fingers Away From the Needle
- Advanced Techniques: Zigzag Stitching and Curves
- Frequently Asked Questions (FAQs)
- Conclusion
Key Takeaways
- Understanding the parts and functions of a sewing machine is essential for mastering its use.
- Threading the machine involves identifying the thread path, inserting the upper thread, threading the needle, winding and threading the bobbin, and joining the upper and lower threads.
- Selecting the right stitch settings, such as stitch length, width, and tension, is crucial for achieving the desired look.
- Proper fabric preparation, including pressing and pinning, is essential for a seamless sewing experience.
How Hard to Use Sewing Machine?
Using a sewing machine can be easy once you understand the basics. The process involves:
Threading the machine
Winding a bobbin
Setting up the machine for your first project
Sewing machines can be intimidating at first, but with practice, you can become proficient. Beginners should start by:
Learning how to thread a machine
Adjusting the tension
Sewing a few lines of stitches
Understanding the Sewing Machine: Parts and Functions
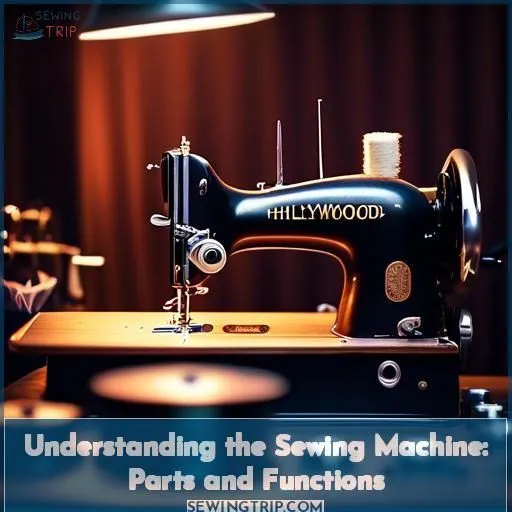
To master the fundamentals of sewing machines, it’s imperative to comprehend the components and functions of your sewing machine.
The foot control pedal serves as the initial point of engagement, enabling you to exert pressure and regulate the pace of your machine. The feed dogs, situated beneath the throat plate, gently grip the fabric and guide it through the machine, ensuring a smooth and uniform stitch. The rotating receiver houses the bobbin, which is wound with thread to provide the lower thread during stitching. The tension guide assists in maintaining the equilibrium between the upper and lower threads, preventing puckering.
The stitch selector dial allows you to select the preferred stitch type, such as straight, zigzag, or decorative stitches. The needle and presser foot collaborate to pierce the fabric and secure it in position during stitching. The tension regulator adjusts the tightness of the upper thread to prevent puckering. The thread take-up lever facilitates threading the needle and maintaining proper tension.
The pressure bar lifter raises and lowers the pressure foot, which exerts pressure on the fabric and prevents wrinkles. The stitch length regulator controls the length of the stitch, while the balance wheel raises and lowers the needle manually. The slide plate aids in removing the bobbin case without lifting the machine.
The feed dog guides the fabric forward during sewing, and the needle bar holds the needle in place. The power switch activates and deactivates the machine, and the foot pedal controls the speed of the machine. By understanding these components and functions, you’ll be on your way to mastering the basics of sewing machines.
Threading the Machine: Upper and Lower Threads
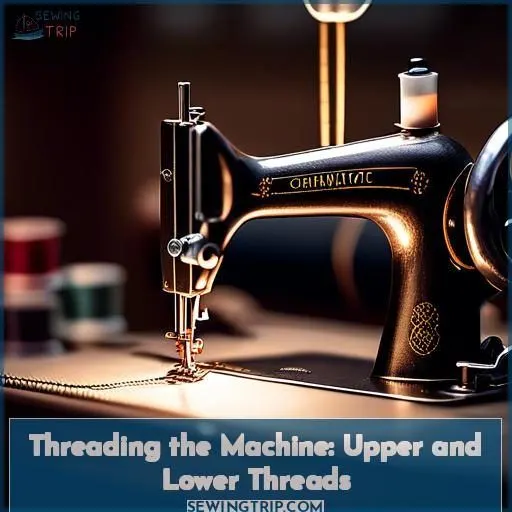
Threading a sewing machine can be an intimidating endeavor for novices, but with the right direction, it transforms into an effortless procedure. Here’s a step-by-step guide on how to thread the upper and lower threads of your sewing machine:
- Identify the Thread Path: Locate the thread path on your machine, which is typically a series of hooks and tension wheels that guide the thread from the spool to the needle.
- Insert the Upper Thread: Place the spool of thread on the spool pin, making sure the thread is wound in the correct direction. Follow the numbered guides on the machine to weave the thread through the machine.
- Thread the Needle: If your machine has an automatic threader, use it to thread the needle. If not, you can thread the needle manually by inserting the end of the thread into the needle eye from front to back.
- Wind and Thread the Bobbin: Wind the bobbin using the bobbin winder, making sure the thread is going in the correct direction. Once the bobbin is full, cut the thread and place the bobbin in the designated spot on the machine.
- Join the Upper and Lower Threads: Turn the flywheel to merge the upper and lower threads. This will guarantee that the machine stitches automatically.
Remember to follow the machine’s manual for specific instructions, as different models may have slightly different threading processes. Practice threading the machine with scrap fabric before starting your project to guarantee everything is functioning correctly.
Loading the Bobbin: Insertion and Winding
After threading your machine, it’s time to address the bobbin—a pivotal component in regulating thread tension for a seamless sewing experience. Firstly, determine your bobbin type; this guarantees compatibility and averts potential sewing machine issues in the future.
Situate your thread on the bobbin winder, and advance it in the direction of the bobbin winder pin. Activate the bobbin winder by depressing the foot pedal. Upon completion, trim the thread, and seat the bobbin within its housing underneath the bobbin cover.
This stage is indispensable for novice sewers, as it establishes the basis for fabric proficiency.
Selecting the Stitch: Types and Settings
Once you’ve threaded your sewing machine, you’ll need to adjust the stitch settings to get the perfect look. Play with the stitch length, width, and tension dials to find the right combination for your fabric and project.
Stitch Settings: Adjusting Stitch Length
Fine-tuning the stitch length on your sewing machine is essential for attaining the desired seam quality and robustness. Here are three key aspects to keep in mind when choosing the stitch length:
- Fabric type: Different fabrics necessitate different stitch lengths. Delicate fabrics, such as challis or silk charmeuse, benefit from a shorter stitch length (12-16 stitches per inch) to avoid puckering and enhance durability. Thicker fabrics, like denim, may require a longer stitch length (3 mm) to penetrate multiple layers.
- Stitch type: Certain stitch types, such as zigzag or decorative stitches, may necessitate a different stitch length than a straight stitch. For instance, a three-step zigzag stitch can be employed for mending and finishing raw edges, while a blind hem stitch is utilized with the blind hem foot when hemming fabrics.
- Seam structure: The stitch length can also influence the appearance of seams, particularly when working with curves. A shorter stitch length (12-16 stitches per inch) is more suitable for smooth curves, while a longer stitch may make the curve appear angular.
Width
To select the stitch width, consider the following factors:
- Needle size
- Presser foot type
- Fabric weight
- Thread color
- Seam allowance
The width can be adjusted using the stitch selector dial. A wider stitch may be suitable for heavier fabrics or larger seams, while a narrower stitch is ideal for lighter fabrics or delicate seams. Practice sewing with different widths to find what works best for your project.
and Tension
After nailing the width, let’s delve into tension adjustment. It’s akin to tuning a guitar; perfect it, and your stitches will harmonize.
- Match thread types to needle sizes; it’s a symphony of precision.
- Consider fabric compatibility; not all materials appreciate the same tension.
- Flawless stitch tension is your secret weapon for impeccable seams.
Preparing the Fabric: Pressing and Pinning
Before you embark on sewing, it’s imperative to adequately prepare your fabric. Employ appropriate ironing methods for your fabric’s composition to prevent damage. Commence by flattening your fabric to eliminate any blemishes or creases.
Subsequently, designate your fabric with pins or chalk to denote the intended sewing locations. Select pins suitable for your project and utilize them to fasten the layers of fabric together.
Bear in mind that thorough fabric preparation will facilitate a seamless sewing experience.
Sewing a Seam: Forward and Backstitching
Now that you’ve mastered pressing and pinning your fabric, it’s time to embark on sewing a seam. Here are five essential steps to guide you through the process:
- Needle types: Choose the right needle for your fabric type.
- Fabric compatibility: Confirm that your fabric is compatible with your needle.
- Pattern selection: Select an appropriate pattern for your project.
- Seam allowances: Determine the suitable seam allowance for your project.
- Presser foot attachment: Attach the appropriate presser foot for your project.
Troubleshooting Common Issues: Thread Tension and Jamming
Troubleshooting common issues with your sewing machine can be frustrating, but understanding the causes can help you resolve them quickly. Here are some common problems you might encounter and how to fix them:
- Thread tension: If your stitches are too loose or too tight, adjust the tension settings. Use a tiny screwdriver to turn the tension screws on the side of the bobbin case.
- Bobbin jamming: Make sure the bobbin is properly loaded and inserted into the machine. If it’s not seated correctly, the needle can hit the bobbin case and break.
- Needle breakage: Check if the needle is in the correct position. If it’s too far to the left or right, the needle can bend and break.
- Fabric puckering: Steam the fabric to relax it or re-cut it if it’s distorted, which can cause bunching and puckering when sewn.
- Tension adjustment: If your top and bottom stitches don’t look the same, adjust the tension on both the top and bottom.
Maintenance and Cleaning: Regular Care for Your Sewing Machine
To maintain the optimal performance of your sewing machine, regular cleaning and maintenance are crucial. Here’s a guide to help you achieve this:
Cleaning: Remove lint accumulation from the bobbin case using a small brush or compressed air. Eliminate dust from the needle plate, feed dogs, and hook. Clean the tension disks and threading area as well.
Oiling: Lubricate the machine with the appropriate sewing machine oil, focusing on areas like the bobbin case, near the needle clamp, and in the machine’s top.
Lubricating: Apply sewing machine lubricant to designated parts as necessary, following the manufacturer’s instructions.
Replacement Parts: Before storing the machine, replace any necessary parts, such as the needle.
Troubleshooting: Cleaning and oiling often resolve common issues. If not, consult your machine’s manual for specific troubleshooting steps.
Storage: Store your sewing machine in a temperature-controlled environment to prevent damage to its moving parts.
Always refer to your machine’s manual for specific care requirements and instructions to ensure proper maintenance.
Safety Precautions: Keeping Fingers Away From the Needle
As you embark on your sewing journey, bear in mind that the needle isn’t merely a sharp companion; it possesses a keen edge that demands respect. To safeguard your fingers while they deftly navigate the fabric, consistently employ needle guards. These invaluable safety measures serve as protective shields for your digits, akin to the armor of a valiant knight in your creative quest.
Don’t neglect finger shields and machine covers; they’re your unwavering allies in preventing a punctured pinky. Maintain a sharp mind, but not a literal sharp needle!
Advanced Techniques: Zigzag Stitching and Curves
Congratulations on mastering the basics of sewing! Now it’s time to explore the realm of advanced techniques, beginning with zigzag stitching and curved seams.
Zigzag stitching is a versatile technique that can add texture and visual appeal to your projects. It’s ideal for creating decorative elements, such as borders or embellishments. To use zigzag stitching, simply select the appropriate stitch setting on your machine and experiment with different stitch lengths and widths.
Curved seams are another advanced technique that can add elegance and fluidity to your projects. They’re commonly employed in garment construction, as well as in home décor and quilting. To sew a curved seam, start by pinning the fabric along the curve, then feed it into the machine slowly and steadily, adjusting the feed dogs as necessary for a smooth stitch.
Additionally, your sewing machine may offer a variety of decorative stitches, such as florals, scallops, and geometric patterns. These stitches can be used to add unique touches to your projects, making them truly one-of-a-kind.
For even more advanced techniques, consider exploring free-motion embroidery and buttonholes. Free-motion embroidery allows you to stitch without the feed dogs engaged, giving you complete control over the stitch direction and rhythm. Buttonholes, on the other hand, can be a challenge for beginners, but with practice and patience, you can master this skill and add a professional touch to your projects.
Frequently Asked Questions (FAQs)
What safety precautions should be taken when using a sewing machine?
Always keep your fingers away from the needle, and never try operating the machine without proper training. Wear protective eyewear, and never leave a running machine unattended. Safety comes first when using a sewing machine.
What are the common causes of sewing machine accidents and how can they be avoided?
Sew careful, my friend! Loose threads, speed wobbles, and wandering fingers can really put a kink in your stitching. Stay present, mind your mitts, and you’ll be sewing like a pro in no time.
What are the recommended maintenance practices for a sewing machine to ensure its longevity?
Regularly clean your sewing machine, oil moving parts, and store it properly. This upkeep’ll keep your machine humming smoothly for years. Make maintenance a breeze by following the manufacturer’s recommendations – your stitches will stay perfect.
What are the potential hazards associated with sewing machine needles and how can they be mitigated?
Needle mishaps are no laughing matter! Don’t let a broken needle catch you unawares – keep your eyes peeled and your fingers clear. With a little know-how, you’ll be sewing up a storm in no time flat.
What are the best practices for handling and storing sewing machine accessories, such as pins and needles?
Store needles and pins safely in magnetic trays or cases. Always cap needles after use, and double-check work area before starting. Proper handling prevents accidental sticks, ensuring a smooth, worry-free sewing experience.
Conclusion
Mastering the sewing machine is akin to uncovering a wealth of creative potential. With the steps outlined, you’ll swiftly become adept at stitching, transmuting fabrics into cherished creations.
Operating a sewing machine isn’t inherently difficult. Bear in mind, a sewing machine may appear daunting initially. Embrace the process, and you’ll experience the delight of sewing – a skill that will benefit you for many years to come.

