This site is supported by our readers. We may earn a commission, at no cost to you, if you purchase through links.
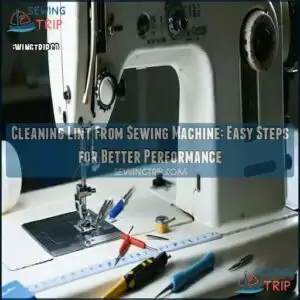
First, remove the needle plate and bobbin case, as lint loves to hide there. Use a soft brush or a mini vacuum to clear the buildup—avoid compressed air, which can push lint further inside.
A cotton swab can tackle tricky corners. Work gently to prevent damaging delicate parts.
Clean your machine regularly, especially after projects with fuzzy fabrics. Routine care also improves performance and extends your machine’s life.
Curious about vintage or industrial machine care? Stay tuned!
Table Of Contents
Key Takeaways
- Clean your sewing machine regularly, especially after using fuzzy fabrics, to avoid skipped stitches, jams, or costly repairs.
- Avoid using compressed air as it pushes lint deeper; instead, use soft brushes, mini vacuums, or tweezers for effective lint removal.
- Check and clean key areas like the bobbin case, needle plate, and tension disks to maintain smooth operation.
- Store your machine in a dust-free, humidity-controlled area with a cover to prevent lint buildup and protect it from damage.
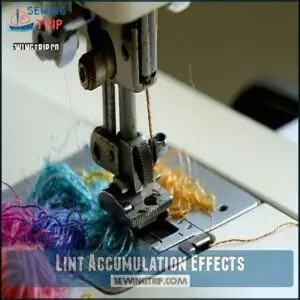
Lint Accumulation Effects
Lint buildup in your sewing machine doesn’t just collect quietly—it disrupts performance and causes skipped stitches, needle strikes, or even misaligned bobbin cases.
Lint isn’t harmless—it sabotages stitching, slows performance, and leads to costly repairs if ignored. Clean regularly for smooth sewing.
Over time, this hidden accumulation can lead to costly repairs and frustrating interruptions in your projects, which can be prevented by addressing the issue of lint buildup.
Machine Performance Issues
Lint accumulation can throw a wrench in your sewing machine performance.
It leads to poor stitch quality and slows fabric feed, making projects frustrating.
Watch for these signs:
- Speed reduction from motor strain.
- Unusual noise increase during operation.
- Uneven or skipped stitches caused by internal buildup.
- Mechanical jamming, affecting movement.
Regular lint removal keeps your machine running smoothly.
Skipped Stitches
Skipped stitches can ruin your sewing flow. Often, they’re caused by hidden lint disrupting needle timing or tension settings.
Factors like needle condition, thread quality, or fabric type make this worse. Regular sewing machine cleaning, especially around the bobbin area, fixes such issues.
Here’s how skipped stitches compare to other problems:
The comparison highlights the importance of addressing lint buildup and maintaining proper tension settings to prevent issues like uneven tension and poor stitching.
Needle Strikes
Needle strikes occur when lint disrupts machine timing, causing bent needles or needle plate damage.
Improper sewing machine cleaning worsens issues.
To combat this, follow these steps:
- Checking for lint under the needle plate.
- Using a sewing machine cleaning brush to clear debris.
- Removing lint near the needle area.
- Avoiding fiber-heavy fabrics without cleaning.
- Regularly inspecting for needle deflection causes.
Bobbin Case Misalignment
A misaligned bobbin case can cause chaos, leading to frustrating needle strikes or skipped stitches.
Excess sewing machine lint is often the culprit, pushing the case out of position.
Prevent this by regularly removing lint during sewing machine cleaning. A key step is to verify you’re using the correct foot-size for your machine.
If adjustment methods don’t work, consider professional help. Repair costs rise when lint buildup creates deeper damage, so act promptly.
Cleaning Methods Warning
When cleaning your sewing machine, it’s tempting to use quick fixes like compressed air to handle lint buildup.
Compressed air scatters lint deeper into your machine, causing hidden damage—stick to safe tools for effective cleaning.
Don’t.
Compressed air might scatter lint deeper into the machine, causing long-term damage and making future cleaning harder.
Improper tool harm is another risk—using unapproved gadgets could scratch parts or misalign mechanisms.
Avoiding shortcuts is key; rushing this step can hurt your machine in the long run.
Experts strongly discourage compressed air, emphasizing it relocates rather than removes sewing machine lint.
Monthly maintenance should include essential oil lubrication to guarantee smooth operation.
Stick to sewing machine cleaning tools recommended by manufacturers, such as soft brushes and micro vacuums.
Proper care guarantees smoother stitching and preserves your investment.
Remember, effective sewing machine cleaning requires patience—not risky, damaging shortcuts or misinformed advice.
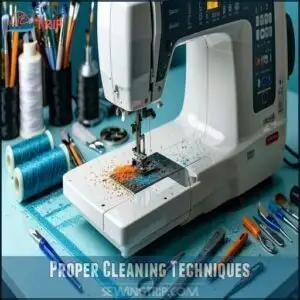
Proper Cleaning Techniques
You need to clean your sewing machine properly to keep it running smoothly and avoid costly repairs. Use the right tools and techniques to remove lint without damaging delicate parts.
Using Manufacturer Tools
Manufacturer-approved methods guarantee safe usage and protect your machine’s warranty.
Using the right tools keeps sewing machine lint buildup in check.
Follow these steps:
- Use the cleaning brush provided in your kit for regular cleaning.
- Choose manufacturer-recommended brush types for specific parts.
- Stick to manufacturer-approved methods for proper maintenance.
- Avoid generic kits that may damage your sewing machine, which can affect your machine’s warranty.
Avoiding Compressed Air
While using manufacturer tools guarantees precise lint removal, avoid compressed air at all costs.
It relocates sewing machine dust deep inside, causing hidden damage and internal buildup.
Experts recommend safe methods like brushing or suction instead.
Check out this comparison:
| Method | Pros | Cons |
|---|---|---|
| Brushes | Gentle and precise | Time-consuming |
| Mini vacuum | Effective on fabric lint removal | May require additional tools |
| Compressed air | Quick and accessible | Risks sewing machine lint buildup |
Choose expert alternatives for thorough cleaning without complications!
Regular Maintenance Schedule
Sticking to the right cleaning schedule keeps your sewing machine running smoothly and lint-free.
Tailor your routine to usage patterns and fabric types:
- Clean every 8-10 hours of use.
- Dust surfaces after each session.
- Remove lint after sewing with cotton or fuzzy threads.
- Oil as per lubrication needs.
- Deep-clean monthly for peak performance.
Consistency makes sewing stress-free!
Annual Servicing
An annual sewing machine service keeps your machine humming like new and saves you from costly repairs later.
Authorized stores and professional expertise guarantee thorough cleaning, lubrication, and part inspections. This complements your regular maintenance schedule nicely.
Check out this quick comparison of benefits:
| Task | DIY Maintenance | Annual Servicing | Cost Considerations |
|---|---|---|---|
| Basic Cleaning | ✓ | ✓ | Low |
| Lubrication | Limited | ✓ | Moderate |
| Deep Inspections | ✗ | ✓ | Higher |
| Long-term Benefits | ✓ | ✓✓ | Worth It |
The table highlights the key differences between DIY maintenance and annual servicing, including the level of expertise required for each task, and the potential long-term benefits of regular servicing.
Effective Cleaning Tools
You’ll need the right tools to keep your sewing machine free of lint and running smoothly.
Soft brushes, tweezers, and mini vacuums are just a few essentials that help you clean effectively without damaging delicate components.
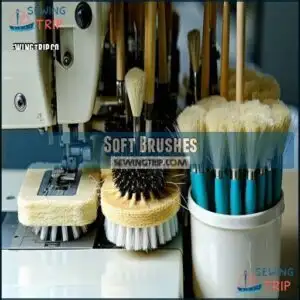
Soft Brushes
Soft brushes are your sewing machine’s best friend for fighting lint. They’re gentle on delicate fabrics and perfect for tricky spots.
Choose one with the right bristle type and brush size to tackle debris without scratching surfaces. Look for ergonomic handles for comfort and manage brush storage properly to keep it clean and ready.
Regular cleaning helps in preventing wear and tear.
- Opt for soft-bristled brushes.
- Use appropriately sized brushes.
- Keep brushes stored hygienically.
Dental Picks
Dental picks are a precision tool for delicate cleaning in tight spaces. They let you remove lint without damaging sensitive areas.
Verify they’re smooth-tipped for material compatibility. Handle with care to avoid scratches during sewing machine cleaning.
Many users find specialized dental picks particularly useful for this task.
Here’s a quick comparison:
| Feature | Benefit | Tip for Safe Usage |
|---|---|---|
| Small tip size | Precision access | Use gently near needles |
| Durable material | Long-lasting use | Avoid excessive force |
| Rust-free metal | Maintains hygiene | Wipe after each use |
| Fine-point design | Effective lint removal | Target small crevices |
| Ergonomic handle | Easier control | Hold with steady grip |
The key to effective use is to use gently and avoid excessive force, ensuring the durable material and rust-free metal properties are utilized for long-lasting use and to maintain hygiene.
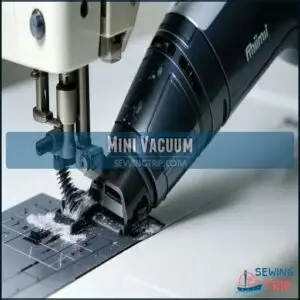
Mini Vacuum
A mini vacuum is a game-changer for sewing machine cleaning.
It’s compact, and with vacuum attachments, you can easily remove lint from hard-to-reach spots.
Cordless vacuums add convenience as you clean around tight spaces. Avoid compressed air—it just pushes lint deeper.
With proper vacuum power, routine cleaning becomes faster.
Find cleaning supplies for your mini vacuum.
Store your mini vacuum nearby for effortless cleaning sessions.
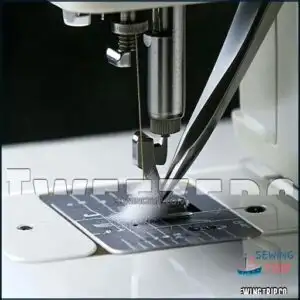
Tweezers
Tweezers are great for sewing machine cleaning lint in tight spaces.
Opt for ergonomic tweezers with fine tips for precision tweezing. Material matters—choose stainless steel for durability.
Use them to gently remove lint from the bobbin case or feed dogs without causing damage.
Many prefer specialized sewing tweezers for this task. If tweezers aren’t available, alternative tools like dental picks can work in a pinch.
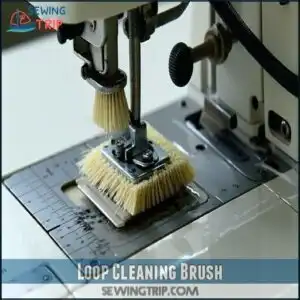
Loop Cleaning Brush
A loop cleaning brush is a must-have for lint removal in tricky spots.
Its compact design and bristle material make it ideal for precision cleaning.
To maintain its brush effectiveness, clean and store it properly after use.
If unavailable, consider brush alternatives like small paintbrushes.
These sewing machine cleaning tips guarantee thorough lint removal, boosting performance and preventing future issues, which is crucial for precision cleaning.
Step by Step Cleaning
Follow these step-by-step instructions to clean lint from your sewing machine safely and effectively. Each step guarantees your machine stays in great condition and operates smoothly.
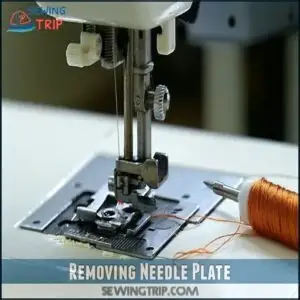
Removing Needle Plate
To access lint beneath the needle plate, start by identifying your needle plate type. Sometimes you’ll need a screwdriver; other times, a release button does it.
Remove the screws carefully and set them aside. Use a cleaning brush to clear debris underneath.
Make sure the plate isn’t damaged before reinstallation. Proper sewing machine cleaning prevents lint troubles!
Be sure to use the correct screwdriver types and sizes for your machine.
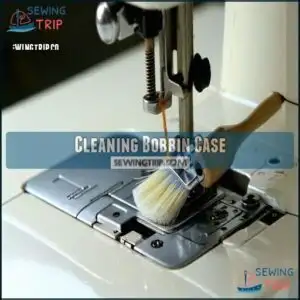
Cleaning Bobbin Case
Start by removing the bobbin case carefully—this area traps lint from fabrics like fleece or flannel.
Use a small brush or tweezers for detailed cleaning, focusing on hidden lint spots. Inspect for tension adjustments if misalignment is noticed.
Once complete, reassemble the bobbin case securely to prevent reassembly challenges.
Regular sewing machine cleaning guarantees smooth bobbin performance and prevents lint buildup.
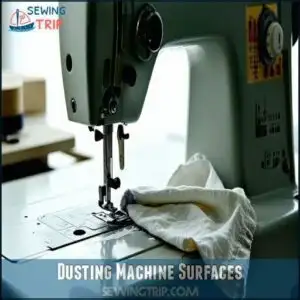
Dusting Machine Surfaces
After cleaning the bobbin case, focus on wiping your machine’s exterior.
Use a soft, lint-free cloth slightly dampened with a surface cleaner. Gently dust all exterior materials, including corners and crevices.
This quick step contributes to lint prevention and keeps your sewing machine looking sharp.
Always follow sewing machine maintenance advice and store in a dust-free space for lasting performance, ensuring your machine remains in good condition for lasting performance.
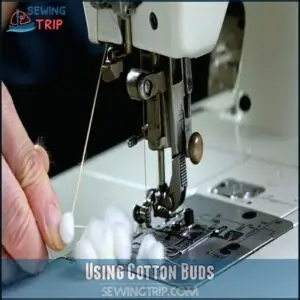
Using Cotton Buds
When tackling hard-to-reach areas, cotton buds work wonders for sewing machine cleaning. Opt for the right size and soft material to avoid scratches.
Here’s how to use them effectively:
- Gently twirl the bud to lift lint.
- Use light pressure to maneuver tight spaces.
- Replace used buds to maintain efficient lint removal in delicate machine parts, which is crucial for effective cleaning and to avoid damages.
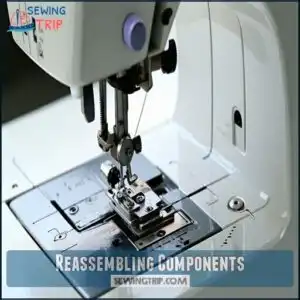
Reassembling Components
Once your sewing machine cleaning is done, carefully reassemble all parts.
Use a Bobbin Case Photo to confirm proper placement. Align the needle plate before securing screws. Check tension disks for lint and make certain the presser foot attachment is tight.
Keep screws sorted during disassembly to avoid confusion.
The table below simplifies key steps:
| Part | Step | Tool Needed | Key Tip |
|---|---|---|---|
| Bobbin Case | Reinsert carefully | None | Use a photo for reference. |
| Needle Plate | Align and secure | Mini screwdriver | Verify alignment before tightening. |
| Tension Disk | Inspect and adjust | Brush | Remove lint; don’t overtighten. |
| Presser Foot | Attach securely | None | Verify stability for smooth sewing. |
The key steps are crucial for the reassembly process and ensuring that your sewing machine is in good working condition, with a properly secured presser foot and correctly aligned needle plate, which is essential for efficient sewing and to prevent any potential damage to the machine.
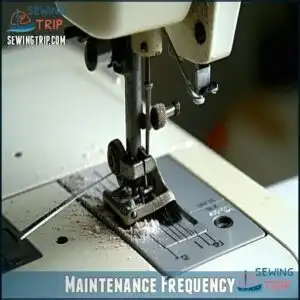
Maintenance Frequency
Keeping up with a regular cleaning schedule prevents lint buildup and keeps your sewing machine running smoothly.
You’ll want to adjust your maintenance frequency based on how often you sew and the types of fabrics you use.
Cleaning After Use
After each session, give your sewing machine a quick clean to prevent lint buildup. Immediate cleaning benefits include avoiding skipped stitches and long-term damage.
Fabric type matters—lint-prone fabrics like fleece need extra attention.
Here’s how:
- Use a soft brush to sweep visible lint.
- Wipe surfaces with a microfiber cloth.
- Remove stuck fibers near the bobbin case.
Weekly Cleaning
A weekly cleaning routine keeps your sewing machine running smoothly.
Focus on lint-heavy areas like the bobbin case and feed dogs—usage intensity and fabric matters.
Use soft brushes or a mini vacuum, avoiding shortcuts like compressed air.
Regular sewing machine cleaning isn’t optional; it’s a must for long-lasting performance.
Preventative measures now save you costly repairs later.
Monthly Cleaning
Every month, give your sewing machine a thorough deep cleaning to prevent lint buildup and guarantee smooth performance.
Focus on hard-to-reach areas like the bobbin case and under the needle plate.
Use tools like soft brushes and a mini vacuum for effective lint prevention.
Following a regular cleaning schedule keeps your machine reliable and reduces the impact of fabrics on maintenance.
Annual Professional Maintenance
Once a year, investing in professional servicing at an authorized store guarantees your sewing machine stays in top shape.
Technicians follow a thorough maintenance checklist, addressing deep lint buildup and confirming smooth operation.
Dealer service often supports warranty requirements, offering cost justification through extended machine life and fewer repairs.
Regular sewing machine servicing saves you time, hassle, and money, and supports smooth operation.
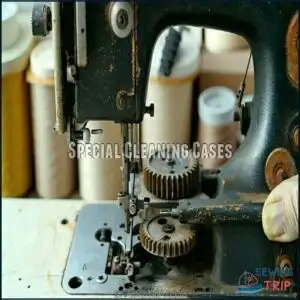
Special Cleaning Cases
Some sewing machines require extra care due to their unique designs or materials, like vintage or industrial models.
You’ll need specific tools and techniques to handle tasks like rust removal, lubrication, or proper storage to keep them functioning smoothly, which is crucial for proper storage.
Vintage Machines
Cleaning vintage machines like antique Singers requires care to preserve their value.
Follow these tips:
- Wipe surfaces gently with a soft cloth.
- Remove lint using toothpicks or small brushes for intricate areas.
- Apply proper lubrication with sewing machine oil, avoiding harsh chemicals.
- Source replacement parts carefully for restoration.
Regular sewing machine cleaning guarantees smooth operation and protects delicate mechanisms.
Industrial Machines
Maintaining industrial machines is essential, especially with heavy-duty lint from high production volume and varied fabrics.
Avoid compressed air—it forces lint deeper. Focus on oiling systems and motor maintenance after detailed cleaning.
| Step | Action | Tools Needed | Notes |
|---|---|---|---|
| Remove Needle Plate | Access feed dogs and bobbin case | Screwdriver, soft brush | Clear visible lint thoroughly |
| Clean Bobbin Case | Remove compacted lint | Tweezers, loop brush | Delicate handling required |
| Dust Surfaces | Wipe down machine thoroughly | Soft cloth, mini vacuum | Prevent surface lint buildup |
| Oil Mechanisms | Lubricate moving parts | Sewing machine oil | Reduces friction, improves lifespan |
The provided steps are crucial for the proper maintenance of sewing machines, ensuring they run smoothly and efficiently.
Removing Rust
Rust can sneak onto your sewing machine if moisture lingers.
Start with steel wool and clear oil to gently scrub off corrosion. For tougher spots, a kerosene alternative like paraffin works wonders.
Prioritize rust prevention by storing the machine in a dry spot and inspecting parts regularly.
Consistent care protects your machine, ensuring smooth sewing sessions.
Lubricating Hook
After tackling rust, let’s talk about keeping your hook mechanism smooth. Lubrication is key for a quiet, efficient machine.
Clean the lint from the hook race first, then apply sewing machine oil sparingly to the lubrication points. For machines with a CB hook, regular maintenance is vital to maintain excellent stitch quality.
- Use only recommended oils.
- Align the hook properly for smooth operation.
- Avoid over-oiling to prevent mess.
- Reassemble carefully for superior results.
Storing Machine
Storing your sewing machine properly protects it from lint and damage.
Use dust-free covers, control humidity levels, and keep it in a temperature-controlled, pet-free zone.
Avoid direct sunlight and store it carefully during transport.
Proper storage guarantees longer machine life.
| Essential Tips | Why They Matter |
|---|---|
| Use dust-free covers | Stops lint buildup |
| Control humidity levels | Prevents rust and corrosion |
| Avoid sunlight | Maintains machine materials |
| Pet-free storage area | Reduces hair and dander issues |
| Safe transport | Avoids internal misalignment |
The key to maintaining your sewing machine is to store it carefully, avoid direct sunlight, and ensure it is in a temperature-controlled environment.
This will help prevent rust and corrosion and maintain the overall health of your machine.
Frequently Asked Questions (FAQs)
Can you use an air duster on a sewing machine?
Imagine a puff of air scattering lint like confetti.
Using an air duster on a sewing machine isn’t ideal—it pushes debris deeper inside, creating future headaches.
Stick to brushes or mini vacuums instead.
How to clean sewing machine tension disks?
To clean sewing machine tension disks, raise the presser foot.
Then gently slide a soft, lint-free cloth, thread, or dental floss between the disks.
Avoid harsh pressure to prevent misalignment or damage.
Can lint cause overheating in sewing machines?
When lint clogs critical areas, your sewing machine struggles to breathe, generating heat and risking motor strain.
Regular cleaning prevents overheating, guarantees smoother stitching, and keeps your beloved machine running as cool as a cucumber.
What fabrics produce the most sewing lint?
Fabrics like fleece, flannel, minky, and wool generate the most lint during sewing due to their loose fibers.
Cotton and knits also shed substantially, especially when cut.
Always clean regularly to prevent lint buildup.
How to store machine to reduce lint?
Store your sewing machine in a dust-free area with a cover or case.
Keep it away from fabric piles, pet areas, and humid spaces.
Use a clean, dry cloth to wipe surfaces before covering.
Are ultrasonic cleaners safe for sewing machines?
Think of ultrasonic cleaners like power tools—they’re effective but risky for sewing machines.
The vibrations can damage delicate parts and dislodge essential components.
Stick to brushes, tweezers, and vacuums for safe, thorough cleaning instead, avoiding the risks associated with ultrasonic cleaners.
Conclusion
Regularly cleaning lint from your sewing machine is the secret to keeping it running smoothly.
Neglecting this simple task can cause skipped stitches, jams, or costly repairs.
By sticking to a routine, using the right tools, and avoiding compressed air, you’ll extend your machine’s life and enjoy better sewing performance.
Whether you’re working with delicate materials or fuzzy fabrics, a lint-free machine guarantees precision and reliability.
Take a few minutes after each project—your machine will thank you.

