This site is supported by our readers. We may earn a commission, at no cost to you, if you purchase through links.
Start by choosing a lightweight, drapey fabric like jersey or silk for that perfect flow. Cut your pattern pieces carefully, ensuring the grain lines match for a smooth drape.
Sew the center back seam, then attach the front and back sections. To construct the cowl neck, fold and stitch the collar piece, aligning it neatly with the neckline.
Finish by hemming the bottom edge and sleeves for a polished look. Press your seams for a crisp finish, and voilà—your stylish cowl neck top is ready to wear!
Table Of Contents
Key Takeaways
- Choose lightweight, stretchy fabrics like jersey or silk for a smooth drape and polished look.
- Cut pattern pieces carefully, aligning with grain lines to ensure proper fit and professional results.
- Use stretchy stitches and press seams thoroughly to secure the cowl neck and maintain its elegant flow.
- Finish edges with precision, including hems and sleeves, for a clean, professional finish.
Sewing Cowl Neck Basics
To sew a cowl neck top, you’ll start by cutting out your pattern pieces carefully, ensuring the fabric’s stretch aligns correctly.
Start your cowl neck top with precision—cut pattern pieces carefully, aligning fabric stretch for a flawless, professional drape.
Choosing the right fabric and taking accurate measurements are key steps to achieving a polished and comfortable fit.
Cutting Out Pattern Pieces
Starting your cowl neck tutorial? Nail the cutting process by following these steps:
- Pattern Layout: Lay pieces efficiently to minimize fabric waste.
- Grain Alignment: Align pieces with grain lines for a polished drape.
- Cutting Accuracy: Use sharp scissors or a rotary cutter for clean edges.
- Notch Placement: Mark notches carefully—they’re sewing lifesavers!
Using quality sewing scissors can substantially improve accuracy.
Keep your top cowl pattern precise!
Measuring for Perfect Fit
Before sewing your cowl neck collar, get Accurate Body Measurements to guarantee a perfect fit.
Focus on Pattern Size Selection, Neckline Circumference, and Cowl Drape Calculation.
Use the table below to guide you:
| Measurement | Purpose | Tools Needed |
|---|---|---|
| Bust | Pattern size fit | Measuring tape |
| Neckline | Collar attachment fit | Flexible ruler |
| Shoulder width | Seam alignment | Measuring tape |
| Front length | Cowl drape calculation | Measuring tape |
| Armhole depth | Sleeve fit | Measuring tape |
Muslin Fitting Adjustments can refine your fit before cutting final fabric, ensuring a perfect fit with proper seam alignment and cowl drape calculation.
Choosing Right Fabric
After measuring for fit, focus on fabric drape and weight.
Lightweight options like silk or jersey create flowy cowl neck designs, while heavier knits add structure.
Fiber content affects stretch and comfort, so choose wisely for your diy cowl neck.
Knit fabric choices impact the final product.
Test fabric handling by holding it on the bias.
Color choices also shape your sewing cowl neck collar project’s final look, considering the overall visual appeal.
Preparing Fabric Pieces
Start by laying out your fabric with the wrong sides together, making sure the stretch runs across the width.
Carefully align your pattern pieces with the grain lines for accurate cutting and a polished fit.
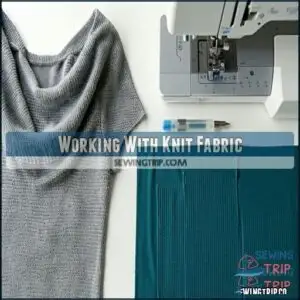
Working With Knit Fabric
When working with knit fabric for your diy cowl neck top, choose stretchy options like jersey or ribbed knit.
Check stretch percentages to confirm proper drape for the cowl neck collar. Use a ballpoint needle to prevent snags and skipped stitches.
Stabilize knits with clear elastic for durability. For best results, consider using a walking foot attachment to prevent stretching.
Finish seams neatly with a serger for a polished look.
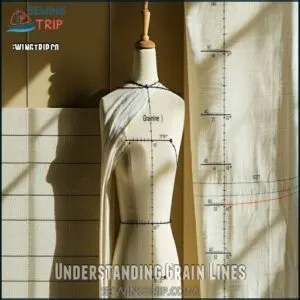
Understanding Grain Lines
Understanding fabric grain is key to a polished cowl neck top.
Grain direction affects drape and fit, so align your sewing pattern DIY with the fabric’s grain lines.
- Match the cutting layout to the grain.
- Avoid skewing the bias grain.
- Check for grain importance in your cowl neck guide.
- Follow cowl neck instructions precisely.
- Verify proper alignment for your DIY sewing project to ensure a polished finish.
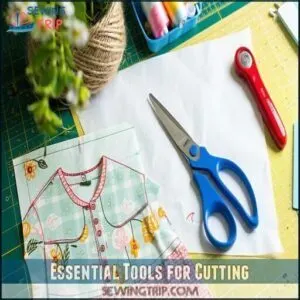
Essential Tools for Cutting
Grain lines mastered? Great! Now, for smooth cutting, grab fabric scissors or rotary cutters for clean edges.
Use a cutting mat to protect surfaces and pattern weights to keep templates steady—no pins snagging your fabric! A seam ripper is handy for quick fixes.
To guarantee the best results, selecting high-quality cutting tools is essential. These tools make any diy sewing project, like following cowl neck instructions, an easy sewing project success.
Assembling Cowl Neck Top
Now it’s time to bring your cowl neck top to life by stitching the pieces together.
You’ll start by sewing the center back seam, attaching the front section, and constructing the collar for a polished look.
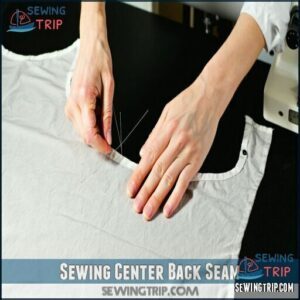
Sewing Center Back Seam
Start by pinning the back pieces together along the center seam, guaranteeing fabric stability.
Use a 5/8” seam allowance and adjust your stitch length for a smooth finish.
After stitching, serge the seam or use another finishing technique.
Pressing techniques are key here—press the seam flat for a polished appearance.
This sewing tutorial step guarantees a neat cowl neck variation.
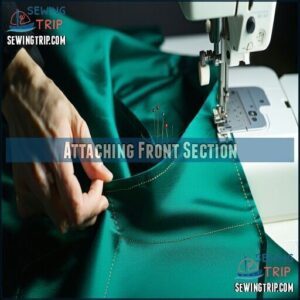
Attaching Front Section
After stitching the back seam, align the front section with the back, guaranteeing proper Front-Back Alignment.
Match notches carefully to keep the sewing cowl neckline smooth.
Use a 5/8” Seam Allowance, maintaining steady Fabric Tension to Prevent Puckering.
This step in the sew along tutorial guarantees a polished base for your cowl neck variation, perfect for any top sewing pattern.
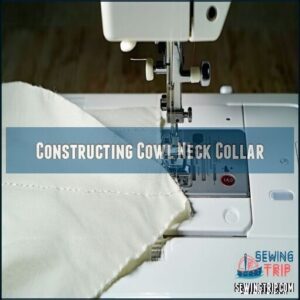
Constructing Cowl Neck Collar
Once the front section is attached, focus on constructing the cowl collar.
Construct the cowl collar with precision for a smooth drape that elevates your top’s elegant design.
Place collar pieces right sides together and sew along the wider edge, stopping 1/4" from the raw edge.
Trim seam allowances, press flat, and align with the neckline.
Explore a cowl collar tutorial for additional guidance.
Use a stretchy stitch for the sewing cowl neckline process, ensuring a smooth drape and secure collar shape.
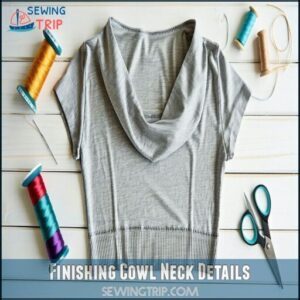
Finishing Cowl Neck Details
You’re almost done, but finishing the details is key to a polished look.
Let’s hem the bottom edge, tidy up the sleeves, and secure the neckline for a clean, professional finish.
Hemming Bottom Edge
For a polished finish, hemming the bottom edge requires precision.
Use these sewing techniques:
- Curved Hems: Ease fabric gently to prevent puckering.
- Mitered Corners: Fold neatly at corners for sharp edges.
- Hem Facing: Add support to lightweight fabrics.
Secure with a blind stitch or serged hems for durability.
These sewing tips and tricks elevate your DIY sewing tutorial!
Finishing Sleeve Edges
Once your bottom hem is complete, it’s time to tackle the sleeve edges. Decide between Sleeve Hems, Cuffs Options, or Edge Bindings for a clean finish.
Use these sewing techniques for precision:
| Method | Tools Needed | Best For | Difficulty Level |
|---|---|---|---|
| Sleeve Facings | Fabric, Pins | Structured Sleeves | Moderate |
| Decorative Stitches | Thread, Machine | Stylish Details | Easy |
| Cuffs Options | Elastic, Fabric | Adjustable Fit | Advanced |
| Edge Bindings | Bias Tape, Clips | Durable Edges | Moderate |
Keep edges neat for a polished look!
Creating Secure Neckline
Once sleeves are finished, it’s time to secure the neckline. For a custom cowl neck, follow these steps:
- Use a stretchy stitch to attach the self-lined collar.
- Align seams and maintain a 5/8” seam allowance.
- Press the neckline stabilizing seam downward.
- Try topstitching options to prevent flipping.
- For best results, trim seam allowances before topstitching.
- Verify clean neckline finishing for polished collar construction.
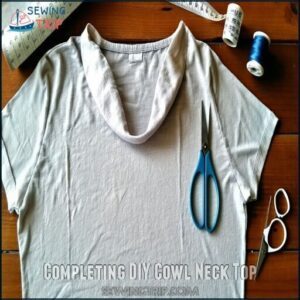
Completing DIY Cowl Neck Top
You’re almost done, so it’s time to focus on those final steps that bring everything together.
From hand-tacking the cowl neck to pressing seams and adding small finishing details, these steps guarantee your top looks polished and professional.
Hand-Tacking Cowl Neck
Hand-tacking is a subtle way to secure your custom cowl neck.
Use invisible stitches to anchor the drape at key points, ensuring it stays in place. This temporary fix lets you tweak the fit before finalizing.
Here’s a quick guide:
| Tacking Techniques | Purpose | Tools Needed |
|---|---|---|
| Invisible Stitches | Securing Drape | Needle, Thread |
| Temporary Fix | Adjusting Fit | Pins, Seam Ripper |
| Neckline Finishing | Polished Handmade Tops | Pressing Cloth, Iron |
Master this for flawless handmade tops!
Pressing Seams for Finish
You’re almost done! Pressing seams gives your garment that professional touch.
Use a seam roll to open tricky areas and a pressing cloth to protect delicate fabrics.
Focus on:
- Flattening flat fell seams.
- Neckline seam pressing for a smooth finish.
- Topstitching techniques to secure seams.
- Reducing bulk in seam allowances.
- Perfecting your garment finishing.
These sewing tips elevate your sewing process!
Adding Final Touches
Finish your cowl neck project with flair! Secure seams with topstitching options for added durability and style.
Explore hemming variations to match your design. For neckline security, press and stitch carefully to prevent flipping.
For a cleaner finish, consider trimming seam allowances after sewing. Add embellishment ideas like decorative stitches or subtle trims for personality.
These sewing tips and tricks guarantee your DIY fashion sewing project shines as a polished masterpiece.
Frequently Asked Questions (FAQs)
How to make a cowl neck?
It’s funny how simple it’s to make a cowl neck.
Cut a wide, stretchy fabric piece, sew edges into a tube, and attach it to a scooped neckline.
Press for a polished drape.
How do you sew a cowl neck top?
Start by cutting fabric pieces, ensuring stretch runs horizontally.
Sew the back, shoulders, and sides.
Attach the collar by aligning seams, then press and topstitch.
Finish with sleeves, hem, and pressing for a polished look.
Should you sew a cowl collar on a Renfrew Top?
Sewing a cowl collar on a Renfrew Top is worth it—it elevates the design effortlessly.
Align notches carefully, use stretchy stitches for durability, and press seams neatly.
The result? A polished, professional-looking finish.
How do you sew a cowl on a dress?
Pin the cowl’s raw edge to the neckline, aligning notches and seams.
Use a stretchy stitch to sew them together.
Press the seam downward, topstitch if desired, and let the cowl drape naturally.
How do you make a cowl-neck knit top?
Cut your fabric pieces, ensuring stretch runs across.
Sew the back, shoulders, and sides.
Create and attach the self-lined cowl neckline, aligning notches.
Attach sleeves, finish seams, and hem for a polished look.
How do you sew a collar on a Renfrew Top?
Align the collar pieces’ right sides together, sew along the unnotched edge, and press the seam open.
Attach the collar to the neckline, matching notches, and topstitch to secure.
Press for a polished finish.
How do you sew a collar on a dress?
It’s funny how a collar can transform a dress.
Place the collar’s right sides together, align notches, and pin.
Sew with a 5/8” seam allowance, press downward, and topstitch for a polished finish.
How do I make a self facing cowl top?
Start by cutting your neckline with a deeper scoop for proper drape.
Sew two identical collar pieces together along the wider edge, then attach them to the neckline, aligning seams carefully for a polished finish.
What is the best fabric for a cowl neck top?
Imagine water cascading smoothly over rocks—that’s how your fabric should drape.
Lightweight knits, silk, or rayon blends work best for cowl neck tops, offering fluidity and stretch to achieve that elegant, flowing effect.
How do you get a cowl neck to sit right?
To get a cowl neck to sit right, make certain the fabric drapes smoothly by cutting it on the bias or using stretchy material.
Adjust the neckline scoop and secure seams evenly for balanced, natural folds.
Conclusion
Just like piecing together a puzzle, sewing your DIY top with a cowl neck collar becomes simple when you follow these steps.
With the right fabric, careful cutting, and precise stitching, you’ll create a polished, stylish piece that’s uniquely yours.
Don’t skip pressing your seams—it’s the secret to a professional finish.
Whether it’s your first sew-along or you’re a seasoned pro, this project is a rewarding way to master the art of crafting a custom wardrobe.

