This site is supported by our readers. We may earn a commission, at no cost to you, if you purchase through links.
There are plenty of easy sewing mistakes to fix that’ll have your projects looking pro in no time.
Crooked seams? No problem! Just unpick and re-stitch, or use decorative topstitching to camouflage them.
Accidentally made a hole? Patch it up with a cute appliqué or embroidery.
Too-small garment? Add a stylish side panel or some strategic pleats.
Remember, even seasoned sewists make mistakes – it’s all part of the creative process.
With a little ingenuity and these quick fixes, you’ll be turning those "oops" moments into "aha!" triumphs.
But wait, there’s more to learn about conquering common sewing challenges…
Table Of Contents
- Key Takeaways
- Common Sewing Mistakes to Fix
- Preventing Thread Breakage and Tangles
- Fixing Fabric Feed Issues
- Mastering Basic Sewing Techniques
- Troubleshooting Common Sewing Machine Issues
- Overcoming Beginner Sewing Blunders
- Easy Fixes for Seaming Issues
- Simple Solutions for Sewing Machine Troubles
- Quick Fixes for Common Sewing Mistakes
- Advanced Troubleshooting Techniques for Sewing
- Frequently Asked Questions (FAQs)
- Conclusion
Key Takeaways
- You’ll improve your sewing skills by mastering proper thread tension adjustment to prevent issues like loose stitches or thread breakage, and proper tension adjustment, fabric handling, and presser foot pressure control.
- Don’t be afraid to use your seam ripper; unpicking and redoing stitches is a normal part of the learning process.
- Regular machine maintenance, including checking and adjusting the bobbin tension knob, and cleaning and oiling, will prevent many common sewing issues.
- When facing complex problems, use diagnostic tools and don’t hesitate to seek professional help if needed.
Common Sewing Mistakes to Fix
You’ll be amazed at how quickly you can fix those pesky sewing mistakes that make your projects look less than perfect.
Whether it’s wonky seams or tangled threads, we’ve got the solutions that’ll transform your sewing from frustrating to fantastic.
Inconsistent Seam Allowance
Your seam allowance’s consistency can make or break your project – literally!
Think of it as your sewing GPS; when you veer off course, things get wonky fast.
Try using your machine’s seam guide or stick masking tape as a DIY guide on the throat plate.
Better yet, invest in a magnetic seam guide – it’s a game-changer for keeping those lines straight and your projects professional-looking.
Improper Thread Tension
Thread tension troubles can turn a perfect project into a puckered mess faster than you can say "bobbin."
Think of tension like a perfect dance between the top and bottom threads – when they’re in sync, magic happens.
To avoid common sewing mistakes like skipped stitches, it’s essential to check your sewing machine skipping stitches solution. Let’s get those stitches looking pro-level with these quick fixes:
- Check if loops appear on top (loosen upper tension) or bottom (tighten it)
- Test tension on scrap fabric first – it’s like a dress rehearsal
- Clean the tension discs regularly – they’re often the hidden culprit
Incorrect Fabric Handling
While perfect tension sets the stage, handling fabric like a pro makes all the difference. Let’s explore some game-changing fabric handling tips that’ll transform your sewing game. Think of fabric as a dance partner – it needs the right moves and respect to perform beautifully.
| Common Issue | Quick Fix | Pro Tip |
|---|---|---|
| Stretching | Hold firmly, don’t pull | Use stabilizer for knits |
| Misaligned grain | Check arrows on pattern | Cut on single layer |
| Fabric bunching | Guide gently | Let feed dogs do the work |
| Wrong prep | Pre-wash fabrics | Test on scraps first |
Insufficient Presser Foot Pressure
Proper fabric feeding starts with getting the presser foot pressure just right, as it controls the downward force on fabric and guarantees consistent fabric feeding and stitch quality.
Think of it as a dance partner – too loose, and your fabric wanders off beat, causing skipped stitches and puckering.
Too tight, and it’ll leave unwanted marks or cause fabric slippage.
Adjusting presser foot pressure can make a big difference in the sewing experience, and learn more about adjusting presser foot pressure.
Try adjusting the pressure dial on top of your machine, testing with scrap fabric until you find that sweet spot for smooth, even stitching.
Incorrect Needle Choice
Getting your needle game right makes all the difference between smooth sailing and choppy waters in your sewing journey.
Now that you’ve mastered presser foot pressure, let’s tackle needle selection.
Here’s what you need to know:
- Match universal needles (size 80/12) with lightweight cottons
- Use ballpoint needles for stretchy fabrics to prevent snags
- Pick leather needles for thick materials like vinyl
- Switch to microtex needles for silks and delicates
Preventing Thread Breakage and Tangles
You’ve probably experienced that frustrating moment when your thread snaps mid-stitch or turns into a bird’s nest under your fabric.
With the right thread tension and a few smart techniques you’ll learn here, you can say goodbye to those pesky thread troubles and get back to enjoying your sewing projects.
Proper Thread Tension Techniques
Just like Goldilocks seeking the perfect porridge, you’ll need to find the right thread tension for flawless stitches.
Start by testing your thread tension on a scrap piece of fabric that matches your project.
You’ll know you’ve hit the sweet spot when both sides look identical – no loops or puckers in sight.
| Tension Issue | Quick Fix |
|---|---|
| Top Loops | Lower Top Tension |
| Bottom Loops | Increase Top Tension |
| Puckering | Decrease Both Tensions |
| Skipped Stitches | Clean and Rethread |
| Thread Breaking | Check Guide Path |
Avoiding Tangles and Knots
Now that you’ve got your tension dialed in, let’s tackle those pesky tangles and knots.
Ever feel like your thread’s playing a game of cat’s cradle?
Here’s the scoop: start by threading your machine correctly.
Double-check your bobbin’s seated right, and always pull both threads to the back before you start sewing.
Slow and steady wins the race – ease up on that pedal, speedster!
Using The Right Thread Type
Choosing the right thread type can make or break your sewing project.
Match thread weight to your fabric; lightweight for delicate fabrics, heavier for denim.
Consider thread properties like strength and elasticity, which can be found at online sewing thread stores like sewing thread suppliers.
Popular thread brands offer a rainbow of colors to complement your fabric.
Remember, thread tension is key – too tight, and it’ll snap; too loose, and you’ll have a tangled mess.
It’s all about finding that Goldilocks zone for smooth stitching.
Preventing Thread Breakage Methods
Got the right thread? Great! Let’s keep that thread from breaking and ruining your zen.
Start by checking your needle size – it’s like Goldilocks, not too big, not too small.
Adjust your tension dial; think of it as finding the perfect handshake firmness.
Clean those feed dogs regularly – they’re the unsung heroes of smooth stitching.
And remember, slow and steady wins the race. Your sewing machine will thank you!
Fixing Fabric Feed Issues
Ever watched your fabric bunch up like an angry accordion while sewing?
You’re not alone – fabric feed issues can turn your sewing dreams into a wrinkly nightmare, but with a few tweaks, you’ll have your machine purring along smoother than a cat in a sunbeam.
Adjusting Presser Foot Pressure
Ever feel like your fabric’s doing the cha-cha instead of feeding smoothly?
Let’s tackle presser foot pressure!
The correct bobbin type, including checking for low thread or a dirty bobbin case, is crucial to a sewing machine’s performance. This often-overlooked sewing machine part can make or break your stitching.
Too loose, and your fabric slips.
Too tight, and it’s stuck like glue.
Adjust it based on your fabric type – lighter for delicate silks, heavier for denim.
You’ll see the difference in your even feeding and stitch quality faster than you can say "perfect seam"!
Ensuring Proper Fabric Alignment
Taming fabric feed issues starts with proper alignment. You’ll stitch like a pro by following these steps:
- Check your grain lines: Line ’em up with your pattern for straight seams.
- Mind the bias: It’s stretchy, so handle with care.
- Match patterns: Line up those prints for a polished look.
- Lay it flat: Smooth out wrinkles before cutting.
Remember, measuring accurately and pre-washing fabric are your secret weapons. Happy stitching!
Using The Right Presser Foot Type
Now that you’ve got your fabric aligned, let’s talk about picking the right presser foot.
It’s like choosing the perfect dance partner for your fabric!
Different presser foot types work magic on various materials.
A walking foot keeps layers in step, while a roller foot glides over sticky fabrics.
Don’t be afraid to swap feet mid-project – it’s the secret to smooth sailing in your sewing adventures!
Preventing Fabric Bunching
The right presser foot sets the stage, but fabric bunching can still crash your sewing party.
Don’t let it ruffle your feathers!
Adjust your presser foot pressure to match your fabric’s weight.
Too tight, and you’ll get a bunched-up mess; too loose, and your fabric might slip and slide.
Keep your feed dogs clean and aligned, and choose the right needle and thread for smooth sailing.
With these tweaks, you’ll be stitching up a storm in no time!
Mastering Basic Sewing Techniques
You’ve got the basics down, but now it’s time to level up your sewing game with some pro techniques.
Let’s tackle those pesky seam allowances, wavy stretchy fabrics, and raw edges that can turn your project from "meh" to "marvelous" in no time.
Understanding Seam Allowance
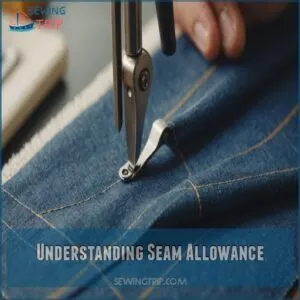
Ever felt like your project’s coming apart at the seams? Let’s talk seam allowance. It’s your secret weapon for sturdy, professional-looking stitches.
Think of it as your fabric’s breathing room. Most patterns call for a 5/8" allowance, but it can vary.
Measure twice, cut once, and your seams will thank you. Use a seam gauge for precision, and always check your pattern’s instructions.
Remember, consistent seam allowance is key to a perfect fit.
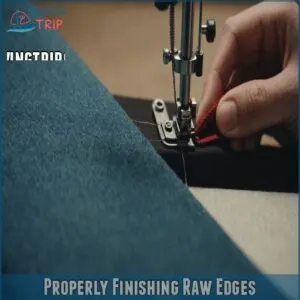
Properly Finishing Raw Edges
With raw edges, you’re on the cutting edge of sewing mastery!
Don’t let fraying fabric unravel your hard work.
Tame those edges with a zigzag stitch or serger for a polished look.
Pinked edges offer a quick fix, while French seams hide raw edges inside.
Experiment with different seam finishes to find your favorite.
Remember, neat edges make your projects look pro and last longer.
It’s all in the details!
Avoiding Wavy Seams on Stretch Fabrics
Wavy seams on stretch fabrics can turn your cozy creation into a rippled mess.
To avoid this, use a zigzag stitch and adjust your tension, as a fine-tuned zigzag stitch can provide a customized fit, especially with mastering stretch stitches.
Choose the right needle – a ballpoint or stretch needle glides through without snagging.
Prep your fabric by gently stretching it as you sew.
Don’t pull or push; let the feed dogs do the work.
With these tricks, you’ll conquer those stretch fabric woes and create smooth, professional-looking seams.
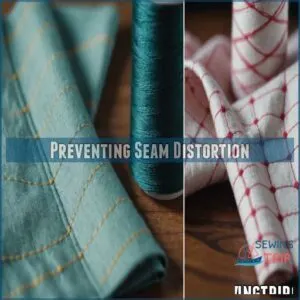
Preventing Seam Distortion
Straight seams aren’t just for rigid fabrics.
To prevent seam distortion, start by choosing the right needle for your fabric.
Balance your tension and use the correct presser foot pressure.
Keep an eye on your seam allowance – it’s your roadmap to perfection.
Remember, a well-maintained machine is your secret weapon.
Regular cleaning and oiling will keep your stitches on the straight and narrow.
It’s like giving your sewing machine a spa day – everybody wins!
Troubleshooting Common Sewing Machine Issues
You’ve mastered the basics, but your sewing machine still throws tantrums? Don’t worry, even the best seamstresses face hiccups now and then, from fabric bunching to skipped stitches.
Fabric Bunching While Sewing
Fabric bunching can turn your sewing dreams into a puckered nightmare. Don’t let it ruffle your feathers! You’ve got the power to smooth things out. Let’s tackle this common hiccup head-on and get your stitches back on track.
Here’s how to iron out those pesky bunches:
- Check your presser foot pressure – it might be throwing a wrench in the works
- Adjust thread tension for a Goldilocks-perfect balance
- Choose the right needle for your fabric type – it’s like finding your sewing soulmate
- Keep those feed dogs clean and happy – they’re the unsung heroes of smooth stitching
Fabric Not Feeding Properly
You’ve smoothed out those pesky fabric bunches, but now your sewing machine’s playing tug-of-war with your material? Let’s tackle feed dog issues head-on!
First, check if they’re raised and clean.
Adjust your presser foot pressure – it might be too light.
Make sure your fabric is aligned properly, and don’t forget about tension problems.
A quick machine cleaning can work wonders too.
With these tweaks, you’ll be stitching smoothly in no time!
Skipping Stitches
Now that your fabric’s moving smoothly, let’s tackle those pesky skipped stitches. They’re like hiccups in your sewing rhythm, but don’t worry!
Here’s how to get back on track:
- Change your needle – it might be dull or bent, causing heartache with every missed stitch
- Check your thread tension – too loose or tight can lead to frustrating gaps
- If you’re still struggling, try checking your fabric compatibility tips for a perfect match
- Clean your machine – lint buildup can throw off your stitching groove
Remember, proper needle type and thread tension are key. Give your bobbin a once-over and make sure your feed dogs are debris-free. With these tips, you’ll be stitching like a pro in no time!
Machine Keeps Jamming
Ugh, a jammed machine can turn your sewing session into a real headache!
Don’t fret – we’ve got your back.
Let’s troubleshoot those pesky jams with some quick fixes.
Check out this handy table for common culprits and their solutions:
| Issue | Cause | Solution |
|---|---|---|
| Needle issues | Bent or dull needle | Replace with new, correct size |
| Bobbin problems | Incorrectly threaded | Rethread following manual |
| Lint buildup | Accumulated debris | Clean machine thoroughly |
| Feed dog check | Lowered feed dogs | Raise feed dogs |
| Wrong needle size | Mismatched to fabric | Choose appropriate size |
Remember, a little TLC goes a long way in keeping your machine humming smoothly!
Overcoming Beginner Sewing Blunders
You’ve got your shiny new sewing machine, but your projects look more like abstract art than Pinterest perfection.
Don’t worry, we’ve all been there – let’s tackle those beginner blunders head-on and turn your sewing disasters into masterpieces.
Not Measuring Accurately
The tape measure is your best friend in sewing.
Don’t eyeball it!
Accurate measurements are vital for garment fit and pattern ease.
To guarantee accuracy, use a flexible measuring tape and consider enlisting a helper to hold the other end, especially when measuring around tight spaces like your natural waistline and bust.
Double-check your numbers to avoid cutting errors and ending up with the wrong size.
Remember, fabric shrinkage can throw off your hard work.
Always measure twice, cut once.
It’s a small step that’ll save you from a big headache later.
Trust me, your future self will thank you!
Not Using Speed Control
Precise measurements are key, but let’s talk about taming your sewing machine’s need for speed.
You wouldn’t drive a car at full throttle all the time, right? The same goes for sewing.
Using speed control is like having a superpower. It helps you:
- Maintain stitch consistency
- Navigate tricky curves with ease
- Prevent fabric puckering
Start slow, then gradually increase your speed as you gain confidence.
You’ll be amazed at how your stitching improves when you’re in control!
Not Ironing or Pressing Seams
Now that you’ve mastered speed control, let’s iron out another common wrinkle in your sewing journey.
Skipping the pressing step can leave your projects looking like a crumpled mess.
Don’t let your hard work go to waste!
Here’s why pressing matters:
| Pressing Benefits | Neglecting to Press |
|---|---|
| Crisp seams | Wrinkled appearance |
| Professional look | Amateur finish |
| Improved accuracy | Misaligned pieces |
| Enhanced durability | Weakened structure |
Remember, a little steam goes a long way in transforming your creations from homemade to handcrafted!
Not Transferring Pattern Markings
Skipping pattern markings is like trying to bake without measuring cups – you’re setting yourself up for disaster!
Those little symbols guarantee your pattern accuracy and perfect seam placement.
Without them, you risk fit issues and wonky garment sizes.
Grab your fabric chalk or tailor’s tacks and mark those darts, pleats, and notches.
It’s a small step that’ll save you from unpicking headaches later.
Trust me, your future self will thank you!
Easy Fixes for Seaming Issues
Seams can be a real pain in the fabric, but don’t worry! We’ve got some easy fixes for those pesky seaming issues.
Ever feel like your stitches are on a rollercoaster ride? Let’s smooth things out.
First, double-check your seam allowance – it’s the secret sauce for even seams.
If you’re dealing with puckering, your tension might be off, so make sure to use the right sewing machine needles for the job. Adjust it bit by bit until your fabric lies flat as a pancake.
Here are some quick fixes for common seaming problems:
- Uneven seams? Use a seam guide or masking tape as a visual aid.
- Puckering got you down? Try a walking foot to keep layers in line.
- Seam allowance all over the place? Mark it clearly before sewing.
- Stubborn seams? Don’t be afraid to break out the seam ripper and start fresh.
Remember, pressing seams is like magic – it can hide a multitude of sins. So iron as you go, and watch your projects transform!
Simple Solutions for Sewing Machine Troubles
Is your sewing machine acting up?
By following basic troubleshooting steps, like checking the drop-feed setting for fabric feed, you’ll be surprised how easy it’s to fix common issues with a bit of TLC and know-how,
from giving your machine a good clean to replacing worn-out parts.
Regular Cleaning and Oiling
Your sewing machine’s been working hard, so let’s give it some TLC!
A clean, well-oiled machine is your ticket to smooth stitching.
Grab your cleaning tools and follow a regular maintenance schedule.
Every 8-10 hours of sewing, give your machine a quick once-over.
A drop of oil here, a brush there, and you’ll keep your trusty stitcher purring like a kitten for years to come.
Checking for Lint Buildup
Now that you’ve oiled your machine, let’s tackle the fluff monster lurking inside.
Lint buildup is like a silent stitching saboteur.
To remove it effectively, consider following a proper lint removal technique.
Check common hideouts like feed dogs and bobbin cases regularly.
A quick brush or mini vacuum keeps things running smoothly.
Remember, a clean machine is a happy machine – it’ll thank you with longer life and picture-perfect stitches.
Don’t let lint build a cozy home in your sewing buddy!
Replacing Worn-Out Parts
Don’t let worn-out parts throw a wrench in your sewing projects!
Keep an eye out for signs of wear and tear on your machine’s key components.
Replace these parts promptly to maintain smooth stitching:
- Dull needles that snag fabric or create uneven stitches
- Scratched or nicked bobbin cases can be prevented with regular bobbin case maintenance to avoid causing thread tension issues, scratched or nicked bobbin cases causing thread tension issues
- Worn foot pedals with inconsistent speed control
By staying on top of these replacements, you’ll keep your sewing machine humming along like a well-oiled machine.
Scheduling Professional Servicing
Longevity is key with sewing machines.
Schedule annual check-ups to keep your trusty stitcher humming.
Technicians can spot issues you might miss, saving you headaches down the road.
Costs vary, but think of it as an investment in your craft.
Find reputable pros through local fabric shops or online reviews.
Regular service intervals boost performance and extend your machine’s life.
It’s like a spa day for your sewing buddy!
Quick Fixes for Common Sewing Mistakes
Even the most experienced sewists make mistakes, but don’t worry—you’re not alone, and there’s usually a quick fix.
Let’s tackle some common sewing slip-ups together, turning those "oops" moments into opportunities to level up your stitching skills.
Fixing Inconsistent Seam Allowance
Inconsistent seam allowances can turn your project into a wonky mess faster than you can say "oops!"
But don’t sweat it – we’ve got you covered.
Grab your seam allowance tools and let’s get cracking.
Start by marking your fabric clearly using chalk or washable pens.
Align your fabric edges carefully, and use your machine’s seam guide or washi tape as a visual aid.
Remember, practice makes perfect, so keep at it!
Adjusting Thread Tension
Thread tension woes got you in knots? Let’s unravel this mystery together!
Perfect tension is your ticket to stitch nirvana.
Here’s your quick-fix cheat sheet:
- Test on scrap fabric first
- Adjust top tension dial in small increments
- Check bobbin for smooth unwinding
- Clean lint from tension discs
- Balance upper and lower tensions
Remember, it’s all about finding that Goldilocks zone – not too tight, not too loose.
You’ve got this, stitch wizard!
Improving Fabric Handling
Now that you’ve got your thread tension sorted, let’s tackle fabric handling.
It’s like learning to dance with your fabric partner!
Pay attention to the fabric grain when cutting and layering.
Use proper pressing techniques to smooth out wrinkles.
When sewing, guide the fabric gently with your hands, don’t push or pull.
And remember, pinning is your friend – it keeps everything in line.
With practice, you’ll be gliding through projects like a pro!
Ensuring Proper Presser Foot Pressure
You’ve mastered fabric handling, but let’s talk about presser foot pressure.
It’s like finding the sweet spot on your favorite chair – not too tight, not too loose.
Different fabrics need different pressure.
Adjust that dial for even pressure across various materials.
Too much? Your fabric might pucker.
Too little? It’ll slip and slide like a kid on a Slip ‘N Slide.
Get it just right, and you’ll be stitching like a pro!
Advanced Troubleshooting Techniques for Sewing
You’ve mastered the basics, but sometimes your sewing machine still throws a tantrum.
Let’s explore some advanced troubleshooting techniques that’ll turn you into a sewing detective, solving even the trickiest stitching mysteries with confidence.
Identifying and Solving Complex Issues
Sometimes, your sewing machine acts like it’s speaking in code.
Don’t sweat it! When facing tricky issues, start by checking your manual.
It’s a goldmine for troubleshooting tips.
Still stumped? Look for patterns in the problem.
Is it happening with specific fabrics or stitches?
Play detective and narrow down the culprit.
Remember, even seasoned sewists face head-scratchers.
Patience is your secret weapon in cracking the case!
Using Diagnostic Tools
When your sewing machine acts up, it’s time to play detective.
Grab a tension gauge to check if your stitches are too tight or loose.
Use a stitch length ruler to make sure your seams are consistent.
Don’t forget your trusty screwdriver for adjusting those pesky feed dogs.
These tools are your secret weapons in the battle against sewing machine gremlins.
With practice, you’ll diagnose issues faster than a tailor on caffeine!
Seeking Professional Help When Needed
Ever feel like your sewing machine’s gone rogue?
It happens to the best of us.
Don’t let it unravel your projects!
If you’ve tried everything and still can’t figure it out, it’s time to call in the pros.
A skilled technician can diagnose tricky issues, perform deep cleanings, and even upgrade your machine.
Think of it as giving your trusty sidekick a spa day – it’ll come back stitching like new!
Frequently Asked Questions (FAQs)
What are the most common sewing mistakes?
You’d think threading a needle was rocket science!
Common sewing blunders include incorrect tension, wrong fabric choice, and skipping pattern instructions.
Don’t fret; even pros make mistakes.
With practice, you’ll be stitching like a pro in no time.
How do you fix a sewing mistake?
Don’t panic!
Grab your seam ripper and carefully undo those stitches.
Take a deep breath, repin your fabric, and give it another shot.
Remember, even pro sewists make mistakes – it’s all part of the learning process!
Are sewing mistakes sabotaging your projects?
Your sewing projects are under siege!
Those pesky mistakes can turn your masterpiece into a hot mess.
But fear not!
You’ve got the power to conquer common blunders.
With a few tweaks, you’ll be stitching like a pro in no time.
Do you learn more from your mistakes in sewing?
Mistakes are golden opportunities in sewing.
They teach you problem-solving, hone your skills, and boost creativity.
Each slip-up is a chance to learn new techniques, understand fabric behavior, and improve your craft.
Embrace the learning curve!
What are the 7 common sewing machine troubles?
A stitch in time saves nine, especially with sewing machines!
Common troubles include thread tension issues, skipped stitches, broken needles, fabric bunching, bobbin problems, needle unthreading, and machine jamming.
Stay calm and troubleshoot step-by-step to keep your projects on track.
How do you fix bad sewing?
Fixing bad sewing starts with identifying the issue.
Check your tension, needle, and thread.
Unpick messy stitches and resew carefully.
Practice on scrap fabric to improve technique.
Remember, even pros make mistakes – it’s part of learning!
How do you cover up sewing mistakes?
Don’t throw in the towel!
Cover sewing mishaps with decorative elements like appliqués or embroidery.
Unpick and redo small sections, or add strategic trims.
For bigger boo-boos, consider repurposing the project into something new and exciting.
What sewing tool takes out sewing mistakes?
Your trusty seam ripper is the go-to tool for undoing sewing mistakes.
It’s like a tiny eraser for stitches.
Just slide it under the threads, gently cut, and pull them out.
Voila! You’re ready for a do-over.
How to fix puckered seams in stretchy fabrics?
Puckered seams on stretchy fabrics can be a real headache.
Use a ballpoint needle and adjust your machine’s tension.
Stretch the fabric slightly as you sew, and consider a zigzag stitch for more give.
Practice makes perfect!
Dealing with uneven stitch length on thick materials?
Uneven stitches on thick fabrics? No worries!
Adjust your presser foot pressure and use a walking foot.
Increase stitch length slightly, and guide the fabric gently.
You’ll be stitching like a pro in no time!
Fixing skipped stitches when sewing delicate fabrics?
Delicate fabrics can be tricky, but don’t fret!
Switch to a fine needle and lighten your touch.
Adjust tension, use stabilizer if needed, and slow down your stitching.
You’ll be gliding through silks like a pro in no time.
Correcting wavy edges on lightweight or slippery fabrics?
Wavy edges on lightweight fabrics? No worries!
Use a walking foot to evenly feed layers, reduce tension, and stabilize with tissue paper.
Take it slow and steady.
You’ll tame those slippery fabrics like a pro in no time!
How to mend holes from accidentally cutting fabric?
To fix accidental fabric cuts, you’ve got options!
Patch it with fusible interfacing, then stitch a decorative appliqué over it.
For small holes, use invisible mending techniques.
If it’s on a seam, re-stitch it.
Don’t sweat it—mistakes happen!
Conclusion
Remember, every stitch is a step in the direction of mastery!
By tackling these easy sewing mistakes to fix, you’re not just improving your projects – you’re leveling up your skills.
Don’t let fear of errors hold you back.
Embrace the learning process, and soon you’ll be stitching with confidence.
Whether it’s adjusting tension or conquering tricky fabrics, each challenge overcome is a victory.
So keep that needle moving, and watch your creations transform from good to great.
Happy sewing!

