This site is supported by our readers. We may earn a commission, at no cost to you, if you purchase through links.
Start by rethreading your machine completely—sounds basic, but it’s often the culprit. Check that your needle isn’t bent or dull, and verify you’re using the right needle size for your fabric weight.
Next, examine your bobbins threading and tension settings. Sometimes the bobbin case isn’t seated properly, causing those frustrating loose loops underneath.
Don’t overlook thread quality either—cheap thread breaks the golden rule of consistent stitching. The real game-changers involve understanding tension relationships and timing adjustments.
Table Of Contents
Key Takeaways
- Start with the basics first – You will solve most stitch-catching problems by completely rethreading your machine, replacing bent or dull needles, and checking that your needle is properly seated with the flat side facing back.
- Master your tension settings – You need to balance upper and bobbin thread tension through gradual adjustments, testing on scrap fabric until both threads meet perfectly in the middle of your fabric layers.
- Keep your machine clean and maintained – You will prevent most issues by regularly removing lint buildup from feed dogs, bobbin areas, and thread guides while using quality thread that matches your fabric weight.
- Follow a systematic troubleshooting approach – You should group similar problems together, consult your owner’s manual for model-specific guidance, and not hesitate to seek professional help when mechanical issues persist beyond simple adjustments.
Identifying Stitch Problems
Your sewing machine’s rebellious stitches don’t have to remain a mystery.
Start with thorough fabric inspection—examine each seam for telltale signs like uneven threads, loose loops, or incomplete formations that scream "something’s wrong here!"
These visual clues are your roadmap to solving the puzzle.
Effective stitch analysis means looking beyond surface problems.
Are you dealing with skipped stitches that create gaps?
Stitches not catching properly?
Or maybe stitch tension that’s tighter than your deadline schedule?
Each symptom points to specific sewing errors requiring targeted fixes.
Before diving into complex solutions, perform basic machine calibration checks.
Verify your needle’s properly seated, thread quality isn’t compromised by age or damage, and threading paths follow manufacturer guidelines.
Think of this detective work as your foundation—get these fundamentals right, and you’ll solve most stitch problems before they escalate into hair-pulling frustrations.
Thread Issues
Thread problems account for roughly 70% of all sewing machine malfunctions, making them your first checkpoint when stitches go wrong.
Thread tangles don’t have to spell disaster—most stitch problems start and end with proper thread management.
You’ll tackle breaking threads, tension imbalances, stubborn knots, and fraying issues with straightforward adjustments that restore smooth operation.
Thread Breaking
Thread fracture frustrates even experienced seamstresses, but you can master this common challenge. When yarn snapping occurs mid-seam, it’s like your machine throwing a tantrum—annoying but fixable.
Here’s your troubleshooting toolkit:
- Replace bent or dull needles that cause fiber damage
- Re-thread completely following your manual’s threading path
- Adjust tension gradually testing on scrap fabric first
- Use quality thread matching your fabric weight
- Clean lint buildup from tension discs and thread guides
These strand failure solutions address most thread breaking issues without requiring professional intervention. Regular maintenance and checking for thread quality issues can help prevent thread breakage and improve overall sewing performance.
Thread Tension
When your machine’s acting up and stitches look wonky, thread tension is often the culprit behind the chaos.
Think of tension as a delicate dance between your upper and bobbin threads—they need to meet perfectly in the middle of your fabric layers.
Here’s how to master thread control:
- Test your tension settings on scrap fabric before starting your project
- Check upper tension first—if it’s too tight, you’ll see bobbin thread on top
- Examine bobbin tension by holding the bobbin case and letting it drop slightly
- Make small tension adjustments incrementally, testing each change thoroughly
Proper thread balance prevents stitch problems like thread breaking and stitches not catching.
Most sewing machine troubleshooting starts with getting your tension adjustment right—it’s your foundation for perfect stitches.
Thread Knots and Tangles
When your project hits a snag with stubborn thread knots, don’t panic.
Thread tangles often stem from poor fiber management or inadequate thread lubrication.
For effective knot prevention, make certain you’re threading correctly and maintaining proper thread tension.
When tangle removal becomes necessary, gently work backward from the knot’s source.
Clean your machine regularly to prevent thread bunching, and check that stitches are catching properly to avoid thread breaking during future projects.
Thread Fraying and Shredding
Tangled threads aren’t your only enemy—fraying and shredding can turn smooth stitching into a nightmare.
Thread breakage often stems from poor yarn quality or fiber damage that weakens cotton durability over time. When thread unraveling becomes constant, it’s usually preventable. Understanding thread tension issues is vital to prevent fraying and shredding.
Fray Prevention Essentials:
- Match needle size to thread thickness – Wrong combinations cause thread shredding and inconsistencies
- Store threads properly – Keep away from sunlight and moisture to maintain integrity
- Check thread path – Remove obstructions that cause friction and premature breaking
Needle Problems
Your sewing machine’s needle is often the culprit when stitches won’t catch or form properly.
A bent, dull, or incorrectly installed needle can turn your sewing project into a frustrating battle with skipped stitches and thread breaks.
Bent or Broken Needles
When your needle suddenly snaps mid-seam, it’s your machine’s way of saying "help!"
Bent needles and dull points create stitch problems that’ll drive you crazy.
Sharp needles are non-negotiable for smooth sewing machine operation.
Check for needle damage before every project—those tiny bends aren’t worth the headache.
Replace needles after eight hours of sewing or when you notice needle issues like skipped stitches.
Keep spare needles handy because needle replacement saves your sanity and your fabric.
Needle Type and Installation
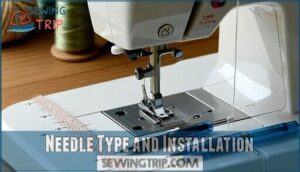
Beyond bent needles, proper needle selection and installation make the difference between smooth stitching and frustrating tangles.
Your needle’s flat side should face the machine’s back, pushed fully into the clamp. Match your needle type to fabric—sharp needles pierce wovens cleanly, while ballpoint needles slip between knit fibers without damage.
Understanding the right needle types is essential for successful sewing projects.
- Needle Alignment: Insert needle completely with flat side facing rear
- Needle Compatibility: Use sharp needles for wovens, ballpoint for knits
- Needle Threading: Secure thread properly to prevent unthreading during sewing
Needle Size
Getting your needle selection right is like finding the perfect key for a lock—size matters tremendously for preventing stitch problems.
Wrong needle sizes create thread tension issues and poor stitch quality. When fabric matching goes awry, your sewing machine needles struggle to pierce properly.
| Fabric Weight | Needle Size | Thread Compatibility |
|---|---|---|
| Lightweight | 60/8-70/10 | Fine cotton, polyester |
| Medium weight | 80/12-90/14 | All-purpose thread |
| Heavy fabrics | 100/16-110/18 | Heavy-duty thread |
| Stretch materials | 75/11-90/14 | Polyester, elastic thread |
The table provides a guide to choosing the right needle size based on fabric weight and thread compatibility, ensuring that your sewing projects turn out with the best possible stitch quality.
Fabric Feeding and Presser Foot Troubles
When your fabric refuses to move smoothly through the machine or bunches up unexpectedly, you’re likely dealing with feed dog or presser foot issues that can turn a simple project into a frustrating ordeal.
These mechanical problems often stem from incorrect pressure settings, lint buildup, or worn components that prevent your machine from gripping and advancing fabric properly, which can be related to presser foot issues.
Fabric Not Feeding
When fabric won’t budge under your presser foot, you’re dealing with a feeding nightmare that stops creativity cold.
Start by checking your drop-feed setting – it must be engaged for normal sewing. Examine the feed dog for lint buildup that prevents proper fabric grip; clean thoroughly and oil if needed.
Proper fabric alignment matters too – position material under the needle before lowering the presser foot. Thread tension affects feeding consistency, so verify settings match your fabric type.
Clean debris around the feed mechanism regularly. These steps eliminate inconsistent fabric feed and restore smooth fabric compatibility with your machine’s feeding system.
Presser Foot Pressure
When your sewing machine feeds fabric unevenly, presser foot pressure often holds the key to solving the mystery. Think of it as the Goldilocks principle – not too tight, not too loose, but just right for your specific fabric.
Here’s how to master presser foot pressure:
- Pressure Adjustment: Locate your machine’s pressure dial and experiment with different settings. Heavy fabrics need more pressure, while delicate materials require a lighter touch.
- Foot Alignment: Check that your presser foot sits parallel to the feed dogs. Misalignment causes uneven fabric grip and irregular stitching.
- Fabric Grip: Clean lint from under the presser foot and around feed dogs. Debris prevents proper fabric control and affects stitch regulation.
- Tension Control: Balance presser foot pressure with thread tension settings. When pressure’s wrong, even perfect tension won’t prevent stitch not catching issues.
- Test Runs: Always test pressure adjustments on fabric scraps before starting your project. This simple step prevents costly mistakes and guarantees consistent results.
Plate Issues
Scratches and burrs on your needle plate can turn smooth sewing into a frustrating battle.
When your stitches aren’t catching or you’re experiencing skipped stitches, examine the plate’s surface carefully.
Remove any burrs with fine sandpaper, working gently to avoid further damage.
Plate cleaning involves removing lint buildup around the feed dogs and checking plate alignment with your needle.
A misaligned needle plate creates stitch problems by preventing proper thread formation.
Regular scratch repair and maintenance keep your machine running like clockwork, eliminating those pesky plate issues.
Proper use of presser foot types can also help prevent stitch problems by ensuring even fabric feed and maintaining stitch consistency.
Bobbin Concerns
When your bobbin becomes the villain in your sewing story, it’s usually announcing itself through thread bunching, uneven stitches, or complete stitch failure.
You’ll need to examine your bobbin threading, tension settings, and bobbin type compatibility to restore smooth stitching performance.
Bobbin Thread Bunching Up
When your machine starts creating thread nests beneath your fabric, you’re dealing with one of the most frustrating bobbin issues that can derail any project. Thread bunching typically signals an imbalance between your upper and bobbin thread tensions, creating those annoying bird’s nests that seem to multiply before your eyes.
Start by checking your threading path – both top and bobbin threads need proper routing through their designated guides. Next, examine your bobbin case for lint, scratches, or damage that could snag the thread. Sometimes the simplest fix involves completely rethreading your machine with the presser foot raised, guaranteeing proper tension release.
Here are key steps to eliminate thread bunching:
- Clean the bobbin area thoroughly, removing all lint and debris
- Check bobbin insertion – confirm it’s seated correctly and spinning clockwise
- Verify upper threading follows the exact path shown in your manual
- Test thread compatibility – mismatched weights cause binding issues
- Adjust bobbin tension gradually using the small screw on the case
Bobbin Tension
Proper bobbin tension keeps your stitches balanced and prevents thread bunching underneath your fabric.
When bobbin threads show on top or won’t catch properly, it’s time for bobbin adjustment.
Find the small screw on your bobbin case—turn clockwise to tighten, counterclockwise to loosen.
Test on scrap fabric after each quarter-turn adjustment.
Getting tension settings right eliminates most stitch quality issues instantly.
Plastic Vs. Metal Bobbins
Beyond tension adjustments, the material of your sewing machine bobbin plays a surprising role in stitch quality. Many sewers don’t realize that bobbin material affects bobbin performance and can create unexpected stitch problems.
Metal bobbins consistently outperform their plastic counterparts in several key areas. Their superior bobbin durability means fewer replacements and less frustration mid-project. The smooth surface of a metal bobbin reduces friction, allowing thread to flow more evenly and preventing those annoying tension fluctuations that plague plastic bobbins.
Here’s why experienced sewers prefer metal bobbins for tackling bobbin concerns:
- Smoother thread delivery – Less friction means consistent tension throughout your seam
- Better heat resistance – Won’t warp under high-speed sewing conditions
- Longer lifespan – Metal bobbin construction withstands repeated use without cracking
- Universal compatibility – Works reliably across different thread weights and fabric types
Making the switch eliminates many common bobbin-related headaches. When selecting a metal bobbin, consider the importance of proper metal bobbin selection to guarantee superior performance.
Seam and Stitch Irregularities
When your perfectly planned project turns into a wavy, puckered mess, you’re likely dealing with seam and stitch irregularities that stem from tension imbalances, incorrect needle choices, or fabric feeding issues.
These common problems can transform even experienced sewers into frustrated troubleshooters, but understanding the root causes will help you achieve consistently smooth, professional-looking seams.
This understanding is crucial for troubleshooters to resolve issues efficiently and produce high-quality work.
Wavy Seams in Stretch Fabrics
Wavy seams plague stretchy fabric projects when fabric stretch overwhelms seam stability.
Lower your thread tension and reduce presser foot pressure to prevent material distortion. Choose ballpoint needles for proper needle selection, and adjust sewing machine settings to longer stitch lengths.
Support the fabric without pulling—let the feed dogs do their job. Quality thread choice matters too; polyester blends handle stretch better than cotton, eliminating most stitch problems before they start.
Puckered and Distorted Seams
Puckered seams happen when your fabric gets bunched up during stitching, creating unsightly wrinkles.
Seam distortion often stems from tension issues—when your upper thread pulls too tight, it causes fabric stretch and creates those annoying puckers. Check your stitch density settings too; overly tight stitches compress the fabric.
Feed errors also contribute to this headache, especially when you’re rushing through thick materials. Test your tension on scraps first, and remember: balanced tension prevents most puckered seams and skipped stitches before they start.
To achieve smooth seams, understanding thread tension basics is essential for preventing fabric puckering.
Thread Weight, Tension, and Feed Issues
When your sewing machine starts acting like a rebellious teenager, thread weight, tension, and feed issues are often the culprits behind your stitching nightmares.
Thread tension problems create uneven stitches, while mismatched thread weight can cause thread breakage and stitch skipping. Your feed dogs need proper adjustment to prevent fabric slippage during sewing.
Here’s how to regain control:
- Balance your tension settings: Match upper and lower thread tension for consistent stitches—think of it as finding the perfect dance partner
- Choose compatible thread weight: Heavy fabrics need robust threads; delicate materials require lighter options to prevent damage
- Optimize feed dog performance: Clean lint buildup and adjust presser foot pressure to eliminate fabric slippage and feeding irregularities
Master these fundamentals, and you’ll transform frustrating sewing sessions into smooth, professional results every time.
Machine Operation and Maintenance
When your sewing machine suddenly stops cooperating or starts making concerning noises, you’re likely facing operational issues that can disrupt your entire project.
These mechanical problems often stem from basic maintenance oversights or incorrect settings, but most can be resolved quickly with systematic troubleshooting techniques, using correct methods to identify and fix the issues.
Machine Seizing Up or Not Sewing
A frozen sewing machine seizing mid-project can derail your creative flow completely.
When your trusty machine suddenly locks up, it’s like hitting a creative brick wall at full speed.
Machine jams often stem from tangled thread, incorrect bobbin placement, or improper thread tension settings.
Start by turning off your machine and manually rotating the handwheel to locate resistance points.
Remove fabric gently, clear thread paths, and check for lint buildup around feed dogs.
Verify you’re not stuck in bobbin-winding mode.
Regular machine maintenance prevents most sewing delays and motor failure issues, keeping your projects running smoothly without frustrating interruptions, which is crucial for maintaining a good creative flow.
Machine Making Strange Noises
Mysterious rattles and grinding sounds signal your machine’s cry for attention.
When strange noises disrupt your creative flow, don’t panic—most issues stem from simple maintenance oversights rather than catastrophic mechanical failures.
Here’s your noise-busting checklist:
- Check oil levels and lubricate moving parts according to your manual
- Inspect the belt for wear, fraying, or improper tension
- Remove lint buildup from feed dogs, bobbin area, and motor housing
- Tighten loose screws that cause machine vibration and rattling sounds
Regular maintenance prevents most sewing machine problems before they escalate.
Needle Not Moving
When your needle refuses to budge, don’t panic—this stitch problem has straightforward solutions.
First, check if you’re accidentally in bobbin-winding mode, which disables the needle mechanism. Turn your handwheel manually to test movement and identify blockages.
Examine needle alignment and machine calibration settings. Thread bunching underneath can jam the feed mechanism, while motor issues might prevent proper operation.
Re-threading and adjusting stitch settings often resolves sewing machine needle issues completely, by addressing potential thread bunching.
Decorative Stitch Settings Not Working
When decorative stitches fall flat, don’t throw in the towel just yet. Your machine’s fancy patterns require precise coordination between multiple components. Start by verifying your stitch mode selection matches your project goals.
Electronic failure can disable advanced features, so test basic stitches first to isolate the problem.
Here’s your troubleshooting checklist:
- Double-check thread alignment – misaligned thread creates wonky decorative stitches
- Verify needle calibration – wrong needle disrupts intricate stitch formation
- Test tension adjustment – decorative patterns need balanced thread flow
- Clean feed dogs – lint buildup interferes with complex stitch settings
- Reset machine settings – electronic glitches cause mysterious sewing machine stitch issues
These stitch problems often resolve with methodical checking. Regular maintenance, including addressing thread tension issues, is vital for superior machine performance.
Troubleshooting Tips
When your sewing machine acts up, you’ll want a systematic approach that tackles the most common causes first before moving to complex solutions.
Start with basic checks like rethreading your machine and replacing the needle, then consult your owner’s manual for model-specific guidance.
Don’t hesitate to seek professional repair when mechanical issues persist beyond simple adjustments, as this will help resolve the problem efficiently and effectively, ensuring you can get back to sewing with a well-functioning machine that undergoes regular maintenance.
Organizing Similar Concepts
Group your stitch problems like sorting laundry—it makes everything easier.
Create stitch categories: tension troubles, thread bunching, skipped stitches, and stitches not catching.
Use sewing checklists to track common sewing machine stitch issues systematically.
Apply fabric sorting logic to your troubleshooting approach.
Thread organization principles work for problem-solving too.
When you cluster similar symptoms together, patterns emerge quickly.
This methodical approach transforms overwhelming sewing hacks into manageable solutions, giving you control over your machine’s quirks, and helps you develop a systematic approach to troubleshooting, leading to more effective problem-solving.
Simple Fixes From The Owner’s Manual
Your owner’s manual contains gold for fixing stitch problems.
Start with Manual Checks outlined in the troubleshooting section—these Basic Adjustments often solve 80% of issues.
Look for Quick Fixes like rethreading steps and Troubleshooting Steps for thread tension problems.
Many manuals include Error Codes explanations for when sewing machine stitches aren’t catching properly during sewing machine repair attempts.
Seeking Professional Help if Needed
Sometimes you’ve exhausted every troubleshooting tip in your owner’s manual, yet your machine still acts up. That’s when it’s time to call in the cavalry.
Professional sewing machine repair services offer machine inspection and technical support that goes beyond basic fixes. Sewing experts can diagnose complex timing issues and internal problems you can’t see.
Consider professional help when you encounter:
- Persistent grinding noises that cleaning won’t eliminate
- Timing problems causing skipped stitches despite new needles
- Electronic malfunctions in computerized machines
- Recurring tension issues after multiple adjustments
- Mechanical jamming that prevents normal operation
While diagnostic fees vary, proper sewing machine maintenance saves money long-term.
Frequently Asked Questions (FAQs)
Why is my sewing machine not catching every stitch?
That frustrating clicking sound without any stitches forming? You’re likely dealing with a bent needle, incorrect threading, or timing issues.
Check your needle first, then re-thread completely—most stitch-catching problems disappear instantly.
Why won’t my sewing machine pick up stitches?
Your machine won’t pick up stitches due to incorrect needle insertion, dull needles, or threading issues.
Check needle placement first, then re-thread completely with presser foot up to release tension properly, ensuring that you address the potential causes of the issue, such as incorrect needle insertion.
Why isn’t my thread catching on my sewing machine?
Check your needle first – it’s likely dull or bent. Re-thread your machine completely with the presser foot up, then verify your threading path follows the manual exactly.
Why are my sewing machine stitches not holding?
Like a house of cards, your stitches collapse when tension’s off-balance.
Re-thread your machine completely, check needle installation, and adjust upper thread tension.
Dull needles or incorrect threading usually cause this frustrating problem, so it’s essential to address these issues to prevent stitches from collapsing.
Why do stitches catch only intermittently?
Intermittent stitch catching usually stems from a slightly bent needle, inconsistent threading tension, or timing issues.
You’ll need to replace the needle, re-thread completely, and check your bobbin placement for consistent results, addressing the root causes such as a slightly bent needle or inconsistent threading tension.
Can humidity affect stitch catching performance?
Ironically, while you’re battling mechanical precision, invisible moisture is sabotaging your stitches.
High humidity causes thread to absorb moisture, changing tension and causing intermittent catching issues that’ll drive you crazy until conditions stabilize, which can be described as a crazy situation.
Does thread age impact stitch formation?
Old thread becomes brittle and weak, breaking easily during sewing.
You’ll notice fraying, inconsistent tension, and poor stitch formation.
Replace thread that’s been sitting around for years to guarantee smooth, reliable stitching performance.
Why do new machines skip stitches?
New machines skip stitches when you’ve inserted the needle incorrectly, used the wrong needle type, or haven’t threaded properly.
Check your needle placement first, then re-thread completely—it’s usually something simple.
Can electrical issues cause stitch problems?
Yes, electrical issues can definitely cause stitch problems.
You’ll notice erratic needle movement, inconsistent stitch formation, or complete stitching failure.
Check your power connection first, then consider professional repair for complex electronic malfunctions.
Conclusion
Remember, fixing stitch problems sewing machine stitches not catching is like solving a puzzle—each piece must fit perfectly for the complete picture.
You’ve now got twenty-one proven solutions in your troubleshooting toolkit. Start with the basics: rethreading, checking needles, and adjusting tension.
Most issues stem from these fundamentals. When simple fixes don’t work, systematically eliminate possibilities using your owner’s manual.
Don’t hesitate to seek professional help for complex timing or mechanical problems that exceed basic maintenance, as this can help resolve issues efficiently and systematically.
- https://pubs.nmsu.edu/_c/C202/index.html
- https://www.justanswer.com/appliance/qcke3-something-loose-sewing.html
- https://www.sewessential.co.uk/blog/how-to-fix-sewing-machine-stitch-quality-problems
- https://www.reddit.com/r/sewing/comments/14x5x9o/stitches_not_catching
- https://wunderlabel.com/en-gb/blog/p/17-common-sewing-machine-problems-solve

