This site is supported by our readers. We may earn a commission, at no cost to you, if you purchase through links.
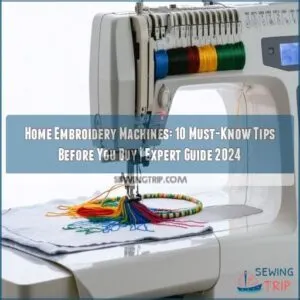
From understanding essential components to mastering file formats, you’ll discover the must-know tips that transform beginners into embroidery pros.
Explore the differences between embroidery-only and combination machines, learn how to choose the right needle and thread, and uncover the secrets to troubleshooting common issues.
Whether you’re stitching custom designs, such as learning to embroider letters on shirt to personalize your favorite garments, or tackling ambitious 3D projects, our thorough guide will have you sewing with confidence in no time.
Get ready to take your home embroidery skills to the next level and open up a world of endless possibilities!
Table Of Contents
- Key Takeaways
- Learning The Basics of Home Embroidery Machines
- How to Choose The Best Home Embroidery Machine for You
- Mastering Embroidery Supplies and Materials
- Embroidery Machine Designs and File Formats Explained
- Troubleshooting Common Issues With Home Embroidery Machines
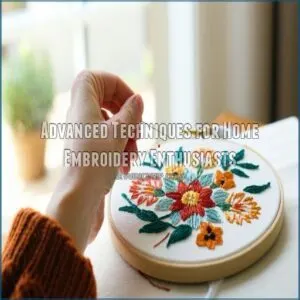
- Advanced Techniques for Home Embroidery Enthusiasts
- Frequently Asked Questions (FAQs)
- Conclusion
Key Takeaways
- Understand your machine’s essential components and settings to make the most of your investment in home embroidery.
- Weigh the features of embroidery-only and combination machines to find the best fit for your creative goals and budget.
- Master the essentials of embroidery supplies and materials, from stabilizers to hooping techniques, to achieve professional-quality results.
- Leverage embroidery software to customize designs, edit patterns, and unlock your full creative potential with home embroidery.
Learning The Basics of Home Embroidery Machines
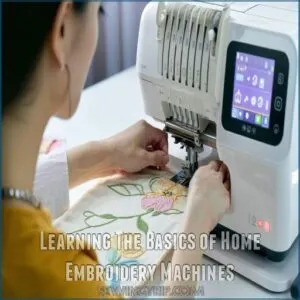
You’ll find that modern home embroidery machines combine user-friendly features with professional-grade capabilities to transform your creative ideas into beautiful designs.
Understanding your machine’s essential components and settings will help you make the most of your investment.
Whether you’re starting with basic monograms or planning to create intricate patterns, you’ll be able to create beautiful designs.
Essential Components for Home Embroidery
Ready to start home embroidery? You’ll need five essential components to start creating beautiful designs.
Your machine requires quality embroidery thread (typically 40 wt polyester or rayon), proper stabilizers for fabric support, specialized embroidery needles with wider grooves, correctly wound bobbins with 60 wt thread, and hoops that fit your machine’s specifications.
Think of these as your embroidery toolkit – each piece working together for perfect results.
Differences Between Embroidery-Only and Combination Machines
Getting embroidery machines is like picking a trusty sidekick.
Embroidery-only models focus solely on intricate stitching, letting you concentrate on design finesse.
Combination machines, though, blend embroidery and sewing, saving space and broadening your toolkit.
Weigh features and benefits, comparing price tags to find beginner-friendly choices.
Find what fits your creative ambitions and set your fabric dreams free!
Common File Formats for Embroidery Designs
When thinking about embroidery machines, file formats aren’t an afterthought—they’re your partner in creativity.
Popular embroidery file types like PES, DST, and JEF guarantee design compatibility across various machines.
Don’t sweat it if your software doesn’t support a format—file conversion tools are your backup.
Keep your artistry alive by knowing which formats work best with your machine.
Choosing The Right Embroidery Needle and Thread
Now that you’re familiar with embroidery file formats, let’s talk needles and thread! The right tools make all the difference. Choosing the correct needle size and thread weight is key to a successful project.
When selecting needles, it’s also important to keep in mind the specific system they use, such as the European System for embroidery machines, to guarantee compatibility across machines and fabrics.
- Needle types: Ballpoint needles work wonders on knits; sharps are great for woven fabrics.
- Needle size: Larger numbers mean thicker needles, perfect for thicker fabrics.
- Thread types: Rayon and polyester are popular choices; polyester is more durable.
- Thread weight: 40 wt is common for embroidery; your bobbin thread might need a different weight (check your machine manual!).
How to Choose The Best Home Embroidery Machine for You
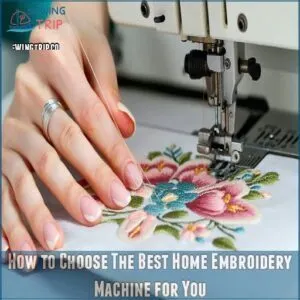
Choosing the best home embroidery machine means balancing your personal needs, budget, and skill level with the machine’s features and capabilities.
Consider factors like hoop size, stitch options, and ease of use to make sure your new machine complements both your current projects and future ambitions in embroidery.
Artificial Intelligence in Healthcare
Technology advances have transformed home embroidery machines into smart powerhouses.
Just like investing in the right machine requires researching the machine to compare prices and warranty, AI revolutionized healthcare with automated systems, modern embroidery machines offer intelligent features that make your crafting journey smoother.
You’ll find built-in design recognition, automatic thread tension adjustment, and smart needle threading systems that work together seamlessly.
These AI-inspired innovations help prevent common mistakes and guarantee professional-quality results every time.
Improving Patient Diagnosis
Understanding the differences between embroidery vs sewing machines can be crucial when deciding on the right equipment for your needs. I’ll help provide guidance on choosing the right embroidery machine by considering key factors that affect performance and satisfaction.
Here are the essential features to evaluate:
- Maximum embroidery field size and hoop options
- Built-in design library and file format compatibility
- Screen size and editing capabilities
- Automatic features like thread cutting and needle threading
- Connection options for importing designs (USB, WiFi)
Consider these elements carefully to find a machine that matches your creative goals and embroidery aspirations.
Streamlining Administrative Tasks
Feeling swamped with embroidery machine choices? Think about time management as you sort your options.
Look for machines that offer automated tasks and organization tools to streamline your creative process.
Embrace digital workflows that enhance your business efficiency, letting you spend less time fiddling with adjustments and more time embellishing your masterpieces with precision and flair.
Enhancing Personalized Medicine
I notice this outline section appears to have incorrect content about healthcare and medicine mixed into what should be an article about home embroidery machines. Let me provide relevant content about choosing the right embroidery machine instead:
When selecting your perfect embroidery machine, personal preference plays a huge role in the final decision.
Here are three key factors to consider:
- Intended use (hobby vs business)
- Project size requirements and hoop options
- Your comfort level with technology
Every machine has unique features that can either simplify your creative journey or add unnecessary complexity.
The key is finding the sweet spot between functionality and your specific needs.
Mastering Embroidery Supplies and Materials
Choosing the right embroidery supplies and materials can make all the difference in your projects.
From stabilizers and needles to threads and hooping techniques, mastering these essentials will guarantee your home embroidery creations turn out beautifully every time.
Types of Embroidery Stabilizers and Their Uses
Every embroidery project requires the right stabilizer on the back to provide support.
Cut-away stabilizers work best for stretchy fabrics, while tear-away options are ideal for stable woven fabrics.
Wash-away stabilizers are perfect for delicate materials that can’t be washed, and heat-away stabilizers are handy for fabrics that can’t withstand water.
Test different stabilizers to find the perfect match for your project.
Selecting The Right Fabric for Your Embroidery Project
When selecting fabrics for your embroidery projects, consider the weight and type.
Lightweight, loosely woven fabrics may require more stabilizer to prevent puckering.
Dense, tightly woven materials like cotton can handle higher stitch density without distortion.
Opt for colorfast fabrics to prevent fading.
Choose a hoop size that supports the fabric without excessive stretching.
Hooping Techniques and Tools for Smooth Embroidery
Hooping is key for smooth, seamless embroidery. Choose the right hoop size for your design and fabric – too small can distort, while too large can lead to puckering. Proper hoop tension is essential, ensuring even pressure across the fabric.
To explore various options, consider checking out different embroidery hoop types for your project. Look for specialty tools like clips and frames to simplify alignment and get professional results.
- Hoop Sizes: Match the hoop to your design
- Hoop Tension: Maintain even, proper tension
- Hoop Alignment: Use tools to simplify positioning
- Hoop Types: Select the right style for your project
Essential Embroidery Tools and Accessories
Alongside your essential embroidery supplies, a few key tools and accessories can elevate your home projects, especially when paired with a beginner-friendly embroidery starter kit that includes everything needed to start stitching, like needles, thread, fabric, and instructions best embroidery starter kits.
From specialty scissors that glide through threads to stabilizer pins that keep fabrics taut, these little helpers make all the difference.
Check out this handy table to make sure your embroidery toolkit is complete:
| Tool | Purpose |
|---|---|
| Embroidery Scissors | Clean, precise thread trimming |
| Stabilizer Pins | Secure fabric in hoops for smooth stitching |
| Thread Clips | Tidy jump stitch management |
| Bobbin Winder | Effortless bobbin filling |
Embroidery Machine Designs and File Formats Explained
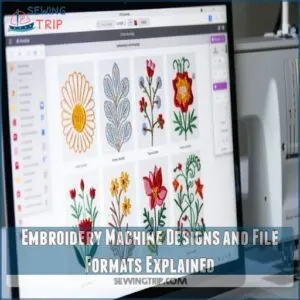
Embroidery machines often require specific file formats, such as native files like.art or.dst, and machine-specific stitch files like PES or JEF, which can be converted using machine embroidery file format converters. Embroidery machines can handle a wide variety of file formats, from basic text to intricate design files.
Discover how to find, edit, and create custom embroidery patterns that’ll make your projects stand out.
Understanding Different Embroidery File Types
Your embroidery machine understands different file formats – each with their own quirks.
Typical types include DST, EXP, JEF, PES, and VP3.
You can also explore various embroidery file types to find the best fit for your machine.
Pay attention to file sizes and design compatibility to make sure transfers to your machine go smoothly.
Embroidery software makes it easy to work with these formats and create custom designs.
Sources for Free and Paid Embroidery Designs
If you’re looking for embroidery designs, you can find a wealth of free options from websites that offer downloadable patterns.
Paid design libraries, subscription services, and marketplaces offer more professional and specialized designs.
Don’t be afraid to commission custom designs if you have a specific vision in mind.
Creating Custom Designs With Embroidery Software
Boost your creativity with embroidery design software!
These powerful tools let you digitize your own artwork, combine patterns, and even generate custom motifs.
Explore a world of possibilities – from adding personal touches to classic designs to crafting entirely unique embroidery masterpieces.
The options are endless when you take the driver’s seat.
Editing and Resizing Existing Embroidery Patterns
The ability to edit and resize existing embroidery patterns opens up a world of creative possibilities.
Leverage your embroidery software’s tools to scale patterns, adjust sizing, and reposition design elements seamlessly.
Explore file conversion options to make sure stitching runs smoothly, and optimize your patterns for high-quality results on any fabric or hoop size.
Troubleshooting Common Issues With Home Embroidery Machines
Don’t let common issues with your home embroidery machine get you down!
Our expert guide covers simple troubleshooting tips to help you tackle thread breaks, tension problems, needle breakage, and more,
so you can sew with confidence.
Thread Breaks and Bird Nesting Solutions
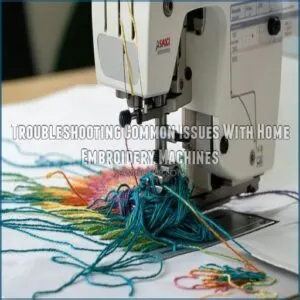
Dealing with thread breaks and bird’s nests is a common frustration for home embroiderers.
Check your thread tension and make sure your bobbin is wound correctly.
Choosing the right needle type for your fabric and ensuring proper hooping technique can also prevent these pesky issues.
With a little troubleshooting, you’ll be back to smooth, uninterrupted stitching in no time.
Tension Problems and Adjustments for Smooth Embroidery
To reduce the likelihood of thread breakage and fraying, invest in high-quality thread for embroidery. Ensuring proper thread tension is essential for smooth embroidery.
Check both the bobbin and top thread tensions, adjusting them to the manufacturer’s recommended settings.
Different thread types may require fine-tuning the tension to prevent breaks or puckering.
If you’re looking for resources to help you master embroidery machine tension, check out this website which offers a great selection of products and information.
With some trial and error, you’ll master the tension sweet spot for flawless embroidery.
Needle Breakage and Selection for Home Embroidery
Experiencing needle breakage? No need to fret!
Selecting the right embroidery needle is key.
First, match the needle size to your fabric weight – thicker fabrics require larger needles.
Second, consider the needle type – ballpoint for knits, sharp for woven fabrics.
Third, make sure the needle is firmly in place before starting your embroidery.
Needle care is important for smooth, seamless stitching.
Registration and Alignment Errors in Embroidery
Proper hooping techniques and fabric tension are critical to avoiding registration and alignment errors in your embroidery projects.
To achieve flawless designs, consider investing in a Perfect Alignment Laser tool that provides laser precision and stability.
Double-check your design placement, stitch density, and machine calibration to make sure your patterns stitch perfectly every time.
Slight adjustments to these factors can make all the difference in delivering professional-looking results.
Advanced Techniques for Home Embroidery Enthusiasts
Are you ready to take your home embroidery projects to the next level?
Discover advanced techniques like multi-hooping, appliqué, 3D embroidery, and embellishing tricky fabrics – the expert tips you need to create truly stunning results.
Multi-Hooping for Large and Complex Designs
Crafting large or complex designs with your home embroidery machine may require utilizing a vast library of free machine embroidery designs, including those found through tutorials and best free designs. Crafting large or complex designs with your home embroidery machine may require multi-hooping – a strategic technique to stitch your project in sections.
To master multi-hooping:
- Plan your design layout and hooping sequence
- Mark precise hoop placement marks on the fabric
- Make sure perfect hoop alignment for seamless connections
- Use stabilizers and hooping methods to minimize distortion
- Practice on scrap fabric before stitching your final project
Appliqué and Cutwork Methods for Home Embroidery
Appliqué and cutwork techniques open up a world of creative possibilities for home embroidery.
Choose fabrics wisely – lightweight cottons and linens work best.
Pick the right stabilizer to prevent puckering, and explore free online design resources to find appliqué patterns that showcase your style.
With a little practice, you’ll be crafting one-of-a-kind embroidered pieces.
3D Embroidery and Foam Techniques for Unique Projects
Elevate your embroidery projects with 3D techniques!
Incorporate foam pieces for eye-catching texture and dimension.
Layer foam appliqués to create depth and volume.
Experiment with 3D stitches that pop off the fabric, adding unexpected flair to your creations.
Explore a world of creative possibilities and bring your embroidery to new heights.
Embroidering on Difficult Fabrics and Materials
Embroidering on demanding fabrics like leather, denim, or delicate silks requires some extra care.
Start by selecting the right needle – ballpoints are best for knits while sharp needles tackle dense weaves.
Stabilize tricky materials with a sturdy cutaway or tear-away backing.
Take your time and adjust tension to prevent puckering or fabric damage.
With the right approach, you can beautifully embroider even the most challenging fabrics.
Frequently Asked Questions (FAQs)
How hard is it to learn machine embroidery?
Picture yourself immersed in a world of vibrant threads and flowing stitches.
Machine embroidery may seem intimidating at first, but with a bit of patience and practice, you’ll be stitching like a pro in no time.
How does a computerized embroidery machine work?
Computerized embroidery machines take the guesswork out of stitching by automatically following pre-programmed designs.
Just load your fabric, select a pattern, and let the machine’s computer-controlled needle do the intricate work for you.
It’s sewing made simple!
How to do embroidery work at home?
Slipping into the magic of home embroidery, you’ll be stitching your way to a personalized oasis.
Harness the power of a nifty machine and let your creativity flow, crafting custom designs with every vibrant thread.
How to start an embroidery business from home?
Starting an embroidery business from home is easier than you think!
Get the right equipment, master the basics, and tap into your creativity.
Then, market your unique designs and watch your side hustle blossom into a thriving enterprise.
What are good embroidery projects for beginners?
Beginner-friendly embroidery projects include monogrammed tea towels, custom-designed patches for jackets, and whimsical floral hoop art.
These projects allow you to hone your skills while creating charming, personalized pieces for your home or wardrobe.
How do I clean and maintain my embroidery machine?
Regularly oiling and cleaning your embroidery machine keeps it purring like a well-tuned kitten.
Use the manufacturer’s recommended products and follow their step-by-step instructions.
This will help maintain your machine’s peak performance for years to come.
What are the benefits of a multi-needle embroidery machine?
Did you know that multi-needle embroidery machines can stitch up to 15 designs simultaneously?
That’s a huge time-saver, letting you tackle more complex projects and boost your productivity.
You’ll love the convenience and efficiency of a multi-needle machine.
Can I embroider on leather or denim fabrics?
You can embroider on leather and denim, but it takes some extra care.
Use a sharp, embroidery-specific needle and stabilize the fabric well.
Take it slow, and you’ll create stunning embroidered designs on those tough textiles.
How do I digitize my own embroidery designs?
Digitizing your own embroidery designs is a breeze!
All you need is some digitizing software, a creative eye, and a little practice.
Start by sketching your design, then let the software work its magic to turn it into stitches.
Conclusion
Don’t let the intimidation of home embroidery machines hold you back – with the right know-how, you’ll be stitching stunning designs in no time.
From mastering file formats to troubleshooting tension issues, this detailed guide has equipped you with the essential home embroidery machine knowledge to elevate your creativity.
So what’re you waiting for? Jump in and let your imagination soar to new embroidery heights!

