This site is supported by our readers. We may earn a commission, at no cost to you, if you purchase through links.
 Master the art of invisible mending with this comprehensive guide to the ladder stitch, a sewing essential for seamlessly repairing your jeans.
You’ll learn how to select the right materials and prepare your fabric, ensuring your stitches blend in perfectly.
Follow step-by-step instructions to create the ladder effect, secure your work, and finish with finesse.
Plus, gain expert tips to perfect your technique, from stitch spacing to thread color selection.
Get ready to make your denim look as good as new with this easy and effective ladder stitch tutorial.
Table Of Contents
Key Takeaways
Ladder stitch is ideal for mending tears in jeans, providing an invisible repair that blends seamlessly with the fabric. To perform the stitch effectively, a sharp, thin needle and durable thread that matches the jeans’ color are essential.
The technique involves alternating needle insertion from one side of the fabric opening to the other, creating a ladder that becomes invisible once the thread is pulled tight. For a strong and inconspicuous finish, small stitches about 1/4 inch apart should be used, and the thread tension should be managed to prevent puckering.
Ladder Stitch Overview
The ladder stitch, also known as the invisible stitch, hidden stitch, or slip stitch, is a hand-sewing technique used to create an invisible seam. It’s perfect for closing the openings on the right side of fabric items like plush toys, pillows, and linings, where you want the stitches to be hidden.
To perform a ladder stitch, you’ll need a few basic materials:
- A sharp, thin needle to easily penetrate the fabric without leaving noticeable holes.
- Matching thread that’s strong and durable, and of a suitable thickness for the fabric you’re working with.
- Scissors for cutting the thread, with embroidery scissors like the Gingher Stork Embroidery Scissors being a good choice for precision.
Before starting, it’s important to press the seam edge where you’ll be sewing to ensure it’s sharp and crisp.
To begin sewing the ladder stitch:
- Start by threading your needle and knotting the end of the thread.
- Insert the needle from the inside of the fabric to hide the knot.
- Alternate the needle insertion from one side of the opening to the other, creating a horizontal line with the thread that resembles a ladder.
- Continue this process until the opening is closed.
To finish off the ladder stitch:
- Poke the needle through the fabric where the last stitch emerged.
- Loop the thread around the needle twice to form a knot.
- Pull the needle through the loops and tighten the thread.
- Poke the needle through the fabric next to the knot to hide the end.
- Use a sharp, thin needle and durable, matching thread.
- Make small, evenly spaced stitches, aiming for about 1/4 inch apart.
- Maintain proper thread tension to avoid puckering the fabric.
- Choose a thread color that closely matches the fabric for the best invisible effect.
By following these steps and tips, you can effectively use the ladder stitch to mend jeans or other fabric items, achieving a professional and invisible finish.
Definition and Purpose
You’re about to embark on a sewing adventure, stitching your way through denim like a pro. Let’s dive into the world of ladder stitch, a nifty little trick that’s a game-changer for your jeans repair toolkit.
- Ladder stitch, a.k.a. the invisible mending maestro, is your secret weapon for seamless fixes.
- It’s like a ninja in the history of hand sewing, leaving no trace on the right side of your fabric.
- Whether it’s a beloved pair of jeans or a cuddly plush toy, this stitch has got you covered.
- Grab your needle and thread, and let’s make those repairs disappear like magic!
Applications in Mending and Crafting
Diving deeper into ladder stitch applications, you’ll find it’s not just for mending tears.
| Use | Details |
|---|---|
| Patches | Perfect for adding personality with visible mending. |
| Darning | Reinforces weak spots, blending seamlessly. |
| Embellishments | Adds unique patterns and textures to your projects. |
Mastering ladder stitch variations can elevate your sewing game, turning simple repairs into creative expressions.
Required Materials for Ladder Stitch
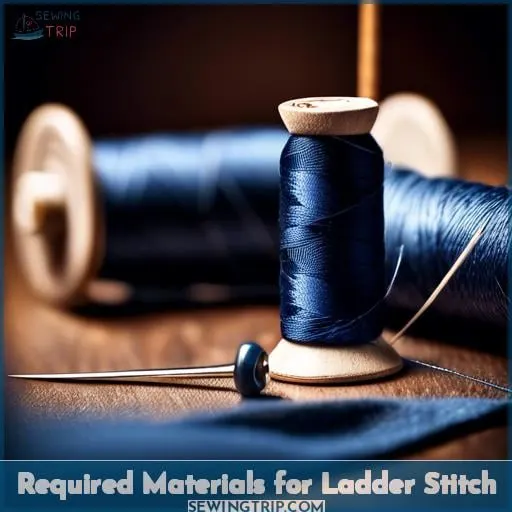
To effectively perform a ladder stitch on jeans or any other fabric, you’ll need to start with the right materials. Selecting a sharp, thin needle and matching thread is crucial for achieving an invisible seam.
The needle’s sharpness allows for easy penetration through the fabric, while its thinness ensures minimal visibility of the entry and exit points.
Matching the thread color to your fabric is equally important, as it helps the stitches blend seamlessly into the material. For jeans, a durable thread that can withstand the fabric’s weight and wear is recommended.
Preparing the fabric by pressing the seam edge where you’ll be working can also enhance the stitch’s invisibility and neatness.
Needle and Thread Selection
To perform a ladder stitch on jeans, you’ll need to select the appropriate needle and thread to ensure the mend is both invisible and durable.
- Needle types: Opt for a sharp, thin needle that can easily penetrate the denim without leaving noticeable holes. A crewel needle or a tapestry needle can be suitable choices.
- Thread materials: Use a thread that matches the color of your jeans. Embroidery floss can be too thick, so choose a strong sewing thread instead.
- Thread durability: Consider the wear and tear your jeans will go through. A double thread can offer more strength, but a single thread will be less visible.
When threading your needle, remember that a shorter length of thread is easier to manage and less likely to tangle. Now, with your materials ready, you’re set to make those invisible mends that will keep your jeans looking neat and tidy.
Preparing the Fabric
The ladder stitch, also known as the invisible stitch, hidden stitch, or slip stitch, is a hand-sewing technique used for creating invisible seams on the right side of fabric. This stitch is particularly useful for closing the openings of st■ toys, pillows, linings, and for attaching bias bindings without visible stitches.
The process involves sewing in a way that mimics stitches on the wrong side of the fabric, creating a ladder-like shape as the thread crosses between two folded edges. The primary purpose of the ladder stitch is to provide a neat and professional finish to sewing projects, making it an essential skill for repairs, crafting plush toys, and tailoring garments like jeans.
To successfully execute a ladder stitch, you’ll need a few basic materials: scissors for cutting thread, a sharp and thin needle for easy penetration of the fabric without leaving noticeable holes, and matching thread to ensure the stitch remains invisible.
The quality of these materials, especially the thread’s strength and the needle’s sharpness, plays a significant role in the durability and appearance of the finished stitch.
For a flawless ladder stitch, preparation and technique are key. Begin by pressing the seam edges where the stitch will be applied to ensure sharpness and ease of sewing. Using a sharp, thin needle and durable, matching thread will facilitate smoother sewing and reduce the likelihood of the thread breaking.
Small, evenly spaced stitches are crucial for maintaining the invisibility of the seam. When finishing the stitch, secure the thread with a knot by looping the thread around the needle twice before pulling through to tighten.
This not only secures the stitch but also helps to hide the knot within the fabric for a clean finish.
The ladder stitch isn’t only practical for mending and crafting but also offers a way to tailor garments for a better fit, such as taking in the waist of jeans. This stitch can be used to create darts at the side seams or to adjust the center back seam, providing a tailored fit without visible stitching.
The technique’s versatility and discreet appearance make it a valuable skill for both beginners and experienced sewers.
In summary, mastering the ladder stitch requires understanding its purpose, gathering the right materials, and practicing the technique with attention to detail. Whether you’re mending a tear, crafting a plush toy, or tailoring a garment, the ladder stitch offers a durable and invisible solution for creating seamless finishes in sewing projects.
Preparing for the Ladder Stitch
Before diving into the ladder stitch, let’s ensure your fabric is primed for perfection.
Here’s your pre-stitch checklist:
- Press that seam edge: A sharp crease is your runway for a smooth sewing journey.
- Sharp needle at the ready: It’s your magic wand for those invisible stitches.
- Matching thread: Like a chameleon, it blends in, making your stitches vanish.
- Durable thread: It’s the backbone of your stitch, so make it strong.
Sewing the Ladder Stitch
To effectively sew the ladder stitch on jeans, begin by threading a sharp, thin needle with a matching thread.
Make small, evenly spaced stitches, aiming for about 1/4 apart. Maintain thread tension to avoid bunching the fabric.
This technique is ideal for invisible mending, offering a seamless finish to your jeans alterations or repairs.
Starting the Stitch
The ladder stitch, also known as the invisible stitch, hidden stitch, blind stitch, or slip stitch, is a hand-sewing technique used to join two folded edges of fabric together in a way that makes the thread almost invisible.
This stitch is particularly useful for closing the openings of turned-inside-out sewing projects, such as st■ toys, pillows, and linings, without showing any visible stitches on the outside. The stitch creates a ladder-like appearance before it’s pulled tight, hence the name.
To perform a ladder stitch, you’ll need a few basic materials:
- Scissors: To cut the thread to the desired length.
- Sharp, thin needle: A fine needle will make it easier to create small, discreet stitches.
- Matching thread: The thread should match the color of the fabric for the stitches to be truly invisible.
For a successful ladder stitch, consider the following tips:
- Press the seam edge where you’ll be stitching to create a sharp, defined edge.
- Use a sharp, thin needle to make it easier to pass through the fabric without leaving large holes.
- Select a durable thread that matches the fabric color to ensure the stitch remains invisible.
- Make small, evenly spaced stitches to maintain consistency and strength in the seam.
To finish off the ladder stitch securely:
- Poke the needle through the fabric at the point where the last stitch emerged.
- Loop the thread around the needle twice to create a knot.
- Pull the needle through the loops to tighten the knot.
- Poke the needle through the fabric next to the knot to hide the end of the thread inside the fabric.
The ladder stitch isn’t only used for mending but also for creating a clean finish on handmade items like plush toys, pillows, and linings. It’s also used in tailoring, such as adjusting the waist of jeans or creating a new hem, where an invisible finish is desired.
The stitch is versatile and can be used in various fabric types and sewing projects.
Making the Ladder
To perform the ladder stitch on jeans, which is also known as the invisible stitch, hidden stitch, blind stitch, or slip stitch, follow these steps:
- Prepare your materials, ensuring you have a sharp, thin needle, scissors, and matching thread.
- Press the seam edge where you’ll be sewing to create a sharp fold, which will help in making the stitch truly invisible.
- Start the stitch by threading the needle and tying a knot at the end of the thread. Insert the needle from the inside of the fabric to hide the knot.
- Sew across the opening, alternating sides and creating a horizontal line with the thread, which will look like a ladder when not pulled tight.
To finish the ladder stitch:
- After completing the last stitch, poke the needle through the fabric where the last stitch emerged.
- Loop the thread around the needle twice and pull the needle through the loops to form a knot.
- Tighten the thread to secure the knot and then poke the needle through the fabric next to the knot to hide the end.
For successful ladder stitching, make small, evenly spaced stitches, and choose a thread color that matches your jeans to make the mending invisible. This technique is easy and effective for mending jeans and can be used for various other applications such as plush toys, pillows, linings, and bias binding.
Finishing the Ladder Stitch
Once you’ve mastered the ladder stitch, finishing it off properly is crucial to maintain the invisibility of your work.
To secure the stitch on your jeans, simply poke the needle through the fabric where the last stitch emerged, loop the thread around the needle twice, and pull the needle through the loops to form a knot.
Then, to hide the knot and ensure a neat finish, poke the needle through the fabric next to the knot and snip off the excess thread.
This technique will help you achieve a professional and durable result, keeping the repair or alteration invisible and the fabric intact.
Securing the Stitch
Once you’ve crafted your ladder stitch with precision, it’s time to anchor your handiwork.
For knot placement, slide your needle through the fabric at the last stitch’s exit point. Wrap the thread around the needle twice for a sturdy finish, then pull through to tighten.
This little trick secures your stitch, ensuring your invisible mending on jeans lasts through wear and wash.
Hiding the Knot
To finish your ladder stitch on jeans with finesse, you’ll want to ensure the knot is as inconspicuous as a chameleon on a kaleidoscope.
- Knot Placement: Tuck it in close to where your last stitch surfaced, like a secret whispered between friends.
- Thread Thickness: Choose a thread that’s the Goldilocks of threads—not too thick, not too thin—so it blends in without a trace.
- Needle Size: Match your needle to the fabric thickness; a needle that’s too big will be like a bull in a china shop, while one that’s too small will have you sewing until the cows come home.
Once you’ve tied the knot, send the needle through the fabric near the knot’s hideout to bury the evidence. Snip the thread tail, and voilà, your ladder stitch is as invisible as a ninja in the night.
Tips for a Perfect Ladder Stitch
To achieve a perfect ladder stitch on jeans, focusing on stitch spacing and tension is crucial.
Ensure your stitches are small and evenly spaced, maintaining a consistent tension to avoid puckering the fabric.
Selecting the right thread color that matches your jeans will make the stitch virtually invisible, enhancing the repair’s aesthetics.
Stitch Spacing and Tension
After securing your stitch, it’s time to focus on stitch spacing and tension. Aim for uniform stitch length, matching your needle size to the fabric thickness.
Durable thread is key for a lasting repair. Whether you’re tailoring jeans at the waist or taking in jeans at the side seams, a consistent stitch pattern ensures your ladder or slip stitch remains invisible and strong.
Choosing the Right Thread Color
The ladder stitch, also known as the invisible stitch, hidden stitch, blind stitch, or slip stitch, is a hand-sewing technique used for creating invisible seams. This stitch is particularly useful for closing the openings on the right side of fabric projects, such as mending tears, sewing plush toys, pillows, linings, and applying bias binding, without visible stitches.
The technique involves sewing in a way that mimics stitches on the wrong side of the fabric, creating a ladder-like shape that becomes invisible once the thread is pulled tight.
To perform the ladder stitch effectively, you’ll need:
- Scissors for cutting thread and fabric as needed.
- A sharp, thin needle to ensure precise stitches without damaging the fabric.
- Matching thread that blends with the fabric to maintain the invisibility of the stitch.
For a successful ladder stitch, consider the following tips:
- Press the seam edge before starting to ensure sharpness and easier handling.
- Use a sharp, thin needle to make the sewing process smoother and to avoid leaving noticeable holes.
- Select a durable, matching thread to ensure the repair lasts and remains invisible.
- Make small, evenly spaced stitches to maintain consistency and invisibility of the seam.
To securely finish the ladder stitch:
- Poke the needle through the fabric where the last stitch emerged.
- Loop the thread around the needle twice.
- Pull the needle through the loops to form a knot.
- Tighten the thread to secure the knot.
- Poke the needle through the fabric next to the knot to hide the end.
The ladder stitch is versatile and can be used for various applications beyond mending, including tailoring jeans waistbands, adding elastic bands to waistbands, and creating darts at side seams for a better fit.
It’s also a preferred method for hand-sewing hems on jeans and other garments, providing a durable and invisible finish.
When altering jeans, such as taking in the waist at the center back seam, adding an elastic band into the jean waistband, or adding darts at side seams, the ladder stitch can be an invaluable tool for achieving a professional and tailored look.
The key to success lies in choosing the right materials, such as a chenille needle for thicker fabrics like denim, and employing techniques that ensure durability, such as using fade-resistant and strong thread.
In summary, the ladder stitch is a fundamental sewing technique that offers an invisible solution for closing seams and making various fabric repairs and alterations. With the right materials and by following the provided tips, anyone can master this stitch to enhance their sewing projects.
Frequently Asked Questions (FAQs)
Can ladder stitch fix large holes in jeans?
The ladder stitch, while a wizard at making invisible seams and closing up small openings, isn’t the best choice for large holes in jeans.
For those gaping chasms, you’re better off with a patch or some creative darning.
Think of the ladder stitch as your go-to for stealth repairs, not the heavy lifting!
Is ladder stitch suitable for stretch denim?
Yes, ladder stitch can be used on stretch denim, but it’s crucial to maintain the fabric’s elasticity.
About 2-5% of jeans today contain spandex for stretch.
When mending, opt for a stretch stitch to prevent seam breakage and preserve the jeans’ flexibility.
How to ladder stitch without puckering fabric?
To avoid puckering with ladder stitch, don’t pull the thread too tight; just enough to join the fabric sides.
Use small, even stitches and ensure the thread isn’t thicker than the fabric.
Can ladder stitch be used on thick denim seams?
Yes, ladder stitch can be used on thick denim seams. However, you’ll need to adjust your technique slightly. Use a strong needle and durable thread. Make your stitches a bit larger, around 1/2 apart, to accommodate the fabric’s thickness.
How to ladder stitch on a curved seam?
To ladder stitch on a curved seam, you’ll need patience and a bit of finesse. Imagine you’re drawing gentle waves with your needle, not straight lines.
Keep your stitches small and even, allowing the curve to guide your hand. This technique ensures a seamless finish, even on the trickiest of curves.
Conclusion
Embarking on the journey of mastering the ladder stitch is akin to weaving a tapestry of resilience and finesse into your denim. With the skills you’ve honed, you’re now equipped to breathe new life into your jeans, making them look as good as new.
By embracing these techniques, you’ve not only mended a garment but also fortified your connection with the art of invisible mending. So, go forth and let your ladder stitch on jeans be a silent herald of your dedication to preserving the beauty and integrity of your beloved denim.

