This site is supported by our readers. We may earn a commission, at no cost to you, if you purchase through links.
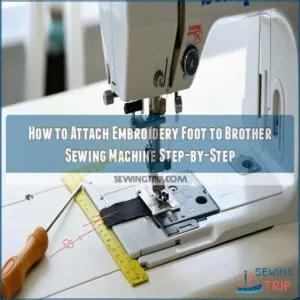
Raise the presser foot lever, then press the black button on the presser foot holder to remove the current foot.
Align the embroidery foot bar directly under the needle clamp screw.
Carefully clip it into place and verify it’s sitting evenly.
Secure the foot by tightening the retaining screw with a screwdriver.
Double-check the attachment to confirm it’s firmly in place.
Once done, lower the presser foot lever and replug your machine.
That’s it—ready to stitch something extraordinary!
Table Of Contents
Key Takeaways
- Turn off and unplug your machine for safety before starting.
- Align the embroidery foot bar under the needle clamp screw and clip it in place.
- Secure the foot with the retaining screw using a screwdriver, ensuring it’s tight but not overly so.
- Double-check the attachment for stability and ensure the embroidery foot is firmly secured and aligned properly.
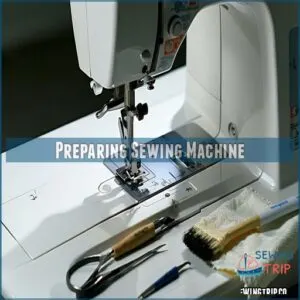
Preparing Sewing Machine
Before attaching an embroidery foot, turn off your sewing machine and unplug it to make certain of safety.
Gather the necessary tools, like the correct screwdriver and embroidery foot, and make sure the parts are compatible with your Brother sewing machine, which is crucial for compatibility.
Ensure Machine is Powered Off
Before you start, always unplug your Brother sewing machine to maintain power safety.
Machine shutdown prevents accidents and protects you during embroidery foot installation.
Electrical precautions matter—don’t trust just the power switch!
This simple step enhances sewing machine maintenance and energy efficiency.
Stay cautious while handling sewing machine attachments, ensuring a smooth and safe process to attach the embroidery foot.
Gather Necessary Tools
You’ll need the right screwdriver, matching your presser foot holder screw type.
Grab the embroidery foot, ensuring it’s compatible with your machine. Check the presser foot holder and its lever for smooth operation.
Verify your tools fit the attachment methods properly. A sewing machine screwdriver purchase might be necessary.
Tool selection matters—using the wrong tool may strip screws, delaying your embroidery foot attachment process, which is why proper tools and a sewing machine screwdriver are crucial.
Locate Correct Attachment Point
Look for the attachment points on your Brother sewing machine. These are typically near the presser foot area.
Follow these steps:
- Locate the mounting areas where the embroidery foot connects.
- Check the foot alignment space for proper fit.
- Identify screw locations for securing.
- Ensure the machine compatibility matches your embroidery foot model.
This leads to a smooth setup! Understanding sewing machine attachments is essential for a successful embroidery project.
Verify Embroidery Foot Compatibility
Before attaching the embroidery foot to your Brother sewing machine, verify compatibility by reviewing the foot type check. Refer to your machine’s manual to confirm it suits your specific model and embroidery settings.
Watch for compatibility issues like mismatched Brother attachments. Double-check sewing machine specs to avoid problems when installing the embroidery foot and achieving smooth stitches on your embroidery machine.
Understanding embroidery foot compatibility is essential for a successful attachment, which involves checking the foot compatibility charts to confirm the right fit. This step is crucial for ensuring that your embroidery foot works correctly with your Brother sewing machine, allowing you to complete your embroidery projects with ease and precision.
Attaching Embroidery Foot
The precision-perfect attachment of your embroidery foot requires careful attention to detail. First, press the needle position button once or twice until your needle reaches its highest point. You’ll know it’s right when the hand wheel mark sits at the top position.
Now, it’s time for proper foot alignment tips – turn off your machine and raise the presser foot lever. Here’s where machine calibration becomes important: locate the black button on the back of your presser foot holder and press it firmly to release the current foot.
With your index finger wrapped around the lever at the foot’s back, position the embroidery foot bar directly over the needle clamp screw. While maintaining pressure on the lever, secure the brother attachment to the presser foot bar. This simple yet precise process makes sure of the best stitch quality for your embroidery projects.
To make sure a successful attachment, always follow the presser foot instructions for your specific sewing machine.
Removing Old Foot
You’ll need to remove your current foot before installing the new embroidery foot on your Brother sewing machine.
Using your screwdriver, locate the black button on the back of the presser foot holder and press it while gently removing the old foot.
This process requires careful handling to avoid damaging the machine or the new embroidery foot.
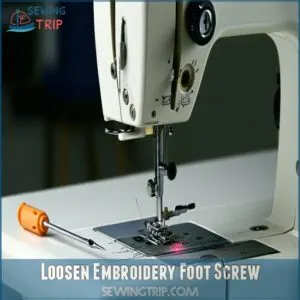
Loosen Embroidery Foot Screw
Right before you proceed into the heart of embroidery foot attachment, locate the presser foot holder screw at the back of your Brother machine.
With your screwdriver in hand, turn it counterclockwise to loosen the embroidery foot screw.
Don’t remove it completely – just enough that the current foot becomes loose. A quarter turn usually does the trick.
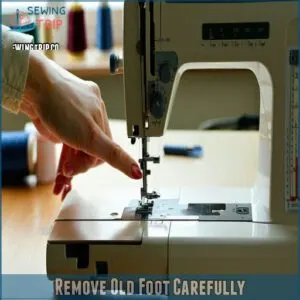
Remove Old Foot Carefully
With steady hands and a gentle touch, you’ll want to carefully remove the old foot from your Brother sewing machine.
Once you’ve loosened the screw, grasp the foot firmly but gently, and lift it away from the presser foot holder.
- Keep your fingers clear of any sharp edges
- Support the foot as you remove it
- Set the old foot aside in a safe place
- Note the original position for reference
- Avoid forcing or twisting the foot during removal to prevent damage and ensure a smooth process with gentle touch
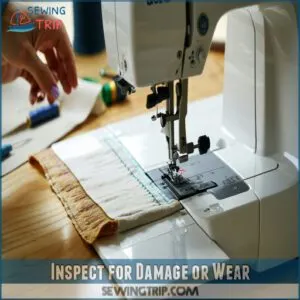
Inspect for Damage or Wear
Careful inspection of your embroidery foot reveals potential issues before they become problems.
Check the metal attachment points for signs of rust or corrosion.
Look closely at the plastic components for cracks or stress marks.
Examine the spring mechanism for proper tension and movement.
Run your finger along the edges to detect any rough spots that could snag fabric during sewing.
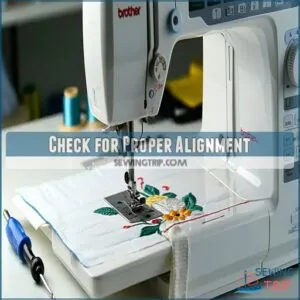
Check for Proper Alignment
Before moving forward, closely examine your embroidery foot’s alignment with the needle position. You’ll want the foot to sit perfectly perpendicular to the feed dogs.
A loose screw can cause the foot to detach, affecting stitch quality. Double-check that the foot’s mounting points align with the presser bar’s attachment slots.
If you spot any misalignment, even slight, it could affect your stitch quality and potentially damage your Brother sewing machine during embroidery.
For troubleshooting and fixes, consult this sewing machine foot guide.
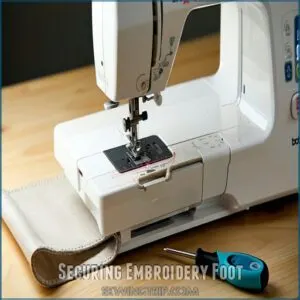
Securing Embroidery Foot
You’ll need to secure your embroidery foot correctly to prevent any unwanted movement during your sewing projects.
Line up the embroidery foot with your machine’s attachment point, and tighten the retaining screw with your screwdriver until it’s snug but not overly tight, to ensure a secure fit.
Align Foot With Attachment Point
Now that you’ve removed the old foot, let’s perfectly position your new embroidery foot.
Take your embroidery foot and locate the mounting tabs underneath.
You’ll see a metal embroidery bar that needs to align with the attachment point on your Brother machine.
Position the foot so these tabs slide into their designated slots – they should match up like puzzle pieces.
Hold the foot steady, keeping it perpendicular to guarantee proper alignment.
Secure Foot With Retaining Screw
Once the embroidery foot is aligned, hold it steady and locate the embroidery foot screw.
Insert it into the presser foot holder screw area on the machine. Begin threading it gently by hand to maintain proper foot alignment.
This assures the embroidery machine attachment process remains smooth, avoiding unnecessary adjustments during machine calibration or embroidery settings setup.
Understanding the role of sewing machine feet is essential for successful embroidery projects, which involves knowing how to use the embroidery machine correctly.
Tighten Screw Using Screwdriver
Use a screwdriver to firmly tighten the embroidery foot screw. Start by selecting the correct tip for the presser foot holder screw.
Align it properly with the screw head, ensuring steady pressure. You can purchase replacement embroidery foot screws online.
Turn clockwise—slowly, not too tight, to avoid damage. These tightening techniques guarantee proper embroidery alignment and machine calibration, an essential step in learning how to attach embroidery foot securely.
Verify Foot is Firmly Attached
Once the embroidery foot is installed, confirm it’s firmly attached by wiggling it gently—no movement should occur.
Check the Foot Alignment and verify proper Screw Tightening for stability.
Test the Embroidery Settings to confirm smooth operation.
If the foot loosens during Machine Calibration, repeat the Attachment Safety steps.
A secure fit provides flawless stitching and prevents needle damage.
Frequently Asked Questions (FAQs)
How to attach the embroidery foot?
Start by raising the needle and presser foot, then loosen the presser foot holder screw.
Align the embroidery foot bar over the needle clamp screw, tighten securely with a screwdriver, and verify it’s firmly attached and vertical.
How do I remove the embroidery foot?
Did you know 90% of sewing mishaps happen due to misaligned tools?
To remove the embroidery foot, loosen its screw using a screwdriver, hold the foot firmly, and gently detach it from the presser foot holder.
How do you use a presser foot embroidery machine?
Position fabric under the presser foot, select your embroidery design, and lower the foot.
Let the machine guide the stitching while ensuring smooth fabric movement.
Keep your hands steady for precise and creative patterns.
How do you tighten an embroidery foot?
Hold the embroidery foot firmly in place.
Align its bar over the needle clamp screw, then tighten the embroidery foot screw securely with a screwdriver.
Make sure it’s snug to avoid wobbling, but don’t overtighten.
How do you operate an embroidery machine?
Power up the machine, load your design, stabilize the fabric, and hoop it securely.
Select your thread, insert it properly, and align the hoop.
Press “start” and monitor the stitching progress for precision.
How do I embroider a piece on a sewing machine?
Think of your sewing machine as a canvas.
Attach the embroidery foot, select your design, stabilize the fabric, and thread the needle.
Then, guide the fabric gently while the machine stitches your masterpiece.
How to attach foot on brother sewing machine?
Detach the current foot by pressing the black button or unscrewing it.
Align the embroidery foot with the bar, secure it with the screw using a screwdriver, and make sure it’s tightly attached for smooth operation.
How to attach an embroidery foot?
Over 85% of sewing errors come from improper setup, so attach the embroidery foot carefully.
Align the foot bar with the needle clamp, secure it with the screw, and double-check for a tight, accurate fit.
How to put the foot back on a sewing machine?
Slide the presser foot into place, aligning it with the mounting area.
Secure it by tightening the screw or snapping it into position.
Make certain it’s firmly attached, and test for stability before stitching.
How to reattach a presser foot?
Align the presser foot with the machine’s holder, ensuring the mounting tabs fit securely.
Press the black release button gently, lower the foot in place, and tighten the screw.
Test for stability before stitching.
Conclusion
Don’t worry if attaching the embroidery foot feels tricky at first—it gets easier with practice.
By following these steps, you’ve learned how to attach an embroidery foot to your Brother sewing machine quickly and safely.
Always double-check that the foot is aligned and securely fastened before stitching. Keeping your tools and machine ready keeps smooth operation.
Now, you’re set to create stunning embroidery projects with confidence and precision. Let your creativity shine! Happy sewing!

