This site is supported by our readers. We may earn a commission, at no cost to you, if you purchase through links.
That’s why learning how to clean a sewing machine isn’t just about appearances; it’s the single best way to keep your stitches smooth and your projects running without a hitch. With the right know-how, a clean machine gives every spool, bobbin, and foot pedal a brand new lease on life.
Table Of Contents
- Key Takeaways
- Why Sewing Machines Need Regular Cleaning
- Essential Tools and Supplies for Cleaning
- How Often Should You Clean Your Sewing Machine?
- Step-by-Step Sewing Machine Cleaning Process
- Proper Maintenance and Machine Reassembly
- Specialized Cleaning Techniques for Key Parts
- Top 7 Sewing Machine Cleaning Tools
- Additional Tips for Sewing Machine Care
- Frequently Asked Questions (FAQs)
- Conclusion
Key Takeaways
- Regular cleaning is essential to prevent lint, dust, and debris from causing jams, poor stitch quality, or costly repairs in your sewing machine.
- Using the right brushes, cloths, oil, and small tools makes cleaning safer, easier, and more effective for both routine and deep maintenance.
- Your cleaning frequency should match how much you sew and the type of fabrics you use, with heavy users and linty projects needing more frequent care.
- Always unplug your machine, remove key parts before cleaning, and follow a step-by-step process—never use compressed air and consult your manual for best results.
Why Sewing Machines Need Regular Cleaning
A sewing machine works best when it’s clean inside and out. Every bit of lint or dust has a way of finding trouble spots.
Here are the main reasons your machine depends on regular cleaning.
Effects of Dust and Lint Buildup
Neglecting lint accumulation and dust effects is a shortcut to machine degradation. Lint and dust slip deep into moving parts, quietly raising maintenance costs and lowering sewing performance. Regularly cleaning your sewing machine matters. If you skip lint removal, expect to face:
- Costly repairs
- Thread breakage
- Skipped stitches
- Frustrating jams
Stay ahead with prevention. Proper maintenance involves checking for lint removal tips to guarantee smooth operation.
Impact on Stitch Quality and Threading
Lint accumulation and old dust aren’t just eyesores—they quietly sabotage your stitches. A clogged thread path, sticky tension disks, or gummed feed dogs can spell stitch irregularities and thread breakage. Even a slight buildup will cause tension issues, needle damage, and headaches.
Hidden lint and dust quietly ruin your stitches, causing irregular tension, needle damage, and frustrating sewing headaches
Regular cleaning of the feed dogs helps prevent compacted lint from accumulating. If smooth, beautiful stitch quality is your goal, keeping the inner workings spotless is non-negotiable.
Signs Your Machine Needs Cleaning
Once your stitches start skipping, your handwheel feels stiff, or you hear odd grinding, your machine is waving a red flag for cleaning.
Keep an eye out for:
- Noisy operation like clicks, rattles, or squeaks
- Sudden stitch problems or thread jams
- Visible lint buildup around the bobbin
- Resistance or dragging during use
Spotting these cues means it’s time for sewing machine maintenance.
Essential Tools and Supplies for Cleaning
Before you start cleaning, it’s good to gather the right supplies for the job. Some tools are essential, while others just make things quicker and easier.
Let’s look at what you’ll need to keep your sewing machine in great shape.
Types of Brushes and Cloths
Ever tried sewing with a dusty needle plate? The right lint brush and microfiber cloth are a gamechanger. Small brushes—often made from nylon or even silicone—grab lint, not just push it around. Microfiber and lint-free cloths offer impressive absorbency for surfaces. Today’s cleaning kits bundle these essentials, reflecting a growing trend toward thorough, damage-free lint removal.
| Brush Materials | Cloth Absorbency |
|---|---|
| Nylon, silicone, dual | Microfiber, bamboo |
| Small brush, lint brush | Lintfree cloth |
| Kit contents vary | Cleaning trends shift |
Importance of Sewing Machine Oil
For smooth sewing, oiling is non-negotiable—think of it as the lifeblood of your machine. Machine oil isn’t just a luxury; it’s essential for:
- Reducing friction and wear between moving parts (Oil Benefits)
- Preventing thread jams and mechanical noise (Oiling Frequency)
- Protecting against costly repairs linked to improper use or poor oil formulations (Market Insights)
Useful Accessories: Screwdrivers, Tweezers, Vacuums
Accessory Kits aren’t just a convenience—they’re your ally in cleaning frequency. A small screwdriver lets you reach tough spots, minimizing damage thanks to specialized designs.
Tweezer precision comes in handy when lint builds up deep in the bobbin case, far beyond a small brush’s reach.
For quick pickups, Vacuum Power from a mini vacuum safely removes dust without using compressed air.
How Often Should You Clean Your Sewing Machine?
Knowing when to clean your sewing machine keeps everything running smoothly and saves you trouble down the road. The right timing depends on how much you sew and the types of projects you tackle.
Here’s what you need to think about before setting your own cleaning routine.
Cleaning Frequency by Usage Type
How often should you clean your sewing machine? It all depends on how much you sew. Daily Cleaning is a must for heavy users—plan on a quick clean every few hours. Light use? Monthly or even every few months works.
Routine maintenance prevents trouble, so make a cleaning schedule that fits your usage intensity. Watch for Cleaning Signs, too!
When to Clean Based on Project Materials
Swapping fabrics mid-project? Lint-heavy fabrics like fleece or minky ramp up cleaning frequency—plan to remove lint and dust right after each project. Dense or textured materials call for special attention, too.
Whenever you change fabric types, a quick material switch cleaning keeps your machine running smooth. For complex jobs or heavy buildup, don’t hesitate to call in professional servicing.
Creating a Cleaning Schedule
Think of your cleaning schedule as a regular tune-up for your workflow. For best results, set up a routine with these three steps:
- Match cleaning frequency to your usage-based schedule.
- Don’t ignore material considerations—linty projects mean more cleaning.
- Watch for cleaning indicators and add scheduled reminders.
Annual professional servicing keeps your sewing machine maintenance routine on track.
Step-by-Step Sewing Machine Cleaning Process
When it’s time to clean your sewing machine, knowing what to do first makes a big difference. Here’s a simple walk-through to take you through each important step. Let’s get started with the basics below.
Unplugging The Machine Safely
Did you know forgetting to unplug your sewing machine is like sewing with your eyes closed? Electrical hazards, sudden surges, and moisture can spell disaster—even for seasoned crafters. Always unplug before cleaning. Turn off the switch first, then unplug. For a quick reference, here’s a handy table:
| Safety Step | Why It Matters |
|---|---|
| Turn Off Power | Prevents arcing |
| Unplug from Outlet | Stops accidental activation |
| Use Surge Protection | Protects internal circuits |
| Check Cord Safety | Avoids trip hazards |
| Store Dry and Covered | Blocks moisture, dust |
Removing Needle, Presser Foot, and Thread
Before you start cleaning any sewing machine parts, take a quick glance at your needle, presser foot, and thread.
Needle removal is simple: loosen the needle set screw, and slide it down. For Presser Foot Adjustment, locate and loosen its screw.
Always pull the thread in the same direction as stitching to protect thread tension. Needle replacement keeps stitches smooth.
Cleaning The Bobbin Area and Feed Dogs
Once you’ve set aside the needle and presser foot, shift focus to the bobbin area. Lint builds up there fast, especially after a few bobbin changes.
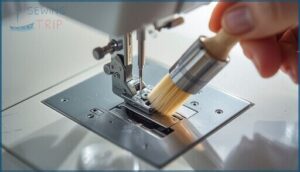
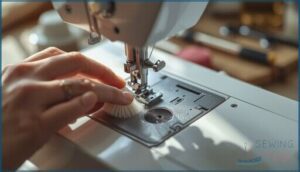
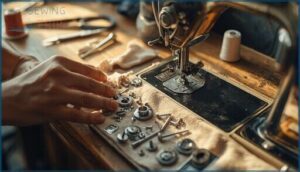
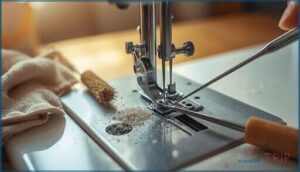
For Bobbin Maintenance and Feed Dog Care, lift the needle plate, remove the bobbin case, and use a small brush for Lint Removal and Shuttle Cleaning—don’t forget under the feed dogs. That’s real Thread Management in action.
Brushing and Vacuuming Internal Parts
With your machine open and surface lint cleared, focus on Internal Brushing and gentle Vacuum Techniques. Use your lint brush or soft cleaning tools and supplies—not compressed air—for removing lint and dust from tricky spaces.
A mini vacuum helps with Lint Removal and Dust Prevention. Before machine lubrication, verify every fiber is cleared for smooth, safe sewing ahead.
Proper Maintenance and Machine Reassembly
Once you’ve got your sewing machine clean, it’s time to check a few key things before you put it all back together. Proper upkeep now can help you avoid bigger headaches down the road. Here’s what you’ll want to focus on as you reassemble your machine.
Inspecting Parts for Wear or Damage
Ever notice a few skipped stitches or hear an odd clunk while sewing? That’s your cue: part inspection is your best ally for wear detection and damage prevention. Before reassembly, check these essentials:
- Examine the needle—look for bends, burrs, or dull tips.
- Inspect the presser foot and stitch plate for nicks.
- Assess the bobbin case and tension disks for roughness or thread grooves.
- Confirm the bobbin maintenance area is clean and smooth.
Staying alert to these trouble spots keeps your sewing uninterrupted and your results precise.
Applying Machine Oil Where Needed
With your freshly cleaned sewing machine sitting open, it’s time for the finishing touch: proper oil application. Reach for colorless, lightweight sewing machine oil—never use anything else. Focus on the lubrication points outlined in your manual, just 1–2 drops per spot. A precision tip helps you target each area without messy overflow. After applying, run the machine (without thread) for a minute, letting the oil settle for peak machine lubrication. Remember, oil maintenance after cleaning keeps your machine humming trouble-free.
| Lubrication Point | Oil Type | When to Oil |
|---|---|---|
| Needle bar | Sewing machine oil | After deep cleaning |
| Shuttle hook | Lightweight oil | Every 5–10 sewing hours |
| Moving joints | Precision oil | Quarterly maintenance |
Specialized Cleaning Techniques for Key Parts
Some parts of your sewing machine need special attention during cleaning. These areas can easily collect more debris or affect how your machine runs.
Let’s go through a few key spots you don’t want to overlook.
Cleaning Tension Discs
Think of tension discs as your secret weapon for perfect stitches—if they’re dirty, your results suffer. For top Thread Flow Optimization, raise the presser foot and use a brush or fabric strip to remove debris.
This simple Disc Cleaning Technique is essential Tension Disc Maintenance, boosting Stitch Quality Improvement and tackling Lint Prevention Methods right at the source every time.
Cleaning Shuttle and Hook
Precision in Hook Maintenance and Shuttle Cleaning pays off every time you sew. Start by removing the shuttle and hook, then use a micro-brush for lint removal in tight spots. Avoid oil on bristles here—oil attracts debris.
For smooth Thread Management, add a drop of oil to the shuttle race, then reassemble. Careful cleaning keeps your stitches crisp and trouble-free.
Cleaning The Machine Foot Pedal
When was the last time you gave your foot pedal a tune-up? Cleaning the sewing machine foot pedal matters just as much as cleaning the machine itself.
Start with Pedal Contact Cleaning—unplug for electrical safety, then open, wipe away dust, polish contacts, and check for stuck debris. Follow up with light Pedal Lubrication Methods for quieter action, following Cleaning Frequency Guidelines every 3–6 months.
Cleaning The Sewing Machine Base
Did you know lint accumulation under the base plate quietly sabotages performance? Cleaning the sewing machine base isn’t just “extra”—it’s core sewing machine maintenance. Unfasten the base plate to tackle stubborn debris. Use the right cleaning supplies for thorough machine base cleaning and finish by carefully wiping the outside. Remember, steady base debris removal protects every stitch.
- Base Plate Removal
- Target Lint Accumulation
- Wipe Exterior Surfaces
Top 7 Sewing Machine Cleaning Tools
Cleaning your sewing machine is a lot easier with the right tools on hand. There are a few essentials every sewist should keep nearby to tackle dust and lint.
Here’s a quick look at the top tools that make cleaning simple and stress-free.
1. Sewing Machine Cleaning Tool Kit
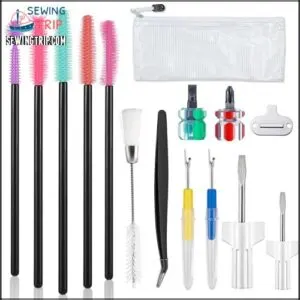
Ever notice how lint has a way of sneaking into every corner of your sewing machine? That’s where a good Sewing Machine Cleaning Tool Kit shines. These kits bundle Cleaning Brushes, tweezers, screwdrivers, and more—everything you need for reliable sewing machine cleaning.
Whether you’re digging lint from tricky spots or tightening a stubborn screw, tool kits keep your cleaning supplies and accessories organized. Add machine oil from the kit, and you’ll tackle sewing maintenance smoothly, keeping every moving part prepped for perfect stitches.
2. Sewing Machine Cleaning Brush Tool
If you want to keep your sewing machine humming, a quality cleaning brush tool is a must-have. These brushes are designed with sturdy plastic grips and come in various bristle types—soft for delicate dusting, firmer for stubborn lint. Flexible heads and micro tips let you reach the smallest crevices.
With durable brush materials, you’ll prevent shedding and metal bending, making cleaning techniques simple and safe. Use your lint brush after every project—your machine will thank you with smoother, cleaner stitches.
3. Sewing Machine Short Screwdrivers Set
Short screwdrivers belong at the heart of your cleaning routine. With sturdy chrome vanadium materials and ergonomic grips, you’ll find they fit tight spots your full-size tools can’t touch. Compact designs help you reach under the needle plate or around the bobbin case.
Some sets feature magnetic tips to catch wayward screws, making machine maintenance feel more manageable. Precision engineering ensures these cleaning tools protect delicate screws and threads, so every stitch starts with confidence—and just a little bit less frustration.
4. Singer Sewing Machine Oil Lubricant
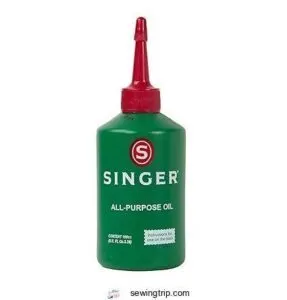
Precision starts with a drop—literally. Singer sewing machine oil, a colorless and odorless blend of paraffinic mineral oils and anti-rust agents, is your go-to for lubricating the sewing machine’s working joints.
Apply oil at key metal contact points to reduce noise and friction, ensuring smooth operation every time. A well-oiled machine won’t just hum quietly; it’ll resist rust and wear.
Store your oil in a cool, dark spot, and always follow safety measures—skin contact may cause mild irritation.
5. Portable Mini Handheld Vacuum Cleaner
A portable mini handheld vacuum cleaner is a powerful ally for sewing machine maintenance. Its compact build brings true Portability Benefits—easy to grab, lightweight, and cordless for dusting even the tightest corners. With strong Suction Power and smart Functional Features like LED lights or washable filters, these mini vacuums make cleaning sewing machine steps fast and satisfying.
Growing Market Growth mirrors rising User Satisfaction; they’re praised for quick touch-ups. For fuss-free cleaning tips, a mini vacuum keeps your workspace neat and your stitches perfect.
6. Portable Mini Makeup Brush Set
Mini makeup brush sets bring true ingenuity to cleaning sewing machines. Bristle Softness matters—these brushes excel at Lint Removal without scratching delicate parts. Their size makes step-by-step dirt control easy, even in the bobbin area.
Brush Durability impresses, especially with synthetic bristles holding shape after repeated cleanings.
What’s great? You get sets for a low cost, offering serious Cost-Effectiveness and easy Portable Cleaning. Add one to your routine and discover how a simple upgrade streamlines your sewing machine maintenance and overall cleaning process.
7. Sewing Machine Cleaning Brush Set
A well-chosen sewing machine cleaning brush set is a game changer for routine maintenance. Look for sets with microfiber or silicone bristles—these Brush Materials are gentle and won’t scratch. Dense Bristle Density and clever Brush Shape, like angled or double-ended designs, let you tackle lint depths in feed dogs, bobbin areas, and tight crevices.
A solid Set Composition includes twenty-plus brushes for every Cleaning Frequency. These sets easily fit into your cleaning sewing machine steps, making every machine parts cleaning process truly straightforward.
Additional Tips for Sewing Machine Care
Keeping your sewing machine in top shape isn’t just about dusting and oiling. There are a few extra habits that can make a big difference over time. Here are a few more tips to help your machine run smoothly and last longer.
Avoiding Compressed Air and Harsh Chemicals
Think canned air makes cleaning easier? It actually introduces moisture risks and compacts lint deeper, sometimes right where you can’t reach it. Harsh cleaning agents are no friend, either—they can damage your machine’s finish and delicate parts.
Expert advice? Stick to a soft brush and safe alternatives. You’ll keep dust at bay and maintain smooth, trouble-free sewing.
Covering and Storing The Machine
Your machine cover isn’t just an accessory—it’s essential. Covered machines collect 30% less dust and require less maintenance, extending your machine’s lifespan by years. Choose a breathable fabric cover that fits snugly.
Store in a dry, stable space away from humidity. Proper storage conditions and protective measures reduce lint jams by 40% and keep your stitches consistently beautiful.
Using Quality Needle and Thread
Ever notice how a strong foundation holds everything together? That’s what quality needle and thread do for your sewing projects. Prioritizing Thread Quality and Needle Selection means:
- Cleaner, more consistent stitches and fewer skipped threads
- Up to 30% less lint, making cleaning easier
- Reduced Machine Wear for a longer-lasting, smoother-running machine
Simple swaps pay off every time.
Consulting The Owner’s Manual
If you’re aiming for worry-free stitching, let your owner’s manual be your north star. Inside, you’ll find clear manual cleaning frequency, illustrated parts diagrams, oiling guidelines, and safety precautions specific to your machine.
It’s like having the manufacturer’s wisdom on your side—plus, those troubleshooting tips in your user guide often solve problems before they begin.
Frequently Asked Questions (FAQs)
Can I use alternative solvents for cleaning?
You can use alternative cleaning fluids like kerosene or isopropyl alcohol, but always check solvent compatibility and safety precautions.
Some agents, including WD40 and Murphy’s Oil, risk machine damage or environmental impact—so choose cleaning agents wisely.
How often should I replace the needle?
Think of the needle as the unsung hero, quietly bearing the brunt of every stitch.
Replace sewing machine needles every 6–8 hours of use, or at the first sign of wear, broken needles, skipped stitches, or thread issues.
Are there any self-cleaning sewing machines?
Yes, there are self-cleaning sewing machines, but mainly in industrial applications. These models feature sophisticated cleaning mechanisms and automation features that reduce maintenance, while typical home machines still require manual cleaning and ongoing care for troubleshooting.
What are signs my machine needs professional servicing?
Like a well-tuned engine, a sewing machine’s rhythm reveals everything—listen for unusual noises, spot stitch problems, or see visible damage.
If frequent fabric damage, usage frequency spikes, or persistent troubleshooting fail, it’s time for annual machine service.
Can dust accumulation affect machine performance?
Dust Impact builds up quickly, especially with frequent sewing.
Lint Buildup increases Machine Friction, slows Sewing Efficiency, and leads to jams, uneven tension, or even breakdowns.
Regular cleaning and dust removal are critical for Performance Optimization and long-term machine performance.
What should I do if I lose a screw?
If you lose a screw—like the needle clamp screw—pause your maintenance.
Safeguard removed screws in a magnetic tray for lost screw prevention, then match replacements from your screw storage kit, ensuring proper fit for safe, reliable machine parts.
How can I clean vintage sewing machines safely?
For vintage machine care, always use gentle maintenance—avoid harsh chemicals and excessive friction.
Cleaning an old Singer sewing machine requires delicate cleaning: use a soft cloth, mild soap, and precise tools for safe handling, preserving every detail.
Is it safe to use canned air for cleaning?
Using canned air for cleaning your sewing machine isn’t safe. Moisture risks can cause rust, the air blast pushes lint deeper, and electronic damage is possible.
For cleaning safety and maintenance, opt for brushes or vacuum alternatives instead.
How do I remove stains from the machine’s exterior?
To tackle stains on your sewing machine exterior, start with Stain Identification. Use Agent Application with mild soap on a microfiber cloth. Employ a gentle circular Cleaning Motion, rinse for Residue Removal, and always dry thoroughly after Cleaning your sewing machine.
Can pet hair affect my sewing machine’s performance?
Imagine fur weaving itself into your delicate stitches—pet hair easily finds its way into mechanisms, clogging filters and causing lint buildup.
Regular cleaning, debris removal, and pet-free zones are your best line of defense against machine trouble.
Conclusion
Ever wonder if a machine really “speaks” after you care for it? Try following these steps on how to clean a sewing machine—there’s a difference you’ll notice stitch by stitch.
Every project, from hems to heirlooms, flows smoother, as if the machine is working with you, not against you. Let this habit become your ritual of respect for your most trusted tool.
You’ll discover: clean machines don’t just sew better, they help you sew with confidence.


