This site is supported by our readers. We may earn a commission, at no cost to you, if you purchase through links.
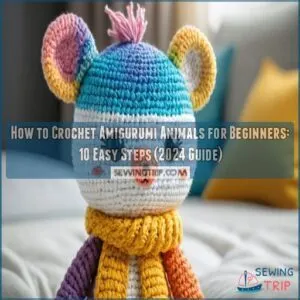 You’ll love learning how to crochet amigurumi animals for beginners – it’s like building with yarn!
Start with basic supplies: a 3.5mm hook, light-colored worsted weight yarn, and fiberfill stuffing.
Master the magic ring and single crochet stitch first – they’re your building blocks for creating any cute creature.
Work in continuous rounds, keeping your stitches snug but not too tight.
Like any craft worth mastering, amigurumi has its tricks: counting stitches becomes second nature, and you’ll soon develop a feel for when to increase or decrease to shape your animal’s features.
The secret to those Instagram-worthy finished pieces? It’s all in the details.
Table Of Contents
- Key Takeaways
- Crocheting Amigurumi Animals for Beginners
- What is Amigurumi and How to Get Started
- Mastering Basic Stitches for Amigurumi
- Shaping Techniques for Amigurumi Animal Bodies
- Adding Details to Bring Amigurumi Animals Alive
- Stuffing and Finishing Amigurumi Animal Projects
- Troubleshooting Common Amigurumi Crochet Issues
- Choosing The Best Yarn for Amigurumi Projects
- Essential Tools and Notions for Amigurumi Crochet
- Next Steps for Amigurumi Beginners
- Frequently Asked Questions (FAQs)
- Conclusion
Key Takeaways
- To start crocheting amigurumi animals, it’s essential to choose the right yarn, such as medium weight yarn options that offer versatility for various projects. You’ll need basic supplies like a 3.5mm hook, worsted weight yarn, fiberfill stuffing, stitch markers, sharp scissors, and a tapestry needle to start crocheting amigurumi animals.
- Begin by mastering the magic ring and single crochet stitch, as these are fundamental techniques for creating seamless, tight-fitting fabrics that encapsulate your stuffing.
- You can shape your amigurumi animals using increases and decreases to create spheres for heads, cylinders for limbs, and unique features like ears—all crucial for giving your creations a lifelike appearance.
- Add personality to your amigurumi by securely attaching safety eyes and embroidering facial features, transforming basic shapes into charming characters with expressive details.
Crocheting Amigurumi Animals for Beginners
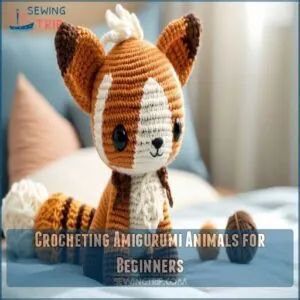
You’ll be amazed at how quickly you can create adorable stuffed animals using just yarn and a hook with the Japanese art of amigurumi.
Amigurumi is a great way to bring your fuzzy friends to life.
Whether you’re dreaming of making a cuddly bunny or a pocket-sized penguin, this beginner’s guide will show you exactly how to bring your fuzzy friends to life.
Essential Supplies and Tools
Starting your amigurumi journey doesn’t require a huge investment – just a few key tools to get you going.
Before diving into your first crochet animal, gather these essential supplies: a set of stitch markers to track your rounds, sharp scissors, and a tapestry needle, which is also ideal for sewing crochet pieces together.
Sharp scissors and a tapestry needle are must-haves for clean finishes.
Safety eyes and fiberfill stuffing for bringing characters to life.
Think of these tools as your amigurumi starter pack – they’ll be your trusty companions as you create your first cuddly creatures.
Choosing The Right Yarn and Hook
Wondering which yarn and hook to choose for your first amigurumi?
You’ll want cotton or acrylic yarn in sport or DK weight – they’re perfect for creating those tight, even stitches that make amigurumi special.
Go for a hook size smaller than what’s recommended on your yarn label to keep stuffing hidden.
Light colors work best for beginners since they make it easier to see your stitches.
Understanding Basic Stitches and Techniques
Now that you’ve got your supplies ready, let’s master the basic stitches that’ll bring your amigurumi animals to life.
You’ll need to know single crochet (sc) for creating tight, even fabric, plus increases and decreases for shaping.
The magic ring technique helps you start pieces without leaving holes.
Working in continuous rounds keeps your projects looking smooth and professional.
What is Amigurumi and How to Get Started
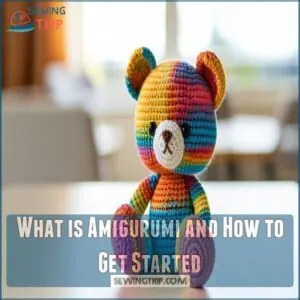
You’ll be amazed at how quickly you can create adorable stuffed animals with amigurumi, the Japanese art of crocheting small yarn creatures.
Amigurumi is a great craft for both beginners and seasoned crocheters.
You’ll only need basic supplies like yarn, a hook, and stuffing to start bringing these cuddly characters to life.
Origins and History of Amigurumi
You might be surprised to learn that amigurumi’s roots stretch back to China’s Shang Dynasty.
The craft made its way to Japan in the 17th century through Dutch and Chinese traders.
It wasn’t until the 1970s that amigurumi exploded in popularity, riding the wave of kawaii (cute) culture and characters like Hello Kitty.
Today, this adorable Japanese art of crocheting stuffed creatures has spread worldwide.
Characteristics of Amigurumi Crochet Animals
Amigurumi crochet animals stand out with their distinctly adorable features and compact size. Most designs pack a big personality into a tiny package, typically ranging from 2 to 6 inches tall.
Here’s what makes these yarn creatures special:
- Worked in continuous spiral rounds for seamless shapes
- Simple shapes combined to create complex characters
- Tight stitches that keep stuffing hidden inside
- Oversized heads and exaggerated features for maximum cuteness
Benefits of Crocheting Amigurumi Animals
Creating these adorable stuffed creatures offers more than just cute decorations.
As a stress relief activity, crocheting amigurumi animals helps you unwind after long days. It’s your personal creative outlet where each stitch builds confidence and skill.
Plus, handmade amigurumi make heartfelt gifts that bring smiles to loved ones’ faces.
Whether you’re learning basic patterns or mastering new techniques, you’ll join a welcoming community of crafters sharing the same passion.
Mastering Basic Stitches for Amigurumi
You’ll be amazed at how quickly you can create adorable amigurumi animals once you’ve got these basic stitches down pat.
Starting with single crochet and working your way up to increases and decreases, you’ll soon be whipping up cute creatures like a pro.
Single Crochet Stitch for Tight Fabric
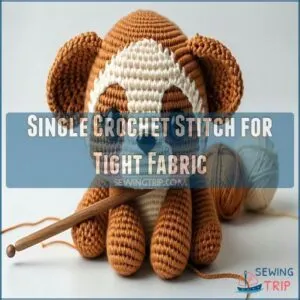
The single crochet stitch forms the backbone of tight, sturdy fabric in amigurumi projects.
By working each stitch close together, you’ll create a dense material that keeps stuffing securely inside your crochet animals.
To achieve this, consider the importance of thread tension, just like when preventing puckering in knit hems, as it affects the overall texture of your amigurumi.
Think of it like weaving a snug blanket – your hook should glide smoothly through the yarn, maintaining even tension.
For best results, choose a hook size smaller than your yarn label suggests.
Increasing and Decreasing Stitches
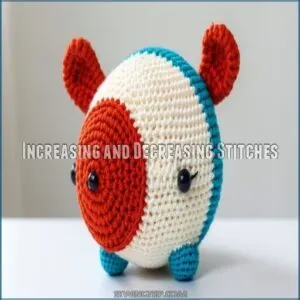
Mastering increases and decreases lets you shape your amigurumi’s curves and contours.
To increase, work two single crochets into one stitch – perfect for creating rounded bellies and heads.
Using the right type of amigurumi yarn can also greatly impact the overall look of your amigurumi.
For decreases, combine two stitches into one by working through both front loops – this helps slim down necks and legs.
Keep track of your stitch count carefully, as missing increases or decreases can throw off your entire project.
Working in Continuous Rounds
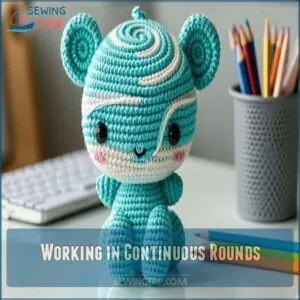
Just like those spiral staircases in old castles, working in continuous rounds is a signature move in amigurumi.
Unlike regular crochet where you join each round, you’ll keep going in a spiral.
This creates seamless, hole-free toys that’ll make you proud.
Here’s what you need to nail those perfect spirals:
- Pop a stitch marker in your first stitch
- Move it up each round to track your progress
- Count your stitches religiously – it’s your best friend
- Keep your tension consistent for even spirals
- Watch for that slight "jog" where rounds meet
Mastering The Magic Ring Technique
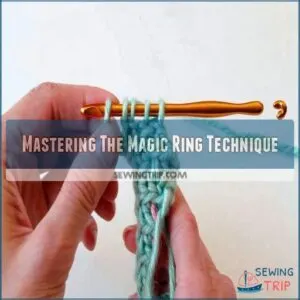
Learning the magic ring technique feels like gaining a secret superpower in amigurumi.
You’ll start by creating a tight, adjustable center that prevents those pesky holes from forming in your work.
Simply wrap your yarn around your fingers, insert your hook, and pull through to form a loop.
Work your stitches into this loop, then pull tight—voilà, a perfect start to your amigurumi project!
Shaping Techniques for Amigurumi Animal Bodies
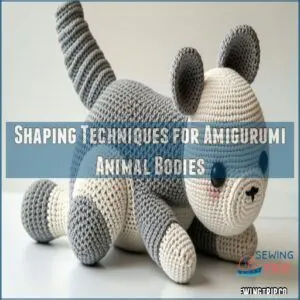
You’ll love watching your amigurumi animals come to life as you learn to shape their bodies using simple increase and decrease techniques.
Whether you’re creating round heads, long tails, or floppy ears, these easy shaping methods will help you transform basic stitches into adorable creatures that look just like the pattern.
Creating Spheres for Heads and Bodies
Creating perfect spheres sets your amigurumi animals apart.
Once you’ve got your basic stitches down, it’s time to shape those adorable round heads and bodies.
Start with a magic ring, then follow a pattern of increases and decreases to build your sphere.
Think of it like building a snowball – you’ll add stitches to expand, then decrease to round it off beautifully.
Forming Cylinders for Limbs and Tails
When making limbs and tails for your amigurumi animals, starting with a simple cylinder shape is your key to success.
Work even rounds of single crochet stitches until you reach your desired length, keeping your stitch count consistent throughout.
For thinner limbs, start with fewer stitches (6-8), while thicker parts like legs might need 12-16 stitches.
Remember to stuff as you go for even shaping.
Shaping Unique Features Like Ears and Snouts
Now that you’ve mastered cylinders, let’s make those cute animal features pop! Shaping ears and snouts brings your amigurumi characters to life. Think of these details as the finishing touches that transform a simple shape into an adorable critter.
- Ears often start with a magic ring and quick increases for pointy tips
- Snouts use decrease rounds to create that perfect nose shape
- Tails can range from simple tubes to elaborate spirals with strategic increases
Adding Details to Bring Amigurumi Animals Alive
You’ll transform your amigurumi from basic shapes into charming characters by adding eyes, smiles, and textured details that give them personality.
With simple embroidery stitches and safety eyes, you can watch your creation come to life right before your eyes.
Embroidering Facial Features and Expressions
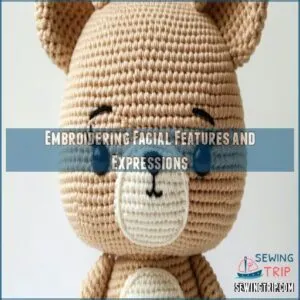
Bringing your amigurumi animals to life starts with mastering simple embroidery stitches for their facial features.
Use black yarn for classic expressions, or mix colors for unique personalities.
Start with basic straight stitches for eyebrows, then graduate to French knots for rosy cheeks.
A backstitch creates smooth curves for smiles, while satin stitches fill in larger areas like noses.
Attaching Safety Eyes Securely
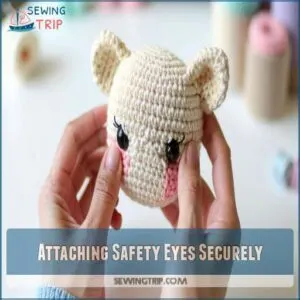
Safety eyes transform your amigurumi from cute to adorable, but proper attachment is key.
You can find a variety of safety eyes amigurumi at online stores like safety eyes amigurumi products.
Place them between rounds 8-12 of your head piece, depending on your pattern.
Always secure the washer with a firm twist until you hear a click.
For extra security, add a dab of fabric glue.
Remember, once they’re locked in place, there’s no going back – so double-check that placement!
Creating Texture With Different Stitch Patterns
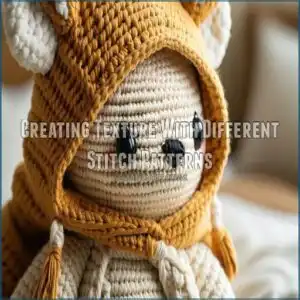
Different stitch patterns breathe life into your amigurumi animals, just like an artist adding texture to a painting.
You’ll create fuzzy fur using the bobble stitch, scaly skin with the crocodile stitch, or fluffy wool using the puff stitch.
When choosing a yarn for these stitch patterns, matching the right crochet hook to the yarn weight is important for smooth crocheting.
Mix these techniques with your basic single crochet to design unique creatures.
Try working a few practice swatches first to master each stitch pattern.
Stuffing and Finishing Amigurumi Animal Projects
You’ll learn how to stuff your amigurumi animals evenly and add those finishing touches that make them truly special.
From getting the right amount of stuffing in all the right places to adding cute accessories, you’re about to transform your crocheted creation into a huggable friend that’ll make anyone smile.
Proper Stuffing Techniques for Even Shapes
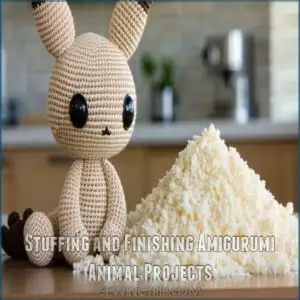
Your amigurumi’s stuffing technique can make or break its final shape.
Getting that perfect, huggable finish isn’t rocket science – it just takes attention to detail and the right approach.
Here are three key steps for stuffing success:
- Start with small pieces of stuffing, not big chunks
- Use a chopstick to reach tight spots
- Add stuffing gradually until you feel firm resistance
Adding Final Touches Like Accessories
Now that your amigurumi is stuffed just right, it’s time to add those special touches that’ll make your creation truly unique, such as embroidery details using techniques found in machine embroidery guides.
Think tiny scarves, miniature hats, or even a pocket-sized backpack – these accessories bring personality to your crochet friends.
| Accessory Type | Difficulty Level | Personality Impact |
|---|---|---|
| Bow Ties | Beginner | Classy & Charming |
| Mini Scarves | Easy | Cozy & Friendly |
| Tiny Hats | Intermediate | Playful & Fun |
| Backpacks | Advanced | Adventurous & Ready |
Tips for a Professional Finish
After adding those adorable accessories, let’s make your amigurumi look polished and professional.
Here are three game-changing finishing touches that’ll transform your creation from homemade to handcrafted:
- Weave ends tightly in a zigzag pattern, then trim close to the surface
- Use a steamer to gently block stubborn areas into shape
- Double-check all safety eyes and parts are firmly secured
Remember, these final steps are like putting on jewelry before a night out – they make all the difference!
Troubleshooting Common Amigurumi Crochet Issues
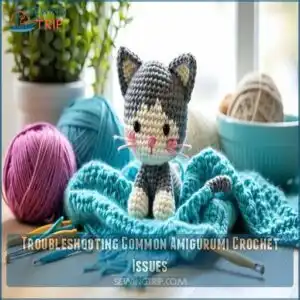
You’ll find that even the most experienced crocheters run into tricky spots when making amigurumi, but don’t worry – we’ve solutions for you.
Whether you’re dealing with stubborn gaps between stitches or wrestling with uneven tension, these easy fixes will help you create the perfect little critter you’ve been dreaming of.
Fixing Uneven Stitches and Gaps
Uneven stitches and pesky gaps can make your amigurumi look less than perfect.
Common culprits include inconsistent stitch height and accidentally skipping stitches.
To help prevent these issues, investing in a good amigurumi crochet hook like those found on amigurumi crochet hook can make a big difference.
Fix these issues by double-checking your stitch count each round and using stitch markers religiously.
If you spot a hole, backtrack and carefully redo the area.
Remember, even experienced crocheters sometimes need to frog (unravel) and restart – it’s part of the journey!
Adjusting Tension for Consistent Fabric
Getting your tension right feels like finding the sweet spot on a guitar string – too tight and your amigurumi becomes stiff, too loose and stuffing peeks through.
Keep your yarn wrapped consistently around your fingers and maintain steady pulling pressure.
Try this trick: practice making small swatches until your stitches look uniform.
Remember, perfect tension comes with time, so don’t stress if your first attempts vary.
Dealing With Color Jogs in Striped Patterns
Striped patterns in amigurumi can leave visible "jogs" where colors meet, but don’t worry!
You can fix this by working an invisible join at the end of each round.
Simply slip stitch into the first stitch of the round before changing colors, then start the new round with a standing single crochet.
This creates a seamless look that’ll make your amigurumi stripes look professionally crafted.
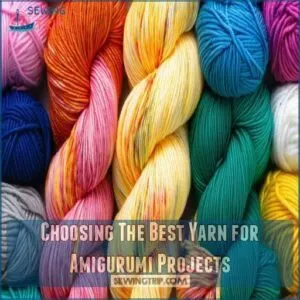
Choosing The Best Yarn for Amigurumi Projects
You’ll be amazed at how the right yarn can transform your amigurumi from floppy to fantastic, and choosing the perfect type doesn’t have to feel like solving a puzzle.
cotton and acrylic yarns in light to medium weights are your best friends for creating adorable stuffed animals that keep their shape.
Whether you’re a complete beginner or getting back into crochet, you’ll find that cotton and acrylic yarns in light to medium weights are your best friends for creating adorable stuffed animals that keep their shape.
Selecting The Right Yarn Weight and Type
After mastering your tension and fixing any gaps, you’ll want to focus on yarn selection – it’s like choosing the perfect ingredient for your recipe.
Cotton yarn gives your amigurumi animals that professional, sturdy look you’re aiming for.
Here’s what makes cotton yarn perfect for amigurumi:
- Holds its shape without stretching out
- Creates crisp, defined stitches
- Shows off your stitch details beautifully
- Doesn’t get fuzzy with handling
Understanding Yarn Labels and Recommendations
Reading yarn labels feels like cracking a secret code at first.
You’ll want to focus on three key details: yarn weight (categories 2-4 work best for amigurumi), fiber content (cotton or acrylic for durability), and recommended hook size.
Pro tip: go down a hook size from what’s suggested to create tighter stitches.
Don’t forget to check those care instructions – your future self will thank you!
Tips for Choosing The Perfect Yarn Color
Picking colors for your amigurumi can make or break your project. While yarn labels help with weight and care, the right color combo brings your crocheted friends to life. Here’s what experienced amigurumi crafters keep in mind:
- Choose colors that match your animal’s real-life counterpart
- Consider using contrasting colors for details like eyes and noses
- Pick yarns from the same brand to guarantee consistent texture
- Test color combinations in natural lighting before starting
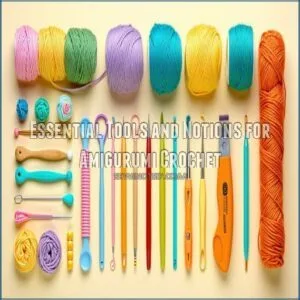
Essential Tools and Notions for Amigurumi Crochet
You’ll need more than just yarn and hooks to bring your adorable amigurumi animals to life.
Let’s explore the essential tools that’ll make your crochet journey smoother, from handy stitch markers that keep you on track to the perfect stuffing that gives your creations that huggable squish.
Stitch Markers and Their Importance
Stitch markers are your secret weapon for keeping track of rounds in amigurumi projects.
Without them, you’ll find yourself counting stitches repeatedly or losing your place, especially when working on complex Tunisian crochet patterns.
Here’s a quick guide to understanding stitch marker types and their uses:
| Marker Type | Best For | Tips |
|---|---|---|
| Locking | Beginners | Won’t slip out |
| Ring-style | Speed | Easy to move |
| DIY Safety Pin | Budget | Works in a pinch |
| Scrap Yarn | Flexibility | Color-code rounds |
| Split Ring | Durability | Great investment |
Safety Eyes and Stuffing Materials
You’ll need two main ingredients to bring your amigurumi animals to life: safety eyes and stuffing.
Safety eyes come in various sizes (6-12mm for small projects), and they snap securely into place.
For stuffing, polyester fiberfill is your best bet – it’s affordable and keeps its shape.
Just remember to stuff your creation firmly but evenly, giving special attention to smaller areas like limbs and ears.
Other Essential Tools and Notions
Beyond safety eyes and stuffing, your amigurumi toolkit needs a few more friends to make magic happen. Think of these tools as your crafting sidekicks, ready to help bring your cute creatures to life.
- A sharp pair of scissors specifically for yarn (don’t use them on paper, trust me!)
- Tapestry needles in different sizes for weaving ends
- Small crochet hooks for detail work and fixing mistakes
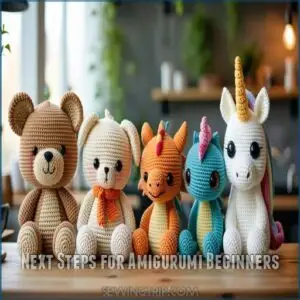
Next Steps for Amigurumi Beginners
Now that you’ve mastered the basics, you’re ready to join the amazing world of amigurumi patterns and meet other crafters who share your passion.
You’ll find endless inspiration as you create more complex projects, from tiny pocket-sized pets to huggable dragons that’ll make your friends say "wow!
Practicing and Building Confidence
Building confidence in amigurumi starts with small victories.
Begin with simple shapes like spheres or cylinders before tackling full animals.
Don’t worry if your first projects aren’t perfect – those little quirks make each piece unique.
Try making the same pattern twice; you’ll be amazed at how much better your second attempt looks.
Join online communities to share your progress and celebrate those early wins.
Exploring New Patterns and Techniques
Once you’ve mastered the basics, it’s time to spread your creative wings with new patterns and techniques.
Think of it as leveling up your amigurumi game!
Here are some exciting ways to expand your skills:
- Try color-changing techniques for multi-colored animals
- Experiment with textured stitches like popcorn or bobble
- Learn wire armature for poseable creatures
- Practice advanced shaping for unique features
Mix and match these techniques in your projects to create truly one-of-a-kind amigurumi animals.
Joining The Amigurumi Crochet Community
Ready to share your amigurumi creations?
You’ll find a welcoming community of fellow crocheters in online groups and local meetups.
Join Facebook groups to swap pattern ideas and yarn recommendations, or connect with nearby crafters through platforms like Meetup.
Share your projects on Instagram using #amigurumi, participate in crochet challenges, and don’t be shy to ask questions – everyone started as a beginner!
Frequently Asked Questions (FAQs)
Should you pick an easy crochet amigurumi pattern for beginners?
You’ll definitely want to start with an easy pattern to build your confidence and master basic techniques.
It’s like learning to walk before you run – simple projects help you nail those essential amigurumi skills.
Are amigurumi stuffed animals easy to crochet?
While they may look complex, amigurumi stuffed animals are surprisingly beginner-friendly.
You’ll start with basic stitches and simple shapes, then gradually build skills.
Most patterns use straightforward single crochet techniques you can master quickly.
Are amigurumi and crochet animals good for beginners?
Amigurumi projects are perfect for beginners since they’re small and use basic stitches.
You’ll master essential techniques like single crochet and increases while creating adorable animals.
Amigurumi projects boost your confidence with every project.
What are easy amigurumi patterns?
Start with simple patterns like bunnies, chickens, or bears that use basic single crochet stitches. These designs typically need minimal shaping and color changes, making them perfect first-time amigurumi projects.
How do I learn amigurumi?
Picture yourself mastering tiny creatures with yarn and hook.
You’ll need basic crochet skills, simple supplies, and patience.
Start with single crochet practice, follow beginner patterns, and watch step-by-step video tutorials.
What crochet stitches are used in amigurumi patterns?
You’ll mainly work with single crochet for tight, stuffing-proof fabric, plus increases and decreases for shaping.
Front and back loop stitches help create texture, while magic rings form perfect circles to start pieces.
What is the easiest animal to crochet for beginners?
Looking to start your amigurumi journey?
A simple round ball or sphere is your best bet – it’ll teach you basic stitches and shaping.
From there, you can transform it into a cute mouse or baby chick.
Can beginners crochet stuffed animals?
Yes, you can absolutely start crocheting stuffed animals as a beginner!
With basic stitches and some patience, you’ll create adorable creatures in no time.
Many simple patterns are designed specifically for newcomers.
Is amigurumi easy for beginners?
Amigurumi is perfect for beginners since it mainly uses simple single crochet stitches, such as the versatile single crochet stitch that is used in various projects. Amigurumi is perfect for beginners since it mainly uses simple single crochet stitches.
While mastering neat, tight stitches takes practice, you’ll be creating adorable stuffed animals in no time with basic techniques.
What is the easiest thing to crochet as a beginner?
For your first project, start with a simple square dishcloth using basic stitches.
You’ll learn essential techniques without getting overwhelmed, and end up with something useful.
A scarf’s another great choice too.
How long does it take to make one amigurumi?
Depending on your skill level and the project’s complexity, you’ll need between 2-8 hours to complete a small amigurumi.
Simple designs like balls or basic animals take less time than intricate characters with details.
Can left-handed people easily learn amigurumi crochet?
Yes, you’ll find amigurumi crochet just as accessible if you’re left-handed!
Most patterns can be mirrored easily, and there are plenty of left-handed tutorials available.
You’ll be creating adorable creatures in no time.
Are amigurumi animals safe for babies?
Amigurumi animals can be safe for babies if you make sure tightly crocheted stitches, use hypoallergenic stuffing, and secure materials like embroidered features instead of plastic eyes.
Always double-check for loose parts or potential choking hazards.
How do you wash and clean amigurumi toys?
To clean amigurumi toys, gently hand wash them in lukewarm water with mild detergent.
Rinse thoroughly and squeeze out excess water.
Air dry them flat, reshaping if needed.
Avoid harsh scrubbing to prevent damage.
Whats the typical cost of making an amigurumi?
Crafting an amigurumi creature is like stitching together a story.
Amigurumi is an affordable way to create charming, huggable gifts with your own hands.
Typically, you’ll spend $5 to $20 per project, covering yarn, stuffing, and small extras.
Conclusion
Diving into crochet is like weaving your own little universe, and you’ve got the know-how to do it with ease.
Now that you’ve learned how to crochet amigurumi animals for beginners, you’ve got all the tools and tips at your fingertips.
Whether you’re shaping heads or adding tiny details, remember it’s a journey of creativity.
Soon, you’ll be designing adorable creatures that bring joy not just to you but everyone around.
Happy crocheting!

