This site is supported by our readers. We may earn a commission, at no cost to you, if you purchase through links.
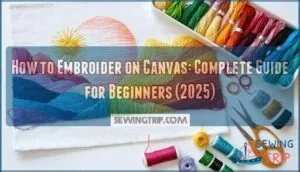
The fabric’s open weave makes it perfect for beginners who want to skip the frustration of pushing needles through tight fabrics. Whether you’re drawn to geometric patterns or free-form designs, canvas gives you a stable foundation that forgives wobbles and makes every stitch look intentional.
Ready to pick up a needle and transform blank canvas into art? The right supplies and a handful of basic stitches are all you need to start.
Table Of Contents
- Key Takeaways
- Best Fabric Choices for Canvas Embroidery
- Essential Supplies for Canvas Embroidery
- Preparing Canvas Before Stitching
- How to Transfer Patterns Onto Canvas
- Choosing and Using Embroidery Threads
- Basic Stitches for Canvas Embroidery
- Advanced Canvas Embroidery Techniques
- Step-by-Step Guide: Starting Your Design
- Adding Decorative Embellishments
- Finishing and Displaying Embroidered Canvas
- Frequently Asked Questions (FAQs)
- Conclusion
Key Takeaways
- Canvas embroidery works great for beginners because the fabric’s sturdy weave and open structure make it easier to stitch through without puckering, and you don’t even need a hoop for most projects.
- The essential supplies you need are a quality embroidery hoop (like the Susan Bates 6 Inch), sharp needles with large eyes (such as Clover Gold Eye), divisible embroidery floss (DMC is the benchmark), and precision scissors (Gingher 4 Inch works best).
- Preparing your canvas properly before stitching—washing to prevent shrinkage, ironing smooth, sealing edges, and marking guidelines—saves you from wonky results and frustration later.
- Master three basic stitches first (running stitch, back stitch, and split stitch) before moving to advanced techniques like French knots, satin stitch, and Florentine patterns that add texture and dimension.
Best Fabric Choices for Canvas Embroidery
Picking the right canvas makes all the difference in how your embroidery turns out. Not all canvas is created equal, and some types work way better than others for stitching.
Let’s break down your best options so you can choose the perfect fabric for your project.
Types of Canvas Suitable for Embroidery
Think of canvas as your fabric foundation—choosing the right type is like picking the perfect skateboard deck before you learn your first trick. Cotton canvas works best for hand embroidery with canvas thread counts between 200–400. You’ll find open weave canvas and linen canvas blends that let embroidery needles glide through easily.
Painted canvas options come pre-printed with designs. Match your canvas weight guide to your project—heavier for bags, lighter for wall art.
Comparing Evenweave and Standard Canvas
Now that you’ve picked your canvas type, let’s talk about evenweave versus standard canvas. Evenweave has matching thread count horizontally and vertically—think of it like a perfectly square grid. This makes it ideal for counted work and cross-stitch with excellent stitch suitability. Standard canvas is sturdier and holds its shape without an embroidery hoop.
Your visual finish depends on which you choose. Evenweave drapes softly, while standard canvas shows more texture. Ease of use differs too—evenweave needs careful tension control, but standard canvas practically stitches itself.
Pick based on your project goals. For beginners, consider Aida fabric due to its clear stitch counting.
Fabric Preparation Tips
Before you stitch a single thread, your canvas needs a little prep work to avoid wonky results later. Wash the fabric to prevent canvas shrinking after you’ve already stitched your masterpiece. Iron it smooth so your thread count stays visible.
Next, seal raw edges with fabric glue or a zigzag stitch to prevent fraying.
Mark guidelines using a water-soluble pen to keep your design centered—this simple stabilizing fabric step saves headaches when transferring patterns later.
Essential Supplies for Canvas Embroidery
You can’t start stitching on canvas without the right gear in your hands. Having quality supplies makes the whole process smoother and helps you avoid frustration as a beginner.
Let’s look at the four essential tools you’ll need to get started.
Embroidery Hoops (Susan Bates 6 Inch Hoop)
The Susan Bates 6 Inch Hoop is a revelation for canvas embroidery because its super-grip-lip keeps your fabric taut without constant readjustment. This plastic hoop offers excellent durability and flexibility, making it perfect for beginner embroidery projects. You’ll love how easy it is to move around as you stitch.
Just know that fabric slippage can happen occasionally with heavier canvas. Despite size limitations for larger designs, this affordable embroidery hoop delivers solid hoop tension for hand embroidery and cross-stitch work.
Needle Selection (Clover Gold Eye Needles)
If your needle feels like threading a rope through a keyhole, the Clover Gold Eye Needles will change your whole embroidery game. These hand embroidery supplies feature large elongated eyes that make Threading Ease a breeze even for embroidery for beginners. The Point Sharpness glides through heavyweight canvas without snagging.
Here’s what makes these needles stand out:
- Needle Sizes range from size 3 to 9 for different Canvas Compatibility needs
- Gold-plated coating prevents rust and boosts Needle Longevity
- Sharp points pierce dense canvas without splitting threads
- Smooth eye finish protects delicate embroidery floss from fraying
Embroidery Floss Options (DMC Prism Thread)
DMC Prism Thread brings a rainbow of possibilities to your fingertips with six strands of divisible cotton floss that transforms plain canvas into art. Thread blending lets you mix strands for custom color variations. DMC alternatives exist but this embroidery floss remains the benchmark for project suitability.
Store your embroidery threads on bobbins or floss organizers to prevent tangling nightmares. These embroidery supplies work beautifully on heavyweight canvas.
Scissors for Precision (Gingher 4 Inch Scissors)
Sharp scissors become your secret weapon when snipping threads close to canvas without accidentally cutting your hard work. Gingher 4 Inch Scissors deliver blade sharpness and ergonomic design that makes precision cuts feel easy. Their compact size gives you control for detailed hand embroidery work.
Keep them dry and oil the hinge occasionally as maintenance tips for longevity. These embroidery supplies beat scissor alternatives every time.
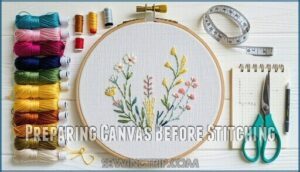
Preparing Canvas Before Stitching
Getting your canvas ready is like prepping a kitchen before you cook—it makes everything easier once you start stitching. A little prep work now saves you from wonky stitches and fabric headaches later.
Let’s walk through three simple steps that’ll set you up for success.
Washing and Ironing Canvas
Before your needle ever touches that canvas, you need to prep it like you’re getting ready for something important, because you’re. Pre-washing canvas prevents shrinkage and removes sizing chemicals that mess with your embroidery techniques.
- Wash gently in cool water with mild detergent
- Skip the dryer—air drying keeps fabric stable
- Iron on medium heat while slightly damp
- Press from the back to avoid shine marks
- Check for stains before starting your hand embroidery
Smart prep saves you heartbreak later.
Pre-Punching Holes for Stitching
Pre-punched canvas is like embroidery with training wheels—it guides every stitch exactly where it needs to go. This simple prep improves stitch alignment and makes embroidery for beginners way less frustrating.
You can punch holes yourself using a nail or awl, spacing them evenly for pattern precision. Match hole size to your thread weight—bigger holes for thicker floss. Just don’t punch too aggressively or you’ll weaken canvas durability.
Applying Glue for Stabilization
Canvas without stabilizer is like building a house on shaky ground—your stitches will pull and pucker before you finish the first row. Fabric glue or spray adhesive works best for embroidery basics. Apply it lightly on the back to prevent bleed-through. Let it dry completely before you start stitching.
This simple trick keeps tension even and makes embroidery for beginners way smoother.
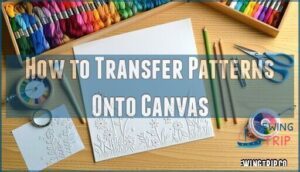
How to Transfer Patterns Onto Canvas
Getting your design onto canvas is where the magic starts. There are a few tried-and-true methods that work beautifully for transferring patterns.
Let’s look at three simple techniques that’ll get your design ready to stitch.
Using Water-Soluble Markers
Water-soluble markers are like magic wands for embroidery—they let you sketch your design right onto the canvas and then vanish completely with a quick rinse when you’re done. Here’s what you need to know:
- Marker Precision: Choose a fine-tip water-soluble pen for detailed hand embroidery patterns
- Fabric Compatibility: Test your water-soluble marker on a scrap piece first to prevent staining
- Color Selection: Pick light blue or purple markers that show up clearly on canvas
- Erasing Techniques: A damp cloth removes marks if you change your mind mid-project
- Longevity Concerns: Don’t iron over marks or they might become permanent before transferring patterns
Iron-on Transfers and Carbon Paper
If you want even more control over your design—or if you’re working with a pattern that’s too complex to freehand—iron-on transfers and carbon paper give you that crisp, trace-perfect outline without any guesswork.
Iron-on transfers work best on canvas when you use medium heat and press firmly for about 10 seconds. Carbon paper sits between your pattern and fabric so you can trace directly with a pen.
Just make sure your canvas is smooth and taut to avoid smudging during the transferring patterns process.
Aligning and Centering Designs
Once your design is on the fabric, getting it perfectly positioned can save you from lopsided stitches or having to start over with fresh canvas. Use a ruler and water-soluble marker to draw a light grid on your canvas for symmetry considerations. This helps with embroidery design placement and keeps repeat patterns aligned.
You can also fold the fabric into quarters to find the center point—a trick that works for mirroring techniques too.
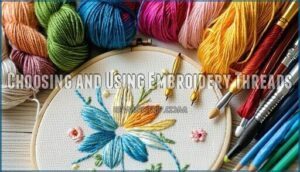
Choosing and Using Embroidery Threads
Picking the right thread can make or break your canvas embroidery project. The weight of your thread matters just as much as the color you choose.
Let’s break down what works best so you can stitch with confidence.
Thread Weight for Canvas
The thickness of your thread makes all the difference between a polished project and one that looks a little wonky on canvas. Weight matching matters because thicker threads manage dense stitch work better and reduce thread consumption.
For heavyweight cotton canvas, 30-weight embroidery thread gives you solid thread coverage without fabric puckering. When you pick the right weight for your fabric, you’ll avoid tension issues and get clean stitch density every time.
Floss Vs. Embroidery Thread
When choosing between embroidery floss and embroidery threads for canvas, thread composition and thread thickness make a real difference. Floss generally comes in six separable strands that you can adjust for stitch definition, while embroidery threads are single-ply and heavier.
For canvas work, threads give you better color vibrancy and coverage with less bulk. Floss works great for fine detail but takes longer to build up.
Cost comparison? Floss is cheaper upfront, but threads save time on heavyweight projects. Floss is known for its wide range of colors.
Selecting Colors for Your Design
Picking your color palette isn’t just about what looks pretty—it’s about making sure your design pops off that canvas like it’s got somewhere important to be.
Start with color theory basics: contrast effects make details stand out while blending colors creates smooth transitions. Check out seasonal palettes for inspiration and choose embroidery floss that complements your vision.
Three to five colors usually work best for balanced embroidery techniques.
Basic Stitches for Canvas Embroidery
Once you’ve got your canvas ready and your threads picked out, you’ll want to learn the three foundation stitches that make everything else possible.
These basic techniques form the building blocks for just about any embroidery design you can imagine.
Let’s start with the simplest stitches that’ll get you comfortable working on canvas.
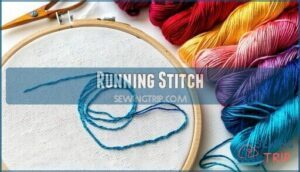
Running Stitch
Think of the running stitch as the friendly handshake of embroidery stitches—it’s simple, straightforward, and gets you started on the right foot. You’ll weave your needle up and down through the canvas weave in a straight line.
Keep your stitch length consistent and watch your thread tension so the fabric doesn’t pucker.
This basic embroidery stitch works great for outlines and curved lines in beginner projects.
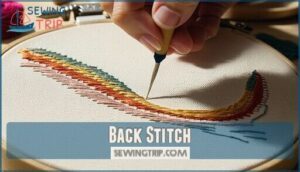
Back Stitch
Back stitch builds strength where running stitch leaves gaps—you’re basically retracing your steps to create a solid, unbroken line that holds up under wear and tear. This hand embroidery workhorse works backward, bringing your needle up one stitch length ahead and then down through the previous hole.
Keep your back stitch tension even to avoid puckering your canvas. It’s perfect for embroidery projects needing crisp outlines and lettering.
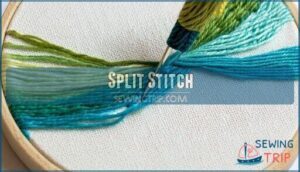
Split Stitch
Split stitch slices right through your previous stitch like you’re splitting a thread sandwich—creating a textured line that’s smoother than back stitch but beefier than running stitch. You’ll push your needle up and then down through the center of your last stitch.
This basic embroidery stitch works great for curves and creates beautiful textured effects on canvas when you need subtle shading in your hand embroidery projects.
Advanced Canvas Embroidery Techniques
Once you’ve got the basics down, it’s time to level up your canvas embroidery skills. These sophisticated techniques add depth and visual interest to your projects.
Here’s what you’ll learn to take your stitching from simple to stunning.
French Knots for Texture
French knots are like tiny beads of thread that pop right off your canvas and bring your design to life with rich dimension. You control knot size by wrapping your embroidery floss once or twice around the needle. Keep thread tension steady but not too tight.
Try varying color and placement density to create texture that looks like flower centers or starry skies.
These basic embroidery stitches work great when combined with other stitch techniques in your hand embroidery tutorial projects.
Satin and Brick Stitch
Satin stitch works like painting with thread to fill in shapes with smooth coverage that looks almost polished. Brick stitch adds texture by staggering stitches like a brick wall pattern. These basic embroidery stitches transform flat canvas into dimensional art.
- Satin variations: Adjust angle and direction for different effects
- Brick direction: Alternate rows create a woven look
- Stitch density: Pack threads close together for solid coverage
- Thread layering: Build dimension with overlapping passes
- Texture creation: Combine both stitch techniques for contrast
Florentine (Bargello) Stitch
Beyond solid fills, Florentine (Bargello) stitch creates dramatic zigzag and wave patterns that practically dance across your canvas. This counted needlework technique from Bargello History uses straight vertical stitches in stepped sequences to build flame-like motifs.
Choose bold Color Palettes to emphasize the pattern’s rhythm. Modern Applications include cushions and wall art.
Experiment with Stitch Variations and Pattern Design to develop your own embroidery stitches. Perfect for beginner projects once you master the basic handcraft rhythm with proper embroidery supplies.
Seed Stitch for Filling Areas
If you want to sprinkle texture across open spaces without following strict patterns, seed stitch is your go-to friend. These tiny straight stitches scatter randomly like seeds across fabric to create organic fills and visual interest.
Here’s how to master seed stitches:
- Vary stitch length and stitch direction for natural texture creation
- Adjust seed stitch density to control color blending effects
- Mix embroidery thread shades for depth
- Keep your embroidery supplies handy and work in small sections
This simple embroidery stitch transforms flat canvas into dimensional art.
Step-by-Step Guide: Starting Your Design
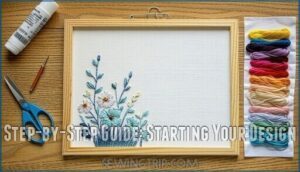
You’re about to bring your design to life and that first stitch can feel like a big moment. Getting your canvas set up properly and making those initial choices will set the pace for everything that follows.
Let’s walk through the essential first steps so you can start stitching with confidence.
Securing The Canvas in a Hoop
Locking your canvas into the hoop might seem simple, but doing it right makes all the difference between smooth stitching and a frustrating mess. Start by loosening the outer ring and placing your canvas over the inner ring. Press the outer ring down firmly until the fabric is taut but not stretched.
Check for wrinkles and adjust canvas tension by gently pulling edges. This prevents slippage and keeps your stitches even.
Threading The Needle
Getting thread through that tiny needle eye can feel like threading spaghetti through a keyhole—but once you know the trick, it’s a breeze. Cut your embroidery floss to about 18 inches and separate the strands you need. A needle threader helps if your lighting conditions aren’t great.
- Match needle eye size to your thread weight for easier threading
- Wet the thread end slightly to prevent fraying and stiffen the tip
- Hold the needle steady instead of moving the thread around wildly
Choosing The First Stitch
Your first stitch sets the rhythm for everything that follows—so reach for one that builds your confidence instead of testing your patience. The running stitch is your best friend for starting embroidery projects—it’s simple enough for embroidery basics yet adaptable for any design complexity.
Consider thread coverage and fabric compatibility when picking between hand embroidery stitches. Your personal preference matters more than stitch difficulty at this stage.
Adding Decorative Embellishments
Once you’ve mastered the basic stitches, you can take your canvas embroidery to the next level with some fun extras. Beads, sequins, and specialty threads can transform a simple design into something that really pops.
Here’s how to add that extra sparkle and texture to your work.
Incorporating Beads and Sequins
Adding beads and sequins to your canvas embroidery is like sprinkling a little magic onto your work—they catch the light and bring your design to life in ways thread alone can’t. Choose bead types and sequin shapes that match your design style. Attach them with a needle and thread using simple stitches.
Color coordination matters—pick shades that complement your embroidery. Scatter them thoughtfully for balanced design integration that elevates your embroidery projects without overwhelming the canvas.
Using Specialty Threads
Specialty threads are like the secret weapons in your embroidery toolkit—metallic, variegated, and textured threads transform ordinary canvas work into something that demands a second look. Match thread weight to your canvas. Experiment with silk threads for sheen or wool threads for warmth.
- Metallic threads add shimmer but need gentle tension
- Blending threads mix with embroidery floss for subtle sparkle
- Novelty yarns create bold texture and dimension
- Caron Collection offers quality specialty embroidery supplies and tools
- Test specialty thread on scrap canvas first
Creative Stitch Combinations
Mix and match your stitches like a chef experimenting with spices—layering running stitch with French knots or weaving satin stitch between seed stitches turns flat canvas into something that practically jumps off the fabric.
Try texture layering by pairing stem stitch applications with French knot techniques for depth. Vary stitch density across pattern repeats to create visual interest.
Color blending happens naturally when you overlap different satin stitch techniques with seed fills, perfect for mixed media effects that catch the light.
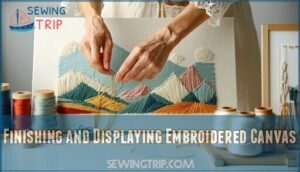
Finishing and Displaying Embroidered Canvas
You’ve put in the work and your canvas embroidery is complete. Now it’s time to clean up those loose ends and show off your finished piece.
Here’s how to wrap things up and keep your embroidery looking great for years to come.
Trimming Excess Threads
Once your final stitch is in place, cleaning up those little thread tails is what separates a polished piece from something that looks unfinished. Use sharp embroidery scissors for flush cutting—snip thread tails to about 1/4 inch from your canvas. Before trimming, weave loose ends through nearby stitches with your needle to prevent unraveling. This secures ends without bulky knots showing through. Good scissors make all the difference in embroidery projects!
- Leave a short tail: Cut threads about 1/4 inch long so they don’t poke through but stay secure
- Weave before you snip: Thread your needle with loose ends and tuck them under existing stitches first
- Invest in quality scissors: Sharp embroidery scissors give clean cuts that won’t fray your thread
Mounting and Framing Options
The right mounting method depends on whether you’re working with canvas board or stretched canvas. Canvas board works great for lighter embroidery—just leave 2.5 to 3 cm of fabric overhang around the edges. Iron your work first to smooth out any puckering before mounting.
Stretched canvas needs more fabric—about 2.5 inches per side—to wrap and staple securely. If framing techniques feel overwhelming, try hoop framing as a DIY display alternative. Your embroidery hoop becomes the frame itself!
For archival methods that protect your work long-term, use acid-free materials and UV-protective glass. Deep box frames work beautifully for textured finishing embroidery projects since they keep fabric from touching the glass.
Care and Cleaning Tips
After all that effort framing and mounting your embroidered canvas, keeping it clean and protected will help your work last for years to come. Here’s how to keep your DIY masterpiece looking fresh:
- Washing canvas: Spot-clean with mild soap and cool water. Never toss embroidery in the washing machine.
- Preventing damage: Store flat in acid-free tissue. Keep away from direct sunlight to avoid thread fading.
- Stain removal: Blot gently—don’t rub. Test any cleaning solution on a hidden area of fabric first.
Storage solutions matter as much as stitching does!
Frequently Asked Questions (FAQs)
What is the best way to display an embroidered canvas artwork?
Don’t worry about needing professional framing services. Mounting techniques like stretching canvas over wooden frames work great for DIY projects.
Display cases protect textile art, while hanging solutions with proper lighting effects showcase your finished embroidery projects beautifully.
What stitches create an interesting texture for embroidering on canvas?
French knots bring playful dimension, while seed stitches scatter organic texture across canvas.
Satin stitch creates smooth raised surfaces, and brick stitch builds structured patterns.
Florentine stitch adds rhythmic waves that catch light beautifully.
How do I prevent canvas from fraying while stitching?
Canvas fraying can feel like watching your masterpiece unravel before your eyes. Apply Fray-Check or fabric stabilizer along raw edges before stitching.
You can also use tight stitch density near borders or add backing methods like iron-on interfacing to prevent thread pulls and keep your embroidery supplies working smoothly.
What tension should I use for canvas embroidery?
Moderate tension works best for canvas embroidery. Too tight causes fabric distortion and puckering. Too loose creates uneven stitch density. Adjust until your stitches sit flat without pulling the weave out of shape.
Can I wash finished embroidered canvas projects?
Thread-fully speaking, you can wash finished embroidered canvas projects. Hand wash gently in cool water with mild detergent to prevent color bleeding and shrinkage risks. Air dry flat to preserve your embroidery floss and stitching work.
How do I fix mistakes on canvas embroidery?
Gently remove stitches with a needle or seam ripper. For stubborn errors, try concealing them with design adaptation or creative stitching techniques.
Prevention tips include planning carefully and practicing embroidery basics before starting complex embroidery projects.
Conclusion
Canvas embroidery used to intimidate you with its thick weave and sturdy texture. Now it’s your most forgiving creative partner.
You’ve learned how to embroider on canvas using basic stitches that transform blank fabric into textured art. The open weave that once seemed challenging now guides your needle with ease.
Your first wobbly stitches taught you more than any perfect pattern ever could. Pick up your needle and let the canvas show you what’s possible when you stop overthinking and start stitching.
- https://www.maggieframes.com/blogs/embroidery-blogs/how-many-threads-for-machine-embroidery-expert-guide-to-optimal-stitch-quality
- https://www.thesewingdirectory.co.uk/canvas-work-tutorial/
- https://rsnstitchbank.org/technique/canvaswork
- https://www.linkedin.com/pulse/embroidery-market-outlook-20262033-trends-growth-forecast-yxd3f
- https://www.lovecrafts.com/en-us/c/article/everything-you-need-to-know-about-aida-evenweave-and-needlework-fabric

