This site is supported by our readers. We may earn a commission, at no cost to you, if you purchase through links.
Understanding fabric behavior, mastering cutting accuracy, and honing your sewing techniques are key to overcoming this common quilting hurdle. This article will guide you through expert tips for perfecting blocks and borders, ensuring your quilt comes out as envisioned.
Whether it’s blocks too big or too small, wavy borders, or tension issues during longarming, we’ve got you covered. Let’s dive into the world of quilting mastery together, where every stitch counts towards creating a masterpiece.
Yes, you can fix an uneven quilt by easing in the difference between block sizes with your sewing machine or by adding borders or coping strips to make blocks uniform.
Table Of Contents
Key Takeaways
- Trim blocks to the correct size and use coping strips or borders to adjust for blocks that are consistently too small, ensuring all blocks are uniform in size before assembly.
- Use a 1/4 presser foot for seam allowance consistency, and consider using scant or chunky seam allowances as needed to adjust for slight discrepancies in block sizes.
- Stabilize fabric with starch to prevent stretching and ease fabric gently when sewing to maintain the shape and size of quilt blocks.
- Measure and trim wavy borders carefully, distributing excess fabric evenly to correct fullness and ensure the quilt lays flat.
Assessing Quilt Block Sizes
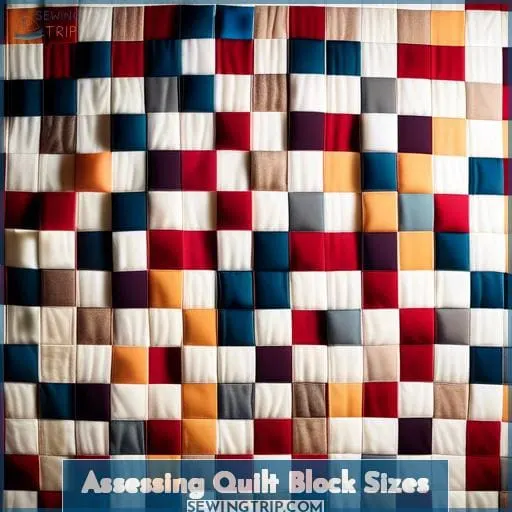
When tackling the challenge of uneven quilt blocks, it’s crucial to approach the issue with a blend of technical know-how and creative problem-solving.
If you find your blocks aren’t aligning due to size discrepancies, don’t panic. Understanding the behavior of your fabric, ensuring your cutting is precise, and refining your sewing techniques can turn this obstacle into an opportunity for growth and improvement in your quilting journey.
Blocks Too Large
- Block Resizing: Trim those blocks down with care. Remember, you’re aiming for square block precision, so measure twice, cut once.
- Seam Allowance Adjustment: If you’ve been generous with your seam allowances, it’s time to scale back. Adjust your seams to ensure consistency across all blocks.
- Point Trimming: If your blocks have points, trim minimally. You don’t want to lose those sharp edges that give your quilt character.
These steps will help you correct those uneven quilt blocks and bring harmony back to your quilt top. Remember, a little imperfection adds charm, but accuracy in cutting and sewing will make your quilt come together beautifully.
Blocks Too Small
When your quilt blocks turn out too small, it can be disheartening, but don’t lose heart.
Assess Seam Allowances: Double-check your seam allowances. A common culprit for blocks too small is a seam allowance that’s too generous. If you find your seam allowance is larger than it should be, consider using a seam guide to ensure consistency.
Trimming HST Units: If you’re working with half-square triangles (HSTs), precise trimming is key. Use a quilting ruler with a 45-degree angle to align with the diagonal seam, ensuring each HST is trimmed to the correct size.
Coping Strips: For blocks that are slightly off, add coping strips to bring them up to size. These strips can be added to one or more sides of a block to achieve uniformity without compromising the design.
Seam Allowance Consistency
Maintaining a consistent seam allowance is crucial for the success of your quilting projects. If you’re finding your quilt rows uneven, it’s likely due to variations in seam allowances, which can lead to mismatched points and puckering in your final quilt top.
To tackle this issue, start by pressing your fabrics well before sewing and consider using a 1/4 presser foot for accuracy. Additionally, pinning your fabrics before sewing can help ensure both layers maintain the correct seam allowance.
Scant Vs. Chunky Seams
When transitioning from assessing quilt block sizes to focusing on seam allowance consistency, it’s crucial to understand the difference between scant and chunky seams. This distinction plays a significant role in achieving uniform quilt blocks and, ultimately, a cohesive quilt.
- Scant vs. Chunky Seams: A scant seam allowance is slightly less than a true 1/4, compensating for the fabric taken up by the fold and thread in the seam. Chunky seams, on the other hand, are those that are a true 1/4 or slightly more, potentially leading to blocks that are too small once assembled.
- Seam Allowance Consistency: Maintaining a consistent seam allowance, whether scant or chunky, is vital. Inconsistencies can lead to blocks that don’t fit together well, resulting in uneven rows or a quilt top that doesn’t lie flat.
- Measuring and Correcting: Regularly measure your seam allowances and make adjustments as needed. This might involve changing the position of the needle or using specific presser feet designed for quilting.
Understanding and applying these concepts can help you navigate the challenges of quilt making, from working with too much fabric at once to machine stitching binding. Embracing a mix of perfectionism and acceptance, as well as adjusting thread weight and incorporating bias stripes, can enhance the overall quality and appearance of your quilts.
Stretching and Easing Techniques
When you’re piecing a quilt, achieving a consistent seam allowance is crucial to ensure your rows line up and your quilt lays flat.
- Check Seam Allowance: Ensure your seam allowance is consistent. A scant 1/4 is often recommended for quilting.
- Stabilize Fabric: If your fabric is stretching, starching before cutting can help stabilize it.
- Easing Fabric: When rows won’t line up, gently ease the fabric as you sew, without creating puckers.
- Squaring Up: After assembly, square up your quilt to correct any minor discrepancies that have accumulated.
Squaring Up Blocks
Accurate squaring up of quilt blocks is crucial for achieving a professional finish in your quilting projects. You’ll need the right tools, such as a cutting mat, rotary cutter, and a square ruler that matches the size of your blocks.
This process ensures all your blocks are uniform in size, which is essential for the overall appearance and assembly of your quilt. Precision in cutting and sewing plays a significant role in minimizing the need for squaring up, but when discrepancies arise, squaring up becomes an invaluable step to correct those slight deviations.
Importance of Accurate Squaring
Ensuring your quilt blocks are perfectly square is crucial for a flat, cohesive quilt top.
- Use Squaring Tools: Invest in quality squaring tools like square rulers. These help in Accurate measurement and maintaining Block precision.
- Check Measurements: Before cutting, double-check measurements to ensure accuracy. This prevents quilting uneven lines and fixing uneven quilt issues later.
- Trim Blocks: After sewing, trim blocks to the correct size. This step is vital for Accurate borders and a Cohesive quilt top.
- Embrace Imperfections: While striving for accuracy, remember quilt imperfections can add character. Quilt perseverance and quilt pride come from overcoming challenges, not perfection.
Tools for Precision
When squaring up quilt blocks, precision is your ally. To achieve the accuracy and consistency needed for a flawless finish, consider these essential tools:
- Rotary Cutters: For clean, straight cuts, a rotary cutter is indispensable. The 45mm blade is ideal for slicing through multiple fabric layers.
- Quilting Rulers: These come with various markings for measuring and aligning fabric. Look for rulers with clear 1/8-inch increments to ensure precise measurements.
- Cutting Mats: A large, self-healing cutting mat protects your surfaces and provides a stable base for cutting, which is crucial for accuracy.
Fixing Wavy Borders
When you’re faced with wavy borders on your quilt, it’s essential to measure and correct the fullness to achieve a smooth finish.
If you’ve noticed that your quilt’s edges have taken on a life of their own, don’t worry; there are strategies to ease that fullness back into line. By understanding fabric behavior and employing precise sewing techniques, you can tackle those waves and create borders that complement your quilt beautifully.
Measuring and Correcting
After squaring up your blocks, it’s time to address those wavy borders that can detract from your quilt’s beauty.
- Measure the Borders: Lay your quilt flat and measure the borders in several places. Use the average of these measurements to determine the correct length of your borders.
- Trimming HSTs: If you’re dealing with half-square triangles (HSTs) at the border, ensure they’re trimmed accurately to avoid unevenness.
- Correcting the Fullness: If your borders are too full, you can ease the excess by:
- Pinning and distributing fullness evenly as you sew.
- Using happy colors and strategic quilting to distract from minor imperfections.
- Cutting off points or ignoring missing points to maintain a cohesive look.
Easing Fullness
After measuring and correcting wavy borders, you might still encounter fullness that needs easing.
- Distribute Excess Evenly: Spread the fullness across the border rather than concentrating it in one area to avoid puckered quilt sections.
- Adjust Needle Depth: If you’re machine quilting, ensure the needle depth is set correctly to handle the layers without creating uneven pressure.
- Steam and Starch: Apply steam and starch to relax the fabric, making it more pliable for easing into place.
- Quilting Design Choices: Select designs like piano keys that can help conceal fullness by allowing you to work in extra fabric between the lines.
Longarming Strategies
When tackling the challenge of longarming an uneven quilt, it’s crucial to approach the task with patience and a strategic mindset.
Practicing on scraps before moving on to your actual project can help you get a feel for managing tension and stitch issues, which are common hurdles in achieving a smooth finish.
Understanding how fabric behaves under the longarm and refining your technique to accommodate for any inconsistencies will ensure a more even result.
This approach not only helps in correcting uneven quilts but also enhances your overall longarming skills.
Practice on Scraps
When tackling longarm quilting, especially if you’re new to the game or working with a particularly cherished project, practicing on scraps before diving into the real deal can be a game-changer.
- Select Practice Fabric: Begin with practice fabric that mimics the weight and weave of your project fabric. Bonnie & Camille fabrics, known for their quality and beautiful designs, make excellent choices for both practice and final projects.
- Create a Practice Sandwich: Assemble a small quilt sandwich using your practice fabric, batting, and backing. This mini version of your quilt allows you to experiment with tension settings, stitch lengths, and patterns without risking your main project.
- Experiment with Techniques: Use this opportunity to try out different longarm quilting services or techniques you’ve been curious about. Whether it’s playing with thread weight or mastering quilt binding techniques, now’s the time to explore.
- Reflect and Adjust: After practicing, take a moment to assess what worked and what didn’t. Adjust your approach accordingly before moving on to your actual quilt. This step is crucial for achieving the best possible outcome on your final piece.
By incorporating these steps into your quilting process, you not only enhance your skills but also increase the likelihood of a successful, beautiful finish on your quilts. Remember, every stitch is a learning opportunity, and even the imperfections add character and uniqueness to your creations.
Tension and Stitch Issues
When tackling tension and stitch issues in longarming, it’s crucial to approach the problem methodically.
- Tension Fixes: Start by re-threading your machine, as improper threading can often lead to tension problems. Ensure the bobbin is wound correctly and that the thread is seated properly in the tension disks.
- Stitch Inconsistencies: Check your needle and foot height. A needle that’s not the correct type or size for your thread can cause skipped stitches, while an incorrectly adjusted foot can lead to tension issues or even more skipped stitches.
- Machine Maintenance: Regularly clean your machine, especially the bobbin area, to prevent lint build-up that can affect stitch quality. Also, ensure that your machine is oiled as needed to keep it running smoothly.
Binding Techniques
When it comes to binding your quilt, you’re faced with a choice between machine and hand stitching, each with its own aesthetic and practical implications.
Machine binding can be a quick way to finish, allowing you to add decorative touches like bias stripes for a burst of color.
On the other hand, hand stitching offers a more traditional look, with stitches that can be virtually invisible, giving your quilt a clean finish on both sides.
Machine Vs. Hand Stitching
After practicing longarming, you’re ready to give your quilt that final touch: binding. You might wonder whether to machine stitch or hand stitch the binding to finish the edges.
- Machine stitching is quick and durable, ideal for quilts that will be used and washed often.
- Hand stitching offers an invisible finish and a personal touch, perfect for heirloom or gift quilts.
- Machine binding can be reinforced with decorative stitches for added flair.
- Hand binding allows for relaxation and satisfaction as you reflect on your quilt’s journey.
- Combining both methods can provide the efficiency of a machine with the craftsmanship of hand stitching.
Choose the method that aligns with your quilt’s purpose and your own preferences. Whether you opt for the speed of a machine or the intimacy of hand stitching, your quilt will be a testament to your dedication and creativity.
Adding Color With Bias Stripes
After mastering machine stitching, it’s time to add a splash of vibrancy to your quilt with bias stripes. Bias stripe colors can transform the look of your quilt, offering a striking contrast or complementing the existing pattern.
- Bias Stripe Width: Choose a width that balances visibility with the quilt’s design. A standard width might be 1/4 inch, but feel free to experiment.
- Bias Stripe Placement: Position your stripes thoughtfully. Whether you’re aiming for a subtle touch or a bold statement, the placement can make all the difference.
- Bias Stripe Pattern: Select a pattern that resonates with your quilt’s theme. A consistent pattern can create harmony, while a contrasting one adds excitement.
Embracing Imperfections
In the world of quilting, embracing imperfections can be a liberating experience. Recognizing that minor flaws in your quilt add character and uniqueness can help you overcome perfectionistic tendencies.
Instead of striving for an unattainable ideal, celebrate the unique beauty of your quilt, knowing that it’s superior to an unfinished project and carries a story of creativity and resilience.
Celebrating Unique Quilts
Binding your quilt is the final step in your creative journey, a moment to reflect on the process and the unique character your work embodies.
- Imperfect quilts carry a story, a testament to learning and growth.
- Each deviation from the norm adds unique character, making your quilt one-of-a-kind.
- Overcoming perfectionism can be liberating, allowing creativity to flow without bounds.
- Tim Gunn’s philosophy encourages us to make it work, to see the beauty in the finished over perfect.
- Celebrate the completion, knowing that your quilt, with all its quirks, is a finished treasure.
Overcoming Perfectionism
Overcoming perfectionism in quilting is akin to embracing the unique journey of each quilt you create.
- Acceptance is Key: Understand that no quilt is perfect. Each stitch, whether straight or not, tells a part of your story. Accepting this can liberate you from the fear of making mistakes.
- Celebrate Uniqueness: Your quilt’s imperfections add character. Instead of striving for uniformity, celebrate the uniqueness that each flaw brings to the overall beauty of your creation.
- Learn and Grow: Use mistakes as learning opportunities. Each error teaches you something new about quilting techniques, fabric behavior, or your own creative preferences.
- Embrace the Process: Remember, quilting is about the journey, not just the finished product. Enjoy the act of creating, from selecting fabrics to the final stitch, and let go of the pressure to be perfect.
By embracing these principles, you’ll find joy in every quilt you make, imperfections and all. This approach not only enhances your quilting experience but also helps you grow as a quilter, encouraging creativity and innovation.
Quilting Philosophy
When you’re faced with an uneven quilt, remember that a finished quilt is always better than a perfect, unfinished one.
Tim Gunn’s philosophy of make it work applies here; you can add extra fabric or trim off points to resolve issues and move forward.
Embrace the quirks of your quilt, as they add character and uniqueness, and consider them a step towards overcoming perfectionism.
Tim Gunn’s Approach
Embrace the wisdom of Tim Gunn’s approach to quilting: Make it work. When faced with uneven rows and mismatched blocks, remember that hidden flaws often add to the quilt’s unique story.
- Accept that uneven rows are part of the quilting journey.
- Use creative solutions to integrate mismatched blocks seamlessly.
- Recognize that hidden flaws contribute to your quilt’s character.
- Celebrate the completion of your quilt, imperfections and all.
By adopting this mindset, you’ll not only finish your projects but also enjoy the process and learn from each challenge.
Finished is Better Than Perfect
In the world of quilting, it’s essential to remember that finished is often better than perfect. This philosophy encourages you to embrace the journey of creation, accepting that imperfections are part of the process.
- Imperfections add character and tell a story, reflecting the time and effort invested.
- Acceptance of slight discrepancies can lead to a sense of accomplishment and progress.
- Practice is key; each quilt improves your skills and builds confidence.
- Perfectionism can hinder creativity; allowing for some flexibility can foster innovation and enjoyment.
By focusing on progress rather than perfection, you’ll find joy in each stitch and pride in every completed project, no matter the quirks.
Pressing and Ironing
When tackling the challenge of an uneven quilt, pressing and ironing emerge as crucial steps in ensuring your quilt blocks and borders align perfectly.
It’s essential to understand that pressing your quilt pieces correctly can significantly impact the overall appearance and accuracy of your quilt. By employing proper pressing techniques, you’re not only working towards achieving flat seams but also enhancing the precision of your quilt’s construction.
This process involves a careful approach to handling your fabric, where pressing, rather than ironing, is recommended to avoid distorting the fabric’s shape. Tools like a dry iron, pressing cloths, and starch can aid in achieving crisp seams and flat quilt blocks, ultimately contributing to a more polished and professional-looking quilt.
Proper Pressing Techniques
To achieve a pristine quilt top, you’ll need to master the art of pressing. Here’s how to ensure your seams are crisp and your quilt top lies flat:
Choose the Right Tools: Equip yourself with the proper pressing equipment. A reliable iron, a sturdy pressing surface, and various pressing tools like a tailor’s ham or sleeve roll can make a significant difference.
Set Your Seams: Before you press them open or to the side, always set your seams by pressing them flat as they were sewn. This melds the stitches into the fabric, reducing distortion.
Press, Don’t Iron: When pressing your quilt, avoid the back-and-forth motion of ironing. Instead, press straight down to prevent stretching the fabric and distorting your blocks. Remember, a consistent seam allowance is crucial for matching up your quilt pieces.
Tools for Effective Pressing
To ensure your quilt blocks and borders come out perfectly, mastering the art of pressing is crucial. After discussing proper pressing techniques, let’s delve into the tools that can elevate your pressing game.
These tools not only aid in fabric smoothing but also play a significant role in achieving precision in your quilting projects.
Starch and Starching Techniques: Applying starch to your fabric before pressing can significantly enhance its stiffness, making it easier to cut and sew. A fine misting bottle can distribute the starch evenly, ensuring a crisp finish. Remember, the right heat setting on your iron is vital to set the starch properly without damaging the fabric.
Clapper Usage: A tailor’s clapper is a game-changer for achieving flat seams. After pressing your seam with steam, place the clapper on top until the fabric cools down. This simple yet effective tool helps in absorbing the steam and setting the seam, resulting in a perfectly flat and crisp finish.
Wool Pressing Mats: These mats are incredible for pressing quilt blocks. Due to their heat-absorbing properties, wool mats press your fabric from both sides simultaneously, speeding up the process and ensuring flat seams. They’re especially useful for quilters looking to achieve professional-level precision and smoothness in their projects.
Incorporating these tools into your quilting routine can significantly improve the quality of your work, making each step from cutting to piecing, and finally quilting, more manageable and enjoyable.
Continuous Learning
In the journey of quilting, embracing continuous learning is crucial for mastering the craft.
Understanding fabric behavior, cutting accuracy, and sewing techniques can significantly improve the quality of your quilts.
By seeking expert advice and evolving your quilting skills, you’ll find that each project becomes an opportunity to refine your techniques and express your creativity more effectively.
Evolving Quilting Skills
Proper pressing techniques set the stage for the next crucial step in your quilting journey: honing your skills. As you continue to evolve as a quilter, remember that each project is an opportunity to refine your craft.
- Quilt Block Accuracy: Strive for precision in cutting and piecing to ensure your blocks are the correct size.
- Seam Allowance Consistency: Use a scant 1/4 seam allowance to account for the fold of the fabric and the width of the thread.
- Squaring Up Techniques: Regularly square up your blocks to maintain the shape and size required for your pattern.
- Longarm Practice: If you’re using a longarm machine, practice on scrap fabric to improve your technique and resolve tension issues.
By concentrating on these aspects, you’ll not only enhance the quality of your quilts but also find joy in the process and a sense of belonging in the quilting community. Embrace each quilt’s unique story, including the imperfections, as they reflect your continuous learning and growth in this beloved craft.
Seeking Expert Advice
In the realm of quilting, seeking expert advice is a pivotal step towards mastering the craft and overcoming challenges. Consulting professionals and asking experts can significantly enhance your quilting journey.
Whether you’re grappling with uneven quilt rows, thread tension issues, or simply looking to refine your technique, reaching out for feedback gathering is invaluable. Engaging with seasoned quilters or participating in quilting communities allows for a rich exchange of knowledge and insights.
Advice seeking isn’t just about solving immediate problems; it’s about continuous learning and growth. By embracing the practice of consulting professionals, you open doors to new techniques, innovative solutions, and a deeper understanding of quilting as an art form.
Frequently Asked Questions (FAQs)
How can I prevent my quilt from becoming crooked when I’m piecing together large sections?
Ensure accurate cutting and consistent seam allowances to prevent a crooked quilt.
Baste densely to avoid fabric shifting, and press fabrics before piecing.
What should I do if my quilt top has fullness or excess fabric in certain areas after piecing?
To smooth out a quilt top that’s like a garden with too many flowers—bursting at the seams with fullness—try pinning the excess fabric into darts on the back, ensuring it lies flat before securing.
This approach, akin to gently guiding a river back into its course, respects the fabric’s nature and your hard work, offering a path to mastery and a sense of belonging in the quilting community.
How can I fix a quilt that has already been quilted but has noticeable puckering?
To fix a quilt with noticeable puckering after quilting, consider steaming and gently pressing the affected areas.
If puckers persist, adding more quilting in puckered regions can help distribute fullness.
For severe puckering, consulting a professional quilter for re-quilting might be necessary.
Is there a way to correct blocks that are not only uneven in size but also skewed or distorted?
Nearly 80% of quilters face the challenge of uneven or distorted blocks at some point, but don’t despair! Understanding fabric behavior and cutting accuracy is key.
Skewed blocks can often be corrected by carefully re-measuring and trimming, or by adding or removing fabric to achieve uniformity.
Embrace the process, knowing each step brings you closer to mastery and a quilt that tells a unique story of perseverance and creativity.
What techniques can I use to ensure my quilt remains flat and square during the quilting process, especially when working on a large quilt?
To keep your quilt flat and square, start quilting from the center and work outward. Ensure even tension and fabric feed. Use basting and proper pressing techniques to prevent puckering.
Conclusion
Embarking on the quilting journey, you’ve likely discovered that even the most meticulously planned quilt can encounter the occasional hiccup. But fear not, as every stitch and seam brings you closer to a tapestry of triumph.
With the strategies outlined, from squaring up blocks to mastering binding techniques, you’re well-equipped to fix an uneven quilt and transform potential flaws into charming features.
Embrace each challenge as a step towards a quilt that tells a story—one of patience, skill, and creativity.

