This site is supported by our readers. We may earn a commission, at no cost to you, if you purchase through links.
First, match your fabric, thread, and needle like a perfect dance trio to avoid mishaps. If your thread tangles or breaks, check the tension and consider using quality thread.
For uneven seams, remember the golden rule: measure twice, sew once! Don’t forget to iron those seams—it’s like a quick spa treatment for your project. And if all else fails, a patch or appliqué can work wonders.
Next up, more insights into advanced troubleshooting techniques!
Table Of Contents
- Key Takeaways
- Common Causes of Sewing Errors
- Preventing Thread Breakage and Tangling
- Troubleshooting Sewing Machine Issues
- Fixing Seaming Issues
- Mastering Sewing Machine Maintenance
- Common Sewing Mistakes to Avoid
- Overcoming Fabric Feed Issues
- Advanced Troubleshooting Techniques
- Frequently Asked Questions (FAQs)
- Conclusion
Key Takeaways
- Match your fabric, thread, and needle carefully to prevent common mishaps like tangled or broken threads.
- For smooth stitching, ensure your thread tension is correctly adjusted and use the right presser foot.
- Regularly clean and maintain your sewing machine, including checking for correct bobbin type and tension, to avoid issues like thread jamming and skipped stitches.
- Don’t skimp on measurements and seam allowances to keep your projects on track and avoid fit issues.
Common Causes of Sewing Errors
When sewing goes wrong, it’s often due to using the wrong fabric, thread, or needles, or simply mishandling the fabric itself.
Remember when you tried to bake with salt instead of sugar? That’s the kind of “oops” moment you want to avoid in sewing!
Choosing The Wrong Fabric
Picking the right fabric can feel like solving a mystery.
Avoid these pitfalls:
- Fabric weight: Choose one that matches your project.
- Fiber content: Know whether it’s cotton, silk, or polyester.
- Pre-washing: Do it to prevent surprises, and learn about the best pre-washing techniques to use depending on fabric type.
- Pattern matching: Align prints properly.
- Drape: Make sure it flows well for your design.
No more fabric nightmares, just joyful sewing!
Choosing The Wrong Thread
Choosing the wrong thread can unravel your sewing projects faster than you can say "bobbin."
Imagine pairing a heavy fabric with delicate thread—it’s a ticket to broken threads and frustration.
Focus on thread type, weight, and tension to dodge tangling issues.
A splash of color or quality mismatch can leave you tying knots, so choose wisely to keep everything in stitches.
Choosing The Wrong Needles
So, you’ve mastered thread selection! Now, let’s talk needles. Using the wrong needle size or type is a recipe for disaster—skipped stitches, thread bunching, and even broken needles!
Always match your needle to your fabric; a heavier fabric needs a stronger needle.
Check your needle’s condition regularly; a bent or dull needle won’t sew smoothly.
Remember, the right needle is key to sewing success!
Proper needle insertion is also important; a crooked needle is a broken needle waiting to happen.
Incorrect Fabric Handling
While needle woes may surprise you, fabric handling trips up even seasoned sewists.
Prevent chaos by avoiding fabric feed mistakes.
Here’s the gist:
- No Pulling or Pushing: Let the machine guide the fabric smoothly.
- Watch Fabric Tension: Monitor to avoid thread snagging or skipping stitches.
- Check Your Settings: Make sure settings prevent wavy seams or machine jamming.
Preventing Thread Breakage and Tangling
When your thread keeps breaking or tangling just as you’re getting into a sewing groove, and you’ve checked that a damaged sewing machine needle isn’t the culprit, it can be as frustrating as trying to detangle Christmas lights.
To sidestep these pitfalls, mastering proper thread tension and choosing the right thread type can keep your projects running smoothly.
Proper Thread Tension
After choosing the right supplies, let’s tackle thread tension basics.
If your thread keeps snapping or tangling, it might be the tension playing tricks.
Adjust tension for different fabrics and stitches.
It’s like taming a rebellious cat; you need patience and a gentle touch.
Proper tension is key to preventing common issues like thread breakage and uneven stitches, which can be caused by factors such as improper thread tension settings, and proper tension can solve many sewing machine problems and keep your seams smooth.
Avoiding Tangles and Knots
Setting the proper thread tension completes the picture of avoiding tangles and knots.
Pay attention to the details:
- Threading Technique: Make sure threading is smooth by double-checking each guide.
- Spool Handling: Keep your spool steady with a proper holder.
- Bobbin Tension: Adjust the tension so it’s not too tight, preventing thread knotting and sewing machine noise.
Using The Right Thread Type
Tired of thread tangles tying you in knots? Choose the right thread type, and you’ll smooth out those sewing mistakes.
Consider matching thread to fabric, as factors like fabric weight and thread finish play a key role in preventing common sewing errors.
Consider thread weight and thread finish; lighter threads match delicate fabrics beautifully, preventing common sewing errors.
Whether it’s vibrant colors or glossy finishes, your thread choices can enhance sewing techniques and guarantee easy sewing machine troubleshooting.
That’s the stitch to master!
Preventing Thread Breakage
Choosing the right thread type is just the start.
Preventing thread breakage involves a few smart habits.
Keep your sewing groove smooth by:
- Checking thread quality: Avoid cheap threads that snap.
- Adjusting spool tension: Not too tight, not too loose.
- Maintaining needle condition: A sharp needle prevents unwanted drama.
Regular maintenance keeps everything humming nicely!
Troubleshooting Sewing Machine Issues
Sewing machine acting up? Don’t panic! This section will help you troubleshoot common problems, from skipped stitches to jammed threads, so you can get back to creating beautiful projects.
We’ll cover simple fixes and helpful tips to get your machine running smoothly again—because even experienced sewists have those "what just happened?" moments.
Fabric Bunching While Sewing
Ever wrestled with fabric bunching like a stubborn knot?
Start by checking your thread tension and ensuring it’s not too tight.
Switch to the right needle type and fabric type — it makes a world of difference.
Slow down your machine speed and let the feed dogs guide the fabric naturally.
Handle fabric gently to keep everything smooth and straight.
Fabric Not Feeding
When your fabric stubbornly refuses to move, it’s usually a feed dog issue.
Start by checking if the feed dogs are raised, and set your stitch length above zero.
Adjust presser foot pressure for tricky fabric types.
Sometimes, bobbin tension might need a tweak.
Keep your machine running smoothly with regular sewing machine maintenance tips, and you’ll be stitching seamlessly in no time!
Skipping Stitches
Skipping stitches can cause frustration but are often a quick fix.
Start by checking these: Make sure the needle size matches the fabric type. A universal needle works wonders on most materials.
To prevent loose loops, check that the bobbin thread tension is correctly adjusted using the screw on its side, as adjusting the bobbin thread tension can make a big difference in the quality of your stitches sewing machine bobbin problems solutions. Adjust thread tension to prevent loose loops.
Slow your machine speed for precision.
Remember, regular sewing machine repair keeps you stitching smoothly, avoiding those pesky skipped stitches.
Machine Keeps Jamming
Sometimes skipped stitches can be a headache, but let’s tackle machines that jam.
Often, bobbin issues cause thread tangles, leading to a jammed bobbin case.
First, stop sewing and carefully remove tangled threads.
Check for needle problems—replace if bent.
Regular machine cleaning helps, too.
Follow these sewing tutorials for smooth stitching and fewer sewing mistakes.
Fixing Seaming Issues
When you’re wrestling with seaming issues, it’s like trying to fit a square peg into a round hole—frustrating but fixable.
Understanding seam allowance and finishing raw edges can transform those pesky wavy seams into a smooth success.
Understanding Seam Allowance
Think of seam allowance as a sewing safety net.
Picking the right allowance keeps your garment on track.
Start with pattern instructions; they often suggest the best seam allowance types.
A quarter-inch works for quilts, while garments might need more.
Using the right needle type, such as sharp points for woven fabrics, can make all the difference in preventing mistakes. Measure and mark consistently, avoiding common sewing mistakes.
Remember, it’s all about precision, not guesswork.
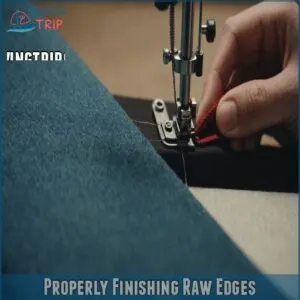
Properly Finishing Raw Edges
Now that your seams are sewn, let’s prevent those pesky frayed edges!
Neatly finishing raw edges is key to professional-looking sewing projects.
You’ve got options!
Here are three easy methods:
- Use pinking shears for a quick, decorative finish on woven fabrics.
- Try a serger for a clean, professional look (Serger vs. zig-zag, anyone?).
- An overcast stitch works wonders, too! It’s like giving your seams a little hug.
Avoiding Wavy Seams on Stretch Fabrics
Finish those raw edges smoothly, then tackle wavy seams on stretch fabrics.
Use a zig-zag stitch, adjust tension, and be wary of stretching fabric under the needle.
A twin needle can help, too.
Check out this handy table for common solutions:
| Issue | Solution | Bonus Tip |
|---|---|---|
| Wavy seams | Zig-zag stitch | Try twin needles |
| Stretch pulling | Adjust tension | Relax shoulders |
| Sewing machine | Settings check | Refer to lessons |
Preventing Seam Distortion
You’ve conquered those wavy seams, but seam distortion is another beast.
Keep it at bay with these handy tips:
- Seam allowance accuracy prevents puckering—measure twice!
- Balanced tension stops fabric stretching from playing tricks.
- Correct needle choice matters; match it to your fabric.
- Pressing techniques set seams straight, giving your project a polished finish everyone will admire.
Mastering Sewing Machine Maintenance
Keeping your sewing machine in top shape doesn’t require a magic wand, just regular cleaning, a little oil, and an occasional check for lint buildup.
Replace worn-out parts and schedule professional servicing to avoid turning your next sewing project into a comedy of errors.
Regular Cleaning and Oiling
Your sewing machine’s purr depends on regular cleaning and oiling—it’s like a spa day for the trusty steed!
To stay in top shape, grab the right cleaning tools and use quality oil types recommended by sewing experts.
Join sewing forums or communities for tips on maintenance schedules and cleaning frequency to avoid common sewing mistakes.
Happy sewing!
| Task | Tools | Frequency |
|---|---|---|
| Cleaning | Brush, Cloth | Weekly |
| Oiling | Sewing Machine Oil | Monthly |
| Inspection | Expert Check-up | Annually |
Checking for Lint Buildup
Just finished oiling? Great! Next, keep your sewing machine running smoothly by checking for lint buildup.
It sneaks into common areas like the feed dogs and bobbin case and can impact stitching.
Regularly blowing compressed air into tight spaces under the feed dogs and tension disks can help remove hidden fuzz and threads.
Grab these tools:
- Small brush or lint brush
- Tweezers for hard-to-reach spots
- Vacuum attachment
- Lint-free cloth
These simple steps can extend your machine’s lifespan.
Replacing Worn-Out Parts
After dusting for lint, consider your sewing machine’s heart—the parts.
If your machine’s making funny noises or stitches go wonky, it might be time to replace worn-out parts.
Weigh the cost comparison: repair versus replace.
Embrace DIY maintenance; it extends your machine’s lifespan.
Think of it like changing car oil, but no greasy hands!
Scheduling Professional Servicing
Preventative maintenance is key! Don’t let your sewing machine become a frustrating monster. Schedule regular servicing, ideally once a year.
- Find local repair shops specializing in your machine brand (Singer, Brother, etc.).
- Ask about service frequency and typical cost estimates.
- Preventative maintenance is cheaper than emergency repairs.
- A well-maintained machine means more time sewing and less time troubleshooting!
Common Sewing Mistakes to Avoid
Avoiding common sewing mistakes can save you time and help you create polished projects, so always measure twice and cut once to guarantee accuracy.
Speed control is also important.
Don’t forget to press seams neatly, and transfer those pattern markings like a pro to keep everything on track.
Not Measuring Accurately
When you’re sewing, not measuring accurately can lead to pattern misalignment, fabric shrinkage, and size discrepancies.
Picture trying to fit into a friend’s shoes—awkward, right?
Here’s a quick fix:
| Problem | Solution |
|---|---|
| Pattern misalignment | Measure twice, cut once |
| Fabric shrinkage | Pre-wash fabric |
| Seam allowance | Mark clearly on fabric |
Accurate measurements guarantee a perfect garment fit!
Not Using Speed Control
Ever felt like your sewing machine’s a runaway train?
Speed control is your friend – especially when using Brother machines for speed control.
Achieving consistent speed can save your projects from wobbly seams.
Here’s why it matters:
- Sewing speed affects stitch quality.
- Reduced hand fatigue improves enjoyment.
- Better fabric control prevents mistakes.
Give those controls a try, and watch your sewing skills soar!
Not Ironing or Pressing Seams
Imagine the frustration of seam puckering ruining your perfect project!
Pressing seams is very important, as it smooths the fabric and sets seam allowances.
Grab your pressing tools, and learn the right techniques for different fabric types.
| Step | Action | Benefit |
|---|---|---|
| 1 | Iron the seam | Reduces puckering |
| 2 | Use steam | Sets fabric perfectly |
| 3 | Press, don’t iron | Keeps seams precise |
Not Transferring Pattern Markings
Finished pressing those seams? Great! Now, let’s chat about pattern marking accuracy. It’s like trying to find your way without a map if you skip this step.
Make sure you have clear fabric transfer methods by:
- Using the right marking tools—pens, chalks, or wheels.
- Double-checking transfer mistakes that can ruin fit.
- Mastering marking techniques for precision.
Overcoming Fabric Feed Issues
If your fabric feels like it has a mind of its own, you might be wrestling with fabric feed issues.
With a few tweaks, like choosing the right presser foot and adjusting your feed dog settings, you’ll soon have your fabric flowing smoothly, saving you from endless seam ripper battles.
Inconsistent Fabric Feed
So, you’ve mastered accurate measuring, right? Now, let’s tackle uneven fabric feed. It’s a common sewing gremlin! Check your presser foot pressure; it shouldn’t be too tight or too loose.
Is your machine clean? Lint buildup around the feed dogs can cause problems.
Here’s a quick guide:
| Problem | Possible Cause | Solution |
|---|---|---|
| Uneven feed | Dirty feed dogs | Clean thoroughly |
| Fabric slippage | Low presser foot pressure | Increase pressure |
| Feed dog issues | Worn-out feed dogs | Replace them |
| Tension adjustments | Incorrect tension | Adjust upper and lower tension |
| Skipped stitches | Dull needle | Replace the needle |
Fabric Bunching at The Beginning of Seams
A frequent sewing hiccup, fabric bunching at the start of seams, can be a real headache.
Tweak some settings to get back on track:
- Lower thread tension just a notch.
- Ensure feed dog function is smooth and active.
- Use the right needle type for your fabric.
- Increase presser foot pressure slightly for better grip.
Fabric Bunching at The End of Seams
After tackling fabric bunching at the beginning, let’s combat the issue at the end.
Mismatched seam tension and thread tension, along with incorrect needle type, are your culprits.
Consider the fabric weight and adjust stitch length to accommodate.
Remember, even feed helps, so flatten the fabric gently.
Picture smoother seams, not puckered ones—it’s totally possible!
Using The Right Presser Foot
When fabric won’t cooperate, consider swapping presser feet like trying on shoes.
Each foot suits different fabrics and stitches, and even tiny adjustments in foot pressure can work wonders.
Imagine your project gliding through the machine:
- Use a walking foot for stubborn layers
- A zipper foot for slim spaces
- A quilter’s foot for smooth motion
- Swap to a roller foot for tricky textures
- Try an adjustable foot for versatile sewing
Advanced Troubleshooting Techniques
Sometimes sewing can feel like a mystery, with tangled threads and skipped stitches that seem to defy logic.
Don’t worry—with a few advanced troubleshooting techniques, like using diagnostic tools and knowing when to seek professional help, you’ll regain your sewing sanity and turn those frustrating moments into learning opportunities.
Identifying and Solving Complex Issues
You’ve sensed the frustration of fabric bunching or needle breakage, wondering if machines have minds of their own.
It’s time to tackle those mysterious malfunctions head-on.
To begin, carefully remove unwanted stitches using a seam ripper tool.
Pay attention to stitch inconsistencies and seam puckering; they might hint at deeper issues.
Adjust tension settings, try different needles, and don’t shy away from multi-layer fabric experiments to master your sewing art.
Using Diagnostic Tools
Facing a stubborn sewing machine problem? Don’t panic!
Before troubleshooting, ensure your machine is properly set up, including checking the presser foot and adjusting thread tension as needed, as these are common issues that can cause problems like thread bunching up under fabric. Check your sewing machine manual first. Many manuals include troubleshooting guides.
Next, explore online forums; other sewists might’ve faced similar issues. Diagnostic apps can also help pinpoint problems.
Remember, a little detective work often saves the day. These tools empower you to fix many problems before needing a repair shop visit.
Seeking Professional Help When Needed
Even sewing maestros face sewing machine repair challenges that call for expert help.
If diagnosing machine problems feels like deciphering ancient texts, it’s time for a professional tune-up.
Save yourself the headache by enrolling in a local professional sewing class, where skilled instructors can teach troubleshooting complex issues.
Remember, seeking expert help or repairs isn’t admitting defeat—it’s smart sewing!
Frequently Asked Questions (FAQs)
Can a sewing machine problem be fixed?
Imagine this: sewing machines can be stubborn mules, but most problems are fixable.
Start by cleaning lint, checking the needle, and adjusting tension.
For bigger issues, consider a manual or seek a pro’s help.
Happy stitching!
How do you fix a sewing machine problem?
Start with basic checks: make sure correct threading, adjust tension, and replace dull needles.
Clean the machine often, and address strange noises promptly.
Don’t hesitate to consult your manual or seek professional help if problems persist.
What are the most common sewing machine problems?
You’ll often face issues like thread jamming, skipped stitches, and tension troubles.
Keep an eye out for dull needles, incorrect threading, and dirty machines.
Regular maintenance, like cleaning and checking settings, helps keep things smooth.
Why is my sewing machine not working?
Remember Sarah’s jammed bobbin? Check your threading, needle, and bobbin case. Is the machine plugged in? A quick check often solves the problem! Clean out lint, too.
What are the 7 common sewing machine troubles?
Common sewing machine troubles include fabric bunching, skipped stitches, thread jamming, thread breaking, bobbin tangling, needle issues, and slow performance.
Each hiccup has a fix, helping you dodge frustration and keep your projects rolling smoothly.
How do you solve sewing problems?
Stitching troubles making you cross-eyed?
Lower tension if fabric bunches, raise feed dogs for better fabric flow, and swap dull needles to skip skipped stitches.
Re-thread bobbin for tangles.
Tackle each issue with patience and regular maintenance.
What is the most common cause of stitching problems?
You’ll often find that incorrect thread tension is the main culprit behind stitching problems.
It’s like walking a tightrope; too tight or too loose can lead to headaches with bunching or loose stitches.
Adjust carefully, and voilà!
How do you cover up sewing mistakes?
Flubbed fabrics frustrate!
Cover those sewing slip-ups by adding a cute patch or appliqué, perhaps even an embroidered detail for flair.
A strategically placed button works wonders.
Embrace your creative side and turn errors into charming embellishments.
How do I fix uneven stitches?
First, check your thread tension—it might be the culprit.
A dull needle or incorrect foot pressure can also mess up stitches, so swap needles and adjust settings.
Remember, patience and practice make perfect in sewing!
What to do if machine makes noise?
When your sewing machine makes noise, check for lint in the bobbin area and oil the machine.
Tighten loose screws, listen for any strange clattering, and don’t forget to test if it needs a professional tune-up.
How to handle fabric puckering?
Puckering happens. Lower your thread tension; that’s often the culprit. Use a sharper needle, and don’t pull the fabric – let the machine do the work. Easy peasy!
Why does my fabric slip while sewing?
Imagine sewing’s a dance floor, and fabric’s slipping as it’s leading!
It may be due to lack of grip.
Check if your presser foot’s pressure’s right, use a walking foot, or try non-slip fabric lining.
How can I adjust thread tension correctly?
Adjusting thread tension involves balancing the upper and bobbin threads.
Start with medium tension settings, then test-sew on scrap fabric.
If stitches look unbalanced, tweak the tension—tighten or loosen slightly—until they’re even on both sides.
Conclusion
Imagine sewing like driving a car; you wouldn’t cruise along without a map or ignore the weird noises under the hood.
By mastering how to fix common sewing errors, you’ll keep your sewing machine purring smoothly.
From checking thread tension to maintaining your machine, these practices save you both time and fabric frustration.
Don’t worry about a hiccup here or there; they’re part of the learning curve.
Just keep your kit stocked and your seams crisp!

