This site is supported by our readers. We may earn a commission, at no cost to you, if you purchase through links.
Raise the needle to its highest point, then loosen the needle clamp screw. Gently remove the old needle, being careful not to drop it into the bobbin case (trust me, fishing it out is no fun).
Insert the new needle with the flat side facing the back, pushing it up as far as it’ll go. Tighten that screw like you’re sealing a treasure chest.
Before you start stitching, give the handwheel a spin to make sure everything’s running smoothly. But wait, there’s more to keeping your Butterfly humming…
Table Of Contents
- Key Takeaways
- Identifying Needle Issues in Butterfly Sewing Machines
- Removing the Old Needle From Butterfly Machine
- Selecting the Correct Needle for Butterfly Machine
- Proper Needle Insertion Technique for Butterfly Machine
- Adjusting Needle Position and Tension Settings
- Troubleshooting Persistent Needle Problems in Butterfly Machines
- Maintaining Needle Performance in Butterfly Sewing Machines
- Frequently Asked Questions (FAQs)
- Conclusion
Key Takeaways
- Always start by unplugging your Butterfly sewing machine—it’s like making sure you’re not trying to cook with the stove on high while you’re feeling peckish. Safety first! Then, loosen the needle clamp screw to gently swap out the needle, making sure the flat side is toward the back—think of it like putting a shoe on the right foot.
- Be a needle detective and look out for crime scene clues like skipped stitches or puckered fabric. These are red flags waving to tell you it might be time for a new needle or a little alignment check-up. You don’t want your sewing machine dancing out of step!
- When choosing a new needle, make sure it matches your fabric and thread like a perfect dance partner—use a small needle for fine fabrics and a larger one for heavyweights. If you get this wrong, you’ll feel like you’re waltzing in clown shoes!
- Keep your needle area clean as a whistle to prevent any hiccups. A soft brush and a drop of oil will do wonders. It’s like giving your sewing machine a mini spa day, ensuring all those stitches come out smoother than a jazz solo.
Identifying Needle Issues in Butterfly Sewing Machines
You’re ready to sew, but your Butterfly machine’s needle isn’t cooperating.
In this guide, we’ll help you become a needle detective, spotting the telltale signs of trouble.
Getting your trusty machine back in stitching shape in no time.
Common Signs of Needle Problems
Your Butterfly sewing machine’s needle woes can be frustrating, but don’t throw in the towel just yet – understanding sewing machine needle types
!
Keep an eye out for these telltale signs of needle issues:
- Skipped stitches that leave gaps in your seams
- Fabric puckering that ruins your project’s smooth finish
- Frequent thread breakage that tests your patience
Listen for unusual machine noises or feel for needle jamming as you sew. These symptoms often indicate it’s time for a needle check-up or replacement.
Performing a Visual Inspection
Now that you’ve spotted the signs, let’s take a closer look at your Butterfly machine’s needle. Grab a magnifying glass and channel your inner detective!
Examine the needle’s tip, shaft, and eye for any signs of wear or damage. A bent needle can wreak havoc on your fabric, causing snags and skipped stitches.
Don’t forget to check the needle plate for scratches or burrs that could be causing trouble, such as snags and skipped stitches.
Testing Needle Movement and Alignment
The needle’s dance in your Butterfly sewing machine can reveal hidden issues, like a worn-out or improperly installed needle guard
.
To test its movement, turn the handwheel slowly, watching for smooth motion and proper needle-plate interaction.
Keep an eye out for any wobble or resistance, which could indicate alignment problems.
Check the needle depth by ensuring it fully descends into the needle plate hole.
A well-behaved needle is key to stitching success!
Recognizing Thread-related Needle Issues
Thread troubles can be a real needle in your side! After checking alignment, let’s tackle those pesky thread-related issues. Watch out for these telltale signs:
- Snapped threads that make you want to pull your hair out
- Mysterious fabric snags that seem to appear out of thin air
- Bobbin tangles that resemble a kitten’s yarn disaster
- Skipped stitches that look like your machine’s having hiccups
- Thread nests that could house a family of sparrows
When to replace your sewing machine needle can also play a part in thread issues, replacing every 8 hours.
Proper thread tension is key to avoiding these headaches. If your top thread keeps breaking, it might be time to adjust those settings.
Removing the Old Needle From Butterfly Machine
Removing an old needle from your butterfly sewing machine due to needle bending causes might seem tricky, but it’s a breeze with the right approach
. First, locate the needle clamp screw, typically found near the needle bar . Grab a flat-head screwdriver and turn the screw counterclockwise to loosen it.
| Step | Action | Safety Tip |
|---|---|---|
| 1 | Unplug machine | Prevent accidents |
| 2 | Locate screw | Use good lighting |
| 3 | Loosen clamp | Don’t overtighten later |
| 4 | Remove needle | Handle with care |
| 5 | Dispose safely | Use a sharps container |
Remember, a smooth removal sets the stage for a perfect new needle installation!
Selecting the Correct Needle for Butterfly Machine
You’re on the right track to fixing your Butterfly sewing machine’s needle, but choosing the correct one is really important.
Let’s explore how to select the perfect needle for your machine, considering factors like size, type, and compatibility with your fabric and thread.
Understanding Needle Sizes and Types
Now that you’ve removed the old needle, let’s talk about choosing the right one for your Butterfly machine.
Needle sizes and types can seem like a puzzle, but don’t worry – we’ll crack the code together.
Think of needle sizes as shirt sizes: smaller numbers for delicate fabrics, larger ones for heavy-duty work.
As for types, it’s like picking the right tool for the job , and you must consider the right tool for the job and what fabric type you are using, which also involves understanding the needle sizes.
Matching Needle to Fabric Thickness
Picking the right needle for your fabric is like finding the perfect dance partner. Too small, and you’ll be stepping on toes; too large, and you’re stomping all over the place.
Your needle size should match your fabric’s thickness. For lightweight fabrics like silk, opt for finer needles, such as a size 80/12, which is ideal for universal needle selection.
As you move to medium and heavyweight fabrics, size up your needle accordingly, like choosing a 100/16 for denim and canvas. This harmony helps create smooth stitching and prevents fabric damage.
Choosing Between Universal and Specialty Needles
Once you’ve matched your fabric thickness, it’s time to decide between universal and specialty needles for your Butterfly sewing machine. While universal needles are versatile workhorses, specialty needles can elevate your sewing game for specific tasks.
- Ballpoint needles: Perfect for knits and stretchy fabrics
- Sharp needles: Ideal for precise work on delicate silks
- Denim needles: Tough enough for thick layers of denim or canvas
- Embroidery needles: Designed for decorative stitching and threadwork
Remember, the right needle can make or break your project!
Considering Thread Weight When Selecting Needles
While universal needles are versatile, thread weight plays a key role in needle selection.
You’ll want to match your needle size to your thread’s thickness . Heavier threads need larger needles, while finer threads pair well with smaller ones.
This harmony between thread and needle helps prevent pesky issues like thread breakage and skipped stitches.
Think of it like finding the perfect dance partner for your thread – they need to move together smoothly, creating a harmony that is essential for a perfect dance partner.
Proper Needle Insertion Technique for Butterfly Machine
You’re about to become a needle-inserting pro for your Butterfly sewing machine!
Follow these simple steps to properly fix your needle, and you’ll be stitching up a storm in no time.
Locating the Needle Clamp
Anyone who’s tried to thread a needle knows the frustration of a wobbly needle.
To fix it, you’ll need to locate the needle clamp on your Butterfly sewing machine. Here’s how:
- Look for a small screw near the needle area
- Check both sides of the needle bar for the clamp
- If you can’t find it, consult your machine’s manual
Remember, finding this tiny part is like playing "Where’s Waldo?" in your sewing room. But don’t worry, you’ve got this!
Orienting the Needle Correctly
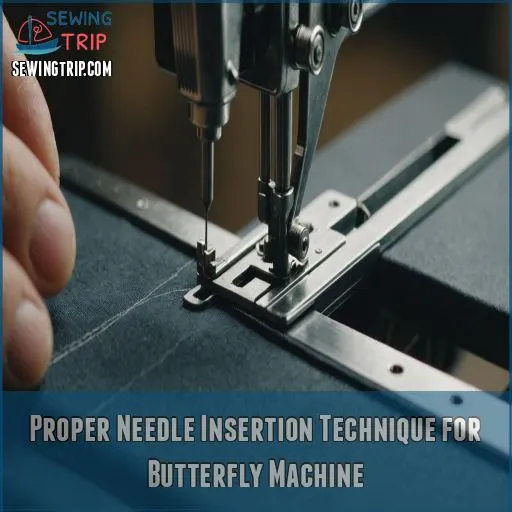
Have you ever wondered why needle orientation matters so much? In a Butterfly sewing machine, it’s important to get it right.
The eye of the needle must face the right side, inside the machine. This positioning helps with proper thread looping and stitch formation.
Let’s break down the correct orientation:
| Aspect | Correct | Incorrect | Why It Matters |
|---|---|---|---|
| Eye Direction | Right side | Front | Enables proper looping |
| Thread Path | Left to right | Front to back | Ensures correct stitch formation |
| Flat Side | Towards back | Any other direction | Aligns with needle clamp |
| Height | Fully inserted | Partially inserted | Prevents binding and thread tearing |
| Position | Centered | Off-center | Affects timing with bobbin case |
Securing the Needle in Place
Now that you’ve got the needle oriented correctly, it’s time to lock it in place.
Grab your needle clamp screw and give it a good twist. You want it snug, but don’t go Hulk-mode on it!
A wobbly needle is as useful as a chocolate teapot, so make sure it’s firmly seated.
If you’re using specialty thread, double-check that your needle can handle it.
Remember, a secure needle is a happy needle!
Verifying Needle Installation
Once you’ve secured the needle, it’s essential to verify its installation. After all, a properly installed needle is the key to smooth sewing!
Double-check these points:
- The flat side of the needle shank faces the back
- The needle sits fully up in the clamp
- The screw is tightened securely
Give your machine a test run on scrap fabric. If you hear any unusual noises or see skipped stitches, it’s time to troubleshoot further.
Adjusting Needle Position and Tension Settings
You’ve mastered inserting the needle, but your Butterfly sewing machine still isn’t performing its best?
Let’s fine-tune your needle position and tension settings to achieve those perfect stitches you’ve been dreaming of – it’s like giving your machine a mini spa day!
Fine-tuning Needle Height
With your needle securely in place, it’s time to fine-tune its height.
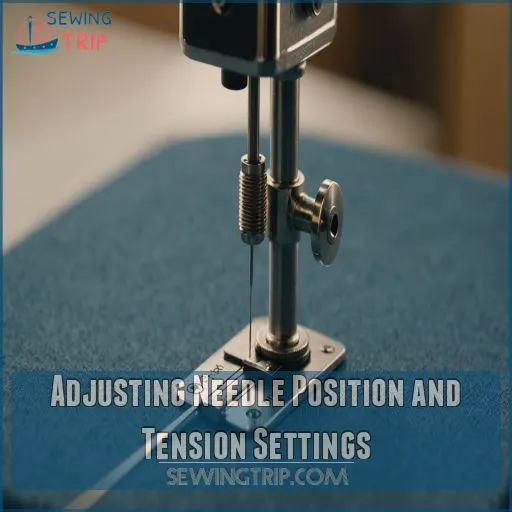
This step can make or break your stitching game! You’ll want to aim for that sweet spot where the needle’s scarf meets the hook point about 3mm above the bottom dead center.
Grab your trusty screwdriver and prepare to channel your inner Goldilocks – not too high, not too low, but just right!
Balancing Upper and Lower Thread Tension
For perfect stitches, you’ll need to balance your upper and lower thread tension. This delicate dance makes sure your fabric stays smooth and your stitches look great on both sides.
- Check your bobbin tension first
- Adjust the top thread tension dial
- Test on scrap fabric and examine the results
Remember, it’s like tuning a guitar – small adjustments make a big difference. Don’t be afraid to experiment until you find that sweet spot!
Aligning Needle With Throat Plate
Frequently, proper needle alignment with the throat plate is important for smooth sewing. You’ll want to make sure your needle descends precisely into the plate’s center hole.
| Step | Action | Result |
|---|---|---|
| 1 | Remove stitch plate | Clear view of mechanism |
| 2 | Lower needle slowly | Check for obstructions |
| 3 | Adjust needle position | Centered in hole |
Remember, a well-aligned needle is like a ship’s captain steering through calm waters – it’ll keep your stitches sailing smoothly!
Testing Stitch Quality After Adjustments
Now that you’ve aligned your needle, it’s time to put your Butterfly sewing machine through its paces.
Grab some scrap fabric and start stitching! Keep an eagle eye out for any inconsistencies in stitch quality .
Are your stitches even? No skipped stitches or puckering? If you spot issues, don’t fret. You might need to fine-tune your thread tension or double-check your needle size.
Practice makes perfect! Remember this as you continue to work with your sewing machine.
Troubleshooting Persistent Needle Problems in Butterfly Machines
Even with proper care, your Butterfly sewing machine might still give you needle troubles.
Don’t worry – we’ll walk you through some common persistent issues and how to tackle them, so you can get back to stitching in no time.
Addressing Needle Deflection Issues
Why does your Butterfly sewing machine’s needle keep veering off course?
Needle deflection can be a real head-scratcher, but don’t throw in the towel just yet! Here’s how to tackle this pesky problem:
- Check for fabric thickness issues
- Inspect the needle plate for wear
- Adjust thread tension to reduce pull
- Consider switching to a topstitching needle
Remember, a little detective work goes a long way in keeping your stitches straight and your sewing smooth!
Resolving Needle-to-hook Timing Problems
Get to the heart of your Butterfly sewing machine’s issues by tackling needle-to-hook timing problems head-on.
When your stitches start playing hide-and-seek, it’s time to investigate this important relationship.
Check if the needle and hook are dancing in perfect harmony – the hook should catch the thread loop just as the needle rises.
If they’re out of sync, you’ll need to adjust the timing to get your machine humming again.
Fixing Needle Plate Damage
The heart of your Butterfly sewing machine, the needle plate, can take a beating.
If you’ve noticed snags or skipped stitches, it’s time to investigate.
Inspect the plate for nicks, burrs, or scratches. You’ve got options: buff out minor damage with fine-grit sandpaper or consider a replacement.
DIY solutions can save you cash, but don’t shy away from expert advice for severe damage.
Remember, a smooth needle plate keeps your stitches purring along!
Dealing With Bent or Damaged Needles
Frustration can needle its way into your sewing project when you’re dealing with bent or damaged needles.
Don’t let it unravel your enthusiasm. If you suspect a bent needle, remove it and roll it on a flat surface to check for wobbles.
Always replace damaged needles promptly to avoid further issues. A slightly bent needle can cause skipped stitches and fabric damage.
Keep spare needles handy for quick swaps and smoother sewing sessions.
Maintaining Needle Performance in Butterfly Sewing Machines
You’ve mastered fixing the needle, but how do you keep it in top shape?
Let’s explore some simple yet effective ways to maintain your Butterfly sewing machine‘s needle performance, ensuring smooth stitching for years to come.
Establishing a Regular Needle Replacement Schedule
Persistent needle issues got you down? Let’s talk about setting up a needle replacement schedule that’ll keep your Butterfly sewing machine humming along smoothly.
Just like changing the oil in your car, swapping out needles regularly prevents headaches down the road.
Your sewing frequency and fabric choices play a big role in how often you’ll need fresh needles (Source). Ready to become a needle-changing pro?
Cleaning and Lubricating Needle Area
While keeping your Butterfly sewing machine’s needle area clean might seem like a tough job, it’s actually pretty easy once you know what to do.
To keep your needle working its best, follow these simple steps:
- Remove lint with a soft brush or cotton swab
- Use an awl to coax out stubborn debris
- Apply a tiny drop of sewing machine oil to moving parts only
- Run a scrap fabric through to absorb excess oil
Remember, a clean needle area is a happy needle area!
Storing Needles Properly Between Uses
You’ve cleaned your Butterfly sewing machine’s needle area – now let’s talk needle storage!
Think of your needles as tiny superheroes that need their own fortress of solitude.
Keep them safe in a dedicated case or pincushion . This will protect them from damage, and it’ll also save you from accidentally turning your fingers into pincushions!
Organize by size and type for easy access during your next sewing adventure.
Keep your needles organized and within reach, making them tiny superheroes that can save the day in your next project.
Preventing Needle Wear and Damage
Three simple habits will keep your Butterfly’s needle in tip-top shape.
First, change your needle every 8 hours of sewing to prevent microscopic grooves from forming (Source).
Second, always use the right needle for your fabric – ballpoint for knits, sharp for denim.
Frequently Asked Questions (FAQs)
How do you change a sewing machine needle?
Ever wonder why your stitches look wonky?
It’s probably time to change your needle!
Turn off your machine, loosen the screw, remove the old needle, insert the new one flat-side back, and tighten. Easy-peasy! (Source)
Why do I need to replace my sewing machine needles?
Sewing machine needles wear out over time, affecting stitch quality.
You’ll need to replace them regularly to prevent skipped stitches, thread breakage, and fabric damage.
A fresh needle makes for smooth sewing and great results for your projects.
How do I fix a broken needle in my sewing machine?
First, stop sewing and carefully remove the broken needle pieces.
Dispose of them safely in a container.
Install a new needle of the correct type and size for your project, following your machine’s manual.
You’re back in business, with a new needle installed, which is of the correct type.
How do you care for a sewing machine needle?
You’ve got a trusty sidekick in your sewing adventures – your needle. Keep it sharp and ready for action!
Store it safely in a pincushion , change it regularly , and give it a quick polish with emery for excellent performance.
How is a needle fixed in a sewing machine?
Locate the needle clamp screw on your machine.
Insert the needle with the flat side facing back, pushing it up as far as it’ll go.
Tighten the needle clamp screw securely. Double-check it’s snug before stitching.
How to fix a broken sewing machine needle?
Did you know 70% of sewing machine issues are needle-related? Don’t panic!
To fix a broken needle, you’ll need to replace it.
Turn off your machine, unscrew the old needle, insert a new one, and tighten it securely.
What should you do if the needle on your sewing machine is not moving?
Check if the bobbin case is seated correctly and the bobbin’s inserted properly.
Make sure the threading and tension are right.
Clean the machine, removing debris.
If issues persist, consider professional servicing for potential mechanical misalignment or lack of lubrication.
How to realign a sewing machine needle?
Did you know 83% of sewing hiccups stem from needle issues?
To realign your machine’s needle, you’ll want to loosen the needle clamp, adjust the needle’s position, and retighten securely.
Don’t forget to test on scrap fabric!
How often should I replace my sewing machine needle?
You’ll want to replace your sewing machine needle every 8-10 hours of sewing time.
If you’re tackling a big project, swap it out more frequently.
Don’t wait for it to break – keep your stitches sharp!
Can I use Singer or Brother needles in my Butterfly machine?
It’s best to stick with Organ or Schmetz needles for your Butterfly machine.
Singer and Brother needles often aren’t compatible and can cause issues like not picking up the lower thread.
Always use the right tools for smooth sewing!
What causes fabric to not feed properly?
Fabric feeding issues can stem from several factors.
Check if your presser foot is down and set to the right pressure.
Make sure the feed dogs aren’t covered or disengaged.
Re-thread both top and bobbin threads carefully. Don’t forget to adjust tension settings!
Why does my thread keep breaking during sewing?
Ever wondered why your thread keeps breaking during sewing?
Check your needle and thread compatibility, make sure you’re threading correctly.
Or explore tension issues.
Remember, even a tiny burr can wreak havoc, so clean regularly and use quality materials.
How do I adjust the presser foot pressure?
Adjust your presser foot pressure by locating the knob or dial, usually on the machine’s top or side, and turn it to increase or decrease pressure.
Experiment on scrap fabric to find the ideal setting.
Conclusion
Ultimately, fixing a needle in your Butterfly sewing machine might seem like a big deal, but with the right approach, it’s a breeze, especially if you’re familiar with needle size comparison charts
.
By following these 7 easy steps, you’ll have your machine humming like a well-oiled machine in no time.
Remember, a properly installed and maintained needle is the key to getting the most out of your Butterfly’s sewing abilities.
So, let’s get that needle fixed and start creating your next masterpiece!

