This site is supported by our readers. We may earn a commission, at no cost to you, if you purchase through links.

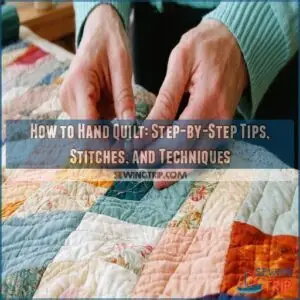
Start by making a “quilt sandwich” using your top fabric, batting, and backing, then secure it with safety pins or basting stitches.
Choose a strong, smooth thread—cotton works great—and a small, sharp needle like a size 9 or 10.
Use a simple running stitch to sew through all three layers, keeping your stitches even. A thimble can protect your finger while you push the needle through.
Don’t stress if your stitches aren’t perfect—practice makes progress. Ready to learn more stitches and techniques? There’s plenty to explore beyond the basics!
Table Of Contents
Key Takeaways
- Start by creating a quilt sandwich with your top fabric, batting, and backing, then secure it using safety pins or basting stitches.
- Use a running stitch to sew through all layers, keeping your stitches small and even for a neat finish.
- Choose a strong cotton thread and a small, sharp needle like size 9 or 10 to make stitching easier.
- Practice consistently, and don’t stress about perfection—focus on steady improvement with each project.
Hand Quilting Basics
Hand quilting starts with understanding the tools, materials, and simple techniques that bring fabric to life.
It’s a hands-on process that connects you to centuries of tradition while creating something uniquely your own.
History of Hand Quilting
Quilting history reflects cultural innovation and artistry.
Ancient quilting started as practical clothing, evolving through quilted armor for warriors and medieval heirloom quilts.
American quilting emerged in the 1800s, with quilts often included in hope chests.
Today, hand quilting preserves these rich traditions, connecting you to centuries of craftsmanship and storytelling.
It’s more than fabric—it’s history stitched together.
To get started, you’ll need to understand the essential hand quilting supplies and tools, which is a key part of the quilting process.
Benefits of Hand Quilting
Hand quilting offers more than stitching—it’s mindfulness in motion.
Mindful stitching transforms fabric into heirloom treasures, blending creativity and tradition with each rhythmic, soothing motion.
The rhythmic needlework feels like therapy, melting away stress while fueling a creative outlet.
Each stitch carries quilting love, transforming fabric into heirloom quality treasures.
As you quilt, artistic expression shines, offering quilting satisfaction and reflection.
Whether soothing nerves or crafting memories, hand quilting brings joy stitch by stitch.
Essential Tools and Materials
To get started, gather the right quilting tools. You’ll need a hand quilting needle (sizes 8-10 are great for beginners), hand quilting thread (stronger than regular thread), and thimble options like metal or leather for comfort.
Choose quality hand quilting fabric with a tight weave. Add basting sprays for easier layering.
Many people buy quilting supplies online for convenience. These hand quilting supplies make stitching smoother!
How to Hand Quilt
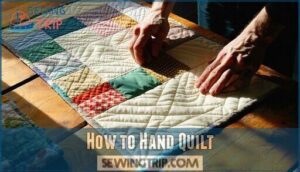
Hand quilting starts with preparing your quilt sandwich, where the top, batting, and backing are layered perfectly.
From there, you’ll use simple stitches like the running stitch to bring your design to life with care and precision, which is a key part of the quilting process.
Creating a Quilt Sandwich
Start by layering your quilt sandwich: backing fabric, batting, then quilt top. To prevent frustration, smooth wrinkles as you go.
Use basting methods like spray adhesive or safety pins to secure quilting layers in place. Your batting choice matters—thinner options are easier for beginners.
Keep the layers taut but not stretched for a neat finish.
- Layer order: backing, batting, quilt top
- Smoothing wrinkles: essential for clean stitching
- Basting methods: spray adhesive, safety pins
- Batting choice: thinner for easy stitching
- Taut layers: prevent puckering
Choosing The Right Thread
After preparing your quilt sandwich, it’s time to pick the perfect quilting thread. Choose thread weight that balances visibility and ease, like 28wt for defined stitches. Fiber content matters—cotton threads are strong yet smooth. Match thickness to your needle size.
For color selection, test to avoid regrets. Specialty threads? They’re fun but use sparingly for flair. Understanding thread weight options is essential for achieving the desired look and durability in your quilt.
| Thread Aspect | Options | Tips | Popular Brands |
|---|---|---|---|
| Thread Weight | 28wt, 12wt | Thicker threads create bold stitches | Aurifil, DMC |
| Fiber Content | 100% cotton | Best for durability | YLI, Gutermann |
| Color Selection | Neutral, Contrast | Test over fabric before committing | DMC, Aurifil |
| Specialty Threads | Metallic, Variegated | Use for decorative effects | Superior, Signature |
Basic Hand Quilting Stitches
When diving into beginner hand quilting, stick to simple, effective stitches.
Master the Running Stitch first—it’s the foundation of hand quilting techniques. Try the Whip Stitch for accents and the Blanket Stitch for decorative edges.
Keep Stitch Consistency in mind; smaller, even stitches create beauty.
- Running Stitch: Swift, basic, and essential.
- Whip Stitch: Great for details.
- Blanket Stitch: Adds flair.
Quilting Techniques and Stitches
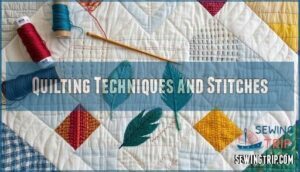
Quilting stitches are the foundation of your quilt’s design, helping hold the layers together while adding texture and charm.
With techniques like the running stitch or the decorative feather stitch, you can create patterns that bring your quilt to life.
Running Stitch Technique
The running stitch is the bread and butter of hand quilting stitches.
Keep your needle angle low for smooth passes, and aim for stitch consistency—small, even stitches row by row.
Adjust thread tension so it’s snug, but not too tight. Begin with proper knotting methods to secure your thread.
This beginner hand quilting technique creates a timeless look. It’s also useful for outlining designs on fabric, which is a key aspect of the hand quilting stitches.
Rocking Stitch Method
Master the rocking stitch with these steps for smooth stitching consistency and needle control:
- Hold the needle horizontally; tilt slightly up.
- Push through fabric using a thimble-covered finger.
- Rock needle back into fabric at an angle.
- Maintain smooth, short strokes for uniform hand quilting stitches.
- Practice stitch direction regularly to perfect this versatile hand quilting tutorial, focusing on smooth stitching.
Feather Stitch Application
The feather stitch adds a delicate, vine-like charm to your quilting stitches.
Perfect for fillers, borders, and curves, it adapts beautifully to intricate quilting designs.
Use it for a touch of elegance or whimsy in your hand quilting projects.
With its variations, feather stitch placement offers endless creativity.
It’s a classic step in any hand quilting tutorial.
Blanket Stitch Usage
The blanket stitch is one of the most versatile hand quilting stitches, perfect for decorative borders, appliqué attachment, and preventing fabric fray.
Its arms create striking edging techniques, whether straight or curved, and stitch variations, like alternating lengths, add unique charm.
A modern application of the blanket stitch is that it’s a favorite for embroidering on felt or fleece, and to master it, practice with a hand quilting tutorial to perfect it!
Preparing and Finishing Quilts
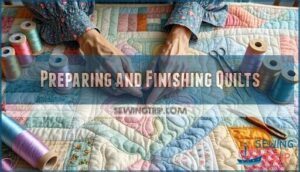
To prepare your quilt, you’ll need to mark patterns, baste the layers, and make sure everything stays secure.
When finishing, focus on tying off threads and hiding knots neatly so your quilt looks clean and polished.
Marking Quilt Patterns
Before stitching, marking quilting patterns makes your hand quilting process smooth.
Choose stencils for your design transfer, pairing them with a chalk pounce or ceramic pencils—both wipe away easily.
Align your pattern placement carefully, ensuring symmetry across quilting designs.
A chalk pounce option can simplify pattern transfer.
Remember, well-marked hand quilting patterns save time, reducing frustration later.
A steady hand here means fewer hiccups during your creative journey.
Basting Quilt Layers
Basting quilt layers is essential for keeping your quilt sandwich secure and wrinkle-free.
Spray basting is quick, while pin basting works well for firm layer alignment, and thread basting is a traditional option if you’re quilting by hand.
Always smooth fabric to prevent wrinkles, and choose a method that fits your style, to enjoy this satisfying step in quilting basting!
Tying Off Threads
When you’re quilting by hand, thread management is key.
Leave a 2-3 inch thread tail, then secure stitches by creating a small coil loop using knotting methods.
Gently pull the quilting needle through the coil to anchor it tightly, preventing unraveling, and keeping your quilt sturdy.
Practicing proper thread tailoring guarantees smooth finishes and professional-looking quilts every time.
Hiding Knots and Ends
To secure knots invisibly, leave 2-3 inches of thread slack.
Create a secure knot by coiling the thread around your needle, then pull it tight near the quilt’s back.
Pierce the batting and pop the knot inside to tangle it securely. A quilter’s knot helps create an invisible finish.
Trim the quilt tail close for a polished finish. This makes your hand quilting flawless and professional!
Advanced Hand Quilting Tips
Tackling advanced hand quilting techniques lets you transform your quilts into true works of art.
You’ll learn to handle tricky fabrics, troubleshoot common challenges, and add eye-catching details that make your projects stand out, utilizing techniques that involve troubleshoot and eye-catching details.
Choosing Quilt Designs and Patterns
Picking the right hand quilting patterns is like choosing a good book—you’ll want one that matches your experience and style.
Quilt design choices should reflect the quilt’s mood and color schemes. Start simple if you’re new.
Keep pattern complexity manageable, and double-check seam allowance for accuracy.
Geometric designs introduce a modern flair. A thoughtful quilt pattern transforms your fabric selection into a stunning masterpiece.
Working With Different Fabrics
Different fabrics bring challenges to hand quilting. Pay attention to fabric weight and weave to keep your stitches smooth.
Test for thread compatibility with hand quilting thread. Pre-wash fabrics to avoid shrinking later.
Follow these tips:
- Check quilting fabric choices for tight weaves.
- Do a colorfast test to avoid bleeding.
- Use a proper hand quilting needle for precision.
Troubleshooting Common Issues
Sometimes, hand quilting can feel tricky, but tackling common challenges makes you better! Struggling with thread breaks or knot issues? Use quality hand quilting thread and trim old spools.
Tension problems or fabric puckering? Check thread tension and avoid overstretching fabric. For stitch consistency, practice patience. A thimble eases pressure.
Use the table below to troubleshoot effectively:
| Issue | Cause | Fix |
|---|---|---|
| Thread Breaks | Weak or brittle thread | Use strong quilting thread |
| Knot Issues | Improper knot technique | Try a secure, small knot |
| Fabric Puckering | Layers shifting | Use hoops or better basting |
| Tension Problems | Unsupported fabric stretch | Loosen thread tension |
| Stitch Consistency | Uneven needle movement | Practice slow, deliberate stitches |
Adding Decorative Elements and Embellishments
Adding quilting embellishments brings quilts to life.
Try appliqué techniques for whimsical touches or embroidery stitches to personalize with dates or messages.
Bead embellishments sparkle beautifully but avoid them for children’s quilts.
Decorative threads and fabric painting add color and texture.
Use a hand quilting needle and hand quilting thread for precision.
These hand quilting tips make designs uniquely yours.
Frequently Asked Questions (FAQs)
How do you start quilting by hand?
Starting to hand quilt is like painting with thread.
Gather fabric, batting, thread, and a needle.
Prep layers, secure with basting, and trace your design.
Use a running stitch, aiming for small, even lines.
What are the disadvantages of hand quilting?
Hand quilting takes time, demands patience, and can strain your hands.
It’s slower than machine quilting, limiting productivity.
Achieving consistent stitches takes practice, and large projects may feel overwhelming.
Still, many find it deeply rewarding and it is a process that requires patience!
What stitch is best for hand quilting?
The running stitch is your best choice for hand quilting.
It’s simple, versatile, and creates charming dashed lines.
With practice, your stitches will become even, adding both beauty and strength to your quilt’s design.
Is quilting by hand difficult?
Quilting by hand isn’t hard, but it does take patience and practice.
Small, even stitches are the goal, and with the right tools and mindset, you’ll find it both relaxing and rewarding.
How can hand quilting improve crafting skills?
Practicing hand quilting sharpens patience, precision, and creativity.
You’ll develop steady hands, master stitch consistency, and grow a keen eye for design.
Plus, it’s rewarding to see your skills stitched into something timeless and beautiful!
What are ways to prevent hand fatigue?
Picture gripping a needle like clutching a pen too tightly—it’ll cramp fast!
Switch hands often, use a supportive pillow for posture, and take short breaks.
Stretch your fingers like they’re waking up from a nap.
How do you store unfinished quilting projects?
Keep unfinished quilting projects clean and wrinkle-free by storing them in breathable cotton bags or pillowcases.
Avoid plastic bags—they trap moisture.
Fold carefully, layer acid-free tissue between folds, and label everything to stay organized.
What are alternative uses for quilted fabric?
You can turn quilted fabric into stylish tote bags, cozy pillow covers, table runners, or even wearable art like jackets.
It also works great for crafting potholders, makeup bags, or decorative wall hangings, which can be considered wearable art.
Can hand quilting be combined with embroidery?
You can absolutely combine hand quilting with embroidery!
Mix stitches like running stitches for quilting with decorative embroidery details to create unique designs.
It adds flair, texture, and a personal touch to your quilt, making it a great way to add personal elements.
Conclusion
Hand quilting may seem slow in a fast-paced world, but its charm lies in the process.
Each stitch is a step toward a cozy, handmade masterpiece.
With your top fabric, batting, and backing secured in a quilt sandwich, you’re ready to get started.
Practice simple running stitches, explore creative patterns, and don’t worry about perfection—your effort makes it unique.
As you master how to hand quilt, enjoy the journey and watch your quilting skills bloom with every project!


