This site is supported by our readers. We may earn a commission, at no cost to you, if you purchase through links.
To master sewing tools, start by identifying your essential cutting, measuring, marking, and securing tools. Handle fabric cutting shears with care, using the ergonomic grip. Measure accurately with a tape measure and seam gauge. Mark fabrics precisely using fabric pencils or chalk. Secure layers with sturdy glass head pins or clips.
For hand sewing, use a needle threader, thimble, and quality scissors. Proper tool handling is key to a successful sewing project. Organizing your sewing tools in zones and using magnetic racks streamlines your workflow. Continue reading to discover the best sewing tools for every sewist and how to expertly utilize them.
Table Of Contents
- Key Takeaways
- How to Handle Sewing Tools?
- 10 Best Sewing Tools for Every Sewist
- 1. Fiskars Premier No 8 Easy Action Scissors
- 2. Ryalan Mini Sewing Scissors Yarn Cutter
- 3. Precision Hemostat Locking Tweezers Clamp
- 4. Sewing Seam Ripper Ergonomic Stitch Unpicker
- 5. Pearlized Ball Head Sewing Pins
- 6. Magnetic Pin Cushion with Drawer
- 7. Premium Hand Sewing Needles Assorted Set
- 8. Premium Plastic Sewing Clips Assorted Colors
- 9. Olfa Self-Healing Rotary Cutting Mat
- 10. Dritz Soft Comfort Thimble Medium Green
- Basic Cutting Tools for Sewing
- Essential Measuring Tools for Sewing
- Indispensable Fabric Marking Tools
- Reliable Securing Tools for Sewing
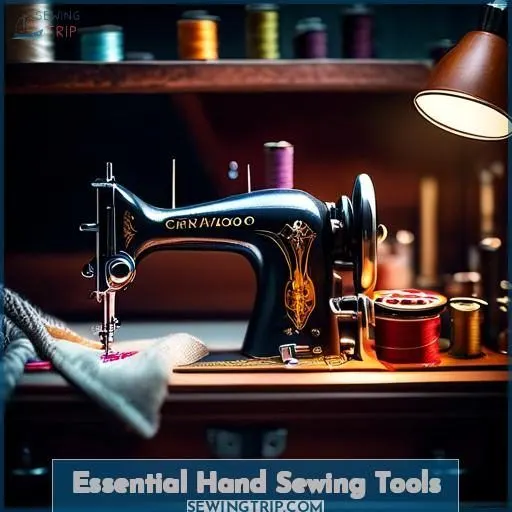
- Essential Hand Sewing Tools
- Organizing Your Sewing Tool Zones
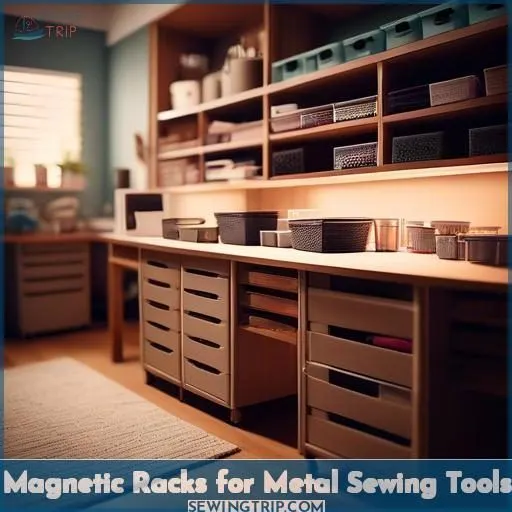
- Magnetic Racks for Metal Sewing Tools
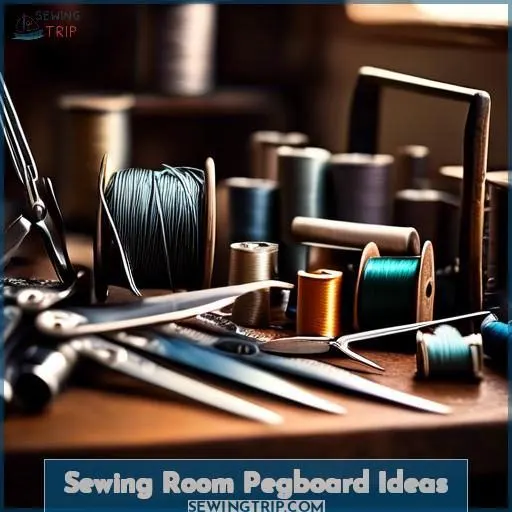
- Sewing Room Pegboard Ideas
- Frequently Asked Questions (FAQs)
- Conclusion
Key Takeaways
- Precise cutting and measuring are foundational to successful sewing projects, requiring the right tools like fabric shears, seam gauges, and yardsticks.
- Fabric marking tools such as pencils, chalk, and markers allow sewists to map out designs and patterns accurately on various fabrics.
- Securing tools like glass-head pins, safety pins, and pincushions are essential for holding fabric components in place during sewing.
- Hand sewing essentials like needle threaders, thimbles, and quality scissors provide comfort and control for meticulous stitching.
How to Handle Sewing Tools?
To handle sewing tools safely and effectively, follow these guidelines:
- Keep your fingers clear of the sewing point: When sewing, keep your fingers away from the needle to prevent injuries and needle breakage.
- Use the right needle for the fabric: Select the appropriate needle for the fabric you’re sewing to prevent skipped stitches and fabric damage.
- Maintain sharp scissors: Dull scissors can result in uneven cuts and frayed edges. Keep your scissors sharp to guarantee precise and professional results.
- Store tools securely: Keep sharp tools and equipment in a safe, locked area, especially if you have children, pets, or other family members who could be at risk.
- Use a thimble: Protect your finger from getting pricked while pushing the needle through thick layers of fabric.
- Handle pins carefully: Don’t hold pins in your mouth; use a pin cushion or holder. Be careful not to drop pins on the floor, as they can be stepped on or picked up by a crawling baby or pet.
- Use a rotary cutter safely: Push the rotary cutter in a cutting direction away from yourself or anyone else. Make sure your hands are behind the rotary cutter when using, and slide the blade cover up over the blade when done cutting.
- Keep your sewing room clean: Keep your sewing area clean and well-lit to prevent accidents and guarantee a safe and productive sewing environment.
By following these guidelines, you can handle your sewing tools safely and efficiently, ensuring the quality and professionalism of your sewing projects.
10 Best Sewing Tools for Every Sewist
As a sewist, having the right tools can make all the difference in your sewing projects. Let’s explore 10 of the best sewing tools that every sewist should have, from high-quality scissors and seam rippers to essential measuring devices and securing tools.
1. Fiskars Premier No 8 Easy Action Scissors
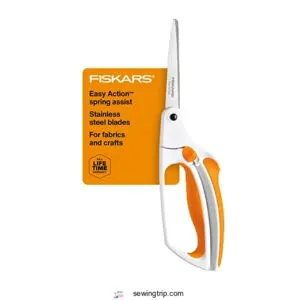
Imagine slicing through fabric as smoothly as butter on a hot skillet. That’s the magic of the Fiskars Premier No 8 Easy Action Scissors.
With blades sharper than a gossip’s tongue, these scissors make detailed cutting a breeze, whether you’re traversing through denim jungles or silk streams. The spring-assisted handle acts like a little helper, reducing hand fatigue so you can keep going without feeling like you’ve arm-wrestled a bear.
And let’s not forget the easy-open thumb lock – a safety feature that’s as reassuring as a seatbelt. Plus, the SoftGrip handle? It’s like holding hands with comfort itself.
So, gear up with these scissors and cut with confidence, knowing you’re in full control of your craft.
Best For: Artists, crafters, and anyone seeking precise cutting with ease and comfort.
- Precision-ground stainless steel blades for sharpness and durability
- Spring-assisted handle reduces hand fatigue
- SoftGrip handle for enhanced comfort and control
- May not be suitable for heavy-duty cutting tasks
- Some users may find the spring-assist to be too strong
- Not dishwasher safe
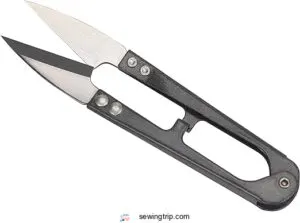
2. Ryalan Mini Sewing Scissors Yarn Cutter
You’re in luck! The Ryalan Mini Sewing Scissors Yarn Cutter is a versatile and essential tool for any sewing enthusiast.
These small snips, made of high-carbon steel, are perfect for cutting fabric, yarn, thread, fishing line, flowers, and even small plants. With a compact and portable design, they’re easy to use for both right and left-handed crafters.
The blades are incredibly sharp, making them great for trimming threads or making precise cuts in fabric. At about 4.1 inches long and 1 inch wide, with a net weight of about 0.7 ounces, they’re lightweight and easy to handle.
Plus, these scissors are designed for cutting thrum, yarn, and other materials, making them a valuable addition to your sewing kit.
Best For: Crafters, sewers, and DIY enthusiasts who need a versatile and precise cutting tool.
- Precision steel blades for accuracy
- One-piece design for durability
- Compact and portable for convenience
- Blades come coated with oil or grease
- Difficult to put back into plastic sleeve
- May not be suitable for heavy-duty cutting tasks
3. Precision Hemostat Locking Tweezers Clamp
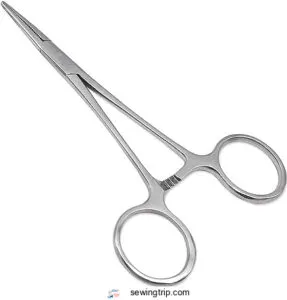
Precision hemostat locking tweezers clamps are a versatile and essential tool for various applications. These tweezers are designed with a locking mechanism, often referred to as a ratchet, which allows for secure and consistent gripping of materials. They’re commonly used in surgical and medical procedures, such as clamping blood vessels or tissues to control bleeding, but also find their place in other fields like fishing, crafts, and hobby projects.
The jaws of the locking forceps gradually come together as each increment of the ratchet is employed, providing a firm hold on the targeted area. They come in different sizes, with medium-length jaws being a popular choice for a wide range of surgical applications. Some of the key features of precision hemostat locking tweezers clamps include:
- Serrated jaws: The serrations on the jaws help to enhance the grip on the material being clamped.
- Locking mechanism: The ratcheted locking mechanism guarantees that the clamp stays in place once locked, providing a consistent and secure grip.
- Stainless steel construction: These tweezers are typically made from high-quality stainless steel, making them autoclavable, rust-resistant, and durable.
- Autoclavable: They can withstand the high temperatures and pressures of sterilization processes, making them suitable for use in medical and veterinary settings.
- Variety of sizes: Precision hemostat locking tweezers clamps come in different sizes, including straight and curved tips, to cater to various applications.
These tweezers are a must-have tool for removing hooks in fishing, as well as for tasks like barb pinching, knot tying, hook straightening, fly organization, and errant fly extraction. They’re also useful in sewing, pruning, pet tick removal, hobby projects, electronic repair, and many other activities. With their large finger loops, precision tips, and serrated self-locking jaws, these tweezers are ideal for grasping small objects securely.
Best For: Individuals seeking a versatile tool for various applications, including medical, fishing, and hobby projects.
- Large finger loops, precision tips, and serrated self-locking jaws
- High-quality stainless steel construction that is autoclavable and rust-resistant
- Three locking positions for secure and consistent gripping
- Limited sizes available
- May not be suitable for all types of medical procedures
- Can be more expensive than other forceps options
4. Sewing Seam Ripper Ergonomic Stitch Unpicker
The Sewing Seam Ripper Ergonomic Stitch Unpicker is a versatile tool designed to make seam ripping a more comfortable and efficient process. With its ergonomic design, it provides a comfortable grip for the user, reducing strain and fatigue during long sewing sessions.
The sharp point of the tool allows for easy insertion between stitches, while the ballpoint tip ensures that the fabric remains unblemished. This tool is suitable for various types of stitches, including regular, serger, and cover stitches, making it an essential addition to any sewing toolkit.
Best For: Individuals who frequently engage in sewing and desire a comfortable and efficient seam ripping tool.
- Ergonomic design for comfortable handling
- Sharp point for easy stitch insertion
- Ballpoint tip to protect fabric
- Keep away from children
- Handle with care to avoid injury
- Durability issues reported
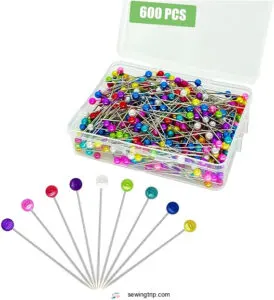
5. Pearlized Ball Head Sewing Pins
Pearlized ball head sewing pins are a versatile and essential tool for sewists and quilters. These pins, which are typically made of nickel-plated steel, feature a pearlized head that adds a touch of elegance to your sewing projects. They come in various lengths, with the most common length being 1.42 inches long and 0.14 inches in diameter at the head.
Pearlized ball head pins are suitable for a range of fabrics, including medium-weight fabrics for general sewing, floral and craft projects, and decorative projects. They’re also available in extra-long lengths for lofty fabrics, quilt basting, and home décor sewing.
One of the key advantages of pearlized ball head pins is that they don’t melt when ironed, making them ideal for use in pressing and holding materials down during the ironing process. They’re also available in different colors, which can be used to add a personal touch to your projects or to differentiate between pins for different stages of a project.
In addition to their functional benefits, pearlized ball head pins are also aesthetically pleasing, with their pearlized heads adding a touch of sophistication to your sewing projects. They’re available in packs of 600 pieces, making them a great value for sewists and quilters who need a large quantity of pins for their projects.
Best For: Sewists and quilters looking for versatile, durable, and aesthetically pleasing pins.
- Strong and durable for repeat use
- Big ball heads are easy to hold
- Available in various colors for personalization or differentiation
- Not specified
- Not specified
- Not specified
6. Magnetic Pin Cushion with Drawer
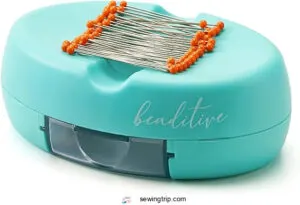
Imagine never having to play a frustrating game of find the pin on your sewing room floor again. Enter the magnetic pin cushion with drawer, a game-changer for keeping those pesky pins in check. With its strong magnet, it effortlessly scoops up scattered pins, turning cleanup into a breeze.
The convenient drawer slides open to reveal a secret stash for extra needles or those tiny, easy-to-lose sewing essentials. It’s like having a mini treasure chest right at your fingertips. Plus, the included glass head quilting pins, while not top-tier, are a nice starter set.
This tool isn’t just about organization; it’s about taking control of your sewing space and making it work for you. Say goodbye to pin pricks and hello to a tidier, more efficient crafting haven.
Best For: People who want to keep their pins organized and accessible while sewing.
- Strong magnet easily picks up dropped pins
- Convenient drawer provides extra storage space
- Includes 50 glass head quilting pins
- Pins included may not be of high quality
- Drawer may not be large enough for all sewing essentials
- Magnetic tool case may not be durable enough for heavy use
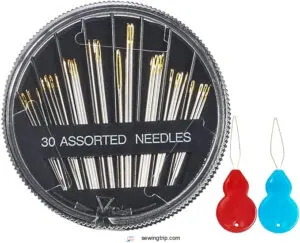
7. Premium Hand Sewing Needles Assorted Set
Regarding hand sewing, possessing the appropriate tools can significantly enhance the experience. A crucial component of your sewing kit is a collection of superior hand sewing needles.
These needles are meticulously crafted to facilitate a seamless sewing journey, incorporating ergonomic designs and materials that ensure comfort during use. The comprehensive set frequently encompasses a diverse range of needle sizes, empowering you to select the most suitable one for your project.
With a set of premium hand sewing needles, you’ll be equipped to undertake any sewing task with effortless ease and unwavering confidence.
Best For: Individuals seeking a comprehensive and durable set of hand sewing needles for various projects.
- Made of corrosion-free stainless steel with a smooth surface for low resistance.
- Includes a wide range of sizes (31mm-51mm) to accommodate different materials and tasks.
- Comes with 2 needle threaders and a convenient storage container for easy use and organization.
- May not be suitable for extremely delicate fabrics.
- Does not include a complete range of needle types (e.g., embroidery needles).
- The plastic container may not be as durable as other storage options.
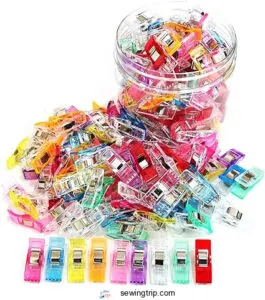
8. Premium Plastic Sewing Clips Assorted Colors
Imagine this: You’re in the midst of a sewing project, and your fabric components are beginning to move about. You require a method to maintain everything in position without jeopardizing your work. That’s where Premium Plastic Sewing Clips Assorted Colors come into play.
These clips aren’t only a sewing necessity, but they’re also a game-changer. They’re made from high-quality plastic that won’t oxidize or tarnish, ensuring your work remains secure and protected. And with a variety of colors to select from, you can add a touch of flair to your sewing area.
These clips are perfect for holding fabric components together, securing patterns, or even marking seams. They’re easy to use and won’t leave any marks on your fabric, making them a must-have for every seamster.
Best For: Seamsters who need to hold fabric components together, secure patterns, or mark seams without damaging their work.
- Made from high-quality plastic that won’t oxidize or tarnish
- Available in a variety of colors to add a touch of flair to your sewing area
- Easy to use and won’t leave any marks on your fabric
- Maximum opening of 0.9cm may not be large enough for some projects
- May not be suitable for heavy-duty sewing projects
- Price may be higher than other sewing clips
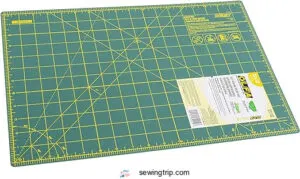
9. Olfa Self-Healing Rotary Cutting Mat
The Olfa Self-Healing Rotary Cutting Mat is a crucial tool for any sewist. This double-sided mat is engineered to prolong the lifespan of your rotary blades while safeguarding your work surface.
The mat’s self-healing attribute guarantees that the surface seals itself after each cut, delivering a continuously smooth cutting surface for all your projects.
The mat comes in diverse sizes, including 24 inches by 36 inches, and boasts a triple-layer heat welding process for enhanced durability and lasting performance.
The mat is compatible with rotary blades and can be utilized for a vast array of crafting and sewing projects.
Best For: Beginners and experienced sewists seeking a durable and self-healing surface for rotary cutting.
- Prolongs rotary blade lifespan
- Self-healing surface for a smooth cutting experience
- Triple-layer heat welding for enhanced durability
- May not be suitable for heavy-duty cutting
- Can be expensive compared to standard cutting mats
- May not be resistant to all types of cuts
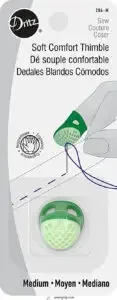
10. Dritz Soft Comfort Thimble Medium Green
The Dritz Soft Comfort Thimble in Medium, Green is a versatile and comfortable tool for hand sewing. Its soft sides provide comfort, while the hard-textured tip guarantees protection and prevents needle penetration.
The large openings on the sides and back allow for breathability, keeping your fingers cool during long sewing sessions.
The thimble is ideal for sewing, quilting, and crafting, and its light/dark green color adds a splash of flair to your sewing kit.
Best For: Sewers, quilters, and crafters seeking comfort and protection while hand sewing.
- Soft sides for comfort
- Hard-textured tip for protection and grip prevention
- Openings for breathability
- Not suitable for very delicate fabrics
- May not fit all finger sizes
- Color may vary slightly from the image
Basic Cutting Tools for Sewing
Cutting fabrics with precision is the foundation of any successful sewing project. Familiarize yourself with the essential cutting tools like fabric shears, thread snips, seam rippers, and craft scissors to guarantee clean, accurate cuts every time.
Fabric Cutting Shears
After acing your scissor selection, let’s dive into the realm of fabric cutting shears. These are your fabric’s bosom buddies, delivering:
- Ergonomic comfort for epic cutting sprees
- Premium blades that slice through materials like silk
- Designs that elicit glowing testimonials
Thread Snips
Thread snips, also known as thread clippers or thread nippers, are compact, lightweight scissors designed for cutting threads, notching fabric, or clipping yarn ends while you work. They’re spring-loaded, making them easy to operate quickly and efficiently. Thread snips come in various shapes, sizes, and price points, allowing you to choose the one that best suits your crafting needs.
When using thread snips, it’s essential to hold them correctly. To do this, place your thumb on the back of the scissors, your index finger on the blade, and your middle finger on the handle. This grip allows you to control the scissors and make precise cuts.
Thread snips are perfect for sewers, multi-crafters, and yarn crafters alike, as they’re small and lightweight, making them easy to carry around your craft room or sewing studio. They’re ideal for snipping threads, notching fabric, or clipping yarn ends while you work.
To keep your thread snips in the best condition, store them in a protective case or on a magnetic strip when not in use. You can also sharpen the blades regularly to guarantee they remain sharp and effective.
Thread snips are a versatile tool that can be used for various sewing tasks. They’re particularly useful for trimming seam allowances, cutting pattern notches, and snipping off thread ends. By incorporating thread snips into your sewing toolkit, you can enhance your sewing experience and achieve better results.
Seam Ripper
A seam ripper is a must-have tool for every sewist’s toolbox. Its blade is designed to easily remove stitches, allowing you to correct mistakes or make alterations.
Seam rippers come in various sizes, with some featuring ergonomic shapes for comfortable handling. To store your seam ripper, consider using a teflon sheet or a designated slot in your sewing tool organizer.
If your seam ripper becomes dull, it’s time for a replacement. Seam rippers aren’t just for ripping seams; they can also be used with marking tools and pressing tools like quilter’s clappers.
Craft Shears
Craft shears, also known as safety shears, are essential for sewing. They have ergonomic handles and are designed for cutting fabrics, paper patterns, and threads.
Some models feature a rotary blade, while others are tabletop or bent-nose pliers with angled tweezers or brayer rollers.
Always make sure you use the right shears for the job to maintain safety and precision in your sewing projects.
Rotary Cutting Tools (Optional)
Rotary cutting tools are an optional yet highly advantageous addition to your sewing toolbox. These tools come in various blade sizes and shapes, engineered to work with rotary cutting mats and blades. Rotary cutting techniques can be utilized with sewing machine feet, and the tools can be stored in storage containers or on needle pullers.
Here are three key points about rotary cutting tools:
- Blade Sizes: Rotary cutting blades come in different sizes, such as 28mm, 45mm, and 60mm. Each size is suitable for specific tasks, like cutting strips, squaring fabric, or cutting curves and intricate pieces.
- Blade Shapes: Rotary cutting blades can have different shapes, such as pinking or scalloping, which are interchangeable and less costly than purchasing a specialized pair of shears.
- Cutting Mats and Blades: Rotary cutting mats are designed to safeguard work surfaces and help keep blades sharp. Rotary cutting blades can be replaced to maintain peak performance.
When using rotary cutting tools, it’s crucial to adhere to safety guidelines and utilize suitable accessories like cutting mats and rulers. These tools can vastly enhance your sewing experience by providing clean, straight cuts, rapid cutting, and the ability to cut multiple layers of fabric simultaneously.
Essential Measuring Tools for Sewing
Precise measuring is critical to successful sewing projects. Keep your tape measure, seam gauge, and yard stick within reach to guarantee accurate measurements and perfectly fitted results.
Tape Measure
A tape measure is your faithful companion in the sewing room, ideal for measuring length, fabric, hems, and distance accurately. Keep it accessible in a drawer organizer with sewing thread and wonder clips for optimal sewing room organization.
Seam Gauge
A seam gauge is an indispensable tool for sewing, especially when dealing with hems and seam allowances. It’s a small, metal ruler that can measure distances from ⅛ of an inch to six inches, with a slider in the middle to help stabilize the gauge for precise measurement. Here are some ways to use a seam gauge:
- Hemming: Slide the plastic portion of the gauge up or down to align the straight edge with the correct hem width, making sure the top of the ruler is level with the folded section of the fabric and the top edge of the plastic slider with the edge of the folded-over portion.
- Seam Allowances: Use the gauge to measure the distance between the edge of the seam line and the edge of the pocket, so you can determine where to start and stop sewing.
- Buttonholes: Decide on the size of buttonholes and measure their spacing with a sewing gauge.
- Making Bias Binding: Measure the fold for bias binding with the gauge to ensure precise and even folding.
- Measuring Pleats: Use the gauge to accurately measure the distance between pleats and make sure they’re all the same width.
- Tucks: Measure the depths of tucks with the gauge for accurate placement.
- Waistbands: Measure waistbands with the gauge, as it has a maximum length of 6 inches.
Yard Stick
Regarding measuring in sewing, a yard stick is an indispensable tool. A yard stick is an elongated, slender, and planar tool employed to ascertain lengths and distances of up to three feet (91 cm). Typically crafted from wood or plastic, it exhibits linear-measurement markings along its length. Yardsticks are instrumental in inspecting hems and delineating protracted lines, aiding in determining the finished drop of the hem. They can also be utilized to measure extensive lengths of dresses, such as bridal gowns, or to sketch a long line.
In addition to a yard stick, other measuring implements commonly employed in sewing include:
- Tape measure: A supple, planar ribbon or strip with linear-measurement markings, used for measuring lengths and distances.
- Ruler: A planar, rigid, and rectilinear instrument used to measure and delineate rectilinear lines, with markings along its edge that denote units of measurement.
- Hem gauge: A planar tool used for measuring and marking hems, typically a diminutive, exiguous metal ruler with indentations or markings at consistent intervals to designate various hem widths.
- Seam gauge: A diminutive, planar tool used for measuring and marking seam allowances, often fabricated from metal or plastic with indentations or markings at consistent intervals.
These implements are fundamental for ensuring precise measurements and achieving a refined and well-fitting garment.
Ruler (Optional)
A ruler is an optional yet indispensable sewing tool that aids you in measuring fabric precisely. There are diverse ruler types and sizes to select from, encompassing flexible and rigid rulers.
To maintain its durability, clean your ruler periodically and store it in a protective case.
Here are some ruler techniques: utilize a ruler as a guideline for severing bias tape, align it with a seam to secure straight stitching, or employ it to measure the interval between two points on a pattern.
In your sewing space, consider storing rulers alongside other measuring tools, such as hand sewing needles, thimble, and bias tape makers, in a tube turner or wall organizer.
Cutting Mat (Optional)
A cutting mat is an essential tool for any sewist, providing protection for your work surface and ensuring precision in your cutting. These mats are typically made from materials like vinyl or plastic, with self-healing properties that allow them to repair themselves after use. They often come with grid lines for accurate alignment and measurement.
When choosing a cutting mat, look for one that’s at least 3 plies thick, with the outer plies not too thin and the inner ply thick. Some cutting mats can be used with rotary cutters and are designed to rotate 360 degrees for better access.
To maintain your cutting mat, clean it with a damp cloth and avoid cutting in the same spot repeatedly, as this can inhibit the self-healing properties.
Indispensable Fabric Marking Tools
Fabric marking tools are essential for any sewing project. From fabric marking pencils to optional tools like chalk, markers, crayons, and pens, these versatile implements allow you to precisely map out your designs and patterns on fabric.
Fabric Marking Pencils
Fabric marking pencils are your secret weapon, akin to the precision of a Cricut Explore Air 2 or the clarity of an Epson Home Cinema projector. They make sure your fabric’s story unfolds flawlessly, without the drama of misplaced stitches.
Chalk (Optional)
- Chalk Uses: Chalk is a versatile marking tool that can be used for various purposes, such as marking the placement of darts, pleats, and other sewing patterns on fabric. It’s particularly useful for marking on dark fabrics, as it appears white and can be easily erased by rubbing or washing the fabric.
- Chalk Types: There are different types of chalk available, including basic tailor’s chalk, chalk wheels, and chalk pens. Basic tailor’s chalk comes in a rounded triangle shape with fine edges, while chalk wheels have a stick of chalk in the top and a tiny metal wheel at the bottom that spins as you draw, creating a fine chalk line. Chalk pens are colorful and come with refill sticks and a sharpener, making them a fun and convenient option for technical sewing.
- Chalk Colors: Chalk is available in various colors, including white, red, yellow, and blue, allowing sewists to choose the color that best suits the fabric they’re working on. Some chalk markers also come with a variety of colors in a set, ensuring that there’s a color for every fabric type.
- Chalk Storage: Proper storage of chalk markers is essential for maintaining their quality and longevity. Chalk markers should be stored in a cool, dry place away from direct sunlight and extreme temperatures. Regular cleaning and maintenance, such as wiping off excess chalk and storing markers in a protective case, can also help to extend their lifespan.
- Chalk Techniques: To use chalk effectively, sewists can employ different techniques, such as using a chalk wheel for fine lines, applying chalk with a chalk pen for a colorful and precise mark, or using a chalk pencil for a more traditional marking experience.
Fabric Markers (Optional)
Fabric markers are a pivotal tool for any sewist, offering a way to mark designs, patterns, and measurements on fabric without using pins or chalk. They’re available in varying tip sizes, including chisel and fine, which allow for both thick and thin lines. Some fabric markers are permanent, while others are washable or soluble, making them appropriate for different fabric types and projects.
When selecting fabric markers, take into account the fabric you’ll be working with. For light-colored fabrics, chisel-tip markers may be optimal, while fine-point markers are more suitable for intricate designs. Water-soluble or air-soluble markers are helpful for temporary markings, while permanent markers are ideal for long-lasting designs.
To use fabric markers, make certain the fabric is clean and dry before marking. Test the marker on a small, inconspicuous area to confirm its colorfastness. When marking, apply consistent pressure and move the marker along the fabric smoothly to maintain a uniform line.
Some fabric markers are crafted for specific applications, such as heat transfer markers for applying designs to materials that are sensitive to heat. It’s crucial to choose the appropriate marker for your project to attain the desired results.
Fabric Crayons (Optional)
Fabric crayons are a versatile and creative tool for adding color to your textile projects. They come in various types, each with its unique uses and characteristics. Here’s a brief overview of fabric crayons, their types, uses, and how to choose and store them:
Types of Fabric Crayons:
- Permanent Fabric Crayons: These crayons are designed specifically for fabric and can withstand washing and drying without fading. They’re often used for quilting, embroidery, and other textile crafts.
- Regular Crayons: While not specifically designed for fabric, regular crayons can be used on fabric by following specific techniques. They may not be as permanent as fabric crayons and may require special handling to prevent wax buildup.
Uses of Fabric Crayons:
- Drawing Designs: Fabric crayons can be used to draw intricate designs on fabric, which can then be used as patterns for quilting, embroidery, or other textile projects.
- Filling in Colors: They can be used to fill in areas of fabric with solid colors, creating a bold and vibrant look.
- Creating Textures: Fabric crayons can be used to create textured effects on fabric, such as shading or highlighting, adding depth and dimension to your project.
Choosing Fabric Crayons:
- Consider the type of fabric you’ll be working with. Some crayons are better suited for specific fabrics, such as cotton or linen.
- Look for crayons that are specifically labeled for use on fabric, as they’ll provide the best results and durability.
- Consider the colors you need for your project and choose a set that includes a range of shades.
Storing Fabric Crayons:
- Store your fabric crayons in a cool, dry place to prevent them from melting or becoming damaged.
- Keep them in a container that’s easy to access and prevents the crayons from breaking or being damaged.
- If you have a large collection of crayons, consider organizing them by color or type for easy access.
Fabric Pens (Optional)
Fabric pens are a versatile and essential tool for any sewer, quilter, or crafter. They allow for precise marking on fabric, eliminating the need for chalk or other messy marking methods. Here are three fabric pen options to think about:
- Madam Sew Heat Erasable Fabric Marking Pens: These pens are great for all-purpose marking and come in various colors, including white for lighter fabrics. They’ve a smooth line and erase with heat, making them perfect for temporary markings.
- Dritz Disappearing Ink Marking Pen: Ideal for marking the outside of plushies or top sewing lines, this pen vanishes with exposure to air over time or water, making it perfect for temporary marking.
- Uni-Ball Signo Gel Pen in White: This gel pen features a smooth, bold line and doesn’t need multiple passes to show up, making it great for dark fabrics.
When it comes to handling and maintaining your fabric pens, consider the following tips:
- Fabric Pen Storage: Store your fabric pens in a cool, dry place away from direct sunlight to prevent the ink from drying out or turning translucent.
- Fabric Pen Sharpening: If your fabric pen tip becomes dull, you can sharpen it using a sharpener designed for fabric pencils.
- Fabric Pen Accessories: Some fabric pens come with refill kits, allowing you to save money by replacing the ink instead of buying a new pen.
Reliable Securing Tools for Sewing
Sewing pins are an essential securing tool, with glass head pins providing a sturdy and neat option. You can also use safety pins, T-pins, or quilting pins depending on your project needs, and a pincushion keeps your pins organized and at the ready.
Glass Head Sewing Pins
Glass head pins are your secret weapon for precision and control in sewing. Unlike their plastic cousins, they won’t melt under heat. Store them in pin cushions for easy access, and choose from various pin types and sizes for every project.
Safety Pins (Optional)
Safety pins are an optional but useful tool for sewing. They can be used to temporarily secure fabrics, hold seams in place, or fasten garments.
For safety pin storage, consider using a pincushion or a designated pin holder. Safety pin sizes vary, with larger pins being better for heavier fabrics and smaller pins for lighter ones. Brands like Clover offer safety pins in various sizes and styles.
Safety pin variations include locking pins, which are great for securing seams while sewing.
T-Pins (Optional)
T-pins, also known as T-head pins, are a type of pin commonly used in sewing, quilting, and other crafts that require the secure attachment of materials to various surfaces. These pins have a distinctive T-shaped head, which provides a strong grip and makes them ideal for working with heavyweight and bulky fabrics, such as wool, upholstery materials, and multiple layers of fabric.
When using T-pins, it’s essential to store them properly to prevent rust and maintain their sharpness. To prevent rust, store T-pins in a dry, cool place, away from direct sunlight and moisture. T-pins can be stored in a pincushion, a magnetic pin holder, or a small container. Always store T-pins with the pointed ends facing downward to avoid accidental pricks.
To organize your T-pins, consider using a wall organizer for sewing machine feet or a magnetic rack for metal sewing tools. This will help keep your workspace clutter-free and make it easier to find the T-pins you need when you need them.
When choosing T-pins, consider the length and head size that best suits your project. T-pins come in various sizes, with lengths ranging from 1 to 2 and head sizes ranging from 9/16 to 9/16. Stainless steel T-pins are a popular choice for their durability and rust resistance.
Quilting Pins (Optional)
Quilting pins, suggested but necessary, come in different types. Choosing the appropriate pin cushion is vital for pin storage and preservation. Arrange pins with pin organization tools to guarantee protection and productivity.
Pincushion (Optional)
Pincushions are essential for sewing, but they can also be decorative and functional. There are various types of pincushions available, such as magnetic, weighted, handmade, and even novelty ones.
Magnetic pincushions are a great organizing tool, keeping pins collected in one place and ready to use. Weighted pincushions are also popular, as they help the pincushion stay in place on the table.
Handmade pincushions can be unique and personal, adding a touch of creativity to your sewing space. Decorative pincushions, like those made by Cherry Chick, can add a pop of color and cheer to your sewing room.
Essential Hand Sewing Tools
As an experienced sewist, you recognize the paramount importance of proficiently using hand sewing tools. Keep your needle threader, thimble, scissors, and thread readily available for seamless stitching and meticulous control over your projects.
Needle Threader
After securing your fabric with pins, you’ll need a needle threader, the unsung hero for your hand sewing toolkit. It’s a simple gadget that tames stubborn threads, guiding them through the eye of any needle size with ease.
- No more squinting to match needle types with thread.
- Protects needle sharpness by reducing mishaps.
- Simplifies needle care and storage, keeping your sewing space orderly.
Thimble
A thimble is a small, pitted cup worn on the finger to protect it from being pricked by a needle while sewing. Thimbles come in various sizes, materials, and shapes to accommodate different sewing techniques and finger sizes. They’re an essential tool for sewers and embroiderers, providing protection and support for the fingertips during the sewing process.
Thimble materials include metal, leather, rubber, wood, glass, or china, with metal thimbles being the most common choice for their strength and durability. Leather thimbles are also popular for their flexibility and comfort, while plastic thimbles offer a softer and more flexible alternative.
Thimble size is important for a comfortable and effective sewing experience. Thimbles are typically available in various sizes to fit different finger widths and lengths. To ensure a proper fit, it’s essential to choose a thimble that fits snugly on the tip of your finger, with the cap facing upward.
Thimble shape can vary, with some having a domed or flat cap and a smooth or textured skirt. The cap’s dimple helps to keep the needle in place while pushing it through fabric, reducing the need for excessive pressure and preventing the needle from slipping off the thimble.
Thimble maintenance is essential to make sure the longevity of the tool. When not in use, store your thimble in a dry, cool place to prevent damage from moisture and sunlight. Avoid storing your thimble with other metal objects, which can cause scratches and dents. If your thimble becomes dirty or grimy, clean it gently with soap and water or use a specialized metal cleaner for metal thimbles.
Thimble needle size should match the needle you’re using for sewing. Using a thimble with a needle size that’s too small or too large can affect the sewing experience and the quality of the finished product.
Scissors
Scissors are an essential part of every sewing kit. They come in various sizes, materials, and grips to cater to different sewing needs.
Some popular scissor blades** include micro-serrated, sharp, and pointed blades. Scissor handles can be made from materials like plastic, metal, or rubber, and they can have ergonomic designs for comfortable use.
Scissor sizes range from small, precision scissors to large, heavy-duty ones. Choose the right scissors for your sewing project based on the task at hand.
Thread
Thread is a fundamental part of sewing, and comprehending its qualities can greatly enhance your sewing experience. Test out various threads to discover the ideal match for your fabric and sewing machine.
Thread tightness, thread varieties, thread manufacturers, thread hues, and thread thicknesses are crucial elements to take into account when selecting the appropriate thread for your project.
The correct thread can make a substantial difference in your sewing endeavors.
Organizing Your Sewing Tool Zones
Keeping your marking tools and tube turners neatly organized is key to efficient sewing. Consider using a wall organizer to store your sewing machine feet, ensuring they’re easily accessible when you need them.
Storing Marking Tools + Tube Turners
Storing marking tools and tube turners is an essential part of organizing your sewing tool zones. You can repurpose containers, use wall space, or arrange storage bins to keep these tools within reach.
For example, you can use a plastic container or a tin to store your sewing machine feet, keeping them within reach of the machine. Another option is to use a magnetic holder for your scissors, which can be attached to a wall or a utility board.
You can also use a spice drawer insert to store spools of thread and small bottles of liquids, keeping them visible and easy to reach. Additionally, you can use a file folder organizer to separate and store dies, rulers, or templates on your work space or a shelf.
Remember to choose storage solutions that fit your sewing space and your specific needs, ensuring that your tools are easily accessible and well-organized.
Wall Organizer for Sewing Machine Feet
Imagine transforming chaos into calm with a wall organizer for your sewing machine feet. It’s the space-saving solution that turns a jumbled mess into a tidy display of readiness. No more digging through drawers; each foot has its own spot, visible at a glance.
It’s clever storage at its best, ensuring you’re the master of your craft with every tool in its place. A tidy workspace isn’t just about neatness—it’s about safety and control, too. With foot storage handled, you’ll stitch with confidence, knowing everything you need is within arm’s reach—organized, accessible, and waiting to be used.
Magnetic Racks for Metal Sewing Tools
Magnetic racks are an excellent solution for organizing and storing your metal sewing tools. With their strong magnetic force, these racks make certain that your tools stay securely in place, making it easy to access them when needed. Here are five ways you can use magnetic racks to optimize your sewing tool storage:
- Wall-mounted panels: These panels can be installed on walls or workbenches and are designed to hold a variety of tools, including screwdrivers, pliers, and wrenches. They often include adjustable hooks, shelves, and other attachments for custom organization.
- Magnetic tool holders: These holders are designed specifically for sewing tools and can be attached to walls or workbenches. They typically feature a magnetic surface that can hold tools of varying shapes and sizes, making them ideal for organizing your sewing tool collection.
- Magnetic trays: These shallow, flat containers have a magnetic base that can securely hold small metal objects, such as screws and nails. They can be placed on work surfaces or attached to a magnetic strip or bar, providing an easy-to-access storage solution for your smaller sewing tools.
- Magnetic pegboards: Similar to wall-mounted panels, magnetic pegboards can be used to organize and display your sewing tools. They often include adjustable hooks and shelves, allowing you to customize the layout and easily access your tools.
- Magnetic drawer organizers: These organizers can be attached to the bottom of a drawer to prevent your metal tools from moving around. They can be used to organize screwdrivers, pliers, and other small tools, keeping them within easy reach and preventing them from getting lost in the drawer.
Sewing Room Pegboard Ideas
Maximize Your Sewing Room’s Potential with Pegboard Organization
Pegboard organization is a transformative solution for sewing enthusiasts, offering numerous advantages for your sewing area. It not merely optimizes wall space but also provides an elegant and practical means to display your tools and accessories. This article delves into the most effective pegboard organization ideas for your sewing room, guaranteeing that your tools are readily accessible and your space is tidy.
To begin, let’s examine the fundamental principles of pegboard organization. A pegboard is a panel of material such as wood, metal, or plastic featuring pre-drilled, uniformly spaced holes. It’s typically employed in workshops for suspending tools, yet it can also be a valuable asset to your sewing room. Pegboards are available in varying materials and shapes, with holes typically spaced one inch apart and commonly offered in two sizes.
Now, let’s explore some pegboard organization ideas for your sewing room:
- Select the Appropriate Pegboard Size: Determine the size of your pegboard based on the tools and accessories you intend to hang. Keep in mind that larger pegboards offer increased storage capacity, but they may necessitate additional wall space.
- Choose the Optimal Hooks: J- and L-shaped hooks are ideal for sewing tools, as they can accommodate varying sizes and shapes. Consider acquiring a set of these hooks to ensure you have sufficient options for your needs.
- Incorporate Pegboard Accessories: Pegboard bins, cups with hooks and loops, and peg locks can assist in securing your hooks and provide additional storage for smaller items.
- Personalize Your Pegboard: Enhance the aesthetic appeal of your pegboard by painting it or covering it with fabric. Simply ensure you plan the placement of objects and hooks before adhering the fabric to the board.
- Mount Your Pegboard: Adhere to the manufacturer’s installation instructions, ensuring sufficient space behind the board for sliding accessories and that the screws are long enough to penetrate the studs in your wall.
Frequently Asked Questions (FAQs)
How to safely dispose of dull sewing needles?
Dispose of dull sewing needles safely by sealing them in a sturdy container like an old tin or plastic bottle. This shields others from potential pricks. Toss the sealed container in the trash – no fuss, no muss!
Can sewing tools be recycled or upcycled?
Did you know that over 95% of sewing tools can be recycled or upcycled? You’d be surprised how many creative ways you can repurpose those old tools – from making jewelry to crafting unique home decor.
Best practices for cleaning and maintaining sewing machines?
Keep your sewing machine humming with regular cleaning and maintenance. Refer to the owner’s manual for specific instructions. Gently wipe down the exterior and interior components. Oil key moving parts as directed for smooth stitching every time.
How to choose ergonomic sewing tools for arthritis?
For arthritic hands, choose ergonomic sewing tools with larger, cushioned grips. Opt for lightweight options that reduce hand fatigue. Try out different designs to find what feels comfiest in your grip. Your comfort is key when tackling those projects!
Tips for child-proofing a sewing area?
Ah, child-proofing – a sewing sanctuary’s secret sauce! Nab those curious hands with lidded containers, lock up sharp tools, and block access to the machine. Easy-peasy, lemon squeezy – your lil’ ones will be safe as kittens.
Conclusion
Undoubtedly, mastering sewing tools is the key to unlocking your full creative potential. By harnessing the power of these carefully curated instruments, you’ll elevate your sewing prowess and bring your visions to life with unparalleled precision.
Whether you’re a seasoned sewist or just starting your journey, this comprehensive guide on how to handle sewing tools will equip you with the knowledge and confidence to tackle any project, from the simple to the sublime.
Embrace the art of sewing, and let your creativity soar.

